Stillwater Top Down Cardigan Knitting Pattern Free
A new top down cardigan knitting pattern, the Stillwater Cardigan, is now a free knitting pattern for women here on the blog. Read all about the easy top down construction and what you need to make this garter stitch cardigan knitting pattern or scroll down for the free pattern, grab the printable PDF from my shop, Etsy shop, Ravelry shop or you can get Lion Brand Kit with pattern PDF and yarn you need for it.
No time right now? Pin this easy cardigan knitting pattern free for later!

*This post contains affiliate links (only for products I love, use and spend my own money on obviously). This means I earn some yarn money if you make a purchase through one of these links (of course at no extra cost for you!), which I promise to use to create more awesome patterns like this one. All opinions are my own. See my full disclosure here.

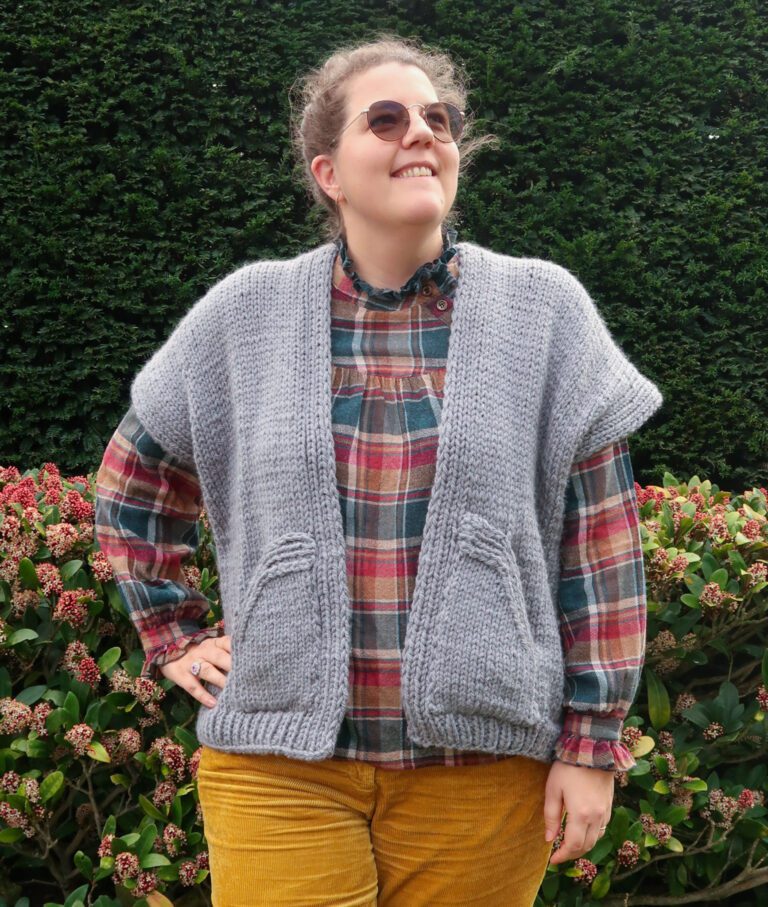
Wrap yourself in effortless elegance with this lightweight cotton-bamboo raglan cardigan, perfect for spring and summer layering. Worked seamlessly from the top down in one piece, its beautifully textured garter stitch drapes naturally, while the i-cord edging adds a refined touch. A versatile and timeless wardrobe essential, ideal for breezy days and relaxed styling.
Stillwater Top Down Cardigan Knitting Pattern Lion Brand Kit
If you’re having trouble finding the right yarn, you have the option to purchase the Lion Brand Kit, which includes a PDF of the pattern and the exact amount of Coboo® Yarn needed for the size you plan to make. There’s no need to calculate how much yarn you’ll need—it’s all done for you. Simply choose the size you want to knit, and you’re ready to go. The Coboo® Yarn is available in 26 gorgeous shades (while supplies last), so you can pick your favorite color to create this easy garter stitch cardigan knitting pattern.

Stillwater Easy Cardigan Knitting Pattern Construction
The Stillwater Cardigan is a top-down raglan open front cardigan. You’ll start with an I-cord cast on and work in rows back and forth. You’ll start by making the yoke increases until you reach the point to split the stitches for the sleeves.
Since we’re working in garter stitch, you’ll to start with the sleeves knit flat before joining stitches from the back and front panels to knit the body. You’ll finish the body off with an elegant I-cord cast off to finish off the seamless I-cord edging and then sew up the sleeves to finish your cardigan.


Downloadable PDF for Stillwater Cardigan Knitting Pattern

Grab the printable PDF of the Stillwater Cardigan Knitting Pattern now in my shop, Etsy shop or on Ravelry shop or get the Lion Beand Kit:
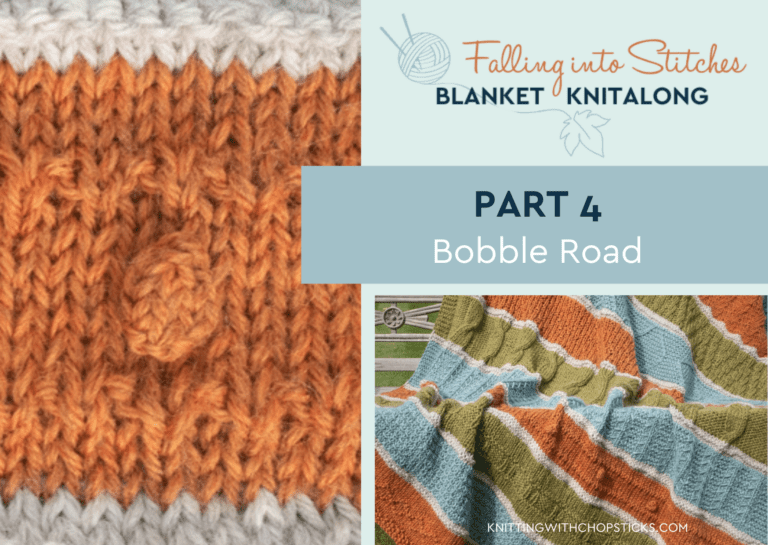
2025 Knit Bestseller Pattern Collection

If this design caught your eye, you’re going to love the 2025 Knit Bestseller Pattern Collection — a handpicked set of this year’s most-made and most-loved knit designs.
You’ll get 10 top-selling knitting patterns that struck a chord with makers all year long: wearable sweaters, classic cardigans, and cozy blankets that are simple, satisfying, and easy to follow.
Each design builds confidence without overcomplicating things, making this collection perfect for knitters who want relaxing projects that turn out beautifully every time.
Grab the 2025 Knit Bestseller Pattern Collection here >>
Before You Start Your Top Down Cardigan Knitting Pattern
Materials
Note: The entire cardigan is worked in rows back and forth and can be worked on straight needles.
- Lion Brand Coboo (100g, 50% cotton, 50% bamboo, 232 yds / 212 m): you will need 5 (5, 6, 6, 7) (8, 8, 9, 10) skeins in Olive color SKU 835-132.
- Tapestry needle to weave in the ends
- 6 stitch markers
- Stitch holders*
*You can use a thread of unused yarn, an interchangeable cable or other substitute.
Size
The cardigan is available in the following sizes: XS to 5XL. Sizes are noted throughout the pattern in the following way: XS (S, M, L, XL) (2XL, 3XL, 4XL, 5XL). The pictures illustrate the L size.
The final cardigan measurements are:

| Cardigan Sizes | XS | S | M | L | XL | |
| a | Bust cm | 78 | 88 | 99 | 109 | 118 |
| a | Bust inch | 30.75 | 34.5 | 39 | 43 | 46.5 |
| b | Upper arm circumference cm | 33 | 34 | 35 | 38 | 45 |
| b | Upper arm circumference inch | 13 | 13.5 | 13.75 | 15 | 16.5 |
| c | Yoke depth cm | 30 | 32 | 33 | 34 | 35 |
| c | Yoke depth inch | 11.75 | 12.5 | 13 | 13.5 | 13.75 |
| d | Sleeve length cm | 34 | 35 | 35 | 36 | 36 |
| d | Sleeve length inch | 13.25 | 13.75 | 13.75 | 14.25 | 14.25 |
| e | Sweater total length cm | 60 | 63 | 64 | 65 | 66 |
| e | Sweater total length inch | 24 | 24.75 | 25.25 | 25.5 | 25.75 |
| Cardigan Sizes | 2XL | 3XL | 4XL | 5XL | |
| a | Bust cm | 129 | 140 | 150 | 160 |
| a | Bust inch | 50.75 | 55 | 59 | 63 |
| b | Upper arm circumference cm | 53 | 54 | 55 | 55 |
| b | Upper arm circumference inch | 21 | 21.25 | 21.75 | 21.75 |
| c | Yoke depth cm | 36 | 36 | 37 | 38 |
| c | Yoke depth inch | 14 | 14.5 | 14.5 | 15 |
| d | Sleeve length cm | 37 | 37 | 39 | 39 |
| d | Sleeve length inch | 14.5 | 14.5 | 15.25 | 15.25 |
| e | Sweater total length cm | 67 | 67 | 68 | 69 |
| e | Sweater total length inch | 26.25 | 26.25 | 26.75 | 27.25 |
The cardigan is designed with a classic fit 3 – 8 cm / 1.25 – 3.25” ease at the bust.
Sick of all the yarn jargon and conversions?
US vs UK, abbreviations, imperial vs metric, yarn weights, etc?

You can easily adjust the length to your desired length, just add/remove length before the final I-cord cast off (make sure to take blocking into account). This will modify your required yarn quantity.
Gauge
The gauge for this pattern, in stockinette stitch, is 17.5 st by 36 rows for a 10 cm by 10 cm square (4” by 4”).
Note: Bamboo has a tendency to grow a lot! Make sure your swatch is big enough and you block it. Gauge and all dimensions are given blocked. Take note of your pre-blocking and blocked gauge and calculate accordingly.
Abbreviations & Instructions
- st = stitch
- k = knit
- inc = increase (invisible garter stitch increase detailed below)
- wyif = with yarn in front
- sl3p = slip 3 stitches purlwise
Repeat instructions between [] the indicated number of times or until the end of the round/row.
The final number of stitches is indicated at the end of the round/row between < >.
Special Stitches and Techniques
- Garter stitch knit flat: knit all rows.
- I-cord cast on: The body starts with a 3 stitch I-cord cast on.
- I-cord edge: You will work and I-cord edge on both front panel ends of the cardigan.
- Invisible Garter Stitch Increase (inc): Locate the stitch directly below the next stitch on your left-hand needle. `This is the stitch from the previous row. Using your right-hand needle, insert it into the top of this stitch from front to back, lifting it onto the left-hand needle. Knit into this lifted stitch as you would a regular knit stitch. Proceed to knit the next stitch on the left-hand needle as usual. One stitch is turned into 2 stitches.
This short video tutorial walks you through how to start the Stillwater Cardigan: I-cord cast on, working the invisible garter stitch increases and making the I-cord front panel edges:
- I-cord cast off: The body is finished off with an I-cord cast off to complete et seamless I-cord edging.
This video tutorial (starting at 2min40) walks you through the I-cord cast off when you have I-cord edges on both sides of your project and how to seamlessly graft the last stitches together for a completely seamless I-cord
Cardigan Construction
The Stillwater Cardigan is a top-down raglan open front cardigan. You’ll start with an I-cord cast on and work in rows back and forth. You’ll start by making the yoke increases until you reach the point to split the stitches for the sleeves.
Since we’re working in garter stitch, you’ll to start with the sleeves knit flat before joining stitches from the back and front panels to knit the body. You’ll finish the body off with an elegant I-cord cast off to finish off the seamless I-cord edging and then sew up the sleeves to finish your cardigan.

Tips & Tricks
- Increases are always worked on the wrong side of your work
- Use a row counter as invisible garter stitch increases are very hard to see and count
- Use stitch markers to separate the 3 I-cord stitches on each side. This will help you avoid knitting them through on the rows you have to slip them instead.
The Actual Stillwater Top Down Cardigan Knitting Pattern Free
Yoke
With your 4 mm / US 6 needles, using a 3 stitch I-cord cast on 85 (85, 87, 87, 89) (91, 93, 109, 113) st.
Row 1 (WS): Wyif sl3p, knit through the back loop until the end of the row, pick up 3 stitches in the base of the i-cord. <88 (88, 90, 90, 92) (94, 96, 112, 116) st>
Row 2 (RS): K14 (16, 18, 19, 20) (17, 20, 24, 27), add marker, k16 (12, 8, 6, 6) (12, 8, 8, 4), add marker, k28 (32, 38, 40, 40) (36, 40, 48, 54), add marker, k16 (12, 8, 6, 6) (12, 8, 8, 4), add marker, k14 (16, 18, 19, 20) (17, 20, 24, 27).
Row 3 (WS): Wyif sl3p, [knit until st before marker, increase in next st, slip marker, increase in next st] four times, knit to last 3 st, wyif sl3p. <96 (96, 98, 98, 100) (102, 104, 120, 124) st>
Row 4 (RS): Knit across.
Repeat Row 3-4 another 0 (3, 7, 13, 20) (34, 39, 40, 42) times. <96 (120, 154, 202, 260) (374, 416, 440, 460) st>
Work the following 4 rows 24 (24, 23, 21, 18) (12, 10, 10, 10) times <288 (312, 338, 370, 404) (470, 496, 520, 540) st>:
- Row 1 (RS): Knit across
- Row 2 (WS): Wyif sl3p, knit until last 3 st, wyif sl3p.
- Row 3: Knit across
- Row 4 (increase): Wyif sl3p, [knit until st before marker, increase in next st, slip marker, increase in next st] four times, knit until end of row, wyif sl3p.

Sleeve
Note: Don’t cut working yarn, you’ll get back to it when working the sweater body.
You’re going to set aside the stitches for the front and back and start by working the sleeves. Join a new yarn at the underarm to knit each sleeve.
Place the first 39 (44, 49, 54, 59) (64, 70, 75, 80) st (until the first marker) on a holder. You’ll work the next 66 (68, 70, 76, 84) (106, 108, 110, 110) to the next marker for the first sleeve.
Knit flat in garter stitch for 29 (30, 30, 31, 31) (32, 32, 34, 34) cm / 11.25 (11.75, 11.75, 12.25, 12.25) (12.75, 12.75, 13.25, 13.25)”
On the next wrong side row: k2tog across. <33 (34, 35, 38, 42) (53, 54, 55, 55) st>
For sizes 2XL to 5XL only: [k2, k2tog] until last X (X, X, X, X) (1, 2, 3, 3) st, knit across. <X (X, X, X, X) (40, 41, 42, 42) st>
Work in k1, p1 ribbing across for 11 rows.
Cast off and leave a long tail for sewing.
Go back to the stitches you left on the needles and place the next 78 (88, 100, 110, 118) (130, 140, 150, 160) stitches for the back on the same stitch holder as the first section of stitches for the front panel.
Work the next sleeve in the same manner as the first sleeve.
Add the final front panel stitches to back with the other stitches you left on the side.
Body
Start working with your original working yarn and work rows across all 3 groups of stitches to join the front and back.
Repeat Row 1 and 2 for 31 cm / 12.25”:
Row 1 (RS): Knit across
Row 2 (WS): Wyif sl3p, knit until last 3 st, wyif sl3p.
On the next RW row I-cord cast off:
[K2, k2tog through the back loop, slip these three stitches back on the left needle] repeat until you have 6 stitches left.
Graft the remaining 6 stitches together.
Weave in the ends.

Assembly
To finish off your cardigan sew up the sleeves from the cuff to the armhole using an invisible garter stitch seam.
Weave in your ends.
Blocking
You are done with the knitting part. Make sure to weave in all the ends.
To make your cardigan prettier and help even out your stitches, carefully block your project to final dimensions. Make sure not to outstretch it as bamboo can be stretched easily. Don’t skip this step as it can make a huge difference. Read my detailed tutorial on why block, how-to, and all my tips and tricks if you need help.