Softspoken Sweater: Free Crochet V Neck Sweater Pattern
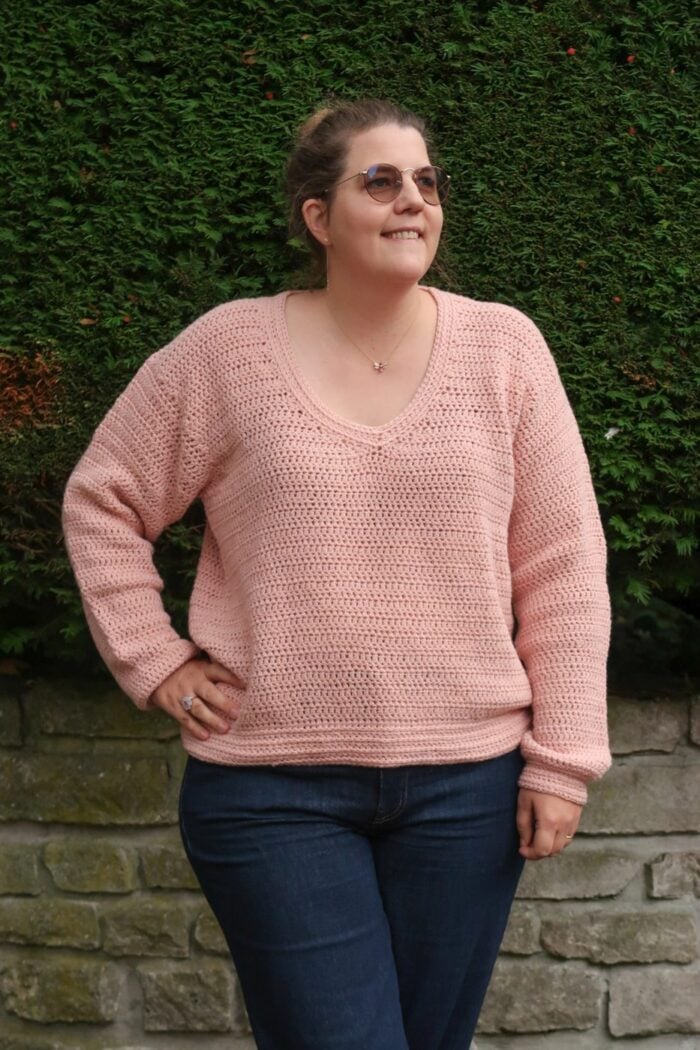
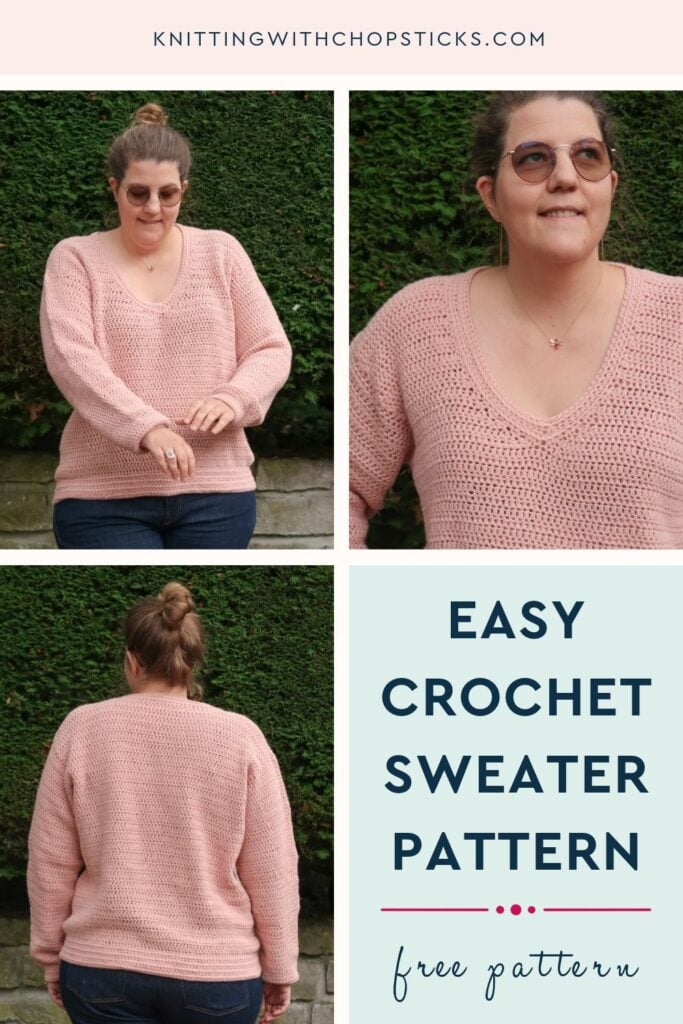
A new relaxed crochet sweater pattern, the Softspoken Sweater, is now a free crochet v neck sweater pattern here on the blog. Read all about the rounded V neck, the easy construction and the soft worsted yarn, or scroll down for the free pattern.
No time right now? Pin this crochet v neck sweater pattern for later!
*This post contains affiliate links (only for products I love, use and spend my own money on obviously). This means I earn some yarn money if you make a purchase through one of these links (of course at no extra cost for you!), which I promise to use to create more awesome patterns like this one. All opinions are my own. See my full disclosure here.
A Rounded V Neck with a Ribbed Twist
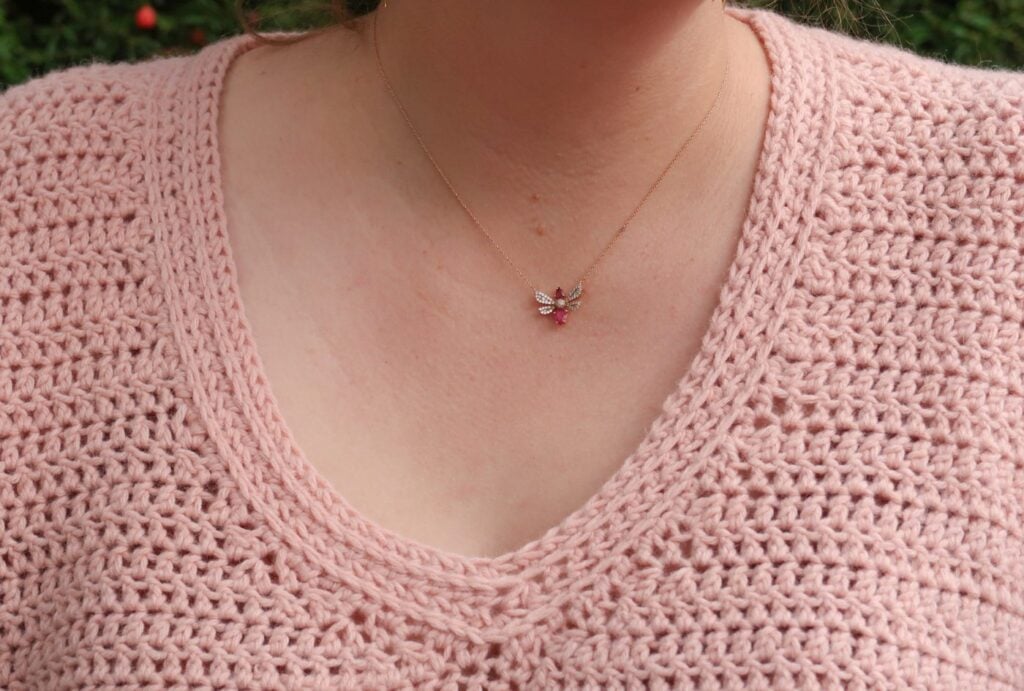
The star of this crochet v neck sweater pattern is the neckline. Instead of a sharp point, the front shoulders are shaped with a few gentle decreases, so the V curves softly into a flattering rounded shape.
The collar, cuffs and bottom band are all worked in half double crochet in the 3rd loop. It pushes the top loops forward and creates a horizontal ribbing that looks almost knitted. It is a small detail, but it is what gives the Softspoken its quiet, polished look.
An Easy Crochet Sweater Pattern, Free and Beginner Friendly
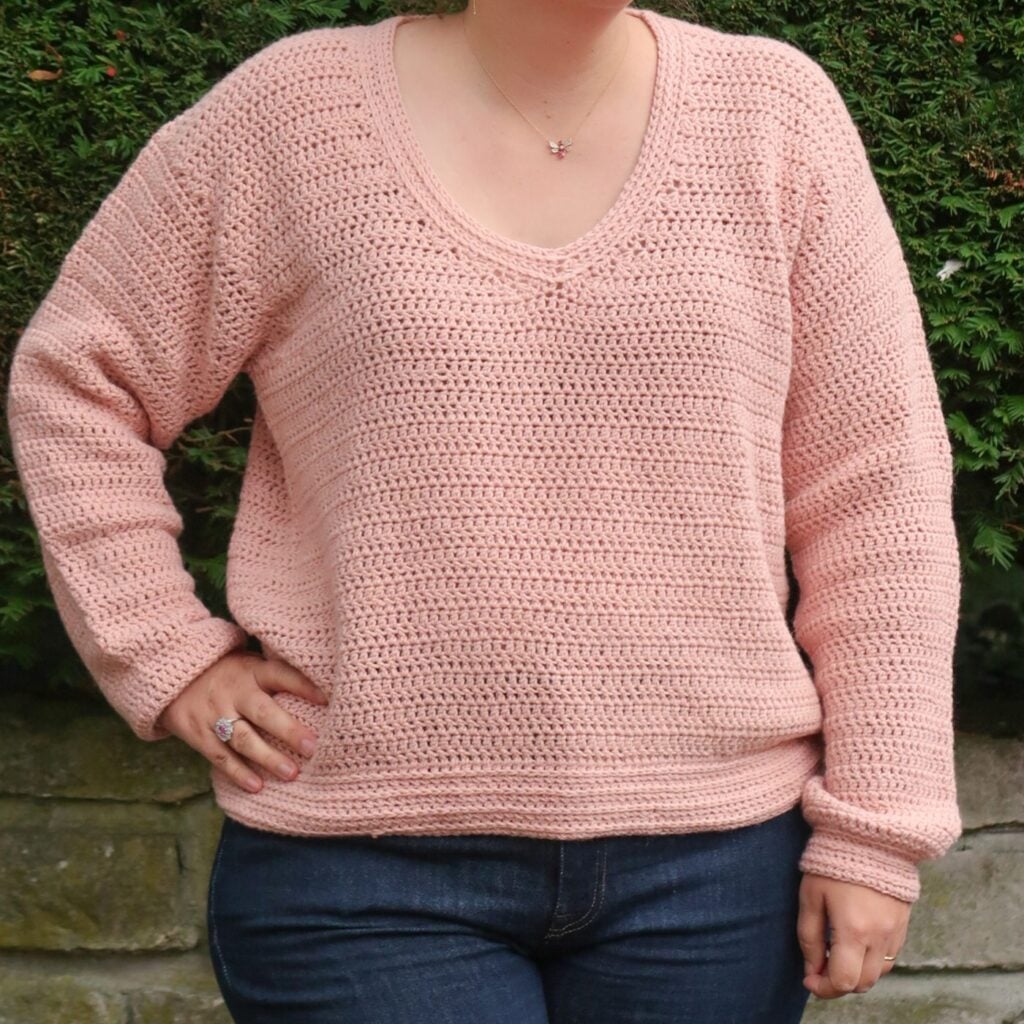
If you have been waiting for an easy crochet sweater pattern to start your garment journey, this one is for you. The body is worked in one piece from the bottom up in plain double crochet, first in the round and then flat for the front and back.
The shoulders are seamed, then you pick up stitches around each armhole and work the sleeves down to the cuffs. A modified drop shoulder keeps the shaping simple, and there is only one short seam per shoulder. The free pattern comes in 9 sizes, from XS to 5XL, with a relaxed, oversized fit and 10 to 20 cm/4 to 8″ of positive ease at the bust.
Want more relaxed crochet pullovers after this one? The Drapey Boxy Sweater and the Cozy Cowl Sweater are both great next projects.
A Simple Crochet Sweater Pattern in a Soft Worsted Yarn
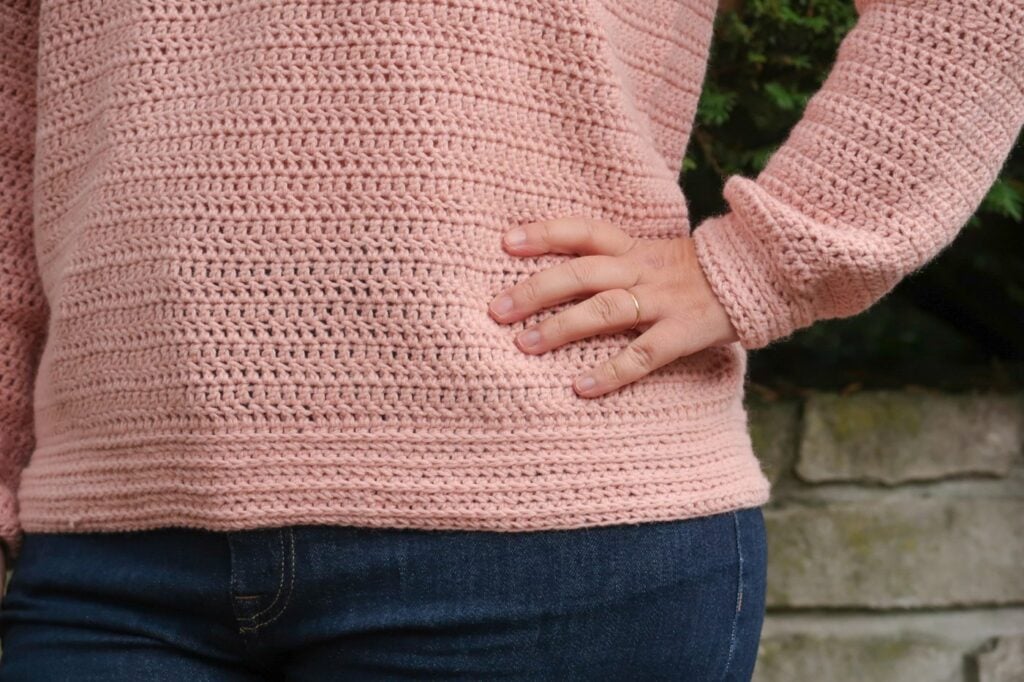
This is a simple crochet sweater pattern in the best sense: no colorwork, no complicated stitch pattern, just a soft solid fabric and clean lines that go with everything in your closet.
I made mine in Katia Cashmere 10, a worsted weight blend of merino, viscose and cashmere, in a soft blush pink. It is wonderfully soft against the skin and has a lovely drape. Any worsted weight wool blend will work, such as LionBrand Wool Ease.
Downloadable PDF for the Softspoken Sweater
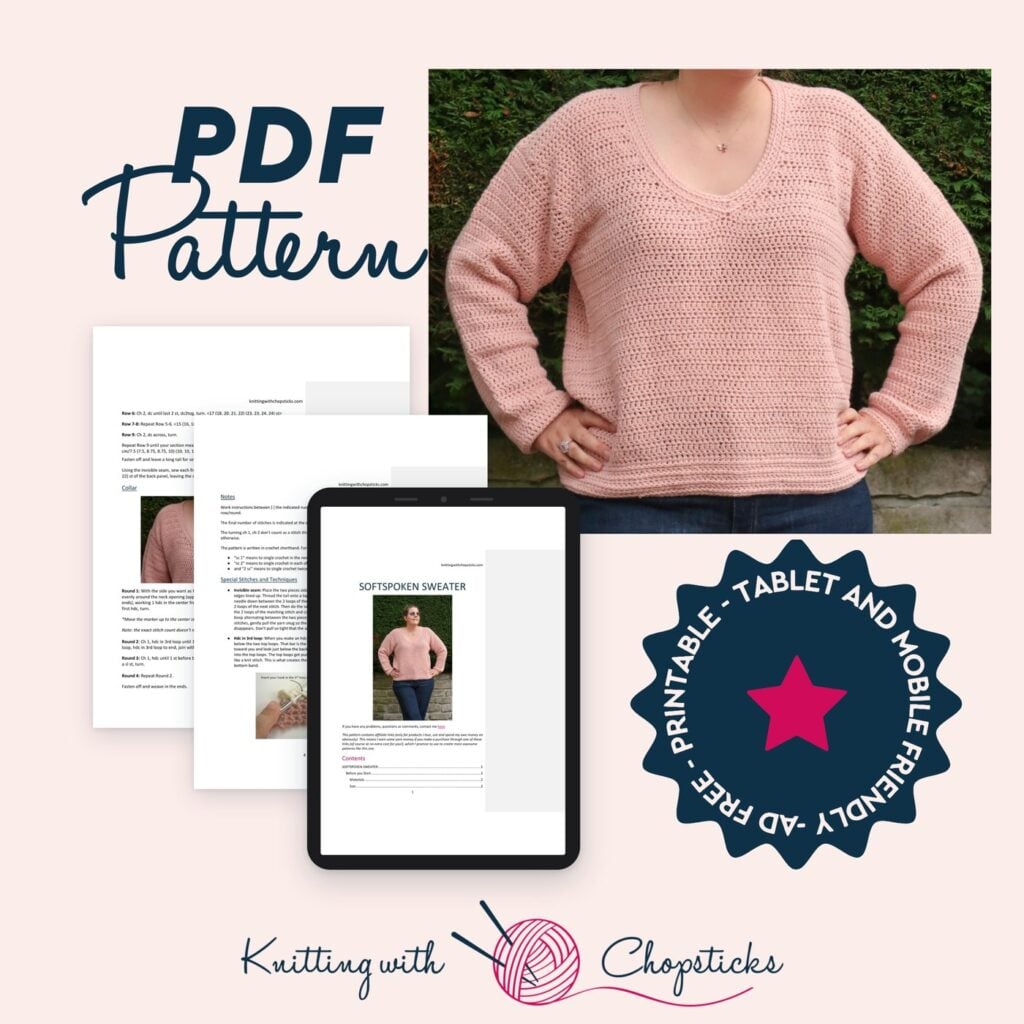
Grab the printable, ad-free PDF of the Softspoken Sweater crochet pattern in my shop, on Etsy or on Ravelry. It has all 9 sizes in one easy-to-print file, ready to keep next to your project.
More Crochet Sweater Patterns You'll Love
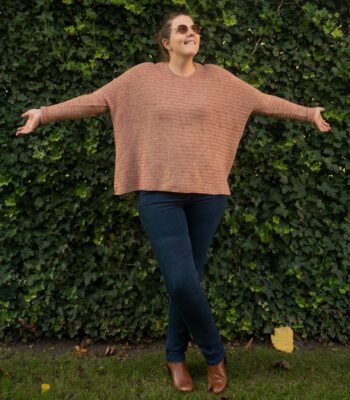


Before You Start Your Softspoken Sweater Crochet Pattern
Materials
- 5 mm/US H-8 crochet hook
- Katia Cashmere 10 (worsted weight #4, 40% merino wool, 25% viscose, 25% polyamide, 10% cashmere, 50 g/1.75 oz, 120 m/131 yds) in blush pink (color 75): you will need 9 (10, 11, 12, 13) (14, 15, 17, 18) skeins
- Tapestry needle
- Stitch markers
- Scissors
The yarn can easily be substituted by another worsted weight wool blend such as LionBrand Wool Ease.
Size
The sweater is available in the following sizes: XS to 5XL.
Sizes are written as XS (S, M, L, XL) (2XL, 3XL, 4XL, 5XL) throughout the pattern. Pictures illustrate the L size.
The sweater is designed with a relaxed, oversized fit, approximately 10 – 20 cm/4 – 8″ of positive ease at the bust.
Finished sweater measurements:
- (a) Bust circumference: 88 (99, 109, 118.5, 129.5) (139, 149, 160, 169.5) cm/34.75 (39, 42.75, 46.5, 51) (54.75, 58.5, 63, 66.75)”
- (b) Body length (hem to shoulder): 54 (54, 57.5, 57.5, 60.5) (60.5, 60.5, 64, 64) cm/21.25 (21.25, 22.75, 22.75, 23.75) (23.75, 23.75, 25.25, 25.25)”
- (c) Armhole depth: 19 (19, 22.5, 22.5, 25.5) (25.5, 25.5, 29, 29) cm/7.5 (7.5, 8.75, 8.75, 10) (10, 10, 11.5, 11.5)”
- (d) Sleeve length: 40 (41, 41, 42, 42) (43, 43, 44, 45) cm/15.75 (16.25, 16.25, 16.5, 16.5) (17, 17, 17.25, 17.75)”
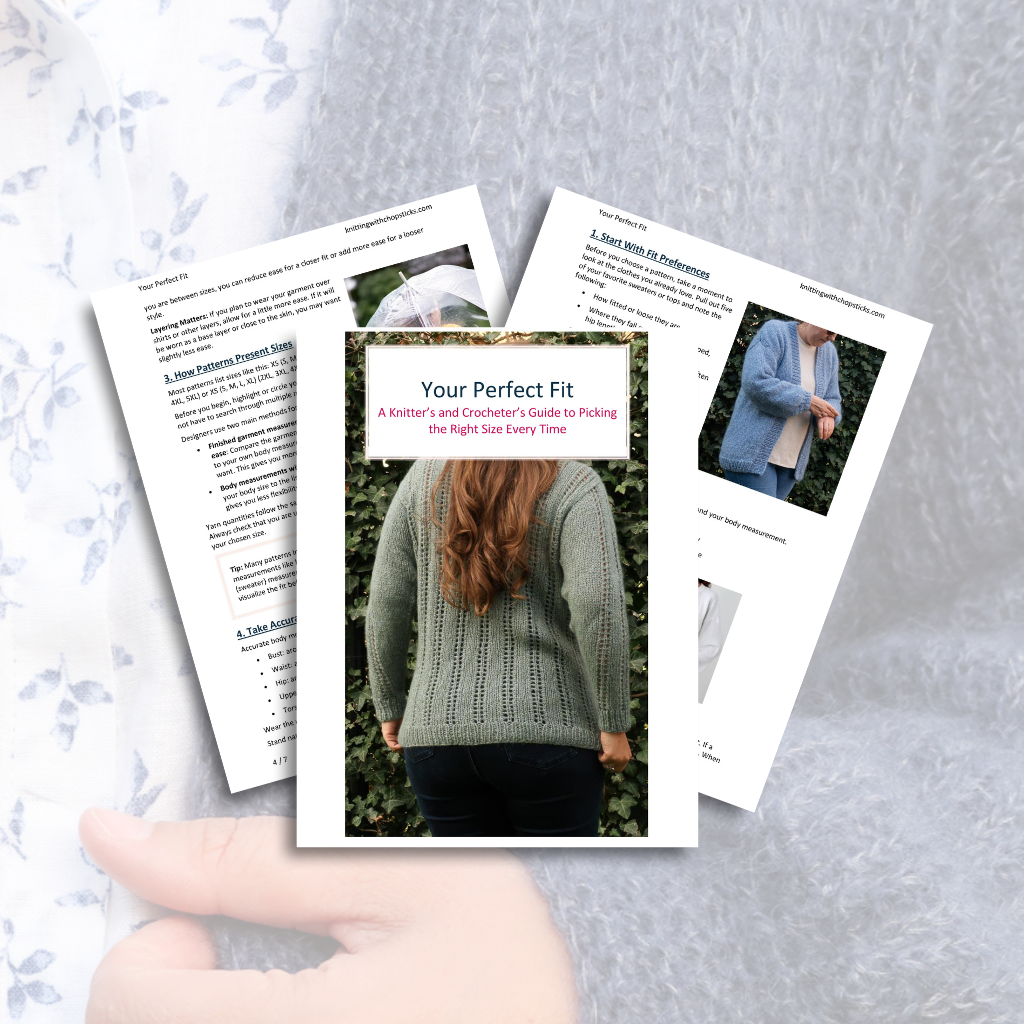
Perfect Fit Guide
Always guessing your size when knitting or crocheting garments?
Gauge
The gauge for this pattern, in dc, is 12.5 st by 10 rounds for a 10 cm by 10 cm/4″ by 4″ square, blocked.
Abbreviations
- ch = chain
- sc = single crochet
- hdc = half double crochet
- dc = double crochet
- dc2tog = double crochet 2 together (1 st decreased)
- hdc2tog = half double crochet 2 together (1 st decreased)
- hdc3tog = half double crochet 3 together (2 st decreased)
- sl st = slip stitch
- st(s) = stitch(es)
- RS = right side
- WS = wrong side
Never forget what an abbreviation means: keep my free Yarn Jargon Cheatsheets next to your project, with all the common abbreviations plus hook and needle size conversions, ready to print. Grab your free cheatsheets >>
Notes
Work instructions between [ ] the indicated number of times or until the end of the row/round.
The final number of stitches is indicated at the end of the row/round between < >.
The turning ch 1, ch 2 don’t count as a stitch throughout the pattern except if mentioned otherwise.
The pattern is written in crochet shorthand. For example:
- “sc 1” means to single crochet in the next stitch,
- “sc 2” means to single crochet in each of the next 2 stitches,
- and “2 sc” means to single crochet twice in the next st.
Special Stitches and Techniques
- Invisible seam: Place the two pieces side by side with the right side facing up and the edges lined up. Thread the tail onto a tapestry needle. On the first piece, insert the needle down between the 2 loops of the first stitch and bring it back up between the 2 loops of the next stitch. Then do the same on the other piece: go down between the 2 loops of the matching stitch and come up between the 2 loops of the next one. Keep alternating between the two pieces, moving one stitch at a time. Every few stitches, gently pull the yarn snug so the edges come together and the seam disappears. Don’t pull so tight that the seam puckers.
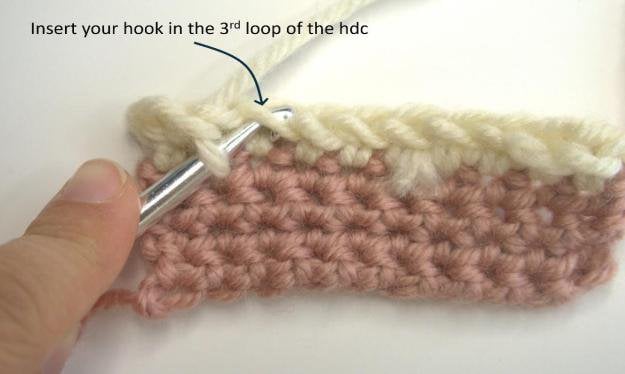
- Hdc in 3rd loop: When you make an hdc, the yarn over leaves a horizontal bar just below the two top loops. That bar is the 3rd loop. To find it, tilt the top of the stitch toward you and look just below the back loop. Work your hdc into that bar only, not into the top loops. The top loops get pushed to the front and make a ridge that looks like a knit stitch. This is what creates the ribbed texture on the collar, cuffs and bottom band.
- 3rd loop of the starting chain: Each chain stitch has three strands: the two loops that form the “V” on top, and a bump on the back. That back bump is the 3rd loop. To work into it, turn the body upside down so the starting chain is at the top, and look for the row of bumps along the back of the chain. Insert your hook under the bump only. This leaves the “V” untouched, so the bottom edge stays clean and matches the ribbing on the rest of the band.
Construction
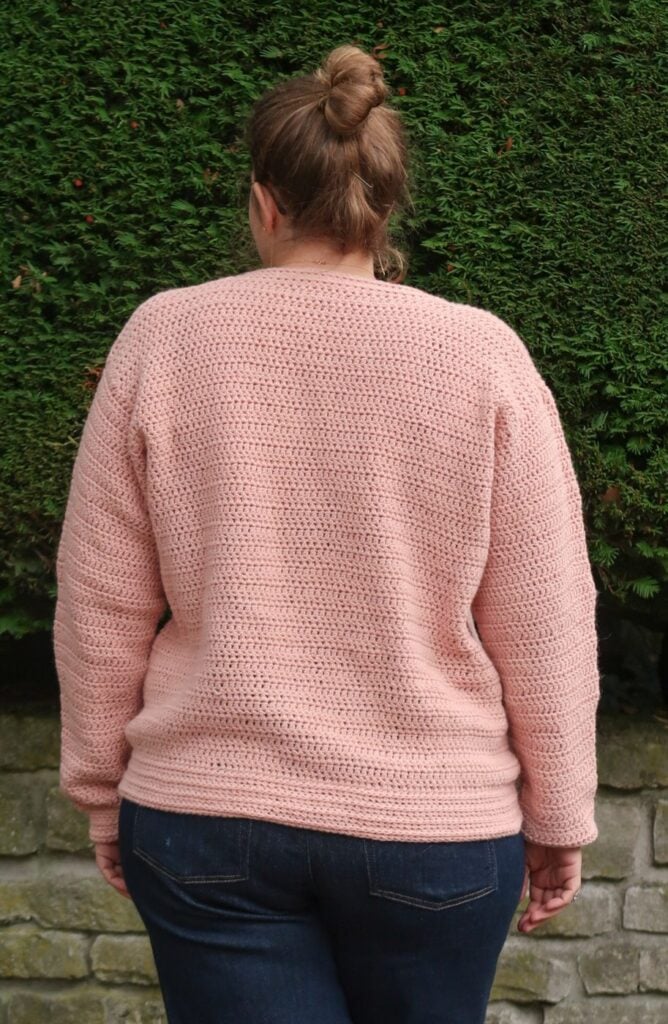
You are going to start at the hem and work the body in the round in dc. After completing the body, you split for the back and front panels and work each flat to the shoulder.
The front panel is divided at the neck opening, and each shoulder is worked with some decreases to give the neck a beautiful rounded V neck shape.
The shoulder edges are seamed together before picking up stitches for the sleeves around each armhole.
Finally, you work a ribbed hdc collar around the neckline, cuffs at the end of each sleeve, and a ribbed band along the bottom hem.
The Actual Softspoken Sweater Crochet Pattern
Body (Worked in the Round)
With your 5 mm/US H-8 hook ch 110 (124, 136, 148, 162) (174, 186, 200, 212) st + 2.
Round 1: Dc in 3rd ch from hook, dc across, join with a sl st in 2nd ch, turn. <110 (124, 136, 148, 162) (174, 186, 200, 212) st>
Round 2: Ch 2, dc around, join with a sl st in 2nd ch, turn.
Repeat Round 2 until you reach 33 cm/13″ from the starting chain.
You’ll now split your stitches for the front and back panel and work in rows back and forth.
Back Panel
Row 1: Ch 1, sc 0 (3, 4, 6, 8) (10, 13, 16, 19), dc 55 (55, 59, 62, 65) (66, 66, 68, 68), turn. <55 (58, 63, 68, 73) (76, 79, 84, 87) st>
Row 2: Ch 2, dc 55 (55, 59, 62, 65) (66, 66, 68, 68), turn. <55 (55, 59, 62, 65) (66, 66, 68, 68) st>
Repeat Row 2 until your sweater measures 19 (19, 22.5, 22.5, 25.5) (25.5, 25.5, 29, 29) cm/7.5 (7.5, 8.75, 8.75, 10) (10, 10, 11.5, 11.5)” from armhole split.
Front Panel – Side 1
Row 1: Go back to the main body, after the last st of back Row 1 skip 0 (6, 8, 12, 16) (20, 26, 32, 38) st and join yarn, ch 2, dc 23 (24, 26, 27, 28) (29, 29, 30, 30), dc2tog twice, turn. <25 (26, 28, 29, 30) (31, 31, 32, 32) st>
Row 2: Ch 2, dc2tog twice, dc across, turn. <23 (24, 26, 27, 28) (29, 29, 30, 30) st>
Row 3: Ch 2, dc until last 4 st, dc2tog twice, turn. <21 (22, 24, 25, 26) (27, 27, 28, 28) st>
Row 4: Ch 2, dc2tog twice, dc across, turn. <19 (20, 22, 23, 24) (25, 25, 26, 26) st>
Row 5: Ch 2, dc until last 2 st, dc2tog, turn. <18 (19, 21, 22, 23) (24, 24, 25, 25) st>
Row 6: Ch 2, dc2tog, dc across, turn. <17 (18, 20, 21, 22) (23, 23, 24, 24) st>
Row 7-8: Repeat Row 5-6. <15 (16, 18, 19, 20) (21, 21, 22, 22) st>
Row 9: Ch 2, dc across, turn.
Repeat Row 9 until your section measures 19 (19, 22.5, 22.5, 25.5) (25.5, 25.5, 29, 29) cm/7.5 (7.5, 8.75, 8.75, 10) (10, 10, 11.5, 11.5)” from armhole split.
Fasten off and leave a long tail for sewing.
Front Panel – Side 2
Row 1: With RS facing, skip 1 (0, 0, 0, 1) (1, 1, 0, 0) st after the last st of Side 1 Row 1 (center front), join yarn in the next st and ch 2, dc2tog twice, dc 23 (24, 26, 27, 28) (29, 29, 30, 30), turn. <25 (26, 28, 29, 30) (31, 31, 32, 32) st>
Row 2: Ch 2, dc until last 4 st, dc2tog twice, turn. <23 (24, 26, 27, 28) (29, 29, 30, 30) st>
Row 3: Ch 2, dc2tog twice, dc across, turn. <21 (22, 24, 25, 26) (27, 27, 28, 28) st>
Row 4: Repeat Row 2. <19 (20, 22, 23, 24) (25, 25, 26, 26) st>
Row 5: Ch 2, dc2tog, dc across, turn. <18 (19, 21, 22, 23) (24, 24, 25, 25) st>
Row 6: Ch 2, dc until last 2 st, dc2tog, turn. <17 (18, 20, 21, 22) (23, 23, 24, 24) st>
Row 7-8: Repeat Row 5-6. <15 (16, 18, 19, 20) (21, 21, 22, 22) st>
Row 9: Ch 2, dc across, turn.
Repeat Row 9 until your section measures 19 (19, 22.5, 22.5, 25.5) (25.5, 25.5, 29, 29) cm/7.5 (7.5, 8.75, 8.75, 10) (10, 10, 11.5, 11.5)” from armhole split.
Fasten off and leave a long tail for sewing.
Using the invisible seam, sew each front shoulder to the outer 15 (15, 17, 19, 20) (21, 21, 22, 22) st of the back panel, leaving the center back neck sts open.
Collar
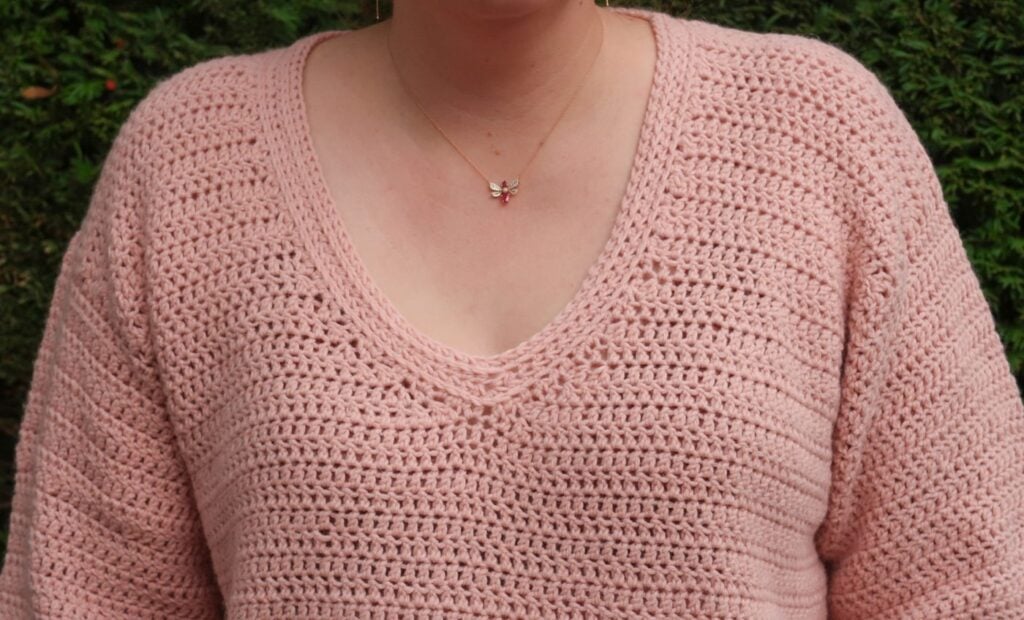
Round 1: With the side you want as RS facing, join yarn at the center back neck, ch 1, hdc evenly around the neck opening (approximately 1 hdc per back neck st and 3 hdc per 2 row ends), working 1 hdc in the center front st and placing a marker in it*. Join with a sl st in the first hdc, turn.
*Move the marker up to the center st of the hdc3tog on each of the following rounds.
Note: the exact stitch count doesn’t matter here.
Round 2: Ch 1, hdc in 3rd loop until 1 st before bottom of the V neck marker, hdc3tog in 3rd loop, hdc in 3rd loop to end, join with a sl st, turn.
Round 3: Ch 1, hdc until 1 st before bottom of V neck marker, hdc3tog, hdc to end, join with a sl st, turn.
Round 4: Repeat Round 2.
Fasten off and weave in the ends.
Sleeves
For Size XS only
No stitches have been left unworked at the underarm so you’ll join in the round directly.
Row 1: Join yarn at the armpit to start on a right side row, ch 2, dc 48 (X, X, X, X) (X, X, X, X) st (spread evenly, approximately 4 st per 3 row ends), join with a sl st in the 2nd ch, turn.
Skip to All Sizes section below.
For Sizes S to 5XL
Row 1: Join yarn at the armpit to start on a right side row, ch 2, dc X (48, 56, 56, 64) (64, 64, 72, 72) st (spread evenly, approximately 4 st per 3 row ends), turn.
Note: Don’t pick up stitches in the unworked body stitches. You’ll seam these together with the row ends of your first X (2, 3, 5, 6) (8, 10, 13, 15) rows before joining in the round.
Row 2: Ch 2, dc across, turn.
Repeat Row 2 another X (0, 1, 3, 4) (6, 8, 11, 13) more times.
All Sizes
On the next round you’ll join in the round.
Plain Round: Ch 2, dc across, join with a sl st in 2nd ch, turn.
Repeat Plain Round three times.
Decrease round: Ch 2, [dc 3, dc2tog, dc 3] around, join with a sl st, turn. <42 (42, 49, 49, 56) (56, 56, 63, 63) st>
Repeat Plain Round nine times.
Decrease round: Ch 2, [dc 2, dc2tog, dc 3] around, join with a sl st, turn. <36 (36, 42, 42, 48) (48, 48, 54, 54) st>
Repeat Plain Round nine times.
Decrease round: Ch 2, [dc 2, dc2tog, dc 2] around, join with a sl st, turn. <30 (30, 35, 35, 40) (40, 40, 45, 45) st>
Repeat Plain Round another 3 (5, 5, 6, 6) (7, 7, 8, 9) times.
Cuff
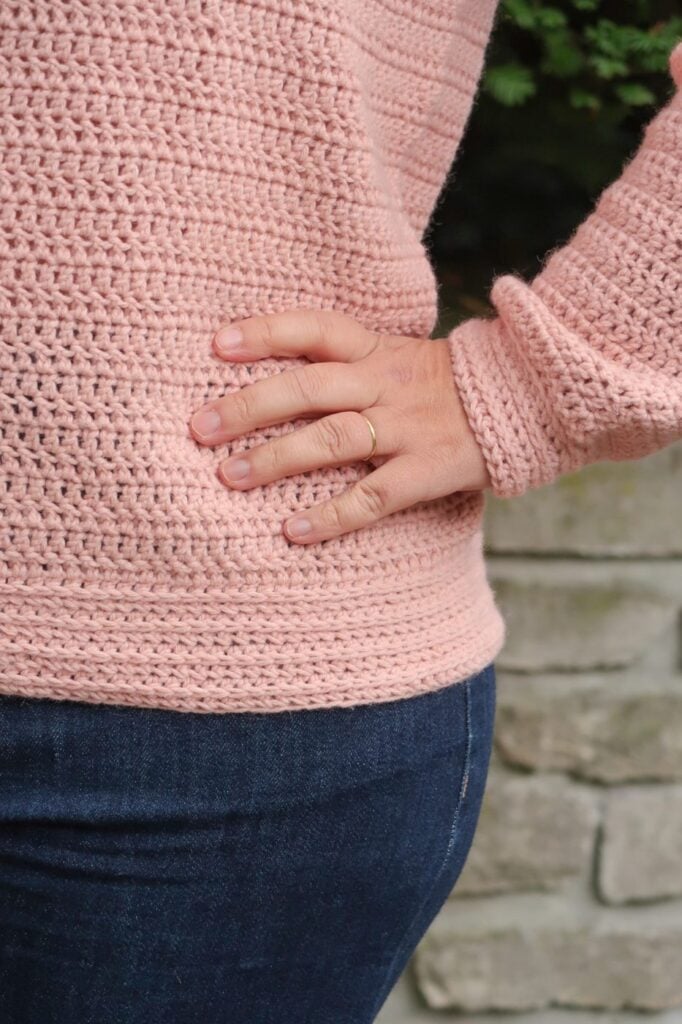
Decrease round: Ch 1, [hdc 2, hdc2tog, hdc 1] around, join with a sl st, turn. <24 (24, 28, 28, 32) (32, 32, 36, 36) st>
Round 1: Ch 1, hdc in 3rd loop around, join with a sl st, turn.
Round 2: Ch 1, hdc around, join with a sl st, turn.
Repeat Rounds 1-2.
Repeat Round 1 one more time.
Fasten off and weave in the ends.
Bottom Band
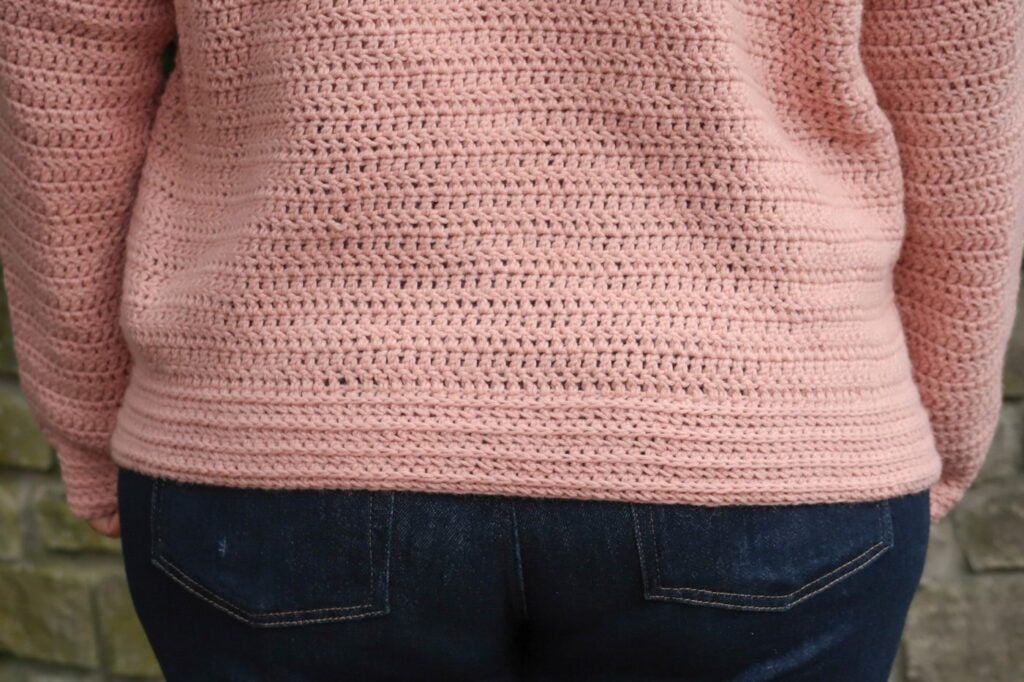
Round 1: Join yarn, ch 1 and hdc in each 3rd loop of the starting chain around, join with a sl st, turn. <110 (124, 136, 148, 162) (174, 186, 200, 212) st>
Round 2: Ch 1, hdc in 3rd loop around, join with a sl st, turn.
Round 3: Ch 1, hdc around, join with a sl st, turn.
Repeat Rounds 2-3.
Repeat Round 2 one more time.
Fasten off and weave in the ends.
Blocking
You are done with the crocheting part. Make sure to weave in all the ends.
To make your sweater even prettier and help even out your stitches, block your project.
Don’t skip this step as it can make a huge difference. Read my detailed tutorial on why to block, how-to, and all my tips and tricks if you need help.
Never blocked before? My free Blocking Cheatsheets walk you through it step by step, with clear examples and the tips I actually use on my own projects. Get the free blocking cheatsheets >>