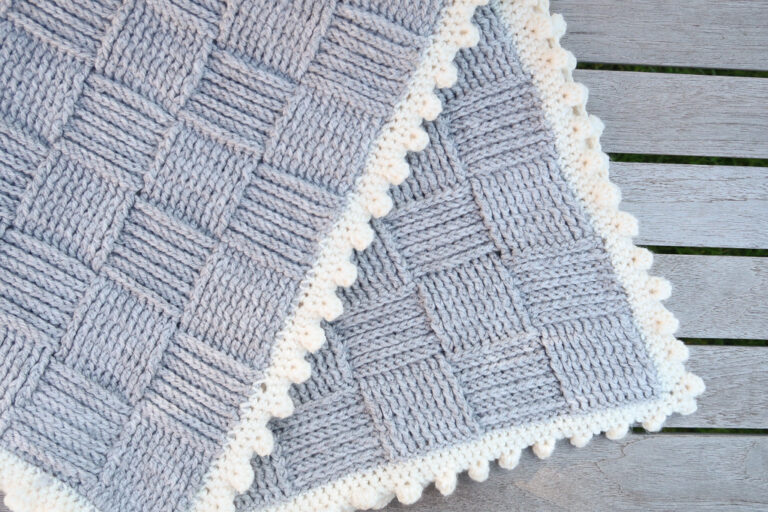
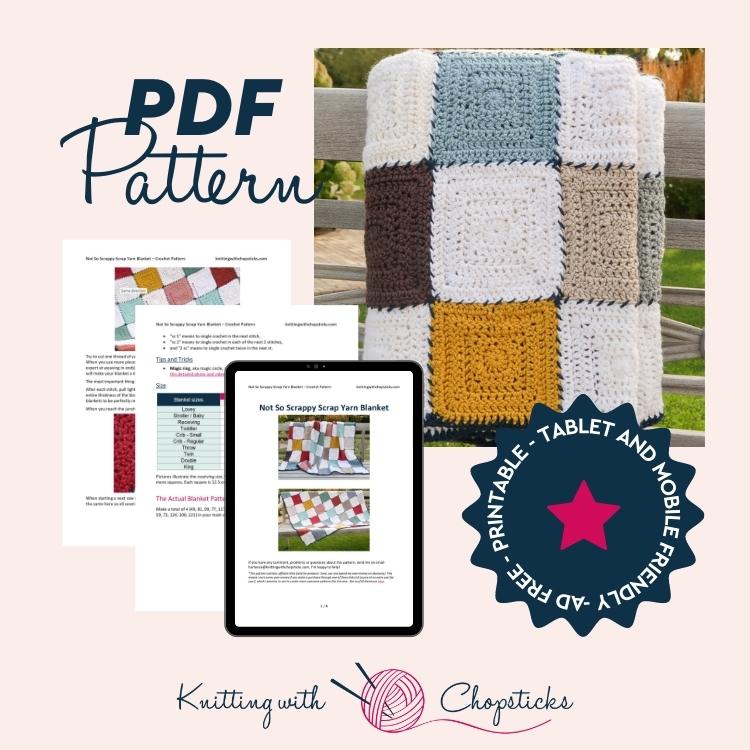
Not So Scrappy Scrap Yarn Blanket
A new crochet blanket pattern, the Not So Scrappy Scrap Yarn Crochet Blanket, is now a free blanket crochet pattern here on the blog! Scroll down to read all about the inspiration, how to use your leftover yarn or scroll down for the free crochet pattern.
No time right now? Pin this easy scrap yarn crochet blanket free pattern for later!

*This post contains affiliate links (only for products I love, use and spend my own money on obviously). This means I earn some yarn money if you make a purchase through one of these links (of course at no extra cost for you!), which I promise to use to create more awesome patterns like this one. All opinions are my own. See my full disclosure here.

Using up yarn scraps can be a “drag your feet” type of task. Being creative on ways to use them is sometimes the only way I can get myself to get rid of those lonely skeins. That is exactly how the Not So Scrappy scrap yarn blanket came to be.
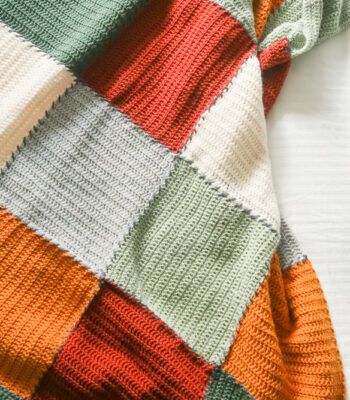
This scrap yarn crochet blanket pattern is a worsted weight baby blanket perfect for any crocheter—beginner and up!
Since the crochet pattern is crafted in squares, you can use as many different types of leftover yarn as it takes and sew it all together with signature seams. Explore the free pattern here!
Use Your Stash: Yarn and Colors
The Not So Scrappy Scrap Yarn Blanket is a great project to use up some of your leftover yarn in your stash. Each square is crocheted separately so you can adjust your hook size to meet gauge with different yarns. If you need help with gauge, check out this detailed tutorial about gauge.
I made mine using all worsted weight wool yarn I had leftover in my stash. You can also combine 2 threads of DK weight.
Some of the yarns I used are:
- WeCrochet Swish Worsted
- Knitcrate Vidalana Ambient Worsted
- Paintbox Yarns Wool Mix Aran
- A lot of unlabeled leftover yarn

I recommend using all yarn with similar fiber composition (%wool, acrylic, etc.) so the fabric will react similarly when washed. If you mix fiber types, they can react differently and your blanket might not look so sharp anymore.
To get a beautiful blend of colors I recommend using a light neutral as the main color (in my case I used all off-white yarns). For the other half of the squares you can use any number of colors you like together. I would avoid using colors too close to the main color so the checkered effect remains. Try to have at least 2 squares in each color and a maximum of 4 or 5 so no one color is under or overrepresented. This will help give your blanket a nice, polished look and no-one will know you used leftover yarn.
For the seams and border I used a much darker color than any other. The contrast is what makes the seams and border decorative. You can use any color you want but I recommend not using a color you’ve also used for some of the squares as the seams will not be visible when joining those squares and the overall effect won’t be the same.
Of course, it’s your project and your choice. Feel free to use more or less colors in your blanket.
To get the same gauge with all yarns you might need to go one hook size up or down as there are quite a lot of variations in thickness within worsted weight yarns.
Downloadable Not So Scrappy Scrap Yarn Crochet Blanket Pattern
More Blanket Crochet Patterns View All
Before you Start your Scrap Yarn Crochet Blanket
Materials
- Worsted weight yarn or DK weight yarn held double (check your gauge). You’ll need approximately 95 (1160, 1920, 2350, 1820, 2770, 3390, 5850, 9450, 10440) m / 105 (1270, 2090, 2000, 3030, 3700, 6400, 10330, 11420) yd.
- 5 mm / US H – 8 hook (or size needed to meet gauge for each yarn).
- 4 stitch markers
- Tapestry needle
Gauge
The gauge for this pattern is 12 st by 10 rows in dc for a 10 cm by 10 cm square (4” by 4”).
Use the hook size you need for all the yarns you use to have the same gauge.
One square is 12.5 cm / 4.75” wide.
Abbreviations
Sick of all the yarn jargon and conversions?
US vs UK, abbreviations, imperial vs metric, yarn weights, etc?

This pattern uses US notations.
- st = stitch
- ch = chain
- sc = single crochet
- dc = double crochet
Notes
Work instructions between [] the indicated number of times or until the end of the row/round. Instructions between () are worked in the same stitch/space.
The final number of stitches is indicated at the end of the row/round between < >.
The turning ch 2 counts as a stitch throughout the pattern except if mentioned otherwise.
The pattern is written in crochet shorthand. For example:
- “sc 1” means to single crochet in the next stitch,
- “sc 2” means to single crochet in each of the next 2 stitches,
- and “2 sc” means to single crochet twice in the next st.
Special Stitches and Techniques
- Magic ring, aka magic circle, adjustable loop. If you’re not familiar with this technique, this detailed photo and video tutorial should help you.
Size
Pictures illustrate the receiving size. You can easily adjust the blanket size by adding/removing more squares. Each square is 12.5 cm / 4.75”.

The Actual Scrap Yarn Blanket Pattern
Make a total of 4 (49, 81, 99, 77, 117, 143, 247, 399, 441) squares from which 4 (25, 41, 50, 39, 59, 72, 124, 200, 221) in your main color.
Crochet Blanket Square

Round 1: In a magic ring, dc 12, sl st in first dc to close the round, turn. <12 st>
Note: By turning your work after each round your squares will be completely reversible.
Round 2: Ch 2, [3 dc, dc 2] until last 2 st, 3 dc, dc, finish with a sl st in 2nd ch and turn. <20 st>
Round 3: Ch 2, dc 2, [3 dc, dc 4] until last 2 st, 3 dc, dc, finish with a sl st in 2nd ch and turn. <28 st>
Round 4: Ch 2, dc, [2 dc, 3 dc (place a marker in middle dc), 2 dc, dc 4] until last 5 st, 2 dc, 3 dc (place a marker in middle dc), 2 dc, dc 2, finish with a sl st, turn. <44 st>
Round 5 – 6: Ch 2, [dc until st before marker, 2 dc, 3 dc in marked st (move marker to middle dc), 2 dc] 4 times, dc across, sl st in 2nd ch, turn. <76 st>
Bind off and weave in the ends.
Blocking
Make sure to weave in all the ends.
To make your crochet squares even prettier, help even your stitches and square your corners block your squares.
Don’t skip this step as it can make a huge difference. Read my detailed tutorial on why block, how-to, and all my tips and tricks if you need help.
Assembly

Usually, the seams are the less fun part of a project, and you try your very best to make them as discrete as possible. In this case, it is the opposite, they are what makes this blanket fun, different and stand out. Ok, I admit, they are still not my favorite part of the project to make but at least here you will see them.
The important thing here is to be as regular as you can manage!
First, weave in the ends of all your squares. Cut any remaining ends nicely.
Clear out a big area, somewhere in your home where you can fit the entire blanket flat and sit around it to sew. I usually move the living room table and put my blanket on the floor right in the middle of the way. It doesn’t make Mr. Artichoke very happy but I don’t have a better spot.
Arrange the squares in pattern alternating main color squares with other colored squares both horizontally and vertically. Except for the lovey size, you should have a main-colored square in each blanket corner. Try to have same-colored squares nicely spread throughout the blanket.
Arranging your squares might take a bit of time but it’s worth the extra effort to have a nice unity in your blanket.
Once you like what you see, start sewing. I usually do all seams in one direction then start on the other direction. This helps me stay consistent.

Try to cut one thread of yarn long enough so you can finish one whole seam with one piece. When you use more pieces, it creates weak spots which can come loose (even if you are an expert at weaving in ends). And, you will see the different layers of yarn at the junction which will make your blanket a tiny bit less pretty. That would be a pity!
The most important thing here is to be as regular as you can manage! Did I say that already?
After each stitch, pull lightly on the yarn to tighten up the stitch. Be careful to sew through the entire thickness of the blanket so that the seam is nice and visible on both sides. I like my blankets to be perfectly reversible.
When you reach the junction of 4 squares try to tie them together with a nice cross.

When starting a next row keep the same direction, if your seam is going from right to left do the same here so all seams are uniform.
Once you’ve done all seams, weave in all the ends. Double check the entire blanket for loose ends on both sides, I always end up with a few.
Border

To finish off your blanket (and hide any uneven square edges and corners), add a thin border.
Round 1: With your seam color yarn, join in a corner, ch 1 and
- Sc in each stitch around
- Dc in the junction between 2 squares (this helps to get a straight blanket edge even if your square corners aren’t nice and sharp).
Join with a sl st in the ch. Bind off and weave in the ends