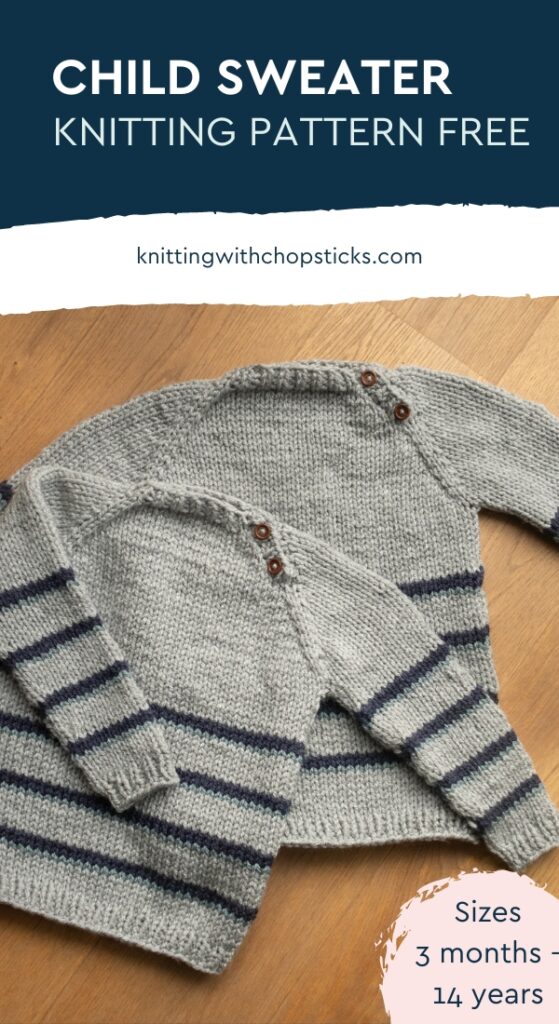
Edgar Sweater

A new child sweater knit pattern, the Edgar boy sweater knitting pattern is now a free raglan sweater knitting pattern here on the blog. Read all about the practical design, wide size range and yarn options or scroll down for the free child sweater knitting pattern.
No time right now? Pin this easy child sweater knit pattern for later!
*This post contains affiliate links (only for products I love, use and spend my own money on obviously). This means I earn some yarn money if you make a purchase through one of these links (of course at no extra cost for you!), which I promise to use to create more awesome patterns like this one. All opinions are my own. See my full disclosure here.
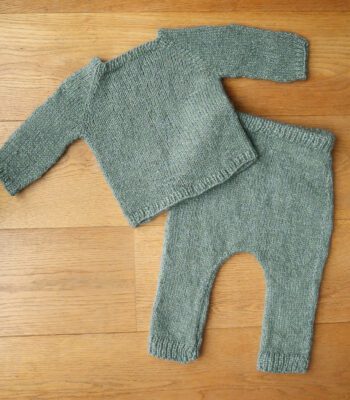
Knitting a baby or child sweater using our top-down raglan pattern with an easy button closure on the shoulder brings a host of wonderful benefits. Firstly, the use of chunky yarn means you’ll be amazed at how quickly your project takes shape, perfect for busy knitters or those eager to see results fast!
And fear not if you’re new to knitting – this pattern is designed with beginners in mind. With clear instructions and simple techniques, even those just starting out can create a stylish garment with ease. Plus, the addition of elegant modern stripes adds a trendy flair that’s sure to turn heads and earn compliments.
With sizes ranging from 3 months to 14 years, this versatile pattern ensures that knitters of all skill levels can create beautiful, handmade sweaters for all the little ones in their lives. Whether you’re looking for a quick project or a stylish addition to your child’s wardrobe, this pattern has you covered with charm and simplicity.

Cute and Practical Child Sweater Knit Pattern
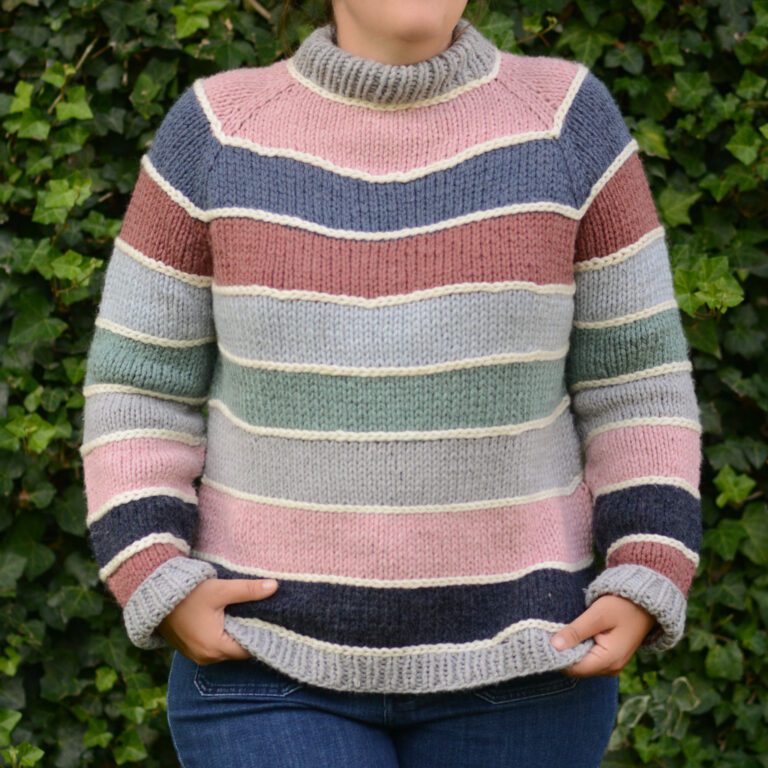
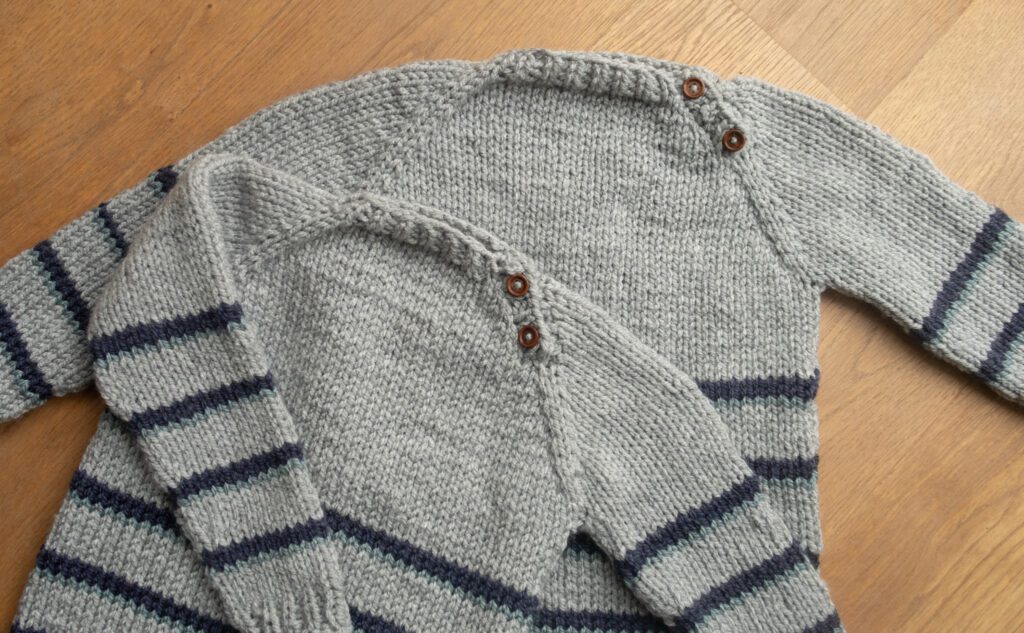
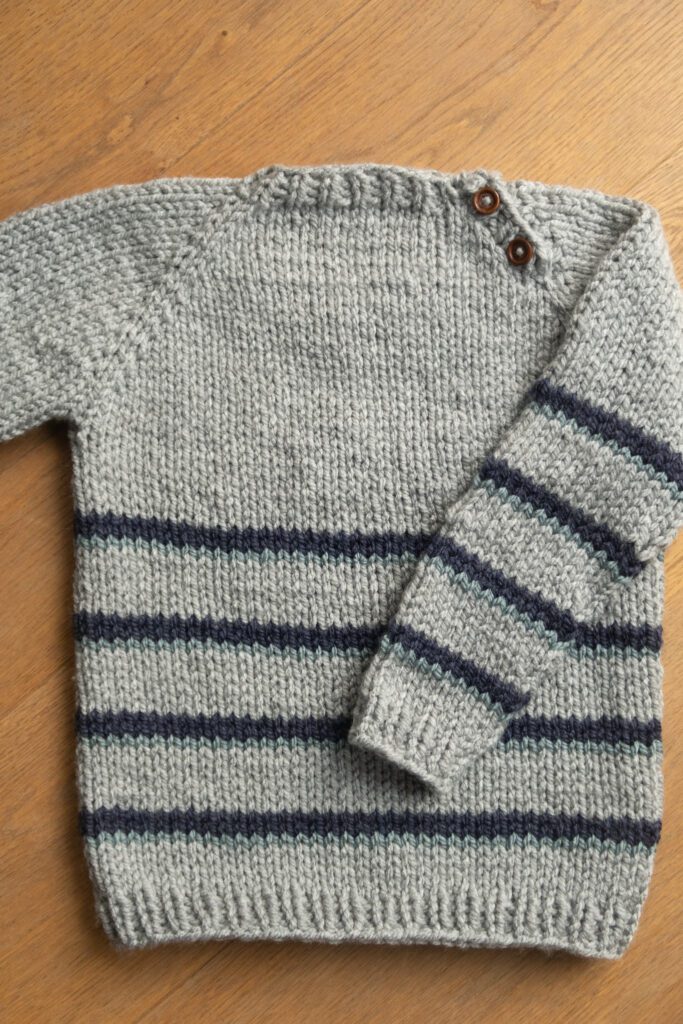
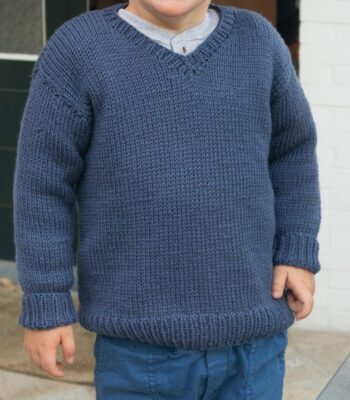
The Edgar sweater is not only adorable and timeless with its delicate bi-color stripe pattern but the neck button opening makes it a very practical sweater for kids. No need to squeeze your little one’s head through the neck opening or worry about a stretchy cast on thanks to this easy opening.
And before you panic at the idea of having to knit a buttonband, let me reassure you, you don’t need to make any buttonholes! The small 15mm buttons slip perfectly in between stitches and stay secured when worn.
Perfect for Every Child
The child sweater knit pattern comes in sizes 3 months to 14 years so you can make matching sweaters for all your kids or grandkids.
I’ve designed the Edgar Sweater with boys in mind but depending on the colors you choose for your sweater, it makes for a great little girl sweater too!
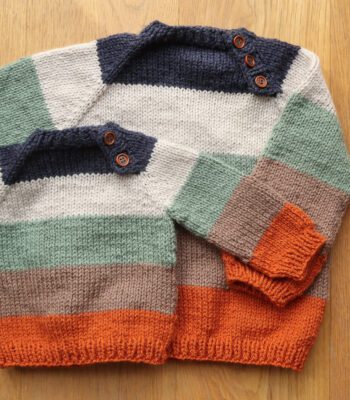
Just like for the popular Paint Colorblock Sweater, my sister has already ordered a matching set for my nieces. Pastel pink background with raspberry pink and off-white for the stripes.

Downloadable Edgar Child Sweater Knit Pattern

Grab the printable PDF of the Edgar child sweater knit pattern now in my shop, Etsy shop or on Ravelry.
2025 Knit Bestseller Pattern Collection
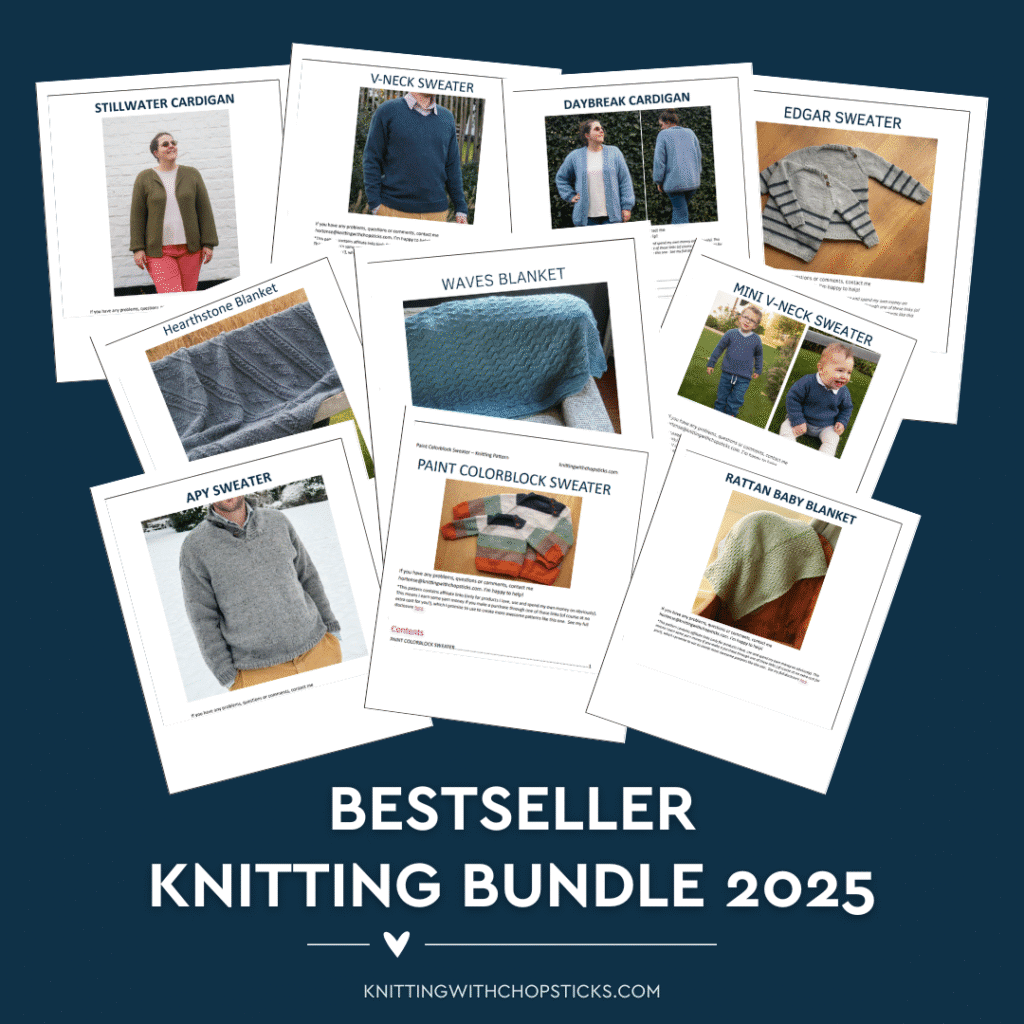
If this design caught your eye, you’re going to love the 2025 Knit Bestseller Pattern Collection — a handpicked set of this year’s most-made and most-loved knit designs.
You’ll get 10 top-selling knitting patterns that struck a chord with makers all year long: wearable sweaters, classic cardigans, and cozy blankets that are simple, satisfying, and easy to follow.
Each design builds confidence without overcomplicating things, making this collection perfect for knitters who want relaxing projects that turn out beautifully every time.
Grab the 2025 Knit Bestseller Pattern Collection here >>
More Child Sweater Patterns You'll Love
Before you Start Your Child Sweater Knit Pattern
Materials
- 6 mm/ US 10 circular knitting needles*
- 7 mm/ US 10.75 circular knitting needles*
- Hobbii Amigo Chunky (Chunky weight 5, 100% acrylic, 100m/109yd, 100g/3.55oz):
- 2 (2, 2, 2, 2) (3, 4, 4, 5, 6, 6) skeins in MC – Light Gray Melange (A15)
- 1 skein all sizes of Dark Blue Melange (A08)
- 1 skein all sizes of Patina Green (A26)
- Tapestry needle to weave in the ends
- 4 stitch markers
- 2 stitch holders (you can use interchangeable needle cables or pieces of scrap yarn to hold the sleeve stitches while you work on the body)
- 2 x 15 mm buttons
*You can choose to either work the magic loop method or use DPN.
Child Sweater Size
The baby/child sweater knit pattern is available in the following sizes: 3 months, 6 months, 12 months, 18 months, 24 months, 4 years, 6 years, 8 years, 10 years, 12 years and 14 years.
Sick of all the yarn jargon and conversions?
US vs UK, abbreviations, imperial vs metric, yarn weights, etc?

Sizes are noted throughout the pattern in the following way: 3 (6, 12, 18, 24) months (4, 6, 8, 10, 12, 14) years.
The pictures illustrate the 6 and 8-year sizes.
Final garment measurements are:
- Bust circumference: 46 (48, 52, 54, 56) (70, 76, 78, 82, 88, 92) cm / 18 (19, 20.5, 21.25, 22) (27.5, 30, 30.75, 32.25, 34.5, 36.25)”
- Upper arm circumference: 17 (17, 20, 23, 23) (25, 27, 28, 30, 32, 34) cm / 6.75 (6.75, 8, 9, 9) (9.75, 10.5, 11, 11.75, 12.5, 13.5)”.
- Length: 31 (32.5, 35.5, 38, 39.5) (43.5, 50.5, 53.5, 57, 61, 65) cm / 12 (12.75, 14, 15, 15.5) (17.25, 19.75, 21, 22.5, 24.25, 25.5)”.
Gauge
The gauge for this pattern, in stockinette stitch, is 10 st by 15 rows for a 10 cm by 10 cm square (4” by 4”).
Abbreviations & Instructions
- st = stitch
- k = knit
- p = purl
- M1R = make one right; single right-leaning knit increase
- M1L = make one left; single left-leaning knit increase
- K2tog = knit 2 stitches together; single right-leaning decrease
Repeat instructions between [] the indicated number of times or until the end of the round/row.
The final number of stitches is indicated at the end of the round/row between < >.
Special Stitches and Techniques
- M1R: Insert your left needle from back to front, under the bar between the stitches (thus lifting it onto the left needle). Knit this bar through the front loop (this twists it into a nice little tight loop).
- M1L: Insert the left needle from front to back, under the bar between the stitches (thus lifting it onto the left needle). Knit this bar through the back loop (this twists it into a nice little tight loop).
If you are not familiar with this increase technique, I find this video tutorial very helpful.
- Magic loop. If you’re not familiar with this technique, this tutorial will help you. Alternatively, you can choose to work with double pointed needles instead.
- Stockinette stitch:
- Flat: knit on RS rows, purl on WS rows
- In the round: knit all rounds.
Baby & Child Knit Sweater Construction

The Edgar sweater is a top-down raglan sweater. Stitches for the neck are cast on and a first section is worked in rows back and forth to create the opening for the buttonholes.
The yoke is then joined in the round and worked down in the round increasing until you reach the point to separate for the sleeves. Leaving the sleeve stitches on the side, you’ll work down the body before going back to finish off the sleeves.
Stitches for the button band are then picked up and worked in ribbing. No buttonholes are needed as the small buttons easily slip in between stitches to close.
The Actual Child Sweater Knit Pattern
The Sweater Yoke
With your 6 mm / US 10 circular needles and MC yarn, cast on 24 (26, 28, 28, 30) (32, 34, 38, 38, 40, 40) (don’t join in the round).
[k1, p1] across for 3 rows.
Switch to 7 mm / US 10.75 knitting needles.
From now on you will start making increases to shape the shoulders of your knit baby/child sweater.
Tip: Place stitch markers to help you know where to increase on the following rows/rounds without counting.
Add markers:
- 3 months: 3 st, add marker, 9 st, add marker, 3 st, add marker, 9 st.
- 6 months: 3 st, add marker, 10 st, add marker, 3 st, add marker, 10 st.
- 12 months: 4 st, add marker, 10 st, add marker, 4 st, add marker, 10 st.
- 18 months: 5 st, add marker, 9 st, add marker, 5 st, add marker, 9 st.
- 24 months: 5 st, add marker, 10 st, add marker, 5 st, add marker, 10 st.
- 4 years: 3 st, add marker, 13 st, add marker, 3 st, add marker, 13 st.
- 6 years: 3 st, add marker, 14 st, add marker, 3 st, add marker, 14 st.
- 8 years: 4 st, add marker, 15 st, add marker, 4 st, add marker, 15 st.
- 10 years: 4 st, add marker, 15 st, add marker, 4 st, add marker, 15 st.
- 12 years: 4 st, add marker, 16 st, add marker, 4 st, add marker, 16 st.
- 14 years: 4 st, add marker, 16 st, add marker, 4 st, add marker, 16 st.
You now have 3 st markers.
Increase row: k1, M1L, [knit until last st before marker, M1R, k1, slip marker, k1, M1L] three times, knit until last st, M1R, k1.
Purl 1 row
Repeat [1 increase Row, 1 purl row] 4 times. <64 (66, 68, 68, 70) (72, 74, 78, 78, 80, 80) st>
Join in the round.
Tip: Use a stitch marker to mark the beginning of the round.
Using the magic loop knit in the round from here onwards.
Increase round: [k1, M1L, knit until last st before marker, M1R, k1] around.
Knit one round.
Repeat [1 increase round, 1 knit round] 1 (1, 2, 3, 3) (5, 6, 6, 7, 8, 9) times. <80 (82, 92, 100, 102) (120, 130, 134, 142, 152, 160)>
Note: after approximately 3 increases you can switch to a shorter cord and simply knit in the round.
Work 4 (5, 4, 3, 4) (4, 3, 4, 3, 2, 2) rounds in stockinette.
Sweater Body
Split for sleeves: Keep working with your current yarn color and place stitches on holder until first st marker, knit until next marker, place st on holder until next marker, knit until end of round.
You should have 17 (17, 20, 23, 23) (25, 27, 28, 30, 32, 34) st for each sleeve and 46 (48, 52, 54, 56) (70, 76, 78, 82, 88, 92) st for the body.
Knit the body stitches remaining on your needles in stockinette for 6 (6, 6, 8, 9) (6, 6, 8, 6, 8, 6) rounds.
[Knit 2 rounds in color A
Knit 1 round in color B
Knit 6 rounds in MC] 2 (2, 2, 2, 3) (3, 4, 4, 5, 5, 6) times.
Knit another 0 (0, 0, 2, 3) (0, 0, 2, 0, 2, 0) rounds in MC
Switch to 6 mm / US 10 knitting needles.
[k1, p1] around for 3 rounds.
Cast off and weave in the end.
Sleeves
Go back to the stitches for one sleeve. With your 7 mm / US 10.75 needles join color MC yarn and knit in the round.
Tip: Leave a tail when joining that you can use to sew up the small gap that always forms at the armpit.
Knit in stockinette for 6 (6, 6, 8, 9) (6, 6, 8, 6, 8, 6) rounds.
[Knit 2 rounds in color A
Knit 1 round in color B
Knit 5 rounds in MC
Decrease: k1, k2tog, knit until last 3 st, ssk, k1] 2 (2, 2, 2, 3) (3, 4, 4, 5, 5, 6) times. <13 (13, 16, 19, 17) (19, 19, 20, 20, 22, 22)>
Knit another 0 (0, 0, 2, 3) (0, 0, 2, 0, 2, 0) rounds in MC.
Switch to 6 mm / US 10 knitting needles.
[k1, p1] around for 3 rounds.
Cast off and weave in the end.
Repeat for the 2nd sleeve.
Button band

To make the neck button band you are going to pick up stitches along the collar opening on each side of the raglan seam.
Pick up 10 stitches.
[k1, p1] across for 2 rows.
Cast off in pattern and weave in the ends.
Repeat for the other side of the raglan collar opening.
Finishing touches and Blocking
You are done with the knitting part. Make sure to weave in all the ends.
Sew the buttons at the shoulder seam, one at each extremity.
To make your sweater even prettier and help even your stitches carefully block your project.
Don’t skip this step as it can make a huge difference. Read my detailed tutorial on why block, how-to, and all my tips and tricks if you need help.