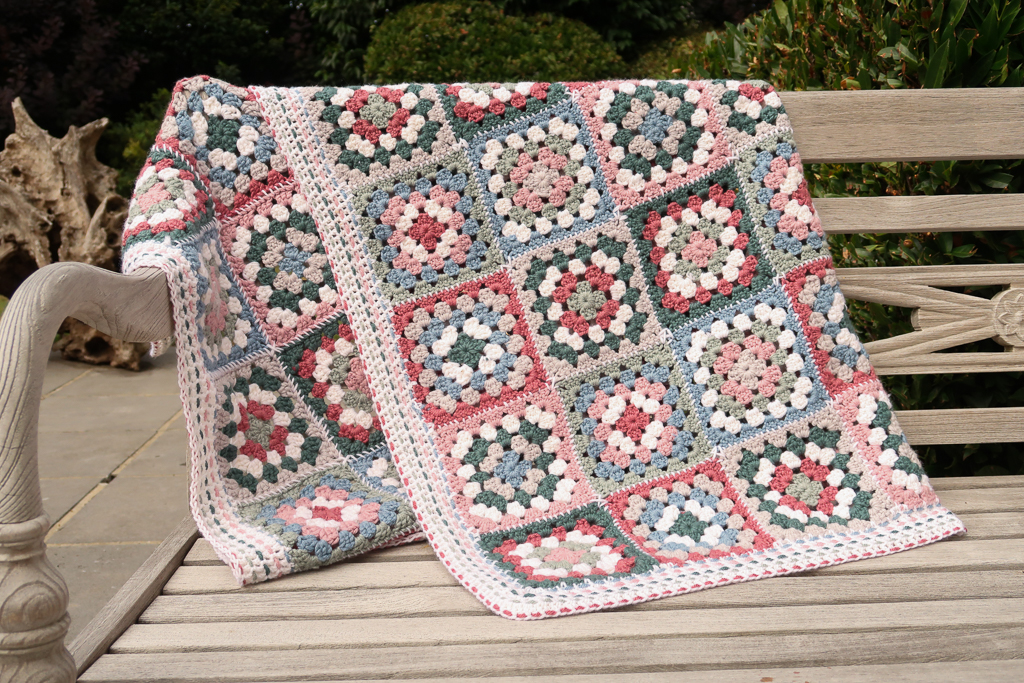
Adelie Granny Square Blanket
A new baby blanket crochet pattern, the Adelie Granny Square Crochet Blanket, is now a free crochet pattern here on the blog! Read all about the inspiration, my tips and tricks and color combination recommendations or scroll down to view the full free pattern or purchase an ad free PDF from the links below.
No time right now? Pin this cute baby crochet granny square blanket pattern for later!

*This post contains affiliate links (only for products I love, use and spend my own money on obviously). This means I earn some yarn money if you make a purchase through one of these links (of course at no extra cost for you!), which I promise to use to create more awesome patterns like this one. All opinions are my own. See my full disclosure here.
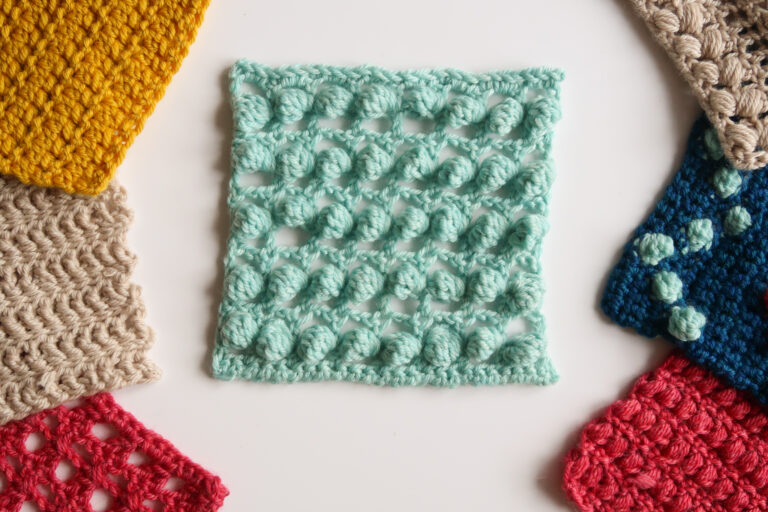
Some things are classic for a reason. Just like there is a reason that granny square crochet projects will always be in style (even if they aren’t really in style). Something about them will always be comforting. Nostalgia is in the air anytime a granny square blanket is near. Are ready for a spell of nostalgia and comfort? Let’s get stitching!
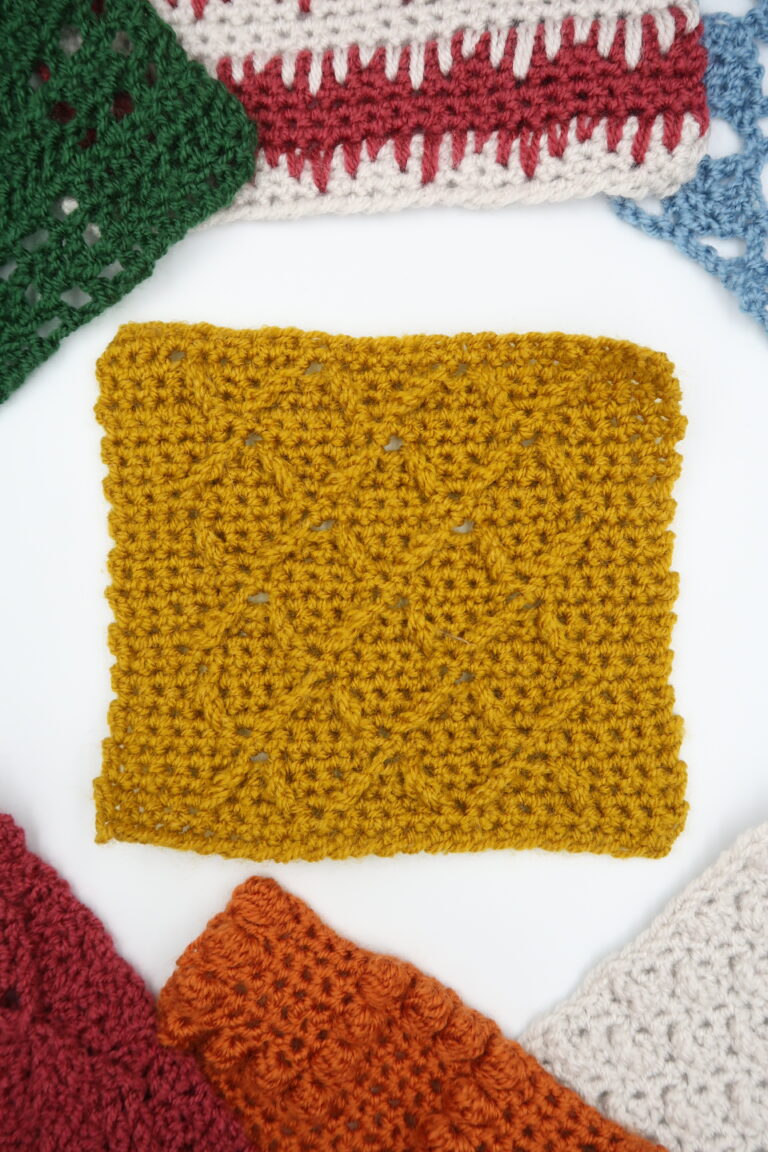
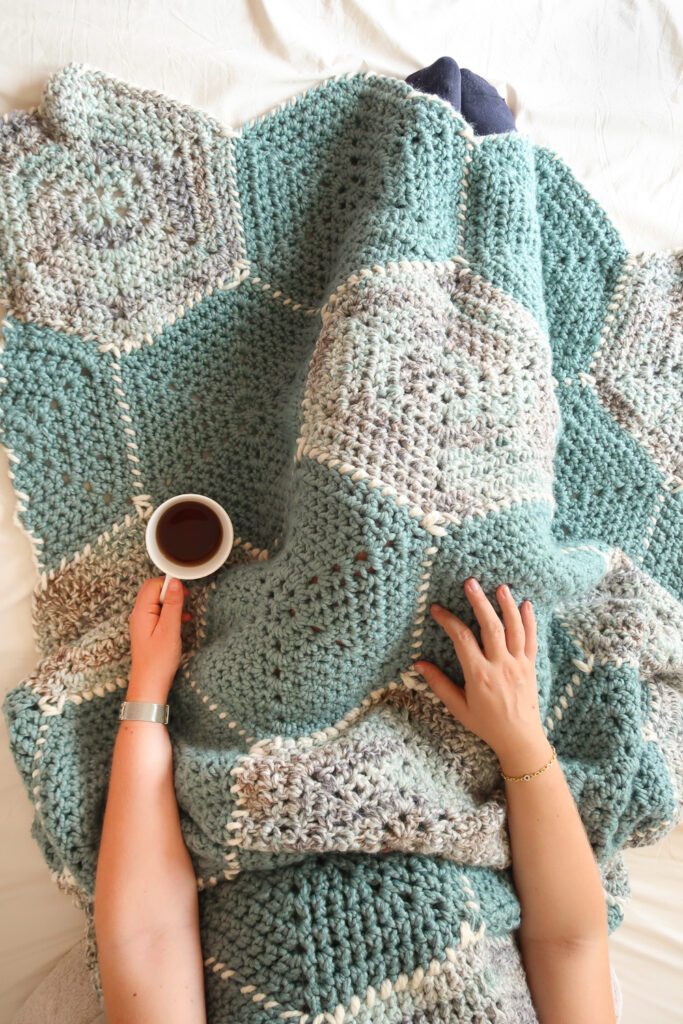
The Adelie granny square crochet blanket pattern is a classic granny square crochet blanket pattern with a few twists: decorative seams and a gorgeous woven border.
Signature Seams to Attach the Crochet Granny Squares
Seams are always my least favorite part of any project so I like to make them a visual part of the design. It makes them feel less of a chore.
You might recognize the granny squares crochet blanket seams from some of my other blanket designs:
The Adelie crochet blanket pattern below includes plenty of tips and tricks on how to make those gorgeous seams.
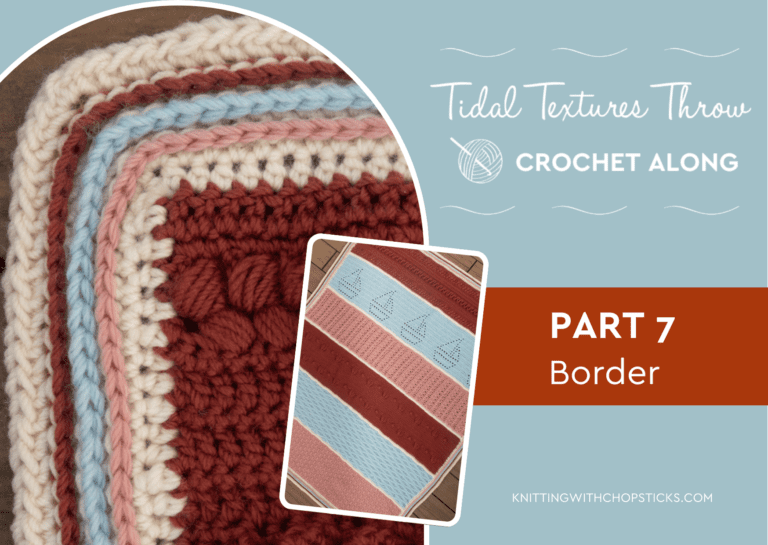
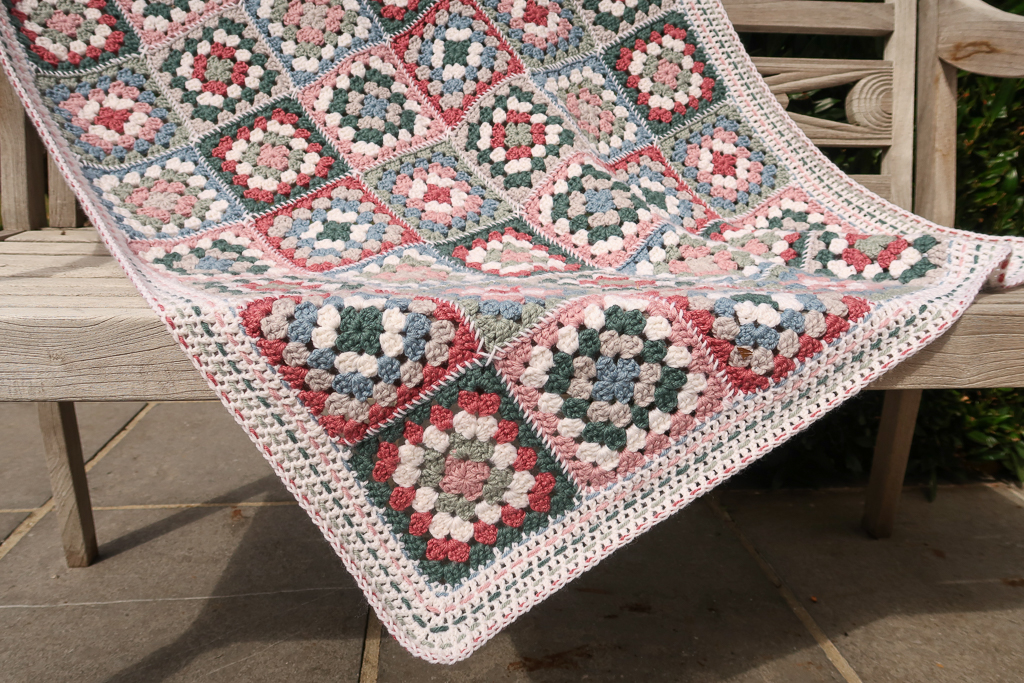
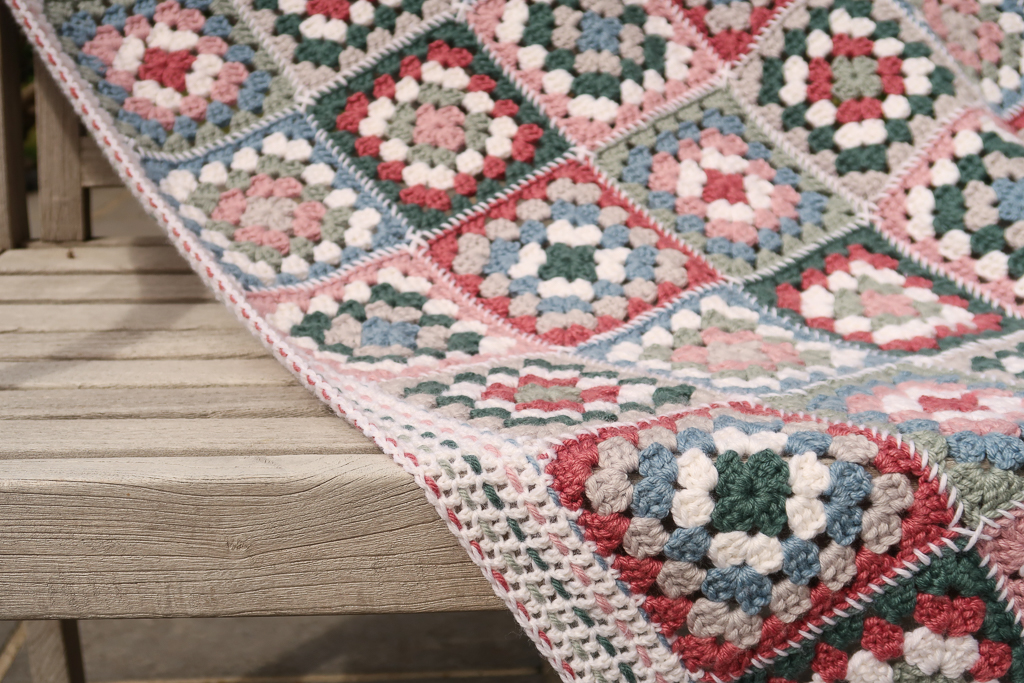
The Crochet Blanket Border
The cute woven border is really what makes the Adelie Granny Square crochet blanket pattern unique.
A simple crocheted border of double crochet in the neutral white is enhanced and softened by weaving in a thread of 5 of the main blanket colors. Don’t let the delicate look of this border fool you, it’s much easier (and quicker!) to make than you’d think!
The short video below shows you how it’s done.
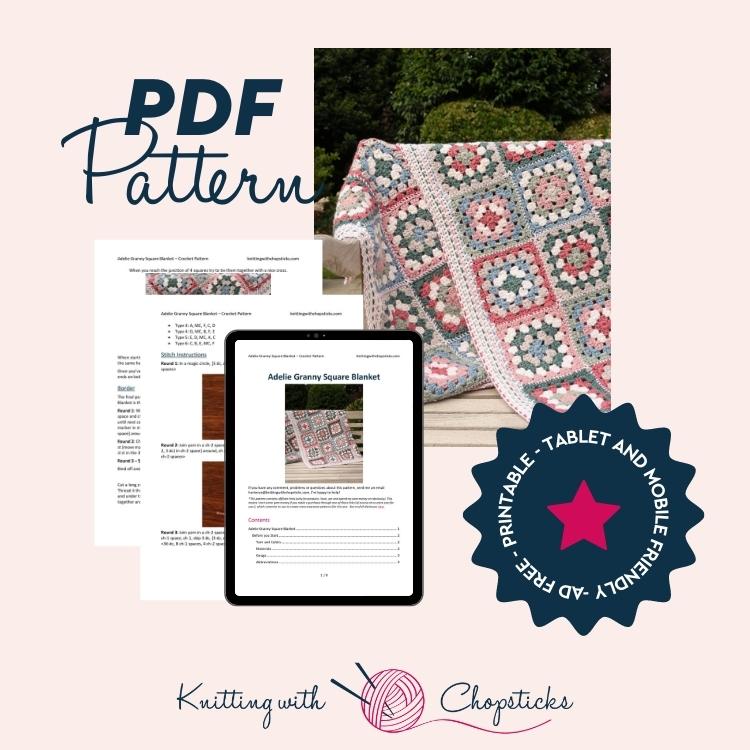
Downloadable PDF Adelie Granny Square Crochet Pattern
Before you Start your Granny Square Crochet Blanket
Yarn and Colors
The Adelie Granny Square Blanket is made with 7 colors.
As I couldn’t find a perfect color combo in the Katia Merino Aran yarn I wanted to work with for this design, I chose to combine colors from this line with their Katia Merino Classic line. Both yarns have the exact same composition, but one is a worsted weight 4 while the other is a DK weight 3.
To get the same gauge with both, I have worked the DK weight colors held double with a 5.5 mm / US I – 9 hook while the worsted weight colors are worked held single with a 6 mm / US J – 10 hook.
To get a beautiful blend of colors I recommend using at least 2-3 neutral colors to balance out the other colors and make them pop. 2-3 light colors and 2-3 darker colors allow alternating light and darker colors in the squares. To me, some variation of white is always a must in any very colorful project. Of course, it’s your project and your choice.
Feel free to use more or less colors in your blanket.
Materials
- Katia Yarns Merino Classic (DK weight 3, 52% merino super wash, 48% acrylic, 100g/3.5oz, 240m/262yd) held double:
- 3 skeins in white (1) (MC)
- 2 skeins in emerald (78) (color A)
- 2 skeins in dark rose (69) (color B)
- 2 skeins in very light grey (38) (color C)
- Katia Yarns Merino Aran (worsted weight 4, 52% merino super wash, 48% acrylic, 100g/3.5oz, 155m/169yd):
- 2 skeins in dark rose (54) (color D)
- 2 skeins in reseda green (91) (color E)
- 2 skeins in jeans (79) (color F)
You can easily substitute with any worsted weight yarn or DK weight yarn held double (check your gauge).
- 5.5 mm / US I – 9 hook
- 6 mm / US J – 10 hook
- Tapestry needle. As there is quite a lot of sewing involved, I recommend using stainless steel needles. I have done it with cheap plastic ones in the past but they kept breaking and got stuck in the fabric more easily.
Gauge
The gauge for this pattern is 14.5 st by 13 rows in dc for a 10 cm by 10 cm square (4” by 4”).
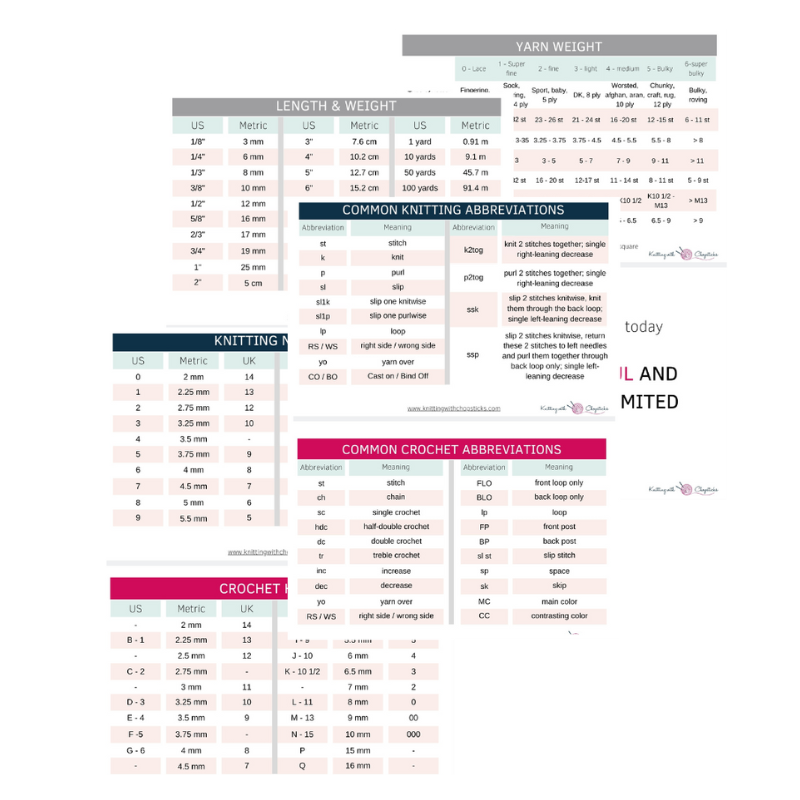
Sick of all the yarn jargon and conversions?
US vs UK, abbreviations, imperial vs metric, yarn weights, etc?

Use the hook size you need for all the yarns you use to have the same gauge.
To get the same gauge with both yarns I used, I have worked the DK weight colors held double with a 5.5 mm / US I – 9 hook while the worsted weight colors are worked held single with a 6 mm / US J – 10 hook.
One square is 12 cm / 4.75” wide.
Abbreviations
This pattern uses US notations.
- st = stitch
- ch = chain
- sc = single crochet
- dc = double crochet
Yarn Jargon Cheatsheets
Whether you knit, crochet, or both, these are a necessity.
Notes
Work instructions between [] the indicated number of times or until the end of the row / round. Instructions between () are worked in the same stitch/space.
The final number of stitches is indicated at the end of the row / round between < >.
The turning ch 3 count as stitches throughout the pattern except if mentioned otherwise.
The pattern is written in crochet shorthand. For example:
- “sc 1” means to single crochet in the next stitch,
- “sc 2” means to single crochet in each of the next 2 stitches,
- and “2 sc” means to single crochet twice in the next st.
Tips and Tricks
- Magic ring, aka magic circle. If you’re not familiar with this technique, this detailed photo and video tutorial should help you.
- Weaving in the ends: As each round uses a different color, a lot of ends need to be woven in. If you’re like me, weaving in ends is not your favorite part of a crochet project.
- As the pattern is not too lacy, you can get away with crocheting the next round over the tail of the previous round.
- After you have crocheted a few stitches over the tail of the previous round, leave about 3-4cm / 1-2” of the tail and finish your round.
- Weave in the end of the tail in the opposite direction. With this method, you only have to do half of the weaving in process per tail.
- When you start a new round, don’t start where you finished the previous one. Start somewhere different at random. Having all your ends in the same section of the square will make an extra layer, which you want to avoid. You don’t want to see where you started your round in your finished square, this trick makes them nearly invisible.
- When I start a new round, I tag along the tail and crochet with a double yarn for a couple of stitches. It’s not perfect but I find as these are at random around your square, they are not too visible and it makes you save a lot of weaving in ends time. If you don’t like it, you can leave your tail and weave it in afterward like you would normally do.
Size
The crochet baby blanket is 82 cm by 118 cm / 32.25” by 46.5”.
You can easily adjust the blanket size by adding/removing more squares. Each square is 12 cm / 4.75” and the blanket border is 5 cm / 2” wide.
The Actual Granny Square Blanket Pattern
Color Combinations
Make a total of 54 squares in different color combinations. To add some repetitiveness and regularity as well as ensure a harmonious blend I made 6 different color combinations. This also helps arrange the squares when assembling the blanket. Make 9 squares of each type.
Each round is worked in a different color, listed from the center (round 1) to the final round (round 5).
- Type 1: B, E, MC, D, A
- Type 2: F, C, A, MC, B
- Type 3: A, MC, F, C, D
- Type 4: D, MC, B, F, E
- Type 5: E, D, MC, A, C
- Type 6: C, B, E, MC, F
Crochet Blanket Stitch Instructions
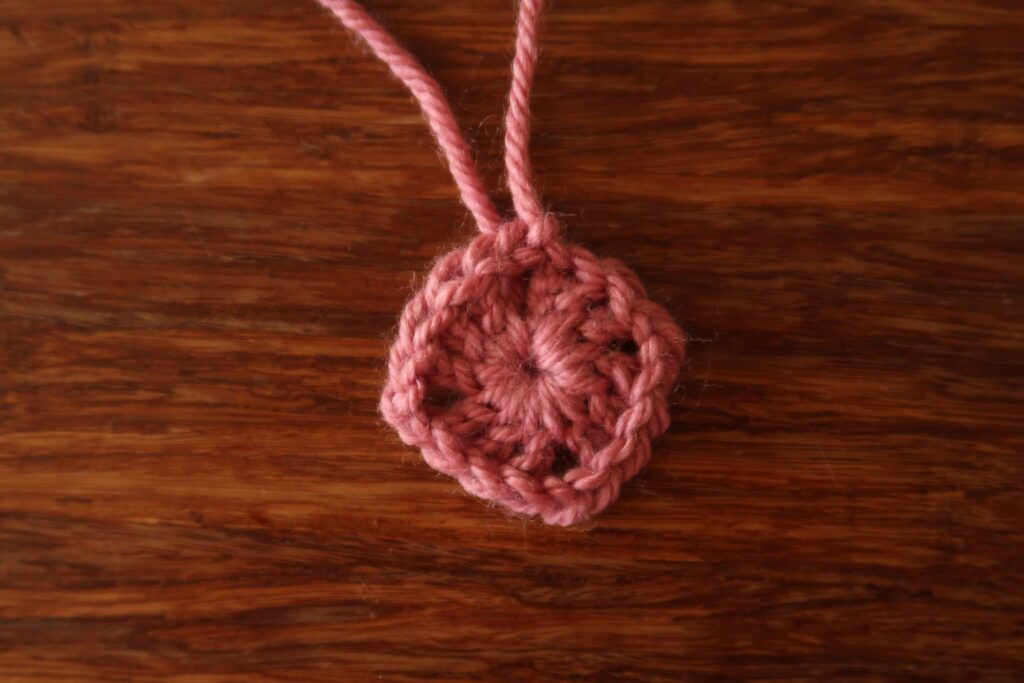
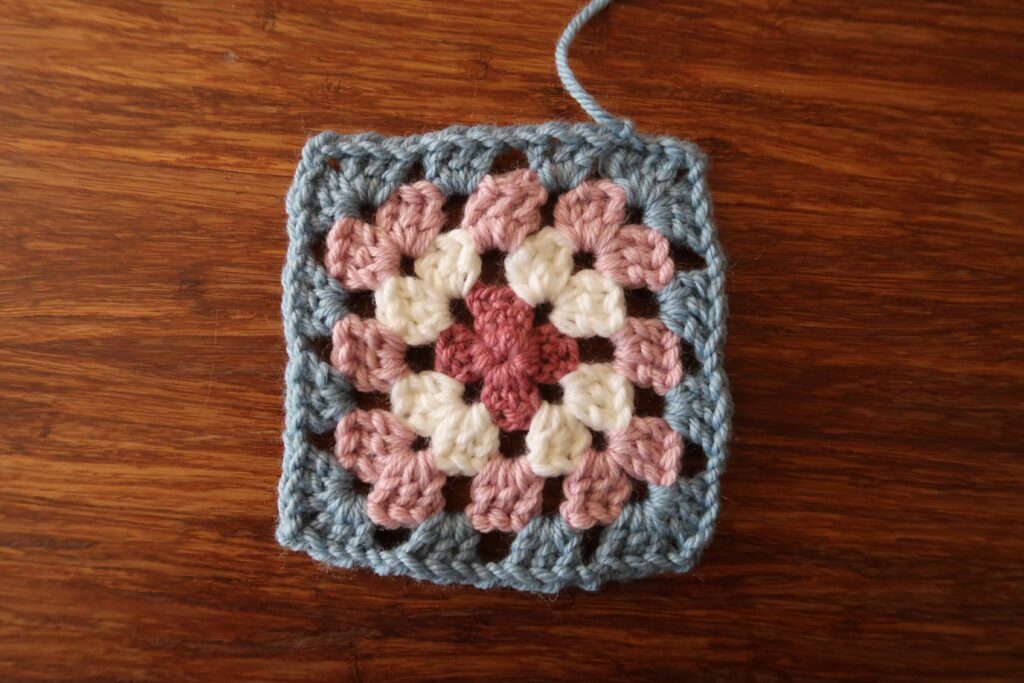
Round 1: In a magic circle, [3 dc, ch 2] four times. Finish with a sl st in the first dc. <12 dc, 4 ch-2 spaces>
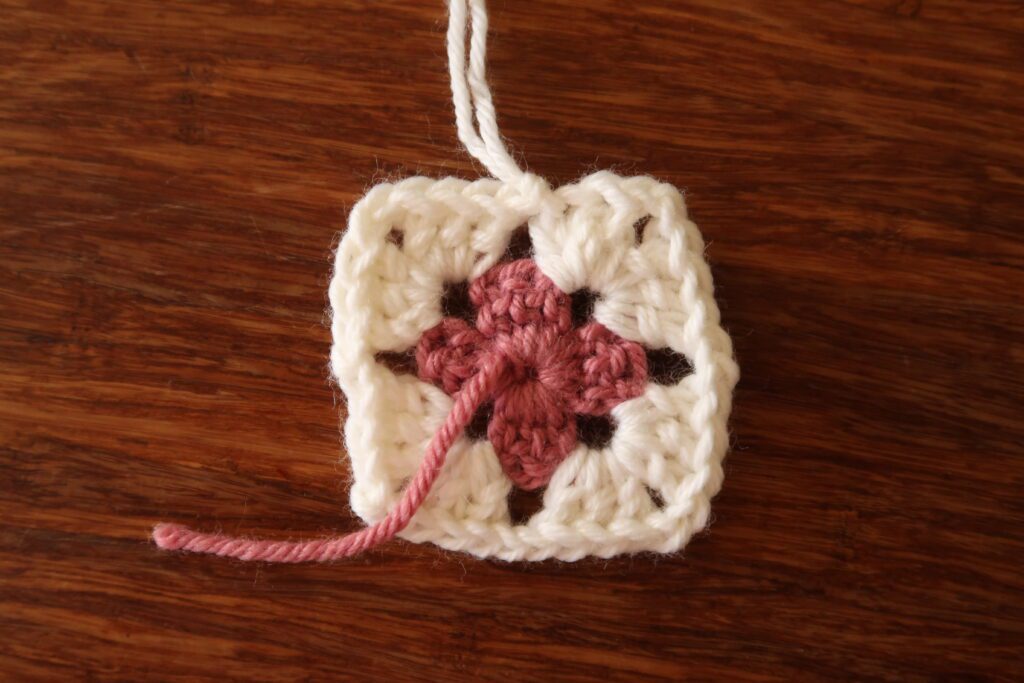
Round 2: Join yarn in a ch-2 space, (ch 3, 2 dc, ch 2, 3 dc) in ch-2 space, [ch 1, skip 3 dc, (3 dc, ch 2, 3 dc) in ch-2 space] around, ch 1 and join with a sl st in the 3rd ch. <24 dc, 4 ch-1 spaces, 4 ch-2 spaces>
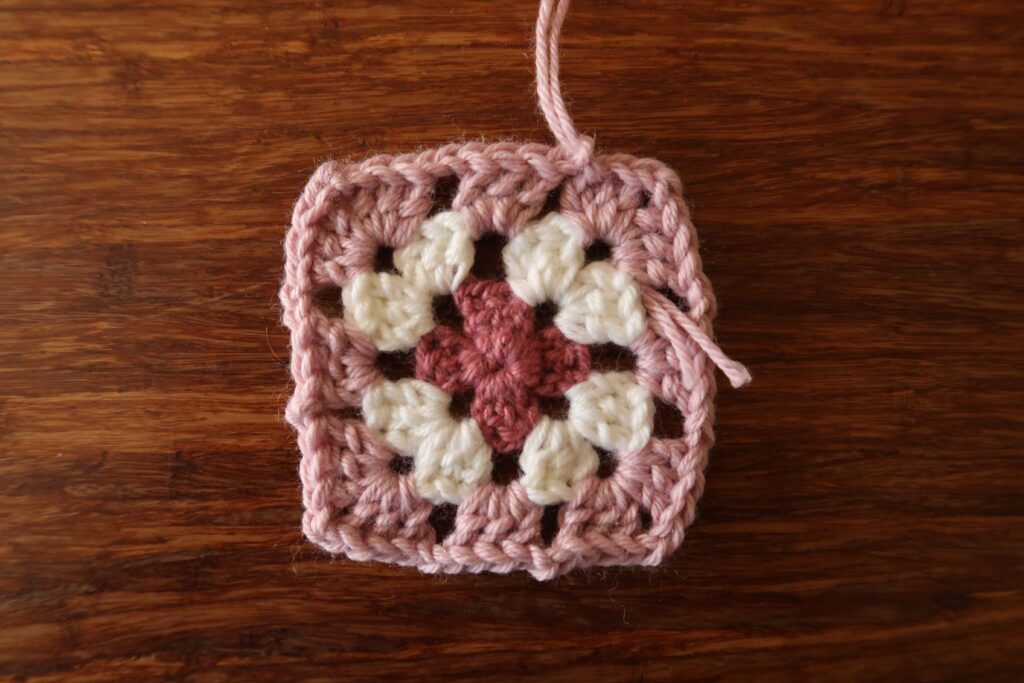
Round 3: Join yarn in a ch-2 space, (ch 3, 2 dc, ch 2, 3 dc) in ch-2 space, [ch 1, skip 3 dc, 3 dc in ch-1 space, ch 1, skip 3 dc, (3 dc, ch 2, 3 dc) in ch-2 space] around, join with a sl st in the 3rd ch. <36 dc, 8 ch-1 spaces, 4 ch-2 spaces>
Round 4 – 5: Join yarn in corner ch-space, (ch 3, 2 dc, ch 2, 3 dc) in corner space, * [ch 1, sk 3 dc, 3 dc in ch-1 space] to next ch-2 space, (3 dc, ch 2, 3 dc) in ch-2 space; rep from * around, [ch 1, sk 3 dc, 3dc in ch-1 space] across final side, sl st to third ch to join. <60 dc, 16 ch-1 spaces, 4 ch-2 spaces>
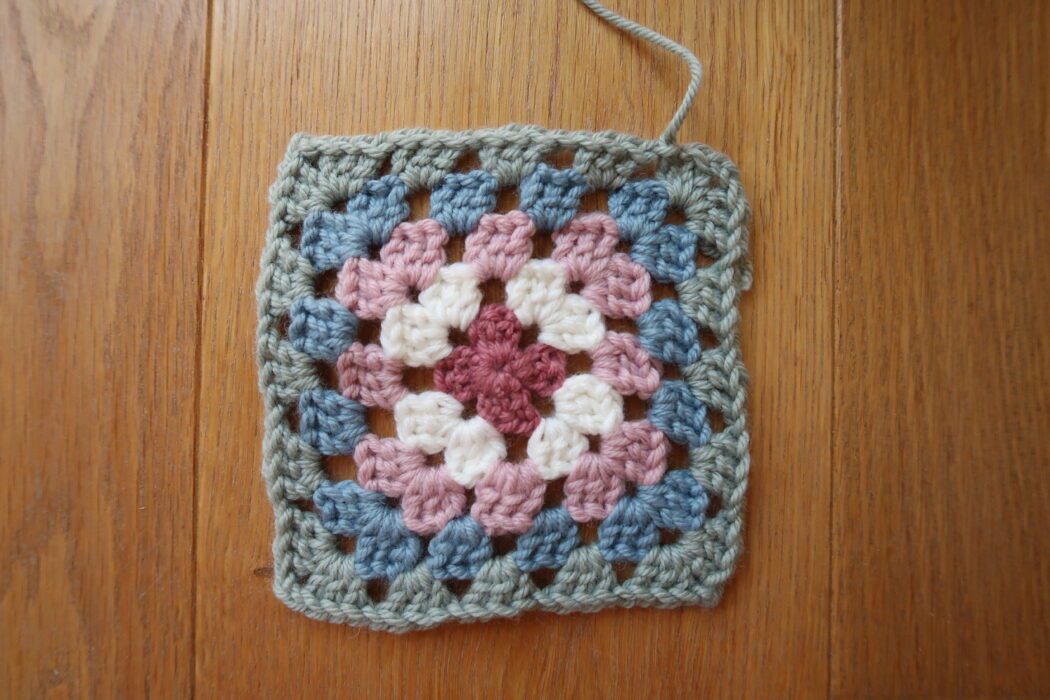
Bind off and weave in the ends.
Blocking
Make sure to weave in all the ends.
To make your crochet squares even prettier, help even your stitches, open up the eyelets and square your corners block your squares.
Don’t skip this step as it can make a huge difference. Read my detailed tutorial on why block, how-to, and all my tips and tricks if you need help.
Assembly
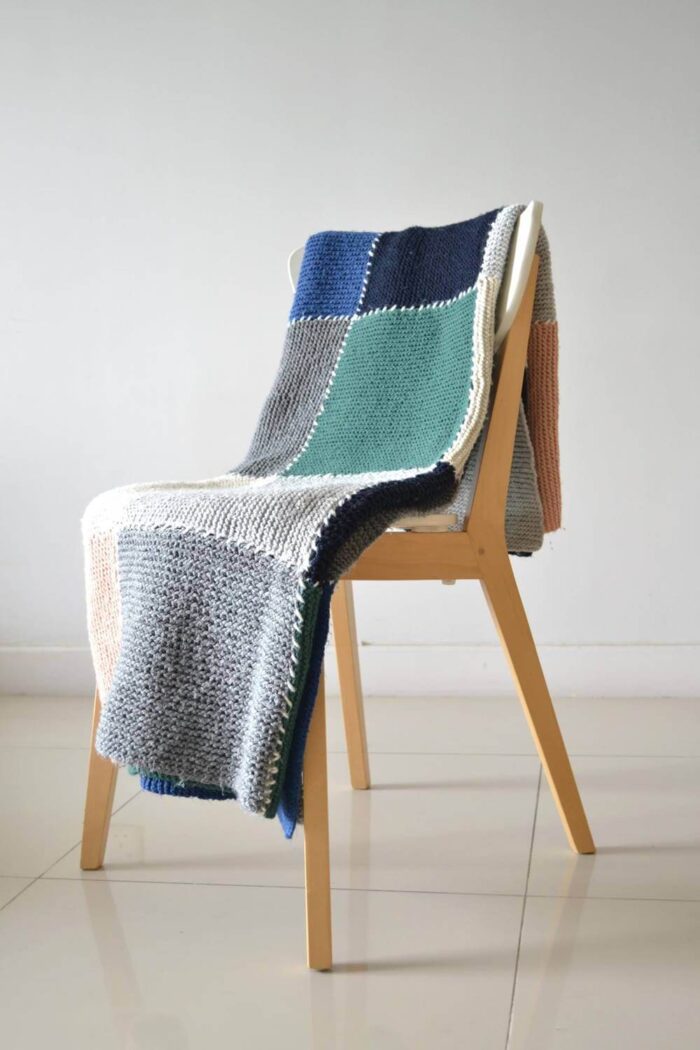
Crafting Blanket
Ready to make your own blanket design without a pattern?
Usually, the seams are the less fun part of a project, and you try your very best to make them as discrete as possible. In this case, it is the opposite, they are what makes this blanket fun, different and stand out. Ok, I admit, they are still not my favorite part of the project to make but at least here you will see them.
The important thing here is to be as regular as you can manage!
First, weave in the ends of all your squares. Cut any remaining ends nicely.
Clear out a big area, somewhere in your home where you can fit the entire blanket flat and sit around it to sew. I usually move the living room table and put my blanket on the floor right in the middle of the way. It doesn’t make Mr. Artichoke very happy but I don’t have a better spot.
Arrange the squares in pattern. On the short side you should have 1 square of each type. Once you like the pattern (I’ve set them type 1 to 6 in order), offset by 2 squares for each following row. This way, no squares of the same type touch.
Once you like what you see, start sewing. I usually do all seams in one direction then start on the other direction. This helps me stay consistent.
Try to cut one thread of yarn long enough so you can finish one whole seam with one piece. When you use more pieces it creates weak spots which can come loose (even if you are an expert at weaving in ends). And, you will see the different layers of yarn at the junction which will make your blanket a tiny bit less pretty. That would be a pity!
The most important thing here is to be as regular as you can manage! Did I say that already?
After each stitch, pull lightly on the yarn to tighten up the stitch. Be careful to sew through the entire thickness of the blanket so that the seam is nice and visible on both sides. I like my blankets to be perfectly reversible.
When you reach the junction of 4 squares try to tie them together with a nice cross.
When starting a next row keep the same direction, if your seam is going from right to left do the same here so all seams are uniform.
Once you’ve done all seams, weave in all the ends. Double check the entire blanket for loose ends on both sides, I always end up with a few.
Border
The final part of the Adelie Granny Square Baby Blanket is the cute border.
Round 1: With your MC yarn, join in a corner ch-2 space and ch 3, 2 dc in same space, dc in each st until next corner space, [3 dc in ch-2 space (add marker in middle dc), dc in each st until next corner space] around. Join with a sl st in the 3rd ch.
Round 2: Ch 3, [dc until marked st, 3 dc in marked st (move marker to middle dc)] around. Join with a sl st in the 3rd ch.
Round 3 – 5: Repeat Round 2.
Bind off and weave in the ends.
Cut a long strand (+- 5m / 5.5 yds) of color F yarn. Thread it through the first border round going over and in the dc posts. Tie the start and end tails together and weave in the ends.
Repeat for the following rounds with colors B, A, E and D.
Weave in any remaining ends.