Capucine’s Baby Cardigan

A new baby cardigant knitting pattern – Capucine’s Baby Cardigan – is now a free knitting blanket pattern here on the blog. Read all about this baby cardigan knitting pattern inspiration, scroll down to view the full free pattern or purchase an ad free PDF from the links below.
I designed this baby cardigan knitting pattern as a gift for a newborn. I made the pattern size 12 to 18 months on purpose. Most parents receive tons of gifts for when their baby is very small. I usually prefer to give something they can use a little later on and for a little longer. The design is very simple and straightforward. It is knitted in one piece. This is a great project if you are not used to knitting clothes yet.
Depending on the color and style of buttons you chose you can make it for a baby boy or a baby girl.
No tine right now? Pin this adorable baby cardigan knitting pattern for later!

Scroll down for the free version but I recommend you purchase the ad-free PDF Pattern to get all the instructions and pictures in a nice PDF you can print and take notes on without relying on your phone or an internet connection, I’ve got you covered!
Capucine’s Baby Cardigan knitting pattern is now available in my shop, on Etsy here and on Ravelry: click here and add it to your queue.
Quick access to the pattern:
- The back of the cardigan
- Adding the sleeves
- The opening for the neck
- The front of the cardigan – Left side
- The front of the cardigan – Right side
- Finishing Touches: Blocking and Sewing
More Baby Makes You'll Love View All


Before you Start your Baby Cardigan Knitting Pattern
Materials
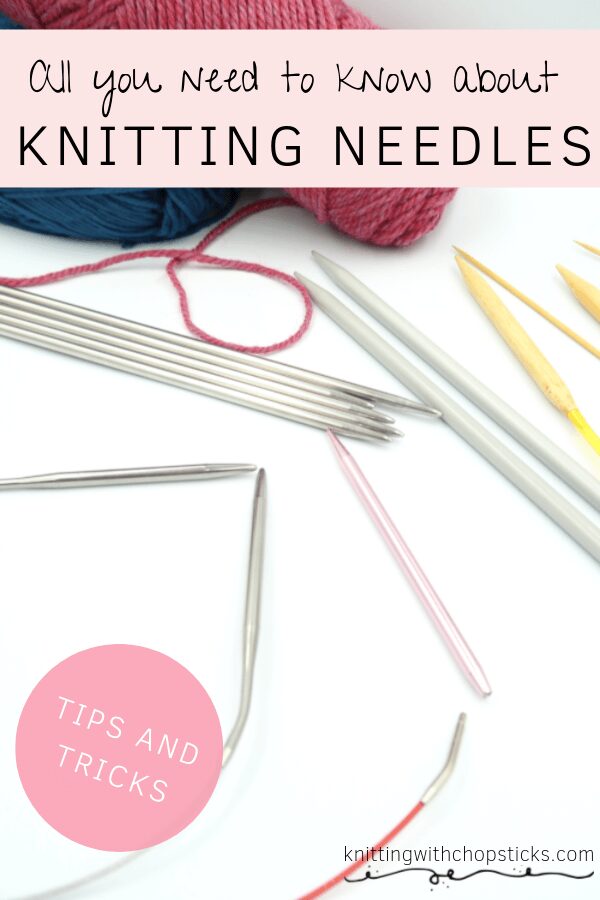
- 4.5 mm needles. I use this stainless steel set. They are not the prettiest but they are very cheap and convenient. You get a whole range of sizes with whom you can make most projects.
- 1.5 100g skein of yarn (approximately 400m). I used bright red Royal yarn from Zeeman. Unfortunately, they don’t make it in bright red this season but they have other lovely colors you can try. Originally I planned to make this baby cardigan in dusty pink but I only had 1 skein and a little bit left. Turns out, after being 90% done, it wasn’t enough. Don’t make the same mistake I did. I used a synthetic yarn because I’m always worried wool would be itchy for a small baby. If you prefer you can make it with wool or any other yarn material.
- 5 10mm buttons. I absolutely love the cute wooden buttons with engraved leaves I used. You can find them here.
- Tapestry needle to weave in the ends. I use, love and recommend this stainless steel set. You get different eye sizes to accommodate for different yarn sizes and they come in a very handy little tube. I used to keep losing and breaking my tapestry needles until I got these.
In seed stitch, my gauge for a 10 cm x 10 cm square is 20 stitches by 34 rows.
Because the yarn I used is not available everywhere, and I know how painful it is to try to find equivalent yarn which will give you the same effect I have selected a few equivalent yarns for you. I haven’t tried them out myself, but they look so pretty, check them out!
- Lion Brand Wool-Ease They have this yarn in about 20 colors, I’m sure you’ll fall in love with more than one.
- La Mia Just Wool
elann Wool Mate- RED HEART Super Saver Yarn. This yarn also exists in more than 60 colors.
Abbreviations
- k = knit
- p = purl
- st = stitch
Yarn Jargon Cheatsheets
Whether you knit, crochet, or both, these are a necessity.

Finished size
This cardigan is size 12 to 18 months.
Stitches and repeated patterns:
- The stockinette stitch: Starting on the right side of the work knit the required number of stitches. On the wrong side, you need to purl these stitches.
Fun fact: In my head, this stitch name has always been sockinette. To me, it made sense as it is a basic knitting stitch and very often used to make socks. While writing up the pattern, Grammarly made me realize my mistake. Better late than never… Thank you dyslexia.
- The seed stitch: Alternate knit and purl stitches k1, p1 for as many stitches as mentioned. On the next row, you will knit the stitches you have knitted and purl the ones you purled. So if you finished on a knit stitch you will start the next row with a knit stitch. One way I find it easy to remember which stitch I need to use is if the stitch looks like it should be purled for stockinette st, I need to knit it instead and vice versa.
- Add stitches at the end of the previous row. I use this method.
- Cast off stitches. I use a basic cast off method for this pattern. Knit (or purl respecting the pattern) one stitch, then a second. You then slip the first stitch above the 2nd and over the needle. Knit the next stitch, pull the previous stitch over it and off the needle etc.
Capucine’s Baby Cardigan Knitting Pattern
1. The Back of the Cardigan
Using 4.5mm needles, cast on 60 st.
Knit in seed stitch (k1, p1, repeat) until you reach 20cm.

2. Adding the Sleeves
Increase 10 stitches at the end of the last row.
Repeat 7 times, so an increase of 40 stitches on each side. Keep working the middle 60 st using the seed stitch. The sleeves are worked in stockinette stitch. Be careful to knit on the right side and purl on the wrong side of your work.

Sick of all the yarn jargon and conversions?
US vs UK, abbreviations, imperial vs metric, yarn weights, etc?

Here it is written out in knitting language:
- Knit 10 st, (k1, p1) 30 times.
- Add 10 st at the end of the previous row.
- purl 10, (p1, k1) 30 times, purl 10.
- Add 10 st at the end of the previous row.
- Knit 20, (k1, p1) 30 times, knit 10.
- Add 10 st at the end of the previous row.
- Purl 20, (p1, k1) 30 times, purl 20.
- Add 10 st at the end of the previous row.
- Knit 30, (k1, p1) 30 times, knit 20.
- Add 10 st at the end of the previous row.
- Purl 30, (p1, k1) 30 times, purl 30.
- Add 10 st at the end of the previous row.
- Knit 40 (k1, p1) 30 times, knit 30.
- Add 10 st at the end of the previous row.
- Purl 40 (p1, k1) 30 times, purl 40.
Now we need to knit the sleeves and the end of the back panel.
I have made the end of the sleeves in seed stitch (for the 5 last stitches of each sleeve), you can make it simpler and do the whole sleeve in stockinette stitch if you prefer. The rest of the sleeve is in stockinette stitch. For the

In knitting language you get this: Starting on the right side of the cardigan:
- Row 1: (p1, k1) 2 times, p1, knit the rest of the sleeve (35 st), (k1, p1) repeat 30 times, knit the sleeve (35 st), (p1, k1) twice, p1
- Row 2: k1, (p1, k1) twice, purl the rest of the sleeve, (k1, p1) repeat 30 times, purl the sleeve up to 5 last st, (k1, p1) twice, k1.
Repeat row 1 and 2 until total length is 28cm is.

3. The Opening for the Neck
Once your sleeves reach 8cm, prepare the opening for the neck.
Continue working the sleeves as before (with or without the seed stitch edge). We now stop working the back panel in seed stitch. This is the transition with the front panels, which we will do in stockinette stitch.

Don’t worry if the sleeves curl up a little (or a lot), this is normal with the sockinette stitch. We will get rid of this by blocking and sewing up the cardigan at the end.
For the neck opening to be in the middle of the cardigan we need to end up with 15 stitches of the back panel on each side of the opening before the sleeves. To do that, knit the sleeve normally respecting the seed stitch edge. Knit 15 stitches of the back panel. If you knit the next stitch and slide it over the previous one to start casting off you will only have 14 stitches on this side of the neck opening left. Therefore we need to knit an additional stitch before starting to cast off. Then cast of 30 stitches. When you have 15 stitches remaining of the back panel you still need to cast off one more as you actually need only 14 stitches of the back panel left. Remember you have one stitch on the other needle that you carry on from the cast offs.
I hope I’m making sense.

In summary, in pattern language:
(p1, k1) twice, p1, knit the rest of the sleeve (35 st) + 16 st of the back. Cast off 30 st. Knit the remaining 14 st of the back and the other sleeve (35st) finishing with the seed stitch edge (p1, k1) twice, p1.
Now you will work on one side of the cardigan at a time.
4. The Front of the Cardigan – Left side
Keep working the sleeve and front panels as before:
- Row 1: (p1, k1) 2 times, p1, knit the rest of the stitches (50 st).
- Row 2: Purl up to the 5 last stitches (50 st), k1, (p1, k1) twice.
Repeat row 1 and 2 until the sleeve is 12cm (total length 32cm)
Finish with a row of the wrong side of your cardigan.
Increase 20 stitches at the end of the last row to create the front panel.

The 5 first stitches will be a border in seed stitch. This is where we will make the
- Row 1: (p1, k1) 2 times, p1, knit 60 st, (p1, k1) 2 times, p1
- Row 2: (k1, p1) 2 times, k1, purl 60 st, (k1, p1) 2 times, k1
Repeat for 4 rows (1.5 cm).
Now we need to start making the buttonholes.
Depending on the size of your buttons you might need to adjust to bigger buttonholes. I used small 10mm buttons so a 1 st hole is enough. We will make it in the middle of the seed stitch border.
On the right side of the cardigan: p1, k1, p1, k1 cast off the last
You get the following result.

On the next row we will close the buttonhole.
Work up the row as usual up to the last 5st ((k1, p1) twice, k1, purl 60) then k1, p1, add a st, p1, k1

Continue working the panel (repeating row 1 and 2 above) until the total length is 37cm.
Now we need to cast off the sleeves. On the wrong side of the cardigan cast off 10 stitches 4 times.

- Row 1: (p1, k1) twice, p1, knit 25
- Row 2: purl 25, (k1, p1) twice, p1
Repeat row 1 and 2 until you have 12 rows (approximately 5cm). Make a buttonhole. Repeat 4 times. Knit 4 rows.

The panel is now 20cm from the end of the sleeve and the total length is 60cm. After a row on the right side of the baby cardigan, cast off. Leave a very long tail (2 meters). This will be used for sewing the side later.
5. The front of the Cardigan – Right side
Go back to the stitches you left on the needle for the other front panel.
Join the yarn and start with a row on the wrong side of the cardigan. Purl the sleeve until the 5 last stitches for which you follow the seed stitch (k1, p1) twice, p1.
- Row 1: (p1, k1) 2 times, p1, knit the rest of the stitches (50 st).
- Row 2: Purl up to the 5 last stitches (50 st), k1, (p1, k1) twice.
Repeat row 1 and 2 until the sleeve is 12cm (total length 32cm)

Finish with a row on the right side of the cardigan. Add 15 stitches at the end of the last row.

Continue working the panel in stockinette stitch except for the 5 first and 5 last stitches of each row.
- Row 1: (k1, p1) 2 times, k1, purl 55 st, (k1, p1) 2 times, k1
- Row 2: (p1, k1) 2 times, p1, knit 55 st, (p1, k1) 2 times, p1
Repeat until total length is 37cm (4 rows).
Now we need to cast off the sleeves. On the wrong side of the cardigan cast off the 10 first stitches.

Repeat 3 times, casting off a total of 40 stitches.
Work the panel in stockinette stitch with a 5 stitch edge in seed stitch.
- Row 1: (p1, k1) twice, p1, knit 25
- Row 2: purl 25, (k1, p1) twice, p1
Repeat row 1 and row 2 until you reach 20cm from the end of the sleeve and the total length is 60cm.
After a row on the right side of the baby cardigan, cast off. Leave a very long tail (2 meters). This will be used for sewing.
6. Finishing Touches: Blocking and Sewing
you’re done with the knitting part of your baby cardigan but it probably doesn’t look much like a baby cardigan yet. The final steps are blocking and sewing up the sides and buttons.
Blocking
I prefer to block my project before sewing it up. Removing all the curling and twisting helps me sew and it is easier to block it when you can still put it all flat in one layer.
Don’t skip this step as it can make a huge difference. Read my detailed tutorial on why block, how-to, and all my tips and tricks if you need help.
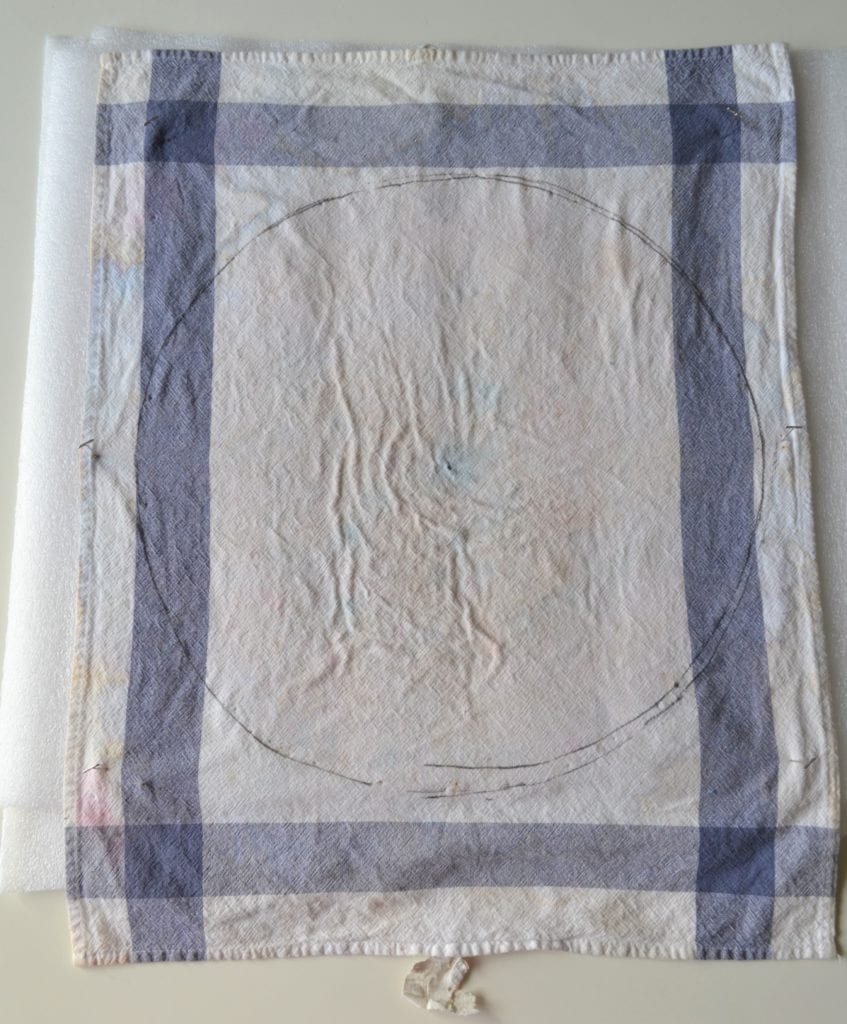
Put your cardigan in some water. I like to give it a good soak. Remove as much water as possible. Do not wring it, roll it between 2 clean dry towels instead. Once most of the water is out, pin it to your blocking mat.

Leave it there to dry completely. It is important it is a 100% dry before you unpin it.
Sewing
Now that we got rid of all (or most of depending on how well your yarn reacts to blocking) the curling and twisting. Our stitches look at their best, all regular and even. We are ready to sew our baby cardigan!
With the inside of the cardigan on the outside place the matching edges on top of each other. Use the long tails we have left to sew the sides and sleeves.


Weave in the ends (from sewing and any other remaining ends).
Turn the baby cardigan inside out to sew the buttons. Sew your chosen buttons (I love the ones I used) in front of the buttonholes (where else?).
Now it’s ready to be gifted to the pretty baby princess or the charming little prince you made it for!
If you liked this baby cardigan knitting pattern, don’t forget to share it with some other yarn addicts.


Thank you for sharing this beautiful pattern! What method did you use to add stitches for creating the sleeves?
Sorry- I just realized that you already addressed this above!