Willow Cardigan
A new cardigan crochet pattern – the Willow Cardigan – is now a free crochet pattern here on the blog. Read all about this chunky cardigan pattern inspiration, scroll down to view the full free pattern or purchase an ad free PDF PDF from my shop, Etsy shop or Ravelry shop.
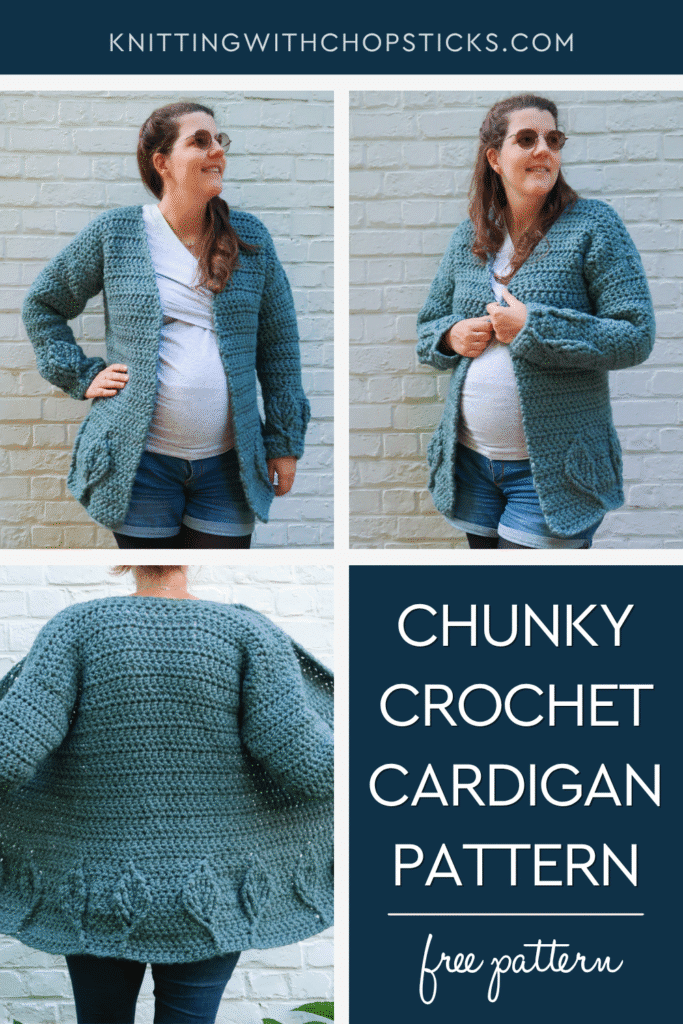
No time right now? Pin this chunky cardigan crochet pattern free for later!
*This post contains affiliate links (only for products I love, use and spend my own money on obviously). This means I earn some yarn money if you make a purchase through one of these links (of course at no extra cost for you!), which I promise to use to create more awesome patterns like this one. All opinions are my own. See my full disclosure here.
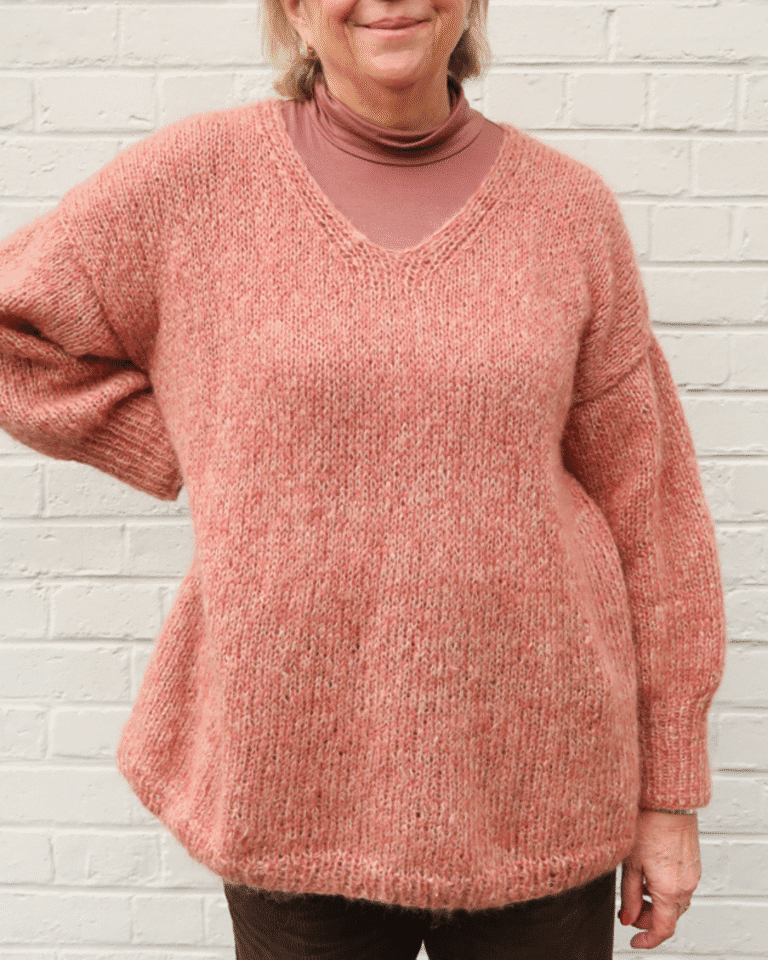
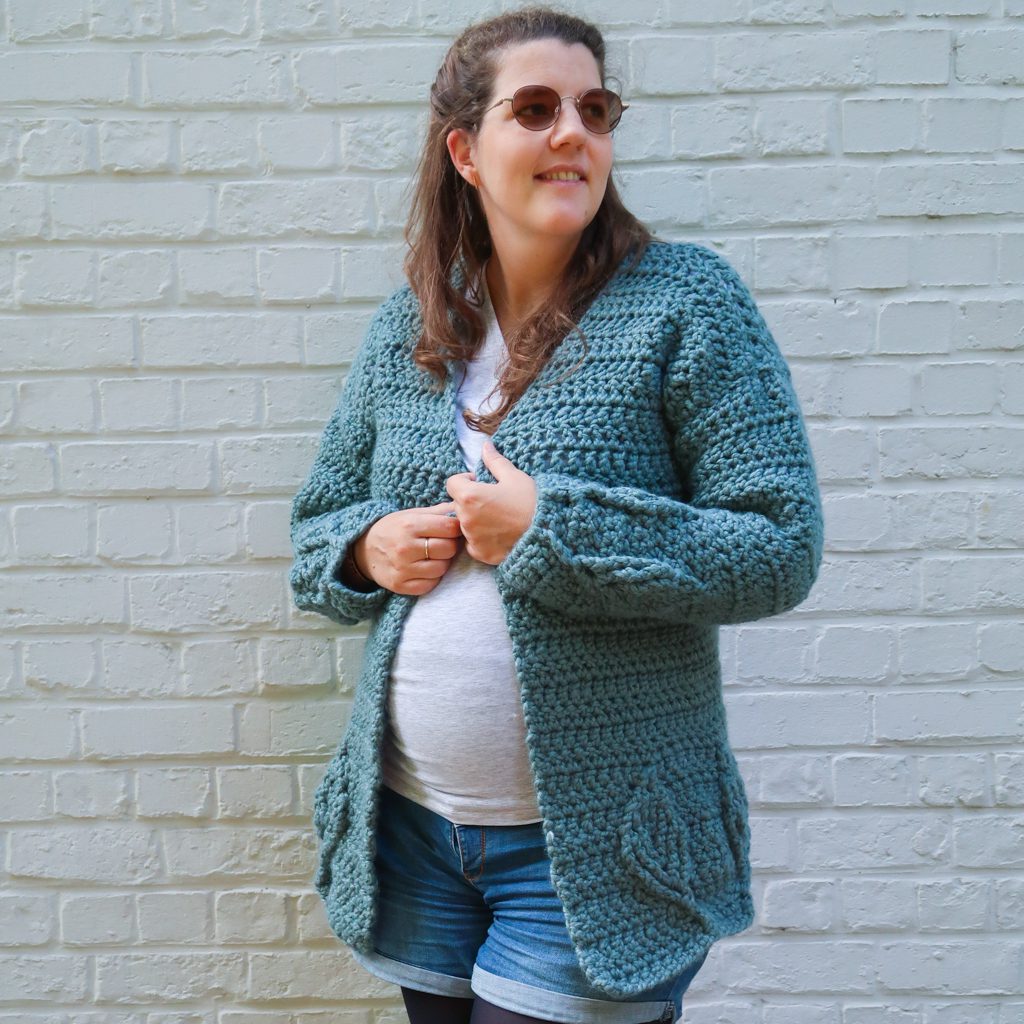
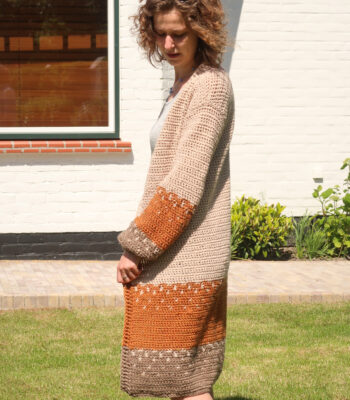
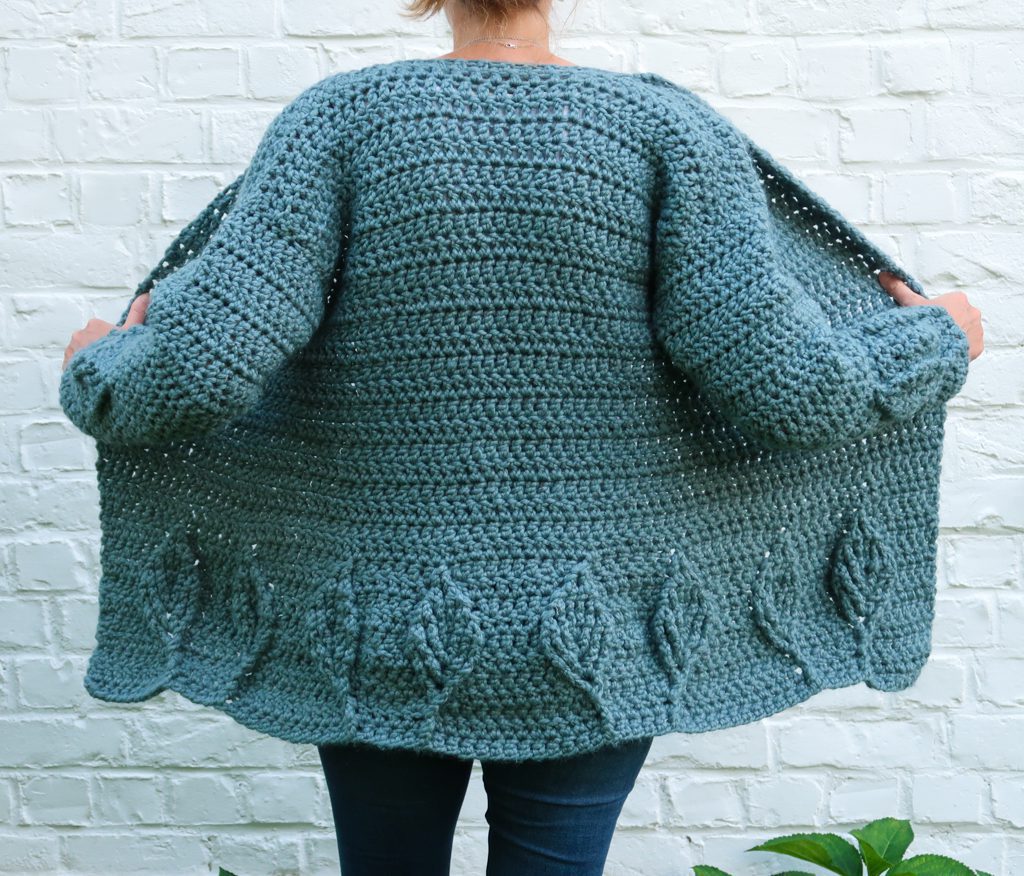
Fall is in the air with the Willow Cardigan. Beautifully textured leaves decorate the bottom edge and sleeves of this super bulky crochet cardigan pattern.
Warm and cozy, wear it as a fall coat for a winter walk or snuggle up inside on cold winter days.
Fall Leaves
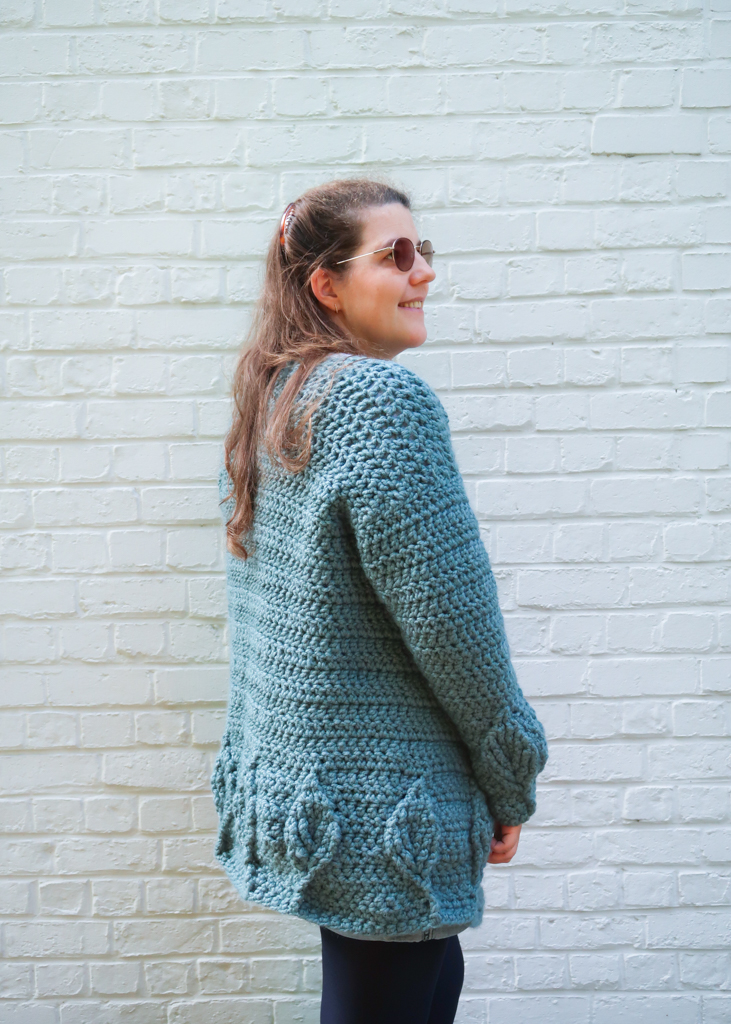
Inspired by the falling leaves during the autumn months, the Willow cardigan features beautifully textured leaves along the bottom edge and sleeve cuffs.
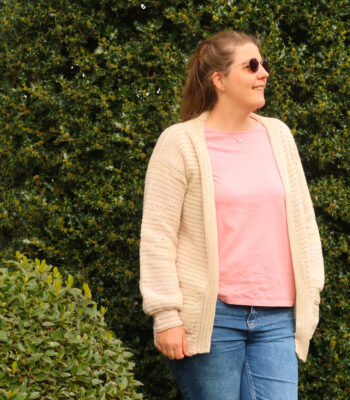
Whether you’re looking for a new cardigan to snuggle up into in front of the fireplace and crochet, go out with friends or for a walk in the forest, this warm chunky crochet cardigan pattern is what you need.
Worked up with super bulky yarn, it works up in no time! The most challenging part are the leave sections (which come with both written and chart instructions!), the rest are simple double crochet stitches you can breeze through.
The cardigan pattern is available in sizes XS to 5XL, more details on sizes below.
Downloadable PDF For Willow Cardigan Pattern
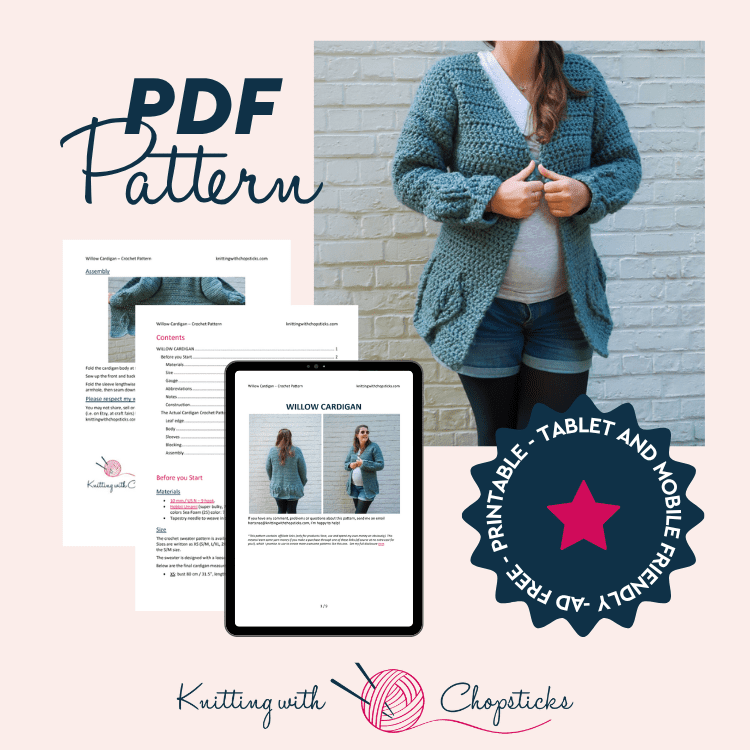
Why I Recommend You Purchase the PDF Pattern
If you’ve never used PDF patterns before, you are missing out on so much convenience!
- You don’t need to take screenshots of the pattern
- You don’t need to have your computer, phone or tablet around to work on your project.
- You don’t need to panic if your husband accidentally closed the page
- You can take notes, highlight your size and write down where you are.
- When your best friend begs you to make her the same sweater, you have the pattern ready.
- It’s a great way to support the blog so I can continue to bring you knitting tutorials.
Grab the printable PDF of the Willow Cardigan crochet pattern is now in my shop, on Etsy shop or on Ravelry:
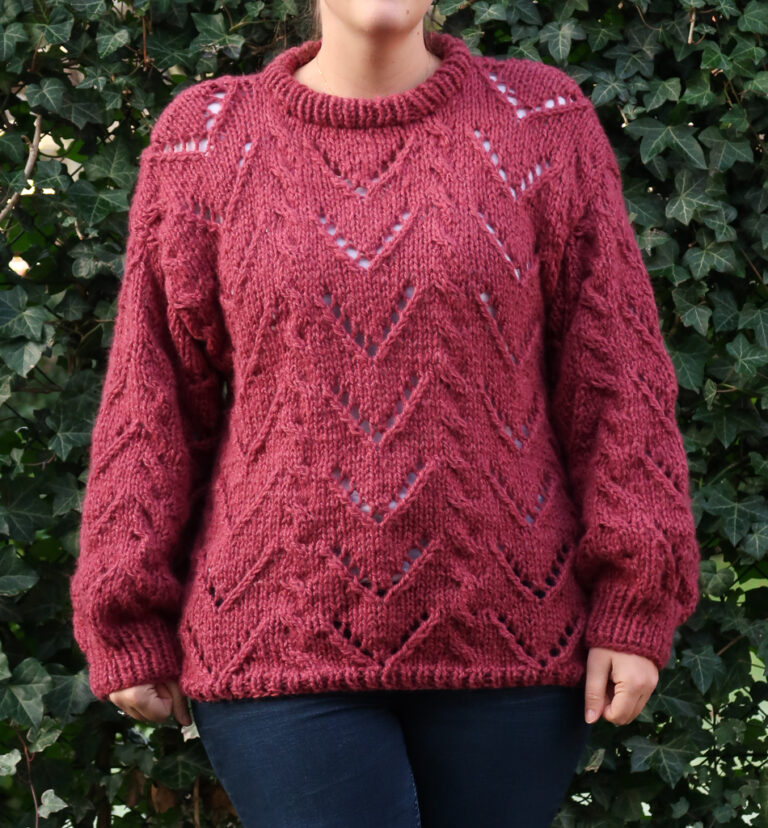
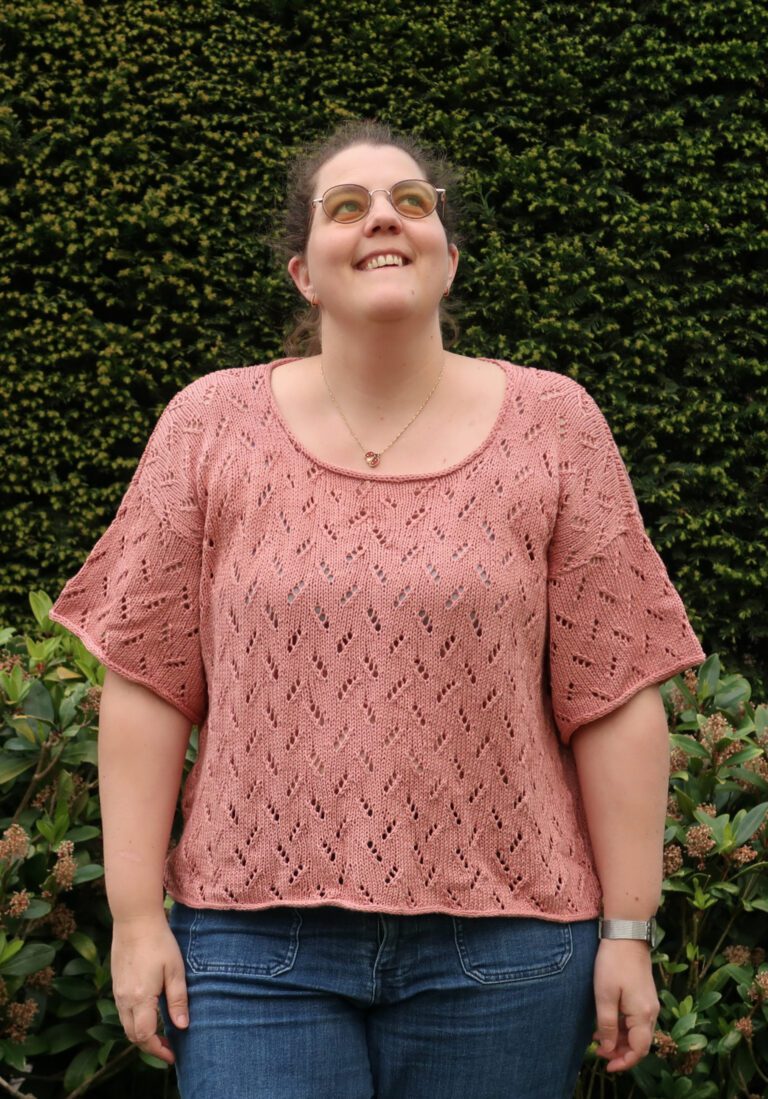
More Crochet Cardigan Patterns You'll Love
Before You Start Your Willow Crochet Cardigan Pattern Free
Materials
- 10 mm / US N – 9 hook.
- Hobbii Umami (super bulky, 78% Premium Acrylic, 22% Wool, 83m/91yd, 150g/5.3oz) in colors Sea Foam (25) color: 7 (9, 12, 14, 17) skeins
- Tapestry needle to weave in the ends. I love this set as it has different eye sizes for different yarn thicknesses and it comes in a small tube which is very convenient so I don’t lose them.
Hobbii Umami yarn is very similar to LionBrand Wool Ease Thick and Quick. It’s a super bulky wool acrylic blend that is both easy to work with and comfortable to wear. It comes in 26 different shades
Sizes
The crochet sweater pattern is available in the following sizes: XS, S/M, L/XL, 2XL/3XL, 4XL/5XL. Sizes are written as XS (S/M, L/XL, 2XL/3XL, 4XL/5XL) throughout the pattern. Pictures illustrate the S/M size.
The sweater is designed with a loose fit, 5 – 15 cm / 2” to 6” ease at the bust.
Below are the final cardigan measurements for the different sizes.
- XS: bust 80 cm / 31.5”, length 73 cm / 28.75”
- S / M: bust 104 cm / 41”, length 77 cm / 30.25”
- L / XL: bust 128 cm / 50.5”, length 82 cm / 32.25”
- 2XL / 3XL: bust 149 cm / 58.5”, length 86 cm / 34”
- 4XL / 5XL: bust 170 cm / 67”, length 91 cm / 36”
Instructions to adjust the length are included in the pattern.
Gauge
The gauge for this pattern, in dc, is 7.5 st by 4.5 rows for a 10 cm by 10 cm / 4” by 4” square.
Abbreviations
This pattern uses US notations.
- st = stitch
- ch = chain
- dc = double crochet
- dc2tog = double crochet 2 stitches together
- fpdc = front post double crochet
- bpdc = back post double crochet
- fpdc2tog = front post double crochet 2 stitches together
- bpdc2tog = back post double crochet 2 stitches together
Notes
Sick of all the yarn jargon and conversions?
US vs UK, abbreviations, imperial vs metric, yarn weights, etc?

Work instructions between [] the indicated number of times or until the end of the row / round.
The final number of stitches is indicated at the end of the row / round between < >.
The turning ch 1, ch 2 don’t count as stitches throughout the pattern except if mentioned otherwise.
The pattern is written in crochet shorthand. For example:
- “dc 1” means to double crochet in the next stitch,
- “dc 2” means to double crochet in each of the next 2 stitches,
- and “2 dc” means to double crochet twice in the next st.
Construction
The crochet cardigan body is worked in one piece from the bottom up. It is then divided in 3 sections to form the back and both front panels. The panels are sewed together at the shoulders. The sleeves are worked from the cuff up and sewed to the cardigan body.
Tips and Tricks
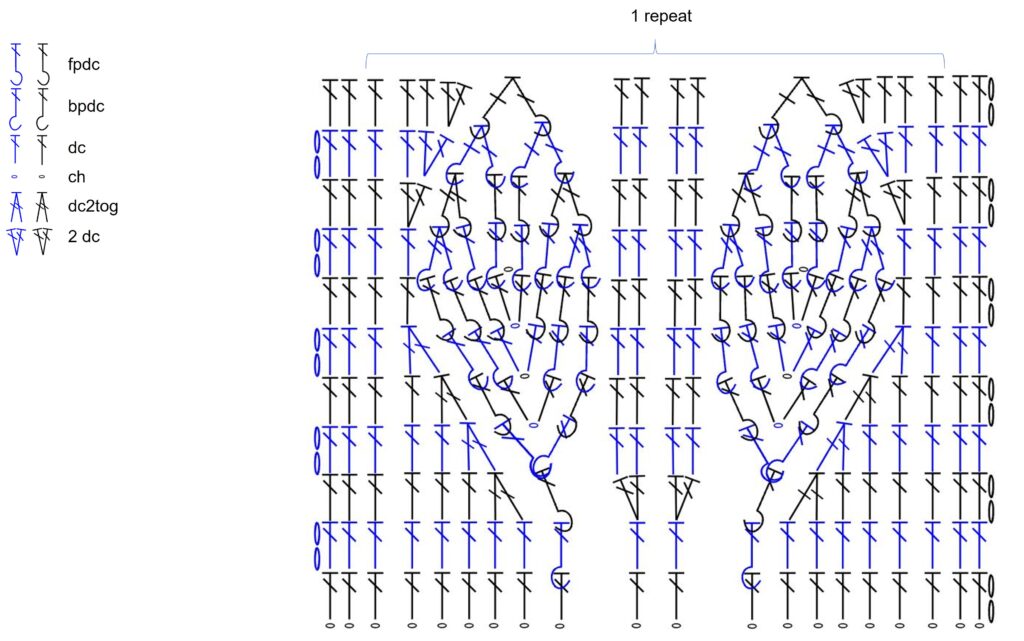
The leaves sections come with both written and chart instructions. If you are not familiar with crochet charts, my Conquer Charts & Graphs workshop is there to help you.
The Actual Willow Chunky Crochet Cardigan Pattern Free
With your 10mm hook, ch 60 (78, 96, 114, 132) + 2.
Leaf Edge
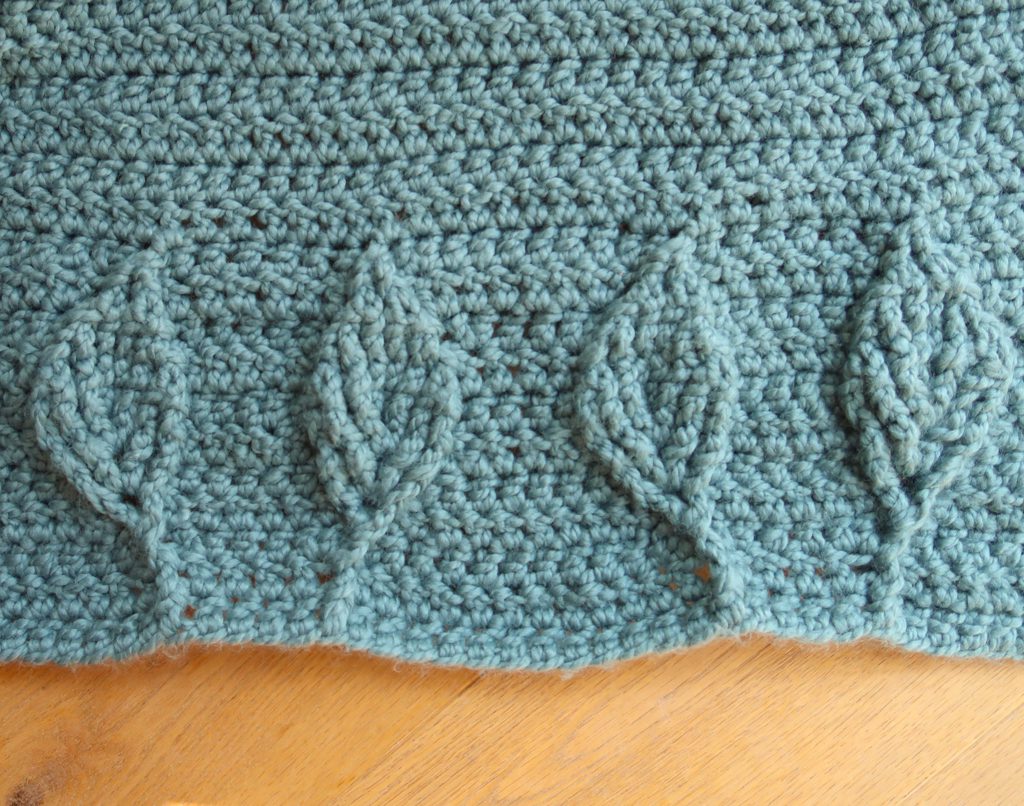
For the visual learners, there is a chart below.
Row 1: Dc in 3rd ch from the hook, dc across, turn. <60 (78, 96, 114, 132) st>
Row 2: Ch 2, dc 3, [dc 6, bpdc, dc 4, bpdc, dc 6] until last 3 st, dc 3, turn.
Row 3: Ch 2, dc 3, [dc 4, dc2tog, fpdc, 2 dc, dc 2, 2 dc, fpdc, dc2tog, dc 4] until last 3 st, dc 3, turn.
Row 4: Ch 2, dc 3, [dc 3, dc2tog, (bpdc, ch 1, bpdc) on next st, dc 6, (bpdc, ch 1, bpdc) on next st, dc2tog, dc 3] until last 3 st, dc 3, turn. <66 (86, 106, 126, 146) st>
Row 5: Ch 2, dc 3, [dc 2, dc2tog, fpdc, (dc, ch 1, dc) in ch-1 space below, fpdc, dc 6, fpdc, (dc, ch 1, dc) in ch-1 space below, fpdc, dc2tog, dc 2] until last 3 st, dc 3, turn. <72 (94, 116, 138, 160) st>
Row 6: Ch 2, dc 3, [dc, dc2tog, bpdc 2, (dc, ch 1, dc) in ch-1 space below, bpdc 2, dc 6, bpdc 2, (dc, ch 1, dc) in ch-1 space below, bpdc 2, dc2tog, dc] until last 3 st, dc 3, turn. <78 (102, 126, 150, 174) st>
Row 7: Ch 2, dc 3, [dc 2, fpdc 3, (dc, ch 1, dc) in ch-1 space below, fpdc 3, dc 6, fpdc 3, (dc, ch 1, dc) in ch-1 space below, fpdc 3, dc 2] until last 3 st, dc 3, turn. <90 (118, 146, 174, 202) st>
Row 8: Ch 2, dc 3, [dc 2, fpdc2tog, bpdc 2, skip ch space, bpdc 2, bpdc2tog, dc 6, bpdc2tog, bpdc 2, skip ch space, bpdc 2, bpdc2tog, dc 2] until last 3 st, dc 3, turn. <72 (94, 116, 138, 160) st>
Row 9: Ch 2, dc 3, [dc, 2 dc, fpdc2tog, fpdc 2, fpdc2tog, dc 6, fpdc2tog, fpdc 2, fpdc2tog, 2 dc, dc] until last 3 st, dc 3, turn. <66 (86, 106, 126, 146) st>
Row 10: Ch 2, dc 3, [dc 2, 2 dc, bpdc2tog twice, dc 6, bpdc2tog twice, 2 dc, dc 2] until last 3 st, dc 3, turn. <60 (78, 96, 114, 132)>
Row 11: Ch 2, dc 3, [dc 3, 2 dc, fpdc2tog, dc 6, fpdc2tog, 2 dc, dc 3] until last 3 st, dc 3, turn.
The chart below shows one repeat of the leaves section
Body
Row 12: Ch 2, dc across, turn
Repeat Row 12 until you reach 55 cm / 21.5”. Finish with a wrong side row.
Now you need to split your work in 3 sections: both front panels and the back panel. This way you create the armholes.
Divide your stitches as follows:
- XS: 16 st, 28 st, 16 st
- S/M: 20 st, 38 st, 20 st
- L/XL: 25 st, 46 st, 25 st
- 2XL/3XL: 29 st, 56 st, 29 st
- 4XL/5XL: 33 st, 66 st, 33 st
Work each part separately.
Section 1 (Front Left Panel)
Row 1: Ch 2, dc2tog, dc 14 (18, 23, 27, 31), turn. <15 (19, 24, 28, 32) st>
Row 2: Ch 2, dc across, turn.
Row 3: Ch 2, dc2tog, dc until end of row, turn. <14 (18, 23, 27, 31) st>
Repeat Row 2 and 3 until only 12 (15, 19, 22, 27) st are left.
Repeat Row 2 one more time.
Fasten off and leave a long tail for sewing.
Section 2 (Back Panel)
Join yarn to next available st from the end of the cardigan body section.
Row 1: Ch 2, dc 28 (38, 46, 56, 66), turn. <28 (38, 46, 56, 66) st>
Row 2: Ch 2, dc across, turn.
Repeat Row 2 another 6 (8, 10, 12, 14) more times.
Fasten off and leave a long tail for sewing.
Section 3 (Front Right Panel)
Join yarn to next available st from the end of the cardigan body section.
Row 1: Ch 2, dc until last 2 st, dc2tog, turn. <15 (19, 24, 28, 32) st>
Row 2: Ch 2, dc across, turn.
Repeat Row 1 and 2 3 (4, 5, 6, 7) times. <12 (15, 19, 22, 27) st>
Fasten off and leave a long tail for sewing.
Sleeves
Make 2.
Leaf Edge
For the visual learners, refer to the chart below.
With your 10mm hook, ch 20+ 2.
Row 1: Dc in 3rd ch from the hook, dc across, turn. <20 st>
Row 2: Ch 2, dc 8, bpdc, dc 2, bpdc, dc 8, turn.
Row 3: Ch 2, dc 6, dc2tog, fpdc, 2 dc twice, fpdc, dc2tog, dc 6, turn.
Row 4: Ch 2, dc 5, dc2tog, (bpdc, ch 1, bpdc), dc 4, (bpdc, ch 1, bpdc), dc2tog, dc 5, turn. <22 st>
Row 5: Ch 2, dc 4, dc2tog, fpdc, (dc, ch 1, dc) in ch-1 space below, fpdc, dc 4, fpdc, (dc, ch 1, dc) in ch-1 space below, fpdc, dc2tog, dc 4, turn. <24 st>
Row 6: Ch 2, dc 3, dc2tog, bpdc 2, (dc, ch 1, dc) in ch-1 space below, bpdc 2, dc 4, bpdc 2, (dc, ch 1, dc) in ch-1 space below, bpdc 2, dc2tog, dc 3, turn. <26 st>
Row 7: Ch 2, dc 4, fpdc 3, (dc, ch 1, dc) in ch-1 space below, fpdc 3, dc 4, fpdc 3, (dc, ch 1, dc) in ch-1 space below, fpdc 3, dc 4, turn. <30 st>
Row 8: Ch 2, dc 4, bpdc2tog, bpdc 2, skip ch space, bpdc 2, bpdc2tog, dc 4, bpdc2tog, bpdc 2, skip ch space, bpdc 2, bpdc2tog, dc 4, turn. <24 st>
Row 9: Ch 2, dc 3, 2 dc, fpdc2tog, fpdc 2, fpdc2tog, dc 4, fpdc2tog, fpdc 2, fpdc2tog, 2 dc, dc 3, turn. <22 st>
Row 10: Ch 2, dc 4, 2 dc, bpdc2tog twice, dc 4, bpdc2tog twice, 2 dc, dc 4, turn. <20 st>
Row 11: Ch 2, dc 5, 2 dc, fpdc2tog, dc 4, fpdc2tog, 2 dc, dc 5, turn.
Sleeve Body
Row 12: Ch 2, dc across, turn.
Row 13: Ch 2, 2 dc, dc until last st, 2 dc, turn. <22 st>
Repeat Row 13 1 (1, 7, 9, 15) times. <24 (24, 40, 46, 52)>
Repeat Row 12 and 13 1 (4, 2, 2, 0) <26 (32, 40, 46, 52)>
Repeat Row 12 8 (2, 2, 0, 0) more times.
Blocking
You’re done with the crocheting part. Make sure to weave in all the ends.
To make your cardigan even prettier, help even your stitches and flatten the leaves, carefully steam block your project.
Don’t skip this step as it can make a huge difference. Read my detailed tutorial on why block, how-to, and all my tips and tricks if you need help.
Assembly
Fold the cardigan body at the armholes.
Sew up the front and back panels at the shoulders.
Fold the sleeve lengthwise and match the fold with the shoulder seam. Then seam sleeve to armhole, then seam down underside of sleeve to wrist.
Copyright 2021 of Knitting with Chopsticks.