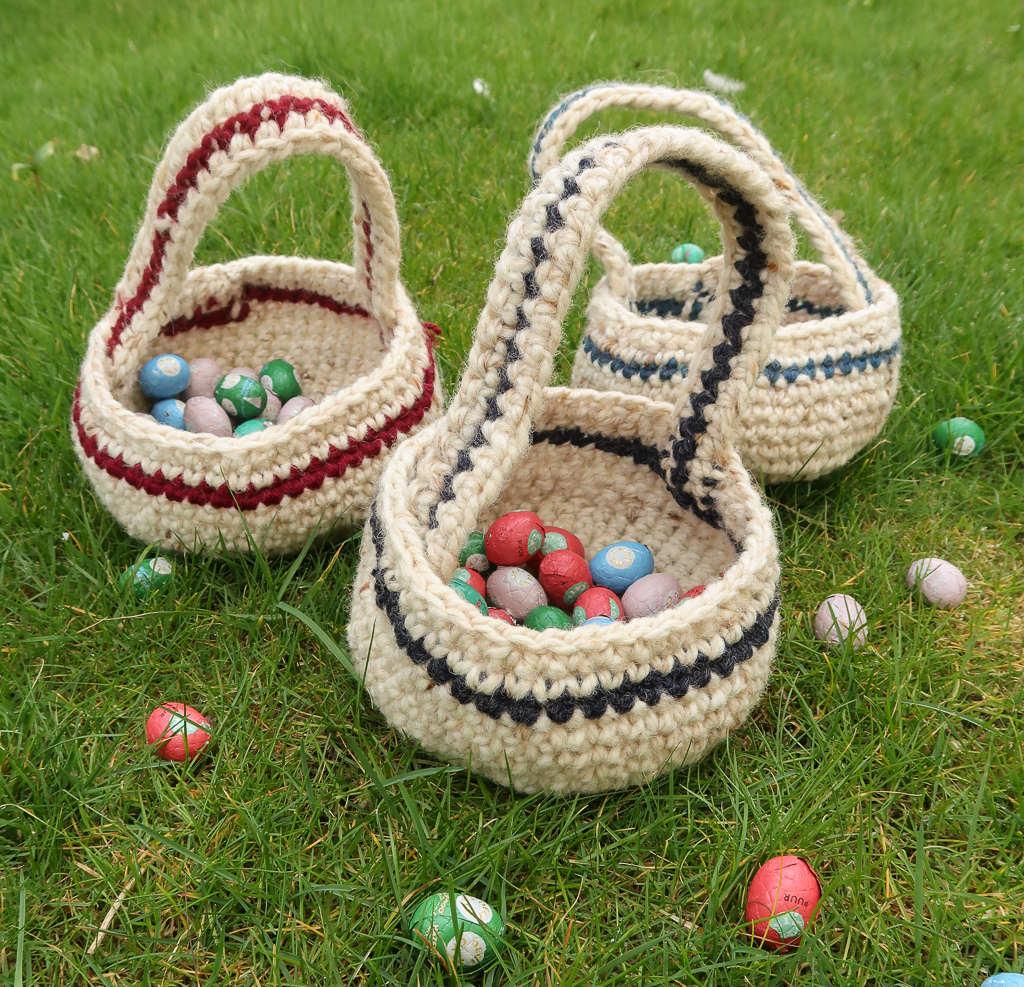
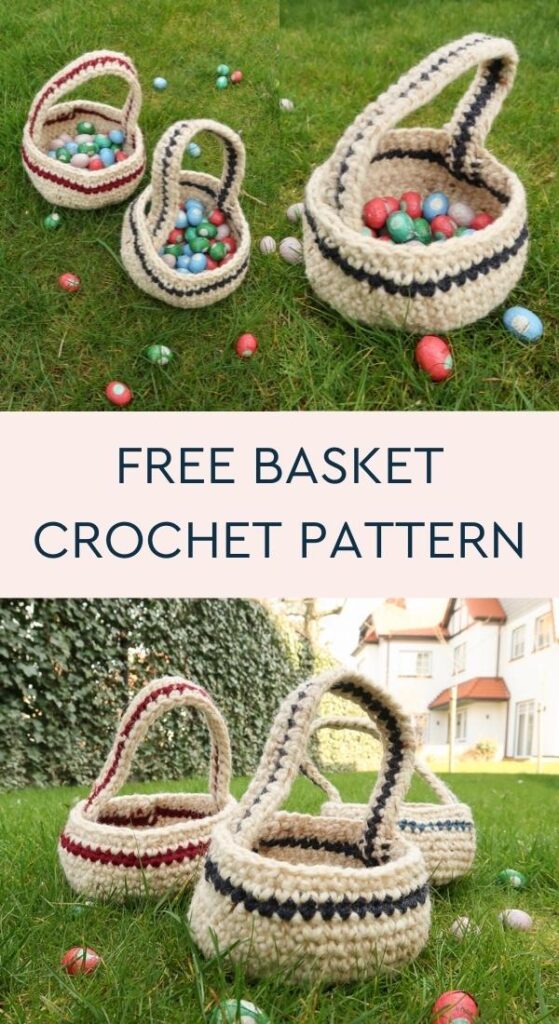
Easter Basket Crochet Pattern
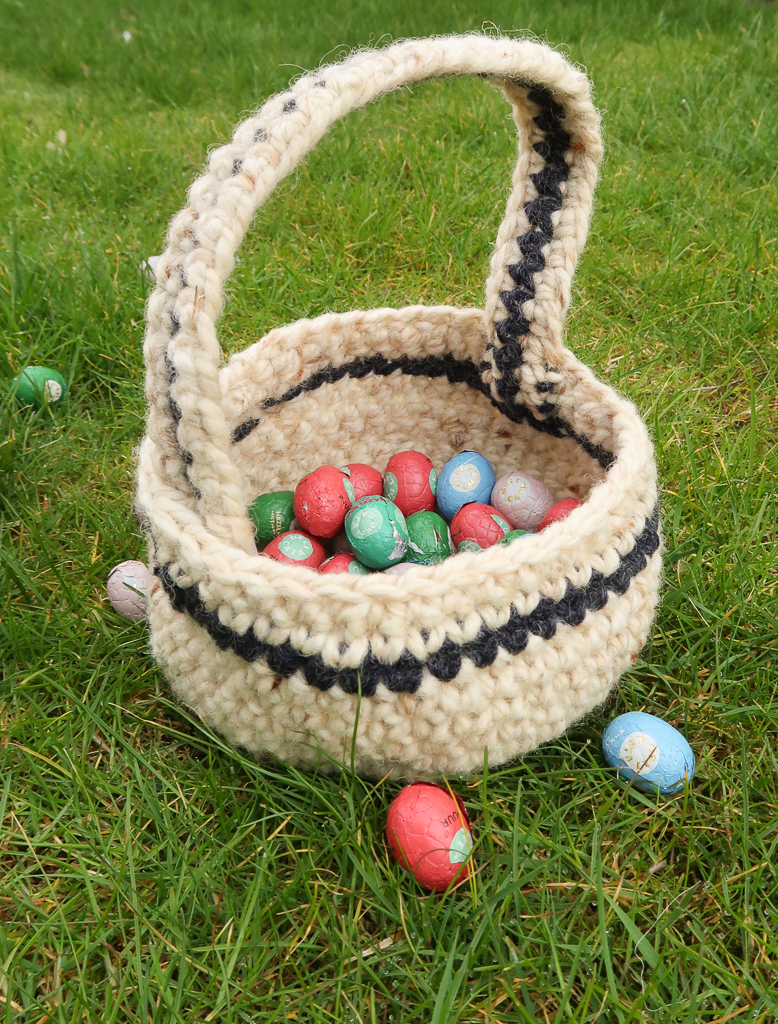
A new crochet basket pattern, the easy Easter Basket Crochet Pattern, is now a free crochet pattern on the blog. Read about the beginner-friendly construction and how to use up your leftover yarn or scroll down for the free crochet basket pattern (full video tutorial included!).
No time right now? Pin this free Easter Basket crochet pattern for later!
*This post contains affiliate links (only for products I love, use and spend my own money on obviously). This means I earn some yarn money if you make a purchase through one of these links (of course at no extra cost for you!), which I promise to use to create more awesome patterns like this one. In addition, some posts are sponsored by yarn companies. All opinions are my own. See my full disclosure here.
Homemade is always more special. That is no different when it comes to this holiday tradition. This crochet project is the perfect way to add a homemade touch to any little one’s egg hunt.
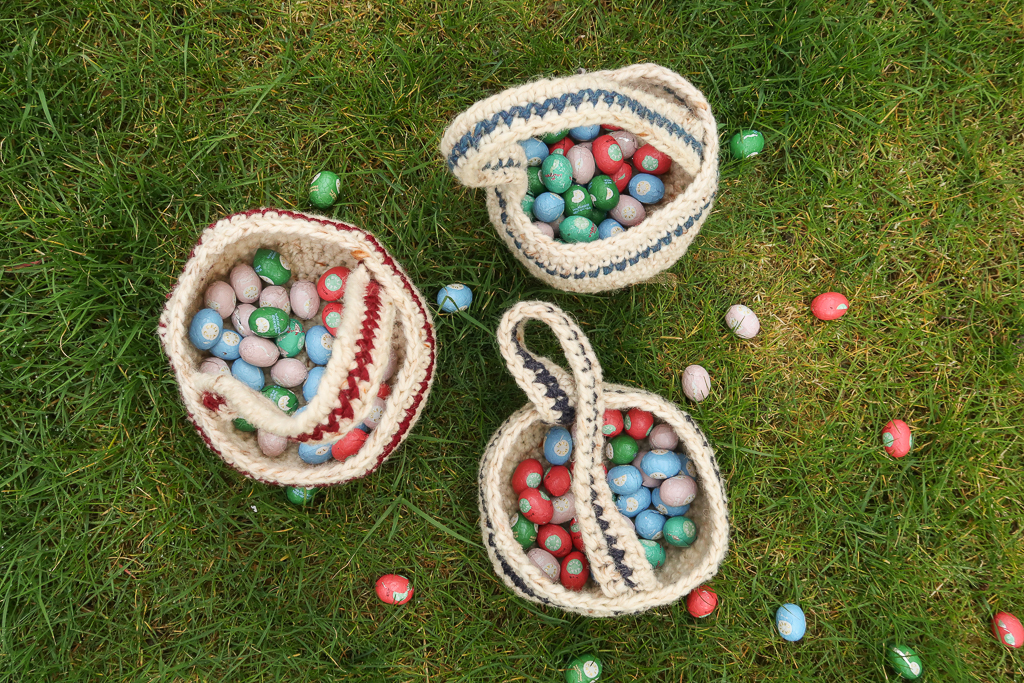
Burst out your scrap yarn! These cute Easter crochet baskets only require a few meters of super bulky yarn (or combine other yarn weights, I’ll show you how). Quick and easy, this is a perfect handmade addition to your Easter festivities.
You can also make these simple crochet baskets to match a wedding theme and have flower girls carry their flowers in them.
Downloadable PDF Easter Basket Crochet Pattern
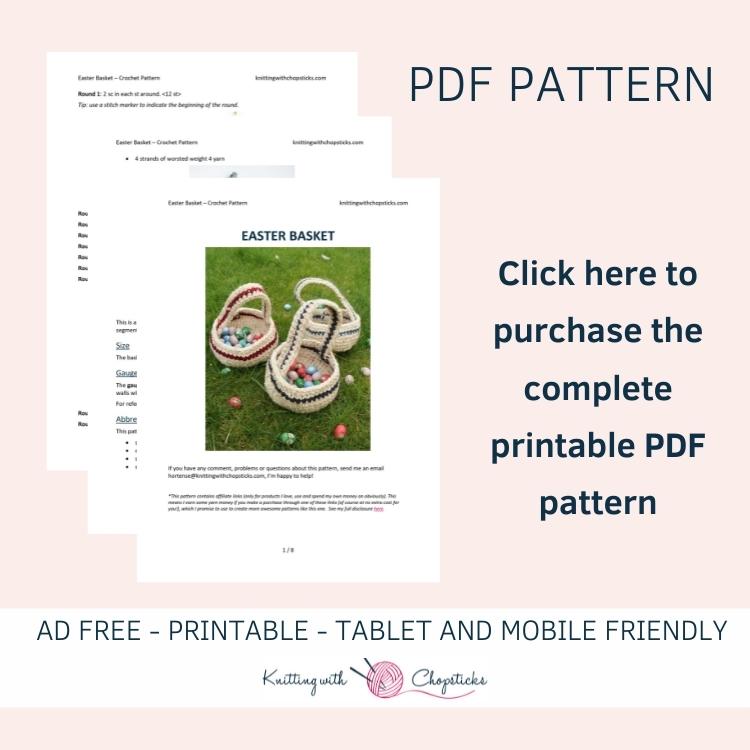
Grab the printable PDF of the Easter Basket crochet pattern now in my shop, on Etsy shop or on Ravelry:
A Great Scrap Yarn Project
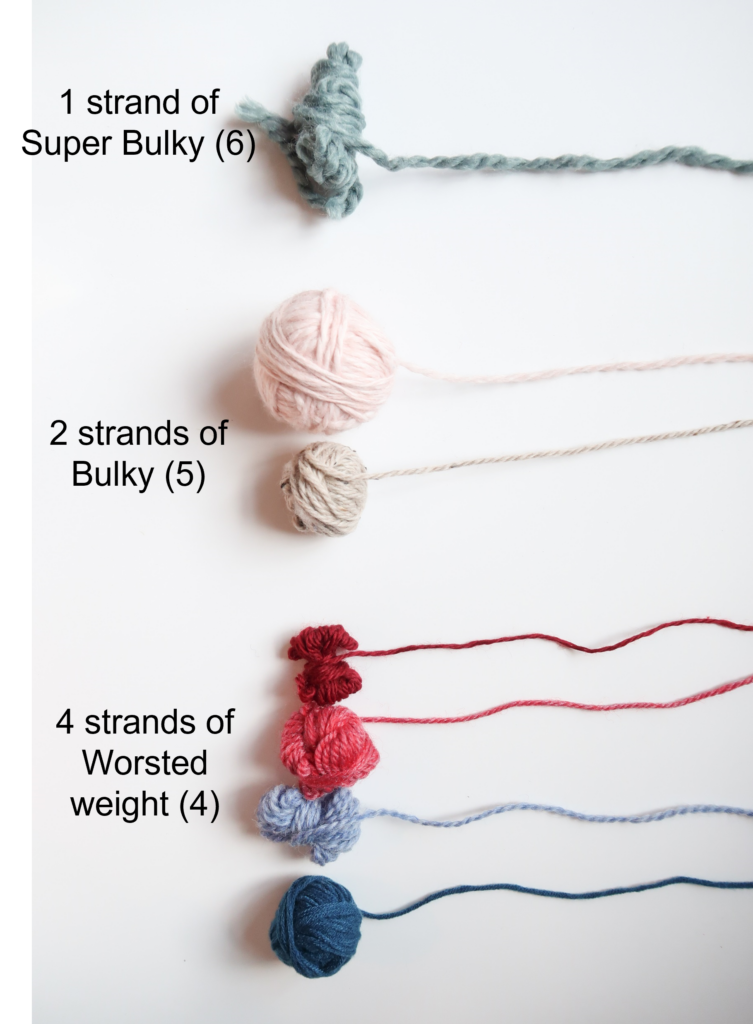
The Easter Basket crochet pattern is crocheted with super bulky weight 6 yarn. It only requires about 120 m / 131 yards of the main color and 12 m / 13 yards of the contrast color
You can also hold more strands together of lighter weight yarns to achieve the same overall thickness:
- 2 strands of chunky weight 5 yarn
- 4 strands of worsted weight 4 yarn
This is a great way to use up your small yarn leftovers, especially for the contrast color segments!
Combine different colors for a fun multicolor effect!
Video Tutorial
For the visual learners, here is a full video tutorial for the Easter Basket Crochet Pattern.
Note: I’m a left-handed crocheter, but the pattern is completely symmetric and works exactly the same for a right-handed person
Before you Start
Materials
- 6 mm / US J – 10 hook.
- Weight 6 super bulky yarn
- Main color: 120 m / 131 yd.
- Contrast color: 12 m / 13 yd.
- Tapestry needle to weave in the ends. I love this set as it has different eye sizes for different yarn thicknesses and it comes in a small tube which is very convenient so I don’t lose them.
- 1 stitch marker.
I used unlabeled yarn from my stash but here are some good equivalents to choose from:
- LionBrand Wool Ease Thick and Quick, you can even grab the bonus bundle skeins to have less ends to weave in.
- LionBrand Hometown
- WeCrochet Mighty Stitch Super Bulky
Size
The basket has a diameter of 15 cm / 6” and a height of 9 cm / 3.5”.
Gauge
The gauge for this pattern isn’t crucial. Make sure your fabric is very stiff, otherwise your basket walls will collapse.
For reference, my diameter after round 3 is 8 cm / 3”.
Abbreviations
This pattern uses US notations.
- st = stitch
- ch = chain
- sc = single crochet
- sc2tog = single crochet 2 stitches together; single decrease
Notes
Sick of all the yarn jargon and conversions?
US vs UK, abbreviations, imperial vs metric, yarn weights, etc?

Work instructions between [] the indicated number of times or until the end of the row / round.
The final number of stitches is indicated at the end of the row / round between < >.
The turning ch 1, ch 2 don’t count as stitches throughout the pattern except if mentioned otherwise.
The pattern is written in crochet shorthand. For example:
- “sc 1” means to single crochet in the next stitch,
- “sc 2” means to single crochet in each of the next 2 stitches,
- and “2 sc” means to single crochet twice in the next st.
Special Techniques
- Magic Loop; if you’re not familiar with this technique, this detailed tutorial (includes a video) will help you.
Tips and Tricks
- To avoid having a jagged line at the junction when changing colors, use an invisible color change technique. Personally, I use this one.
- I recommend using invisible decreases. If you don’t know how this tutorial is very easy to follow.
The Crochet Basket Pattern
The Basket
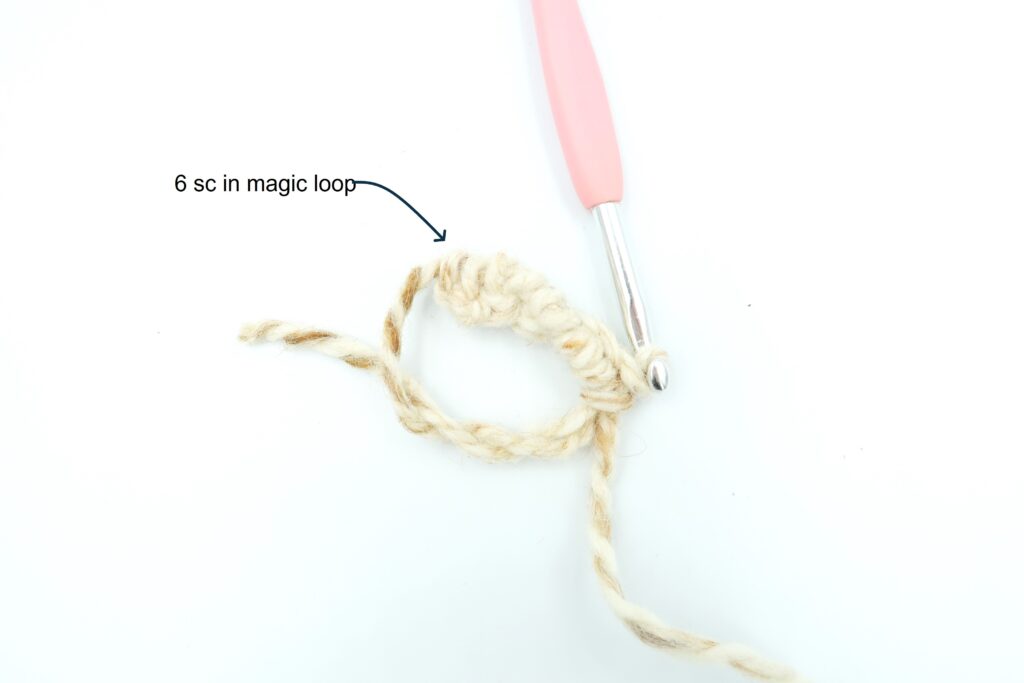
With your 6 mm / US J – 10 hook and main color yarn, make 6 sc in a magic loop. Work in continuous rounds from here onwards.
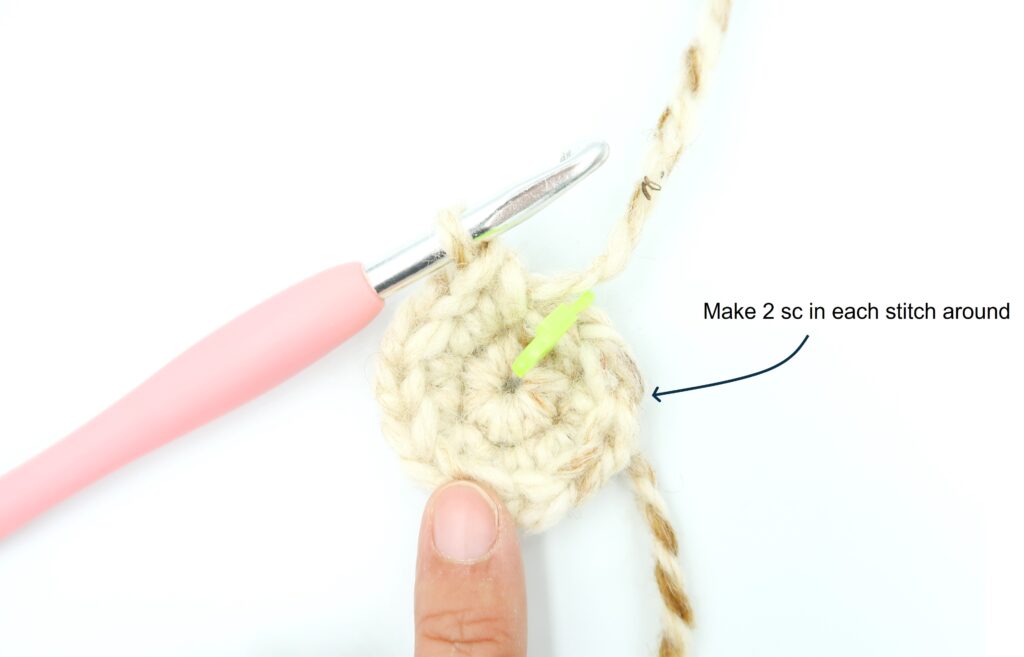
Round 1: 2 sc in each st around. <12 st>
Tip: use a stitch marker to indicate the beginning of the round.
Round 2: [2 sc in the next st, sc] around. <18 st>
Round 3: [2 sc in the next st, sc 2] around. <24 st>
Round 4: [2 sc in the next st, sc 3] around. <30 st>
Round 5: [2 sc in the next st, sc 4] around. <36 st>
Round 6: [2 sc in the next st, sc 5] around. <42 st>
Round 7: [2 sc in the next st, sc 6] around. <48 st>
Round 8: [2 sc in the next st, sc 7] around. <54 st>
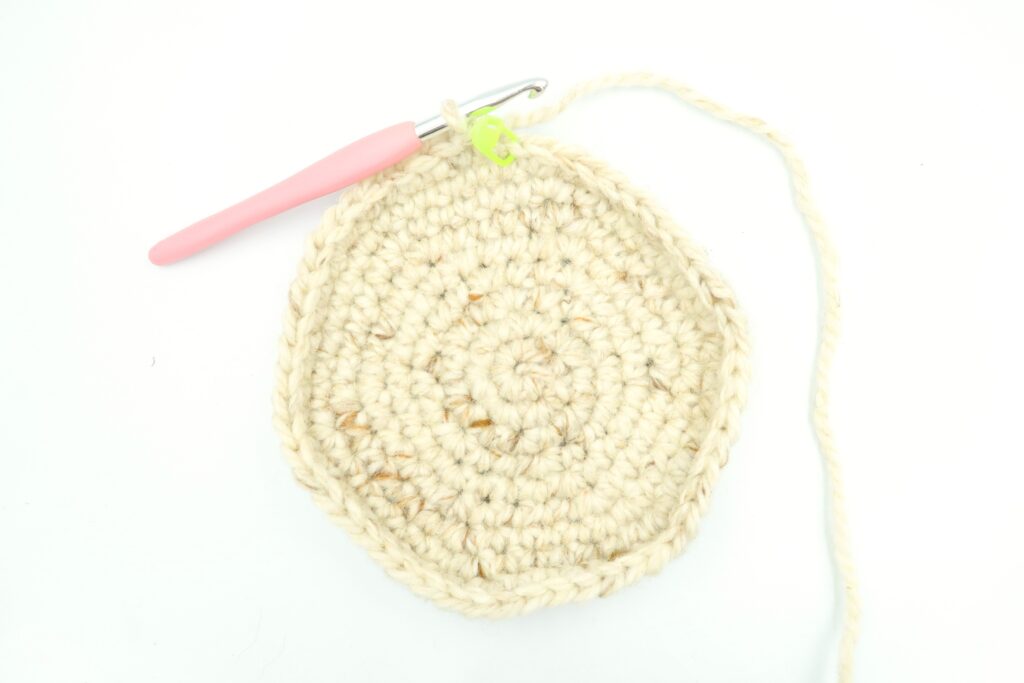
Round 9: [sc2tog, sc 7] around. <48 st>
Round 10 – 12: Sc around.
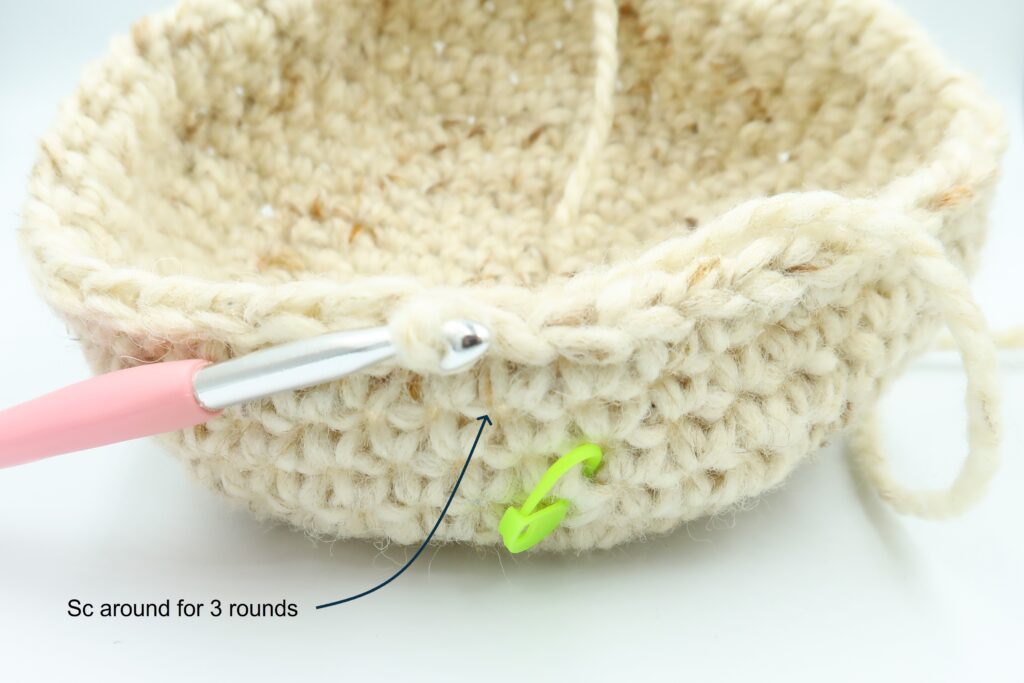
Switch to contrast color yarn.
Round 13: Sc around.

Switch back to main color yarn.
Round 14: Sc around.
Round 15: [sc2tog, sc 6] around. <42 st>
Bind off and weave in the ends.
The Strap
Notes:
- Leave a long tail when changing color. You can use these ends to attach the strap to your basket.
- Don’t worry if your strap is twisting and curling, blocking will make it nice and flat.
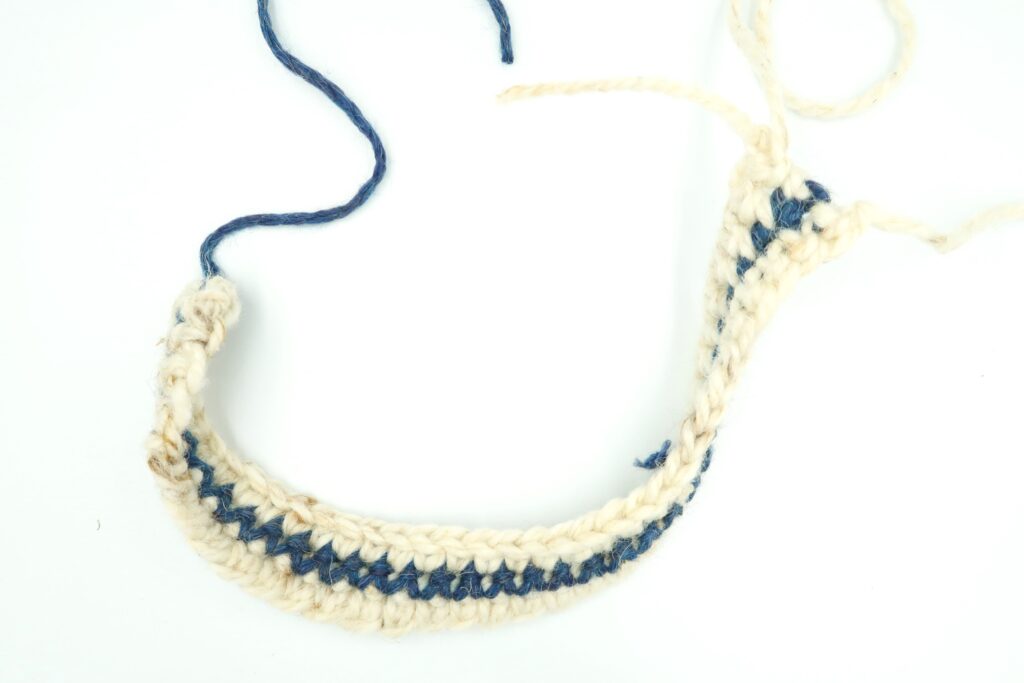
With your 6 mm / US O – 16 hook and main color yarn, ch 34 + 1.
Row 1: Sc in 2nd ch from hook, sc across, turn. <34 st>
Switch to contrast color yarn.
Row 2: Ch 1, sc across, turn.
Switch back to main color yarn.
Row 3: Ch 1, sc across, turn.
Blocking & Assembly
Before assembling your basket, wet block your strap to help it stay nice and flat.
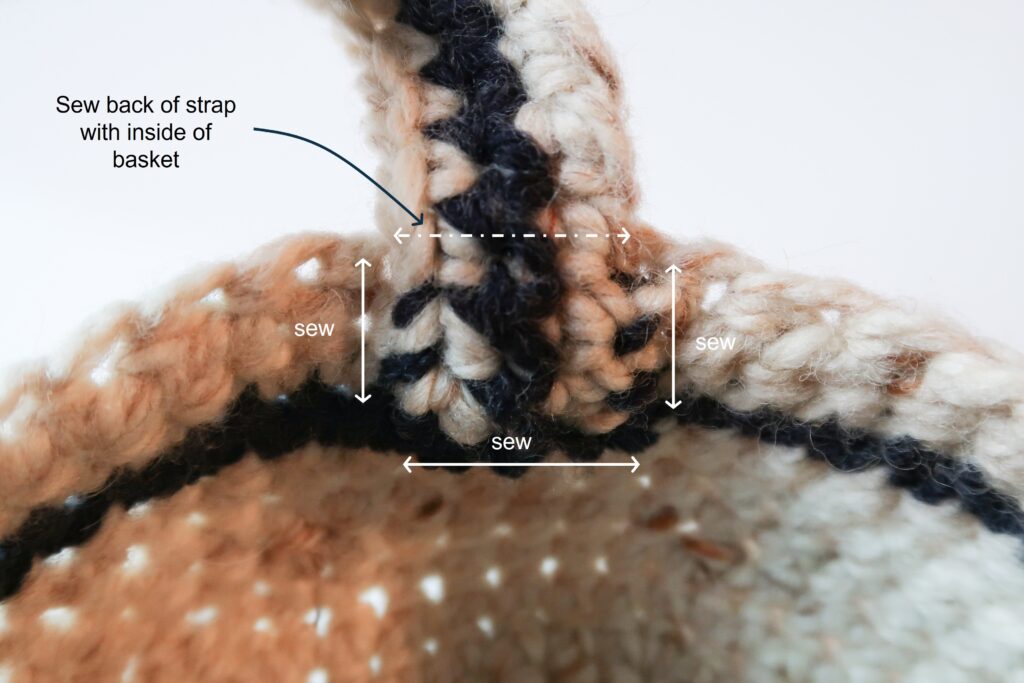
To assemble your basket set your strap on the inside of your basket, the end of the strap should align with the contrast color round. Sew the width of the strap and along the sides up to the basket brim.
Make sure both ends of the strap are at opposite sides of the basket.