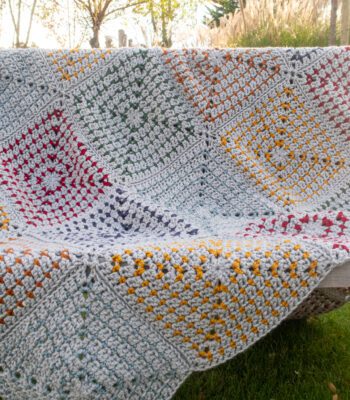
Easy Crochet Blanket Pattern for Beginners – Alex Blanket

A new easy crochet blanket pattern for beginners – the Alex Blanket – is now a free crochet blanket pattern here on the blog. Read all about this simple crochet blanket pattern, scroll down to view the full free pattern or purchase an ad free PDF from the links below.
No time right now? Pin this simple crochet blanket pattern free for later!

*This post contains affiliate links (only for products I love, use and spend my own money on obviously). This means I earn some yarn money if you make a purchase through one of these links (of course at no extra cost for you!), which I promise to use to create more awesome patterns like this one. All opinions are my own. See my full disclosure here.
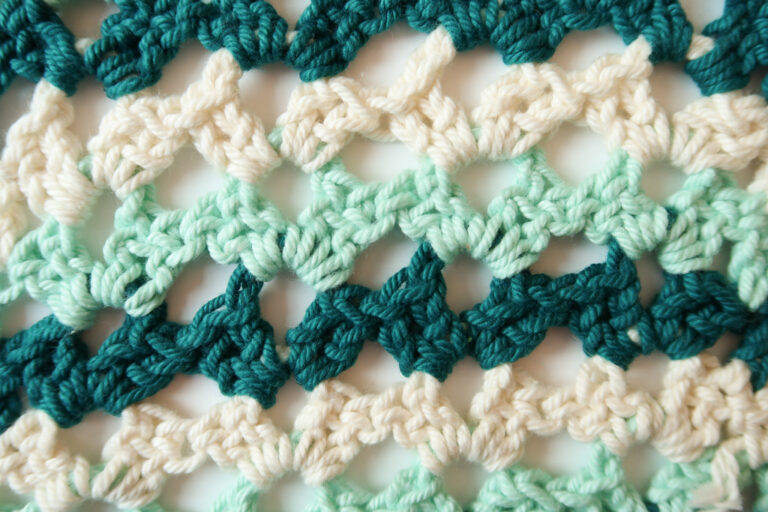
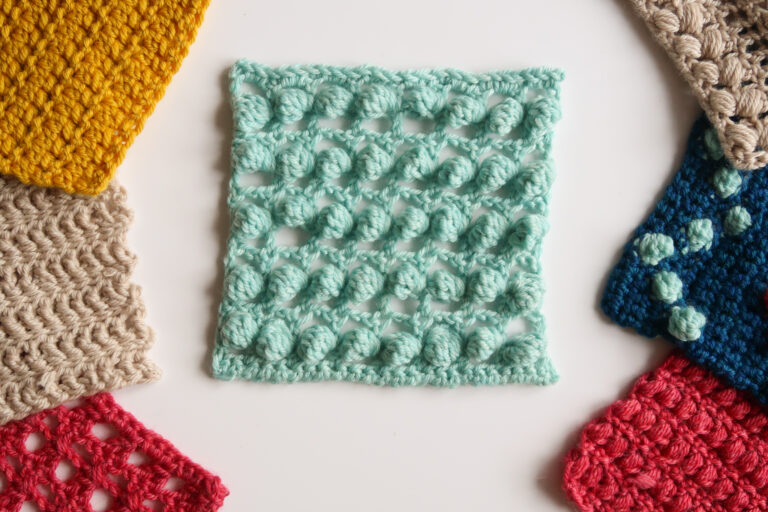
There’s something deeply relaxing about the rhythm of the Alex Blanket. Rows of soft half-double crochets flow between playful split puff stripes, creating a cozy, modern texture that’s as soothing to make as it is to snuggle under.
This beginner-friendly pattern is all about comfort — easy stitches, simple color changes, and a design that looks far more intricate than it feels to crochet. Whether you’re making a quick baby gift or a full king-size blanket, the gentle repeat and color play will keep your hook happily moving.

Alex Blanket Construction
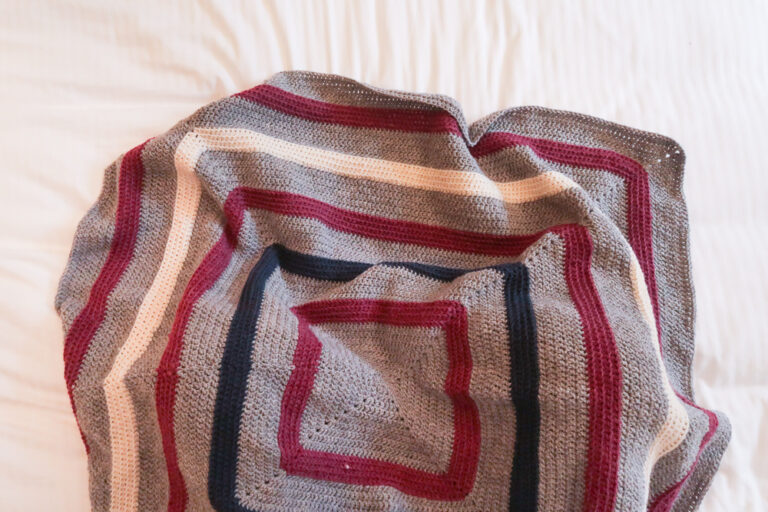
The Alex Blanket is worked flat in simple, repeating rows. A base of half double crochet stitches creates soft texture, while split puff stripes in two contrast colors add playful movement. Finished with a neat single crochet border, it’s a clean, modern design that’s easy to customize in any size or color combination.
Downloadable PDF for Alex Crochet Blanket Pattern

Grab the printable PDF of the Alex Blanket Pattern now in my shop, Etsy shop or on Ravelry shop:
More Crochet Blanket Patterns you'll love


Crafting Blanket
Ready to make your own blanket design without a pattern?
Before You Start Your Alex Simple Crochet Blanket Pattern
Materials
- 6 mm / US J – 10 crochet hook
- 5 mm / US H – 8 crochet hook
- Royal Zeeman yarn (100% acrylic, 100g/3.5oz, 241m/264yd) in following colors and amounts:
- 1 (2, 2, 2, 3, 3, 6, 9, 10, 11) skeins in red
- 1 (2, 2, 2, 3, 3, 6, 9, 10, 11) skeins in blue
- 3 (4, 6, 5, 7, 8, 15, 24, 26, 29) skeins in beige
- Tapestry needle to weave in the ends.
Size
The blanket pattern comes in 9 sizes, noted: baby (receiving, toddler, crib, throw, twin, double, queen, king) throughout the pattern. Pictures illustrate the throw size.
| Blanket sizes | Inches | Centimeters | ||||
| Width | Length | Width | Length | |||
| Stroller / Baby | 30 | 36 | 76 | 92 | ||
| Receiving | 40.5 | 39.5 | 103 | 100 | ||
| Toddler | 42 | 52 | 107 | 132 | ||
| Crib – Small | 36.5 | 55 | 93 | 140 | ||
| Crib – Regular | 45.5 | 61.5 | 115 | 156 | ||
| Throw | 52 | 61.5 | 132 | 156 | ||
| Twin | 66.5 | 90 | 169 | 228 | ||
| Double | 90 | 108.5 | 229 | 276 | ||
| Queen | 97 | 108.5 | 246 | 276 | ||
| King | 108.5 | 108.8 | 275 | 276 | ||
If the table isn’t easy for you to read, here are the dimensions for the different sizes:
- Width: 76 (103, 107, 93, 115, 132, 169, 229, 246, 275) cm / 30 (40.5, 42, 36.5, 45.5, 52, 66.5, 90, 97, 108.5)”
- Length: 92 (100, 132, 140, 156, 156, 228, 276, 276, 276) cm / 36 (39.5, 52, 55, 61.5, 61.5, 90, 108.5, 108.5, 108.5)
You can easily adapt the size to your desired project size.
- To adjust the width by around 2 cm / 0.75”, add or remove a multiple of 3 to your starting stitch count.
- To adjust the length by around 8 cm / 3”, add or remove a row repeat.
Gauge
The gauge for this pattern, in the stitch pattern is 14.5 st in 10 cm / 4”.
One row repeat is 8 cm / 3.25” and is 8 rows high (2 rows making one split puff repeat plus 6 rows hdc).

Abbreviations
This pattern uses US notations.
- st = stitch
- ch = chain
- sc = single crochet
- skip = miss
- yo = yarn over
- hdc = half double crochet
- in eye = under the two loops forming the top of a stitch
Work instructions between [] the indicated number of times or until the end of the row / round.
The final number of stitches is indicated at the end of the row / round between < >.
The turning ch 1 / ch 2 doesn’t count as stitches throughout the pattern except if mentioned otherwise.
Sick of all the yarn jargon and conversions?
US vs UK, abbreviations, imperial vs metric, yarn weights, etc?

Stitches above a ch-1 space are worked in the ch-1 space.
The pattern is written in crochet shorthand. For example:
- “sc 1” means to single crochet in the next stitch,
- “sc 2” means to single crochet in each of the next 2 stitches,
- and “2 sc” means to single crochet twice in the next st.
Sick of all the yarn jargon and conversions?
US vs UK, abbreviations, imperial vs metric, yarn weights, etc?
Special Stitch

Split puff: [yo, insert hook and pull up a loop] three times in same st, skip 2, [yo, insert hook and pull up a loop] three times in next st, pull through all 13 loops on hook.
Puff: [yo, insert hook and pull up a loop] five times in same st, pull through all 11 loops on hook.
Tips and Tricks
Minimize Ends
- To save yourself from weaving in too many ends, carry the beige yarn up the side of the contrast puff stitch rows instead of fastening off and rejoining each time, as the border will hide it anyway.
- Fasten off the contrast color after each section, and when you go back to beige, work over the ends on that first row to weave them in as you go.
Border
The exact stitch count doesn’t matter and your personal tension and yarn choice means that your blanket may be more or less stretchy so don’t be afraid to adjust accordingly to keep your border smooth and even:
- if you feel the border is pulling the side edge a little too tight, simply work an extra stitch in a row end stitch where you’d expect to work only one stitch.
- If the border starts to look a bit ruffled, just work one stitch in a row end stitch where you’d expect to work two stitches.

The Actual Alex Crochet Blanket Free Pattern
With your 5 mm / US H – 8 crochet hook and beige color yarn ch 103 (142, 148, 127, 160, 184, 238, 325, 349, 391) + 2,
Row 1: Hdc in 3rd st from hook, hdc across turn. <103 (142, 148, 127, 160, 184, 238, 325, 349, 391)>
Row 2: Ch 1, hdc across, turn.
Rows 3 – 5: Repeat Row 2 another 3 times.
Do not fasten off beige yarn.
Switch to your 6 mm / US J – 10 crochet hook and red yarn.
Row 6 (Split Puff Row 1): Ch 2, dc, ch 1, split puff in same 1st st, [ch 2, split puff making the first leg in the same st as last leg of previous split puff] across, ch 1, dc in last st (same as last leg of previous split puff), turn.
Row 7 (Split Puff Row 2): Ch 2, dc, skip ch-1, puff, [ch 2, split puff making the first leg in the same st as last leg of previous split puff] until last 2 st, puff in same st as last leg, skip 1, dc, turn.
Fasten off red yarn.
Switch to your 5 mm / US H – 8 crochet hook and back to beige yarn.
Row 8: Ch 1, [hdc in eye, 2 hdc in ch-2] until last st, hdc in last st, turn.
Rows 9 – 13: Ch 1, hdc across, turn.
Do not fasten off beige yarn.
Switch to your 6 mm / US J – 10 crochet hook and blue yarn.
Rows 14 – 15: Repeat Split Puff Row 1 and 2.
Fasten off blue yarn.
Switch to your 5 mm / US H – 8 crochet hook and beige yarn.
Row 16: Ch 1, [hdc in eye, 2 hdc in ch-2] until last st, hdc in last st, turn.
Row 17 – 21: Ch 1, hdc across, turn.
Do not fasten off beige yarn.
Repeat Rows 6-21, alternating red and blue split puff rows for a total of 11 (12, 16, 17, 19, 19, 28, 34, 34, 34) split puff sections, remembering to work the last six beige rows after the final split puff repeat, until blanket length is approximately 92 (100, 132, 140, 156, 156, 228, 276, 276, 276) cm / 36 (39.5, 52, 55, 61.5, 61.5, 90, 108.5, 108.5, 108.5)” total.
Don’t fasten off the beige yarn; you will use it for the border.
Border
With your 5 mm / US H – 8 crochet hook and beige color yarn, work in sc along each side of the blanket. You’ll work in rows, turning your work at the end of each row.
The exact stitch count doesn’t matter (refer to the tips and tricks section). You’ll need approximately 12 st per 8-row repeat.
Row 1: Ch 1, 1 sc in first row end stitch of side, 2 sc in next row end stitch, [1 sc, 2 sc] across, turn.
Row 2-3: Ch 1, sc across, turn.
Fasten off.
Blocking
You’re done with the crocheting part. Make sure to weave in all the ends.
To make your stitch pattern even prettier, help straighten your edges and flatten the corners block your project.
Don’t skip this step as it can make a huge difference. Read my detailed tutorial on why block, how-to, and all my tips and tricks if you need help.