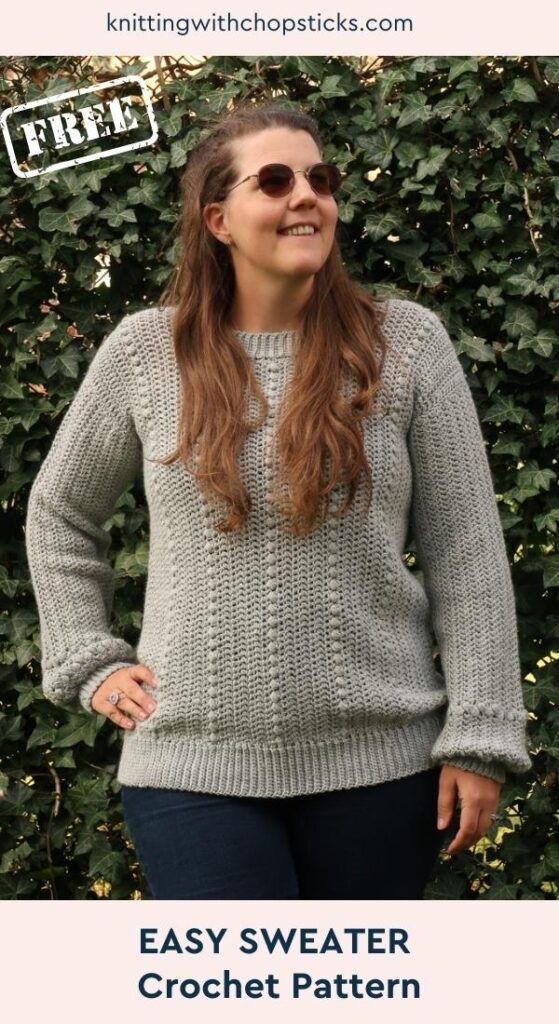
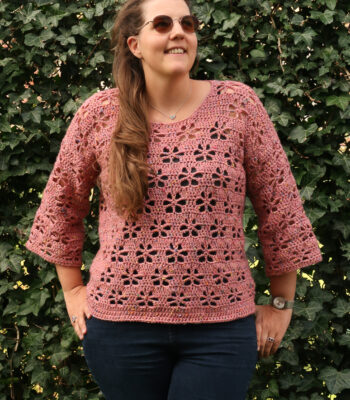
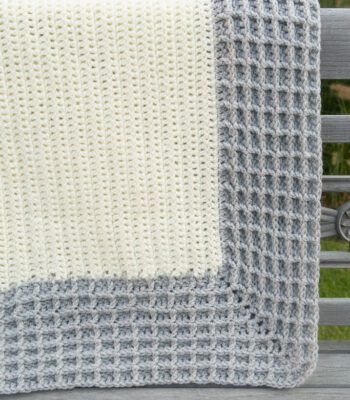
A new crochet sweater pattern, the Kate Sweater, is now a free crochet pattern here on the blog. Read all about the construction and crochet ribbing or scroll down for the free sweater crochet pattern.
No time right now? Pin this easy crochet sweater pattern for later!
*This post contains affiliate links (only for products I love, use and spend my own money on obviously). This means I earn some yarn money if you make a purchase through one of these links (of course at no extra cost for you!), which I promise to use to create more awesome patterns like this one. All opinions are my own. See my full disclosure here.

An Unusual Crochet Sweater Construction
The Kate Sweater is worked in 4 panels sewed together. Both the front and back panels are worked from one side to the other (instead of the more traditional bottom up / top-down construction). Similarly, the sleeves are worked in rows lengthwise.
This unusual construction allows to create a fabric with a vertical lines effect.
After crocheting all panels and attaching them together you will add the ribbing to the collar, cuffs and bottom of your sweater.
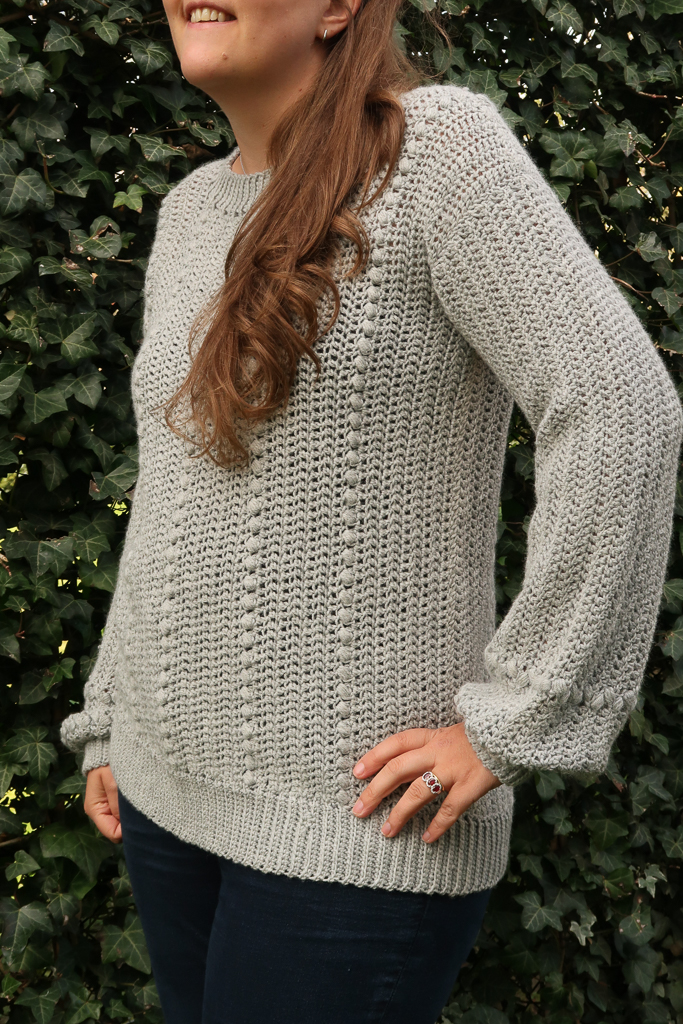
Crochet Ribbing
When I knit I always like to have ribbed edges at the bottom, cuffs and neckline to finish off my sweaters. In knitting it is very easy to achieve, just alternate knits and purls (the 2 basic stitches) and you get a gorgeous ribbing. Unfortunately, when crocheting it is a bit more complicated. And it took me a very long time to venture out doing this in crochet.
Instead of working the ribbing with a specific stitch but following the normal project rows, ribbing is worked as a narrow strip, in rows back and forth, joined to the main panel as you go. All stitches are worked through the back loop only to achieve the rib look. You can crochet ribbing with slip stitches, single crochet (that’s what the Kate crochet sweater pattern calls for), half double crochet or even double crochet stitches.
It takes a bit of time but the end result is so worth it!
Crochet ribbing can be intimidating at first, that’s why I made detailed videos for the bottom and cuff ribbing of this crochet sweater pattern.
The pattern also gives detailed written and photo instructions of for the ribbing sections.
Downloadable PDF Kate Crochet Sweater Pattern
Why I Recommend You Purchase the PDF Pattern
If you’ve never used PDF patterns before, you are missing out on so much convenience!
- You don’t need to take screenshots of the pattern
- You don’t need to have your computer, phone or tablet around to work on your project.
- You don’t need to panic if your husband accidentally closed the page
- You can take notes, highlight your size and write down where you are.
- When your best friend begs you to make her the same sweater, you have the pattern ready.
- It’s a great way to support the blog so I can continue to bring you knitting tutorials.
Grab the printable PDF of the Kate Crochet Sweater pattern is now in my Etsy shop or on Ravelry:
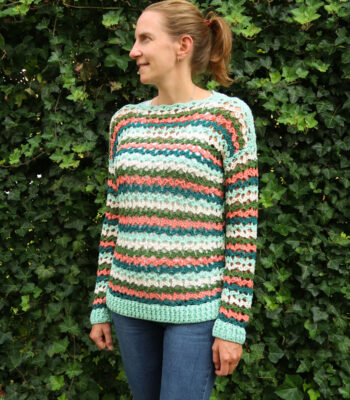
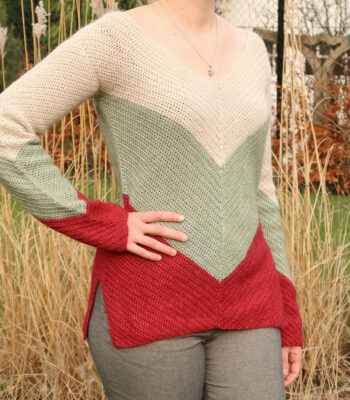
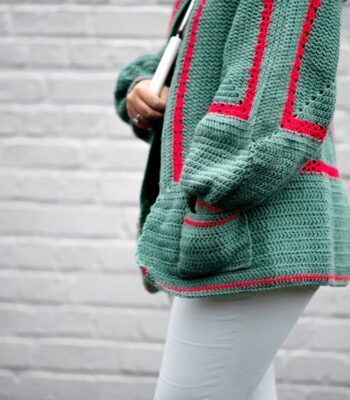
More Crochet Sweaters you'll love
Before you Start
Materials
- 5 mm / US H – 8 hook.
- 4 mm / US G – 6 hook.
- Katia Lopapeysa Basic (light weight (3), 70% wool, 30% acrylic, 120m/131yd, 50g/1.75oz) in color 2: 9 (10, 11, 12, 14, 15, 16, 18, 19) skeins
- Tapestry needle to weave in the ends.
Size
The crochet sweater pattern is available in following sizes: XS, S, M, L, XL, 2XL, 3XL, 4XL, 5XL. Sizes are written as XS (S, M, L, XL, 2XL, 3XL, 4XL, 5XL) throughout the pattern. Pictures illustrate the L size.
The sweater is designed with a close fit, 0 – 5 cm / 0” to 2” ease at the bust.
Below are the final cardigan measurements for the different sizes.
- XS: bust 80 cm / 31.5”, armhole 34 cm / 13.5”, length 65 cm / 25.75”
- S: bust 88 cm / 34.5”, armhole 35 cm / 13.75”, length 65 cm / 25.75”
- M: bust 96 cm / 37.75”, armhole 37 cm / 14.5”, length 67 cm / 26.5”
- L: bust 104 cm / 41”, armhole 40 cm / 15.5”, length 69 cm / 27”
- XL: bust 120 cm / 47.25”, armhole 44 cm / 17”, length 70 cm / 27.5”
- 2XL: bust 128 cm / 50.5”, armhole 49 cm / 19”, length 73 cm / 28.75”
- 3XL: bust 136 cm / 53.5”, armhole 52 cm / 20.5”, length 75 cm / 29.5”
- 4XL: bust 152 cm / 59.75”, armhole 56 cm / 22”, length 76 cm / 30”
- 5XL: bust 160 cm / 63”, armhole 59 cm / 23”, length 78 cm / 30.5”
To adjust the length increase / decrease the starting chain of the body panels by a multiple of 2 (make sure to adjust your yarn requirements accordingly).
Gauge
The gauge for this pattern, in dc, is 13 st by 10 rows for a 10 cm by 10 cm / 4” by 4” square.
Abbreviations
This pattern uses US notations.
- st = stitch
- ch = chain
- sc = single crochet
- dc = double crochet
Notes
Work instructions between [] the indicated number of times or until the end of the row / round.
The final number of stitches is indicated at the end of the row / round between < >.
The turning ch 1, ch 2 don’t count as stitches throughout the pattern except if mentioned otherwise.
The pattern is written in crochet shorthand. For example:
- “dc 1” means to double crochet in the next stitch,
- “dc 2” means to double crochet in each of the next 2 stitches,
- and “2 dc” means to double crochet twice in the next st.
Special Stitches and Techniques
- Skewed bead stitch (counts as 2 stitches): Dc in indicated st, [yo, insert hook in previous skipped st, yo, pull up a loop] 5 times, yo, pull through all 11 loops on the hook, ch 1 to close (pull tightly, doesn’t count as a st).
The Actual Sweater Crochet Pattern
Body Panels
Make 2 body panels: one front panel and one back panel. Follow the instructions accordingly when there is a difference (which is only in the neck shaping section).
With your 5 mm / US H – 8 hook, ch 54 + 2.
1st Shoulder Section
Row 1: Dc in 3rd st from hook, dc across, turn. <54 st>
Row 2 – 3: Ch 2, dc across, turn.
Finish the 1st shoulder section following your size’s instructions then skip to the neck shaping section.
Size XS
At the end of Row 3, chain an additional 22 + 2 stitches.
Row 4: Skewed bead in 3rd ch from hook, [skip 1, skewed bead] across, turn. <38 beads>
Row 5: Ch 2, [(skip closing chain st), dc in top of bead st, dc in between beads] until last bead, dc in top of the bead st, dc 1 in last st, turn. <76 st>
Row 6- 10: Ch 2, dc across, turn.
Size S
At the end of Row 3, chain an additional 22 + 2 stitches.
Row 4: Dc in 3rd st from hook, dc across, turn. <76 st>
Row 5: Ch 2, dc across, turn.
Row 6: Ch 2, [skip 1, skewed bead] across, turn. <38 beads>
Row 7: Ch 2, [(skip closing chain st), dc in top of bead st, dc in between beads] until last bead, dc in top of the bead st, dc 1 in last st, turn. <76 st>
Row 8- 12: Ch 2, dc across, turn.
Size M
At the end of Row 3, chain an additional 24 + 2 stitches.
Row 4: Dc in 3rd st from hook, dc across, turn. <78 st>
Row 5 – 7: Ch 2, dc across, turn.
Row 8: Ch 2, [skip 1, skewed bead] across, turn. <39 beads>
Row 9: Ch 2, [(skip closing chain st), dc in top of bead st, dc in between beads] until last bead, dc in top of the bead st, dc 1 in last st, turn. <78 st>
Row 10- 14: Ch 2, dc across, turn.
Size L
At the end of Row 3, chain an additional 26 + 2 stitches.
Row 4: Dc in 3rd st from hook, dc across, turn. <80 st>
Row 5 – 9: Ch 2, dc across, turn.
Row 10: Ch 2, [skip 1, skewed bead] across, turn. <40 beads>
Row 11: Ch 2, [(skip closing chain st), dc in top of bead st, dc in between beads] until last bead, dc in top of the bead st, dc 1 in last st, turn. <80 st>
Row 12- 16: Ch 2, dc across, turn.
Size XL
At the end of Row 3, chain an additional 28 + 2 stitches.
Row 4: Dc in 3rd st from hook, dc across, turn. <82 st>
Row 5: Ch 2, dc across, turn.
Row 6: Ch 2, [skip 1, skewed bead] across, turn. <41 beads>
Row 7: Ch 2, [(skip closing chain st), dc in top of bead st, dc in between beads] until last bead, dc in top of the bead st, dc 1 in last st, turn. <82 st>
Row 8 – 13: Ch 2, dc across, turn.
Row 14 – 20: Repeat Rows 6 to 12.
Size 2XL
At the end of Row 3, chain an additional 32 + 2 stitches.
Row 4: Dc in 3rd st from hook, dc across, turn. <86 st>
Row 5 – 7: Ch 2, dc across, turn.
Row 8: Ch 2, [skip 1, skewed bead] across, turn. <43 beads>
Row 9: Ch 2, [(skip closing chain st), dc in top of bead st, dc in between beads] until last bead, dc in top of the bead st, dc 1 in last st, turn. <86 st>
Row 10 – 15: Ch 2, dc across, turn.
Row 16 – 22: Repeat Rows 8 to 14.
Size 3XL
At the end of Row 3, chain an additional 34 + 2 stitches.
Row 4: Dc in 3rd st from hook, dc across, turn. <88 st>
Row 5 – 9: Ch 2, dc across, turn.
Row 10: Ch 2, [skip 1, skewed bead] across, turn. <44 beads>
Row 11: Ch 2, [(skip closing chain st), dc in top of bead st, dc in between beads] until last bead, dc in top of the bead st, dc 1 in last st, turn. <88 st>
Row 12 – 17: Ch 2, dc across, turn.
Row 18 – 24: Repeat Rows 9 to 15.
Size 4XL
At the end of Row 3, chain an additional 36 + 2 stitches.
Row 4: Dc in 3rd st from hook, dc across, turn. <90 st>
Row 5: Ch 2, dc across, turn.
Row 6: Ch 2, [skip 1, skewed bead] across, turn. <45 beads>
Row 7: Ch 2, [(skip closing chain st), dc in top of bead st, dc in between beads] until last bead, dc in top of the bead st, dc 1 in last st, turn. <90 st>
Row 8 – 13: Ch 2, dc across, turn.
Row 14 – 21: Repeat Rows 6 to 13.
Row 22 – 28: Repeat Rows 6 to 12.
Size 5XL
At the end of Row 3, chain an additional 38 + 2 stitches.
Row 4: Dc in 3rd st from hook, dc across, turn. <92 st>
Row 5 -7: Ch 2, dc across, turn.
Row 8: Ch 2, [skip 1, skewed bead] across, turn. <46 beads>
Row 9: Ch 2, [(skip closing chain st), dc in top of bead st, dc in between beads] until last bead, dc in top of the bead st, dc 1 in last st, turn. <92 st>
Row 10 – 15: Ch 2, dc across, turn.
Row 16 – 23: Repeat Rows 8 to 15.
Row 24 – 30: Repeat Rows 8 to 14.
Neck Shaping (common to all sizes)
Row 1:
- Front panel: Ch 2, dc until last 10 st, turn (ignore the last 10 st). <66 (66, 68, 70, 72, 76, 78, 80, 82) st>
- Back panel: Ch 2, dc until last 2 st, turn (ignore the last 2 st). <74 (74, 76, 78, 80, 84, 86, 88, 90) st>
Row 2: Ch 2, [skip 1, skewed bead] across, turn.
Row 3: Ch 2, [(skip closing chain st), dc in top of bead st, dc in between beads] until last bead, dc in top of the bead st, dc 1 in last st, turn.
Row 4 – 9: Ch 2, dc across, turn.
Row 10 – 11: Repeat Row 2 & 3.
Row 12 – 17: Repeat Row 4 – 9.
Row 18: Repeat Row 2.
Row 19:
- Front panel: Ch 2, [(skip closing chain st), dc in top of bead st, dc in between beads] until last bead, dc in top of the bead st, dc 1 in last st, add 10 + 2 chains at the end of the row. <78 (78, 80, 82, 84, 88, 90, 92, 94) st>
- Back panel: Ch 2, [(skip closing chain st), dc in top of bead st, dc in between beads] until last bead, dc in top of the bead st, dc 1 in last st, add 2 + 2 chains at the end of the row. <78 (78, 80, 82, 84, 88, 90, 92, 94) st>
2nd Shoulder Section
This section is symmetrical to the 1st shoulder section. Follow your size’s instructions.
Size XS
Row 1: Dc in 3rd chain from hook, dc across, turn. <76 st>
Row 2 – 6: Ch 2, dc across, turn.
Row 7: Ch 2, [skip 1, skewed bead] until last 22 st, turn. (ignore remaining st) <27 beads>
Row 8: Ch 2, [(skip closing chain st), dc in top of bead st, dc in between beads] until last bead, dc in top of the bead st, dc 1 in last st, turn. <54 st>
Row 9 – 10: Ch 2, dc across, turn.
Size S
Row 1: Dc in 3rd chain from hook, dc across, turn. <76 st>
Row 2 – 6: Ch 2, dc across, turn.
Row 7: Ch 2, [skip 1, skewed bead] across, turn. <38 beads>
Row 8: Ch 2, [(skip closing chain st), dc in top of bead st, dc in between beads] until last bead, dc in top of the bead st, dc 1 in last st, turn.
Row 9: Ch 2, dc across, turn.
Row 10: Ch 2, dc 54, turn. (ignore remaining st) <54 st>
Row 11 – 12: Ch 2, dc across, turn.
Size M
Row 1: Dc in 3rd chain from hook, dc across, turn. <78 st>
Row 2 – 6: Ch 2, dc across, turn.
Row 7: Ch 2, [skip 1, skewed bead] across, turn. <39 beads>
Row 8: Ch 2, [(skip closing chain st), dc in top of bead st, dc in between beads] until last bead, dc in top of the bead st, dc 1 in last st, turn.
Row 9 – 11: Ch 2, dc across, turn.
Row 12: Ch 2, dc 54, turn. (ignore remaining st) <54 st>
Row 13 – 14: Ch 2, dc across, turn.
Size L
Row 1: Dc in 3rd chain from hook, dc across, turn. <80 st>
Row 2 – 6: Ch 2, dc across, turn.
Row 7: Ch 2, [skip 1, skewed bead] across, turn. <40 beads>
Row 8: Ch 2, [(skip closing chain st), dc in top of bead st, dc in between beads] until last bead, dc in top of the bead st, dc 1 in last st, turn.
Row 9 – 13: Ch 2, dc across, turn.
Row 14: Ch 2, dc 54, turn. (ignore remaining st) <54 st>
Row 15 – 16: Ch 2, dc across, turn.
Size XL
Row 1: Dc in 3rd chain from hook, dc across, turn. <82 st>
Row 2 – 6: Ch 2, dc across, turn.
Row 7: Ch 2, [skip 1, skewed bead] across, turn. <41 beads>
Row 8: Ch 2, [(skip closing chain st), dc in top of bead st, dc in between beads] until last bead, dc in top of the bead st, dc 1 in last st, turn.
Row 9 – 14: Ch 2, dc across, turn.
Row 15 – 17: Repeat Row 7 – 9.
Row 18: Ch 2, dc 54, turn. (ignore remaining st) <54 st>
Row 19 – 20: Ch 2, dc across, turn.
Size 2XL
Row 1: Dc in 3rd chain from hook, dc across, turn. <86 st>
Row 2 – 6: Ch 2, dc across, turn.
Row 7: Ch 2, [skip 1, skewed bead] across, turn. <43 beads>
Row 8: Ch 2, [(skip closing chain st), dc in top of bead st, dc in between beads] until last bead, dc in top of the bead st, dc 1 in last st, turn.
Row 9 – 14: Ch 2, dc across, turn.
Row 15 – 19: Repeat Row 7 – 11.
Row 20: Ch 2, dc 54, turn. (ignore remaining st) <54 st>
Row 21 – 22: Ch 2, dc across, turn.
Size 3XL
Row 1: Dc in 3rd chain from hook, dc across, turn. <88 st>
Row 2 – 6: Ch 2, dc across, turn.
Row 7: Ch 2, [skip 1, skewed bead] across, turn. <44 beads>
Row 8: Ch 2, [(skip closing chain st), dc in top of bead st, dc in between beads] until last bead, dc in top of the bead st, dc 1 in last st, turn.
Row 9 – 14: Ch 2, dc across, turn.
Row 15 – 21: Repeat Row 7 – 13.
Row 22: Ch 2, dc 54, turn. (ignore remaining st) <54 st>
Row 23 – 24: Ch 2, dc across, turn.
Size 4XL
Row 1: Dc in 3rd chain from hook, dc across, turn. <90 st>
Row 2 – 6: Ch 2, dc across, turn.
Row 7: Ch 2, [skip 1, skewed bead] across, turn. <45 beads>
Row 8: Ch 2, [(skip closing chain st), dc in top of bead st, dc in between beads] until last bead, dc in top of the bead st, dc 1 in last st, turn.
Row 9 – 14: Ch 2, dc across, turn.
Row 15 – 22: Repeat Row 7 – 14.
Row 23 – 25: Repeat Row 7 – 9.
Row 26: Ch 2, dc 54, turn. (ignore remaining st) <54 st>
Row 27 – 28: Ch 2, dc across, turn.
Size 5XL
Row 1: Dc in 3rd chain from hook, dc across, turn. <92 st>
Row 2 – 6: Ch 2, dc across, turn.
Row 7: Ch 2, [skip 1, skewed bead] across, turn. <46 beads>
Row 8: Ch 2, [(skip closing chain st), dc in top of bead st, dc in between beads] until last bead, dc in top of the bead st, dc 1 in last st, turn.
Row 9 – 14: Ch 2, dc across, turn.
Row 15 – 22: Repeat Row 7 – 14.
Row 23 – 27: Repeat Row 7 – 11.
Row 28: Ch 2, dc 54, turn. (ignore remaining st) <54 st>
Row 29 – 30: Ch 2, dc across, turn.
Sleeves
Make 2.
With your 5 mm / US H- 8 hook, ch 68 (68, 68, 68, 66, 66, 66, 64, 64) + 2.
Row 1: Dc in 3rd st from the hook, dc until last 14 st, skip 1, skewed bead, dc 8, skip 1, skewed bead, dc 2.
Row 2: Ch 2, skip 1, skewed bead, dc 8, skip 1, skewed bead, dc until end of row, turn.
Row 3: Ch 2, dc until last 14 st, skip 1, skewed bead, dc 8, skip 1, skewed bead, dc 2, turn.
Repeat Row 2 and 3 until you reach 34 (35, 37, 40, 44, 49, 52, 56, 59) cm / 13.5 (13.75, 14.5, 15.5, 17, 19, 20.5, 22, 23)”.
Assembly
Assemble the front and back panels by sewing the shoulder seams.
Attach the sleeves to the body panels. Fold the sleeve in half and start by sewing the middle to the shoulder seam. The skewed beads should be at the wrist side. Sew down on both sides.
Be careful to sew the sleeve to the shoulder shaping indent in the body correctly.
Finish sewing the sides together and close the sleeves all the way to the end of the cuffs.
Bottom Edge
With your 4mm / US G – 6 hook, join yarn at the side seam and ch 15.

Row 1: Sc in the back loop of the 2nd ch from hook, sc in next 13 st, sc in next body panel placing*, ch 1 and turn. <16 st (including ch)>
* Body panel placings: make 1 for every row.


Row 2: Sc in the back loop of the 3rd st from hook (skipping the ch 1 and the sc in the body panel), sc in the back loop of the next 13 sts, ch 1 and turn. <15 sc>
Repeat Row 1 and 2 around.
Finish with a Row 2 starting in the st of the body panel. Sew the ribbing closed.
Collar
Note: The body panels create a square shaped neckline, adding the ribbing will round it off by itself.
With your 4mm / US G – 6 hook, join yarn at the shoulder seam and ch 9.
Row 1: Sc in the back loop of the 2nd ch from hook, sc in next 7 st, sc in next body panel placing*, ch 1 and turn. <10 st (including ch)>
* Body panel placings: when working into a st, make 1 for every 2 sts. When working into a row end, make 1 for every row.
Row 2: Sc in the back loop of the 3rd st from hook (skipping the ch 1 and the sc in the body panel), sc in the back loop of the next 7 sts, ch 1 and turn. <8 sc>
Repeat Row 1 and 2 around.
Finish with a Row 2 starting in the st of the body panel. Sew the ribbing closed.
Cuffs
Repeat for each sleeve.
Start by working a base row: Join yarn at the seam, ch 1 and make approximately 1 sc for every 2 rows, sl st in first sc and ch 8. (The exact number of sc in the base row doesn’t matter).
Row 1: Sc in the back loop of the 2nd ch from hook, sc in next 6 st, sc in base row st, ch 1 and turn. <9 st (including ch)>
Row 2: Sc in the back loop of the 3rd st from hook (skipping the ch 1 and the sc in the base row), sc in the back loop of the next 6 sts, ch 1 and turn. <7 sc>
Repeat Row 1 and 2 around.
Finish with a Row 2 starting in the st of the base row. Sew the ribbing closed.
Blocking
You’re done with the crocheting part. To make your sweater even prettier, even out your stitches and highlight the bead texture, carefully wet block your project.
Don’t skip this step as it can make a huge difference. Read my detailed tutorial on why block, how-to, and all my tips and tricks if you need help.


