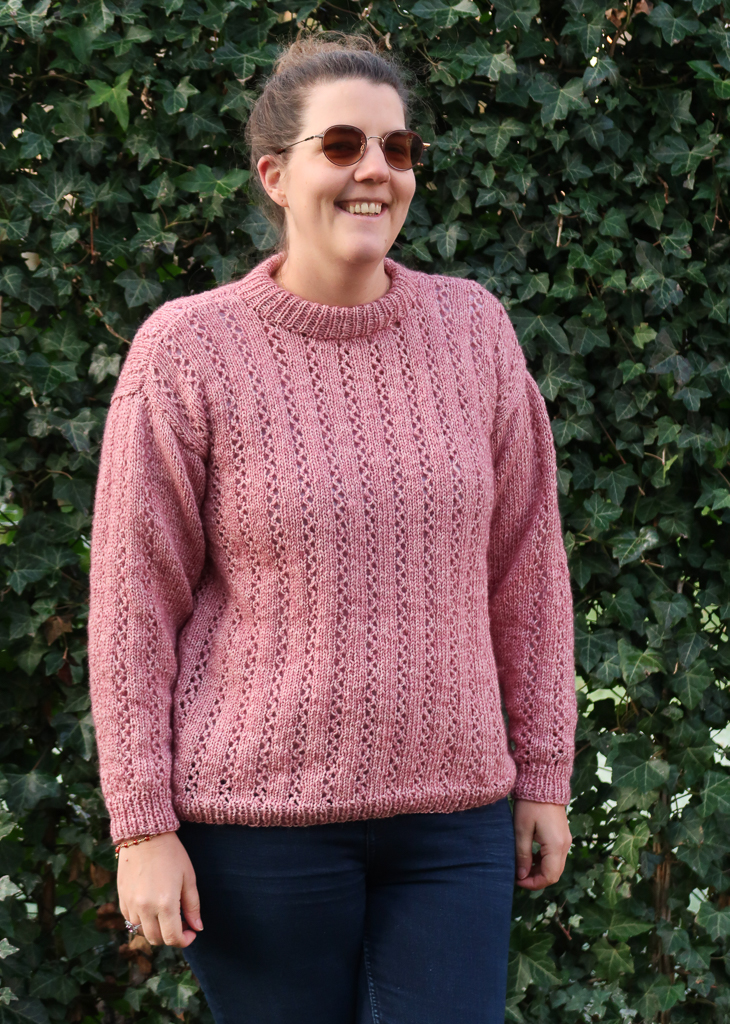
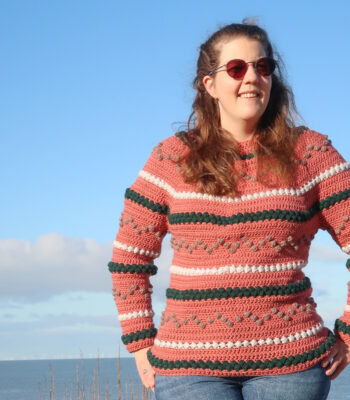
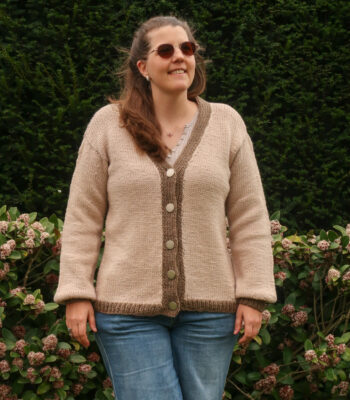
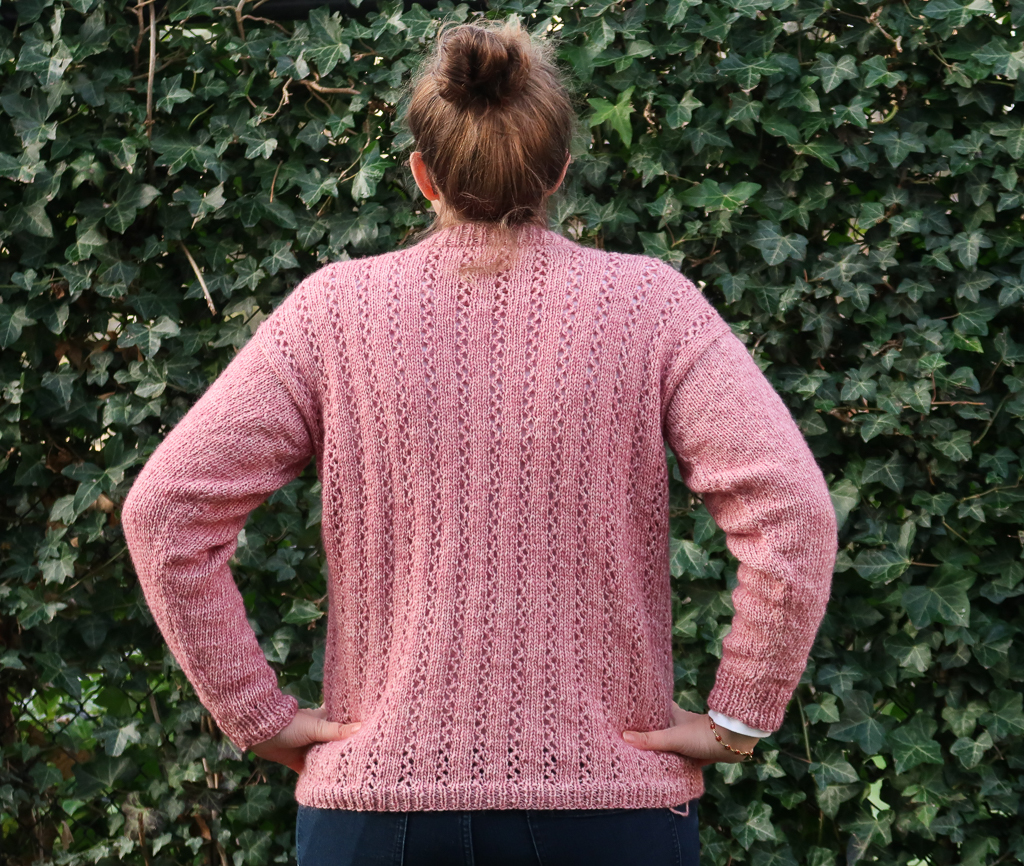
A new easy lace sweater knitting pattern, the Lily Sweater, is now a free knit sweater pattern here on the blog. Read about the inspiration and yarn or scroll down for the free knitting pattern.
No time right now? Pin this easy lace knit sweater pattern for later!
*This post contains affiliate links (only for products I love, use and spend my own money on obviously). This means I earn some yarn money if you make a purchase through one of these links (of course at no extra cost for you!), which I promise to use to create more awesome patterns like this one. All opinions are my own. See my full disclosure here.
Knitting is a wonderful way to create wearable art. This pattern is no different. The lace detail of this sweater is so easy to work up. With its 4 row repeat, this sweater is not only beautiful but a great, simple project even if you’ve never knit lace before.
The Yarn
The Lily sweater knitting pattern is designed with Hobbii Zafira yarn. It’s a gorgeous cotton blend yarn. The fine fibers are held together by an ultra thin net made from durable polyamide.
The fine-meshed tube of polyamide is the foundation of the yarn. The tube is either black or white, depending on the color of the fibers. With the help of a special spinning technique, the mix of cotton and wool are blown into the tube and creates a lovely, full volume. The construction creates a beautiful play of colors when the natural color of the tube shows delicately through and creates Zafira’s beautiful, slightly mottled look.
Unfortunately, the Zafira yarn is now discontinued, but you can easily substitute it with other similar worsted weight yarns. Here are a few good matches (make sure you check your gauge):
- Hobbii Divina, it has the same particular construction as Zafira but with super soft merino instead of cotton.
- LionBrand Chainette is spun in a chain construction allowing air to pass through and get a similar airy effect as Zafira
- Katia Cotton Merino also has a similar construction and play of color and would be a great substitute.
However, the Lily sweater also looks beautiful with more classic worsted weight yarns. Just make sure it’s fot a too fizzy yarn so the lace detail stand out.

Downloadable PDF Lily Knit Sweater Pattern
Why I Recommend You Purchase the PDF Pattern
If you’ve never used PDF patterns before, you are missing out on so much convenience!
- You don’t need to take screenshots of the pattern
- You don’t need to have your computer, phone or tablet around to work on your project.
- You don’t need to panic if your husband accidentally closed the page
- You can take notes, highlight your size and write down where you are.
- When your best friend begs you to make her the same sweater, you have the pattern ready.
- It’s a great way to support the blog so I can continue to bring you knitting tutorials.
Grab the printable PDF of the Lily Sweater knitting pattern is now in my Etsy shop or on Ravelry:
More Lace & Eyelets Knit Sweaters you'll love
Before you Start
Materials
- 4 mm / US 6 circular knitting needles
- 5 mm / US 8 knitting needles
- Hobbii Zafira (Worsted weight 4, 55% cotton, 27% wool, 18% acrylic, 150m/164yd, 50g/1.75oz): 5 (6, 6, 7, 8, 9, 9, 10, 11) skeins
- Tapestry needle to weave in the ends
Size
The sweater knitting pattern is available in 9 sizes: XS, S, M, L, XL, 2XL, 3XL, 4XL, 5XL. Sizes are noted throughout the pattern in the following way: XS (S, M, L, XL, 2XL, 3XL, 4XL, 5XL).
The pictures illustrate the L size.
The sweater is designed with a normal fit, 4 – 8 cm / 1.5 – 3” ease at the bust.
Final garment measurements are:
- XS: 76 cm / 29.75” bust, 37 cm / 14.5” upper arm circumference, 56 cm / 22.25” length.
- S: 89 cm / 35” bust, 38 cm / 15” upper arm circumference, 57 cm / 22.5” length.
- M: 96 cm / 37.5” bust, 40 cm / 15.75” upper arm circumference, 58 cm / 23” length.
- L: 109 cm / 43” bust, 42 cm / 16.5” upper arm circumference, 59 cm / 23.25” length.
- XL: 116 cm / 45.5” bust, 46 cm / 18” upper arm circumference, 61 cm / 24” length.
- 2 XL: 129 cm / 50.75” bust, 51 cm / 20” upper arm circumference, 64 cm / 25” length.
- 3XL: 142 cm / 56” bust, 54 cm / 21.5” upper arm circumference 65 cm / 25.5” length.
- 4XL: 149 cm / 58.5” bust, 59 cm / 23” upper arm circumference 67 cm / 26.5” length.
- 5XL: 162 cm / 64” bust, 61 cm / 24” upper arm circumference 69 cm / 27” length.
You can adjust this length by following the notes given in italic.
Gauge
The gauge for this pattern, in lace pattern, is 18 st by 25 rows for a 10 cm by 10 cm square (4” by 4”).
Abbreviations & Instructions
- k = knit
- k2tog = knit 2 stitches together, single right-leaning decrease
- p = purl
- p2tog = purl 2 stitches together, single decrease
- st = stitch
- sl1k = slip 1 stitch knitwise
- sl1p = slip 1 stitch purlwise
- ssk = slip 2 stitches knitwise, knit these 2 stitches together through back loops; single left-leaning decrease
- yo = yarn over
Repeat instructions between [] the indicated number of times or until the end of the round/row.
The final number of stitches is indicated at the end of the round/row between < >.
Special Techniques
- Picking up stitches: if you’re not familiar with this technique, this tutorial is very helpful.
- I recommend using the sloped bind off technique for the collar shaping. If you’re not familiar with this technique, this tutorial is very helpful.
Special Stitches and Repeated Patterns
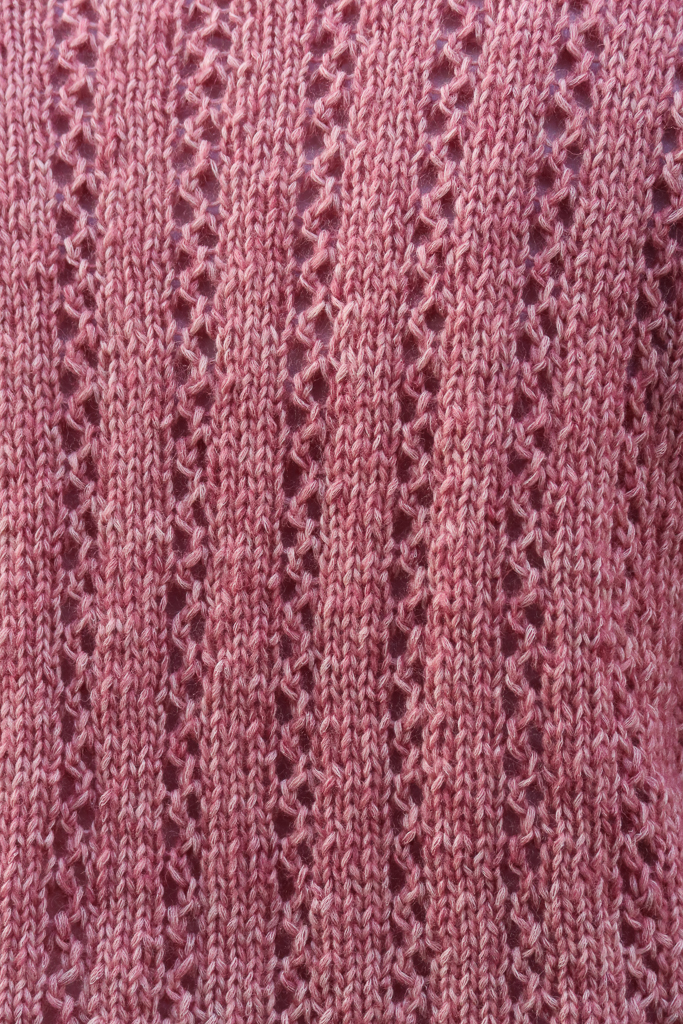
- The Lily sweater knitting pattern features the lace vines stitch (find a detailed stitch tutorial here).

Construction
The sweater is worked in panels sewed together. The back and front panels are worked from the bottom up with a rounded neck shaping. The sleeves are worked from the cuff up. After assembling the panels, stitches are picked up for the neckline ribbing which is then folded and sewed back on the inside of the neckline.
The Actual Sweater Knitting Pattern
Back Panel
With your 4 mm / US 6 needles cast on 68 (80, 86, 98, 104, 116, 128, 134, 146) st.
[k1, p1] across for 5 cm / 2”.
Switch to 5 mm / US 8 needles.
Lace vines stitch pattern:
Row 1: Sl1k, [k2, yo, ssk, k2] until last st, k1.
Row 2: Sl1p, purl across.
Row 3: Sl1k, [k2, k2tog, yo, k2] until last st, k1.
Row 4: Sl1p, purl across.
Work in lace vines stitch pattern (repeating Rows 1 to 4) until you reach 38 cm / 15”.
Note: To adjust the sweater length, add or remove height here. Make sure to take note how many cm or inches you’ve modified to adjust accordingly in the next parts.
Continue in lace vine stitch pattern while decreasing on the sides to shape the armholes as follow:
- Decrease Row: k3, ssk, work lace vine pattern until last 5 st, k2tog, k3. <66 (78, 84, 96, 102, 114, 126, 132, 144) st>
- Purl 1 row
Repeat [Decrease row followed by purl row] twice. <62 (74, 80, 92, 98, 110, 122, 128, 140) st>
Work [Decrease row followed by 3 rows in lace pattern] twice <58 (70, 76, 88, 94, 106, 118, 124, 136) st>
Continue in lace stitch pattern without decreases until total length is 55 (56, 57, 58, 60, 63, 64, 66, 68) cm / 21.5 (22, 22.5, 22.75, 23.5, 24.75, 25.25, 26, 26.72\5)”.
Note: If you’ve chosen to modify your sweater length, you will need to adjust this measure accordingly.
Neck Shaping
Cast off middle 34 st: Sl1k, k11 (17, 20, 26, 29, 35, 41, 44, 50) in pattern, cast off 34 st, k12 (18, 21, 27, 30, 36, 42, 45, 51) in pattern.
Work both sides separately for 3 rows in pattern then cast off. Join yarn at the neckline and start with a purl row for the 2nd side.
Front panel
With your 4 mm / US 6 needles cast on 68 (80, 86, 98, 104, 116, 128, 134, 146) st.
[k1, p1] across for 5 cm / 2”.
Switch to 5 mm / US 8 needles.
Lace vines stitch pattern:
Row 1: Sl1k, [k2, yo, ssk, k2] until last st, k1.
Row 2: Sl1p, purl across.
Row 3: Sl1k, [k2, k2tog, yo, k2] until last st, k1.
Row 4: Sl1p, purl across.
Work in lace vines stitch pattern (repeating Rows 1 to 4) until you reach 38 cm / 15”.
Note: If you’ve chosen to modify your sweater length, you will need to adjust this measure accordingly.
Continue in lace vine stitch pattern while decreasing on the sides to shape the armholes as follow:
- Decrease Row: k3, ssk, work lace vine pattern until last 5 st, k2tog, k3. <66 (78, 84, 96, 102, 114, 126, 132, 144) st>
- Purl 1 row.
Repeat [Decrease row followed by purl row] twice. <62 (74, 80, 92, 98, 110, 122, 128, 140) st>
Work [Decrease row followed by 3 rows in lace pattern] twice. <58 (70, 76, 88, 94, 106, 118, 124, 136) st>
Continue in lace stitch pattern without decreases until total length is 50 (51, 52, 53, 55, 59, 60, 61, 63) cm / 19.5 (20, 20.25, 20.75, 21.5, 23, 23.5, 23.75, 24.5)”.
Note: If you’ve chosen to modify your sweater length, you will need to adjust this measure accordingly.
Neck Shaping
Cast off the middle 18 st: Sl1k, k19 (25, 28, 30, 34, 37, 43, 52, 58), cast off 18 st, k20 (26, 29, 31, 35, 38, 44, 53, 59).
You will work each side separately from here onwards. Start working with the first set of stitches to form the left shoulder (when wearing the sweater):
- Purl across.
- [Cast off 2 st, knit in pattern across.
Purl across] 3 times. <14 (20, 23, 25, 29, 32, 38, 47, 53) st>
- [Cast off 1 st, knit in pattern across.
Purl across] 3 times. <11 (17, 20, 22, 26, 29, 35, 44, 50) st>
- Knit straight in pattern until total length reaches 56 (57, 58, 59, 61, 64, 65, 67, 69) cm / 22.25 (22.5, 23, 23.25, 24, 25, 25.5, 26.5, 27)”.
Note: If you’ve chosen to modify your sweater length, you will need to adjust this measure accordingly.
Cast off and leave a long tail for sewing.
Go back to the stitches you left and the side and join yarn at the neckline to work the right shoulder (when wearing the sweater):
- [Cast off 2 st, purl across.
Knit 1 row in pattern] 3 times. <14 (19, 22, 28, 31, 37, 46, 52) st>
- [Cast off 1 st, purl across.
Knit 1 row in pattern] 3 times. <11 (16, 19, 25, 28, 34, 43, 49) st>
- Knit straight in pattern until total length reaches 56 (57, 58, 59, 61, 64, 65, 67, 69) cm / 22.25 (22.5, 23, 23.25, 24, 25, 25.5, 26.5, 27)”.
Note: If you’ve chosen to modify your sweater length, you will need to adjust this measure accordingly.
Sleeves
With your 5 mm / US 8 needles, cast on 66 (68, 72, 76, 82, 92, 98, 106, 110) st.
Sleeve pattern:
Row 1: Sl1k, k23 (24, 26, 28, 31, 36, 39, 43, 45), [k2, yo, ssk, k2] three times, k24 (25, 27, 29, 32, 37, 40, 44, 46).
Row 2: Sl1p, purl across.
Row 3: Sl1k, k23 (24, 26, 28, 31, 36, 39, 43, 45), [k2, k2tog, yo, k2] three times, k24 (25, 27, 29, 32, 37, 40, 44, 46).
Row 4: Sl1p, purl across.
Repeat Row 1 to 4 until you reach 15 (15, 15, 15, 13, 10, 10, 8, 8) cm / 6 (6, 6, 6, 5, 4, 4, 3, 3)”.
Start decreasing to shape the sleeve. You will keep working in pattern and decrease on both sides of the sleeve (always on RS) as follows:
Decrease Row: Sl1k, k1, ssk, knit in pattern until last 4 st, k2tog, k2.
[Work a decrease row followed by a purl row. Then knit 2 rows in pattern] 15 (15, 15, 15, 14, 13, 11, 10, 9) times. < 36 (38, 42, 46, 54, 66, 76, 86, 92) st>
[Work a decrease row followed by a purl row.] 3 (4, 5, 5, 9, 14, 18, 23, 25) times. <30 (30, 32, 36, 36, 38, 40, 40, 42) st>
Knit straight until you reach 44 cm / 17.25”.
Switch to 4 mm / US 6 needles.
[k1, p1] across for 5 cm / 2”.
Cast off and leave a long end for sewing.
Assembly
Assemble the front and back panels by sewing the shoulders seams.


Attach the sleeves to the body panels. Fold the sleeve in half and start by sewing the middle to the shoulder seam. Sew down on both sides. Finish sewing the sides together and close the sleeves all the way to the end of the cuffs.
Collar
With your 4 mm / US 6 needles, pick up 72 stitches around the neckline and join in the round.
[k1, p1] around for 10 cm / 4”.
Cast off and leave a long tail for sewing.
Fold the collar in half and sew the cast-off edge to the inside of the picked-up stitches.
Blocking
You’re done with the knitting part. Make sure to weave in all the ends.
To make your sweater even prettier, help even your stitches, open up the lace and make the textures come out even more, block your project.
Don’t skip this step as it can make a huge difference. Read my detailed tutorial on why block, how-to, and all my tips and tricks if you need help.

