Appaloosa Sweater Knitting Pattern

A new sweater knitting pattern – the Appaloosa Knit Sweater – is now a free knitting pattern here on the blog. Read all about theknitting pattern inspiration, scroll down to view the full free pattern or purchase an ad free PDF from the links below.
I love wearing chunky cardigans (like the Hometown Chunky Cardigan or the Apricity Cardigan) but when the end of winter is nearing and the weather heats up, I like my knit sweaters to not be that chunky. Don’t get me wrong it’s still nice and warm but just less bulky.
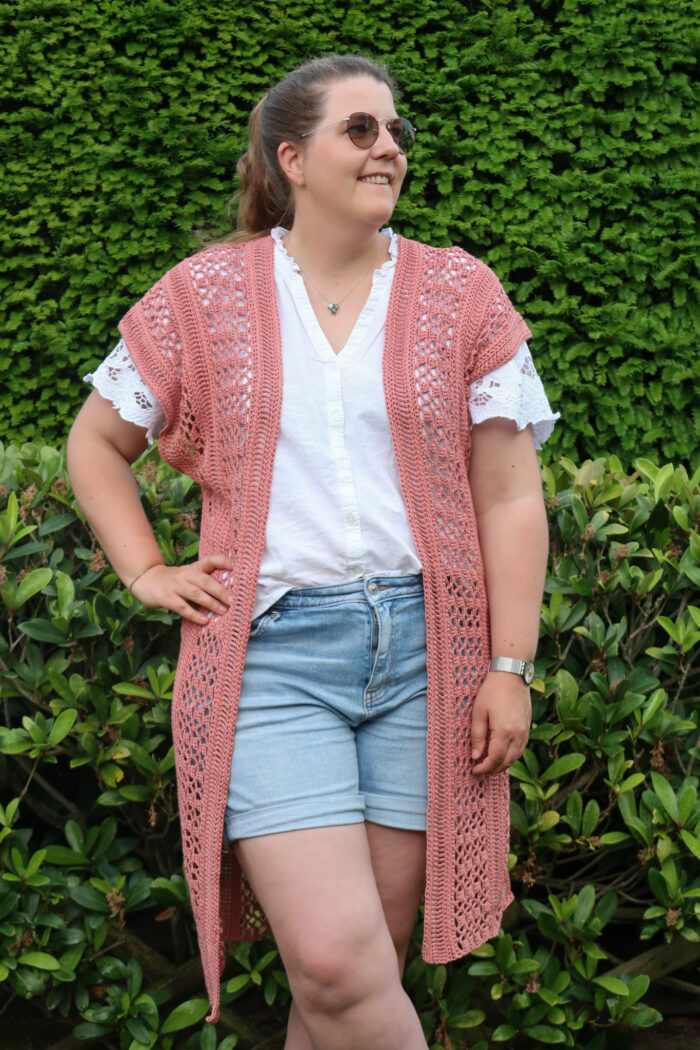
The Appaloosa knit sweater pattern is one of those. An elegant everyday sweater with a comfy loose fit and of course great drape.
It’s simple construction makes it a great garment pattern for advanced beginners.
No time right now? Pin this Appaloosa knit a sweater pattern for later!

Scroll down for the free version but I recommend you purchase the ad-free PDF Pattern to get all the instructions and pictures in a nice PDF you can print and take notes on without relying on your phone or an internet connection, I’ve got you covered!
The Appaloosa Sweater knitting pattern is available in my shop, on Etsy Shop and on Ravelry. Make sure to add it to your favorites / queue before you forget.

*This post contains affiliate links (only for products I love, use and spend my own money on obviously). This means I earn some yarn money if you make a purchase through one of these links (of course at no extra cost for you!), which I promise to use to create more awesome patterns like this one. All opinions are my own. See my full disclosure here.
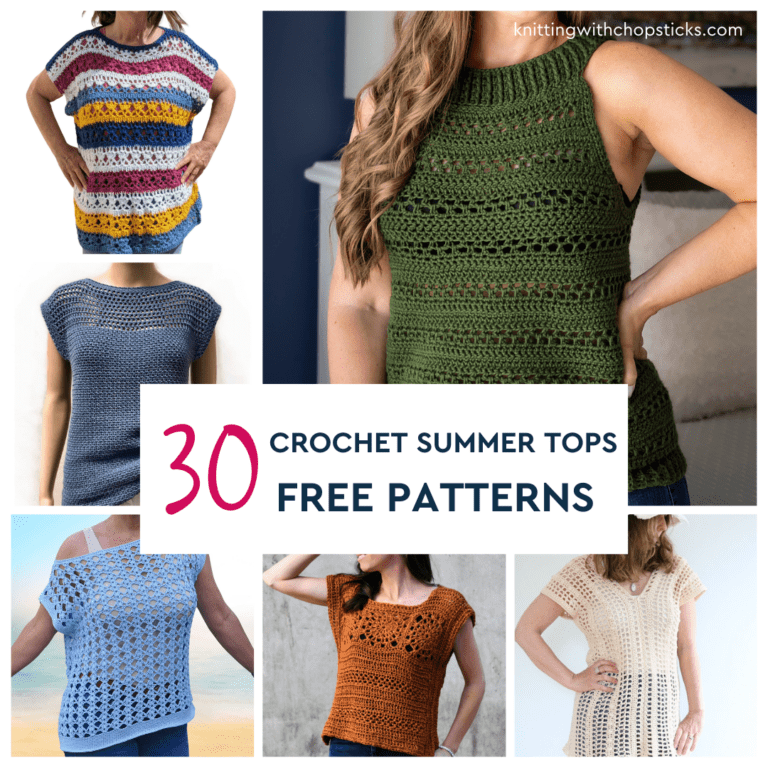
More Sweater Patterns You'll Love View All

Before you Start your Knit Sweater
The Yarn
I used the gorgeous DK yarn from Biffsugar yarns in their Cove colorway which is absolutely captivating to work up. I could not stop knitting just to see which shade of blue, brown or white would show in the next stitches.
This yarn is soft, really comfortable to work with and so nice on the skin.

Materials
- 4.5 mm/ US 7 knitting needles. I use my circular needles for convenience but you can use straight needles for this pattern. Confused about all these types of knitting needles? Here’s a complete overview that will answer all your questions.
- Biffsugar Yarns DK 75/25 Superwash Merino, Nylon (225m / 246 yards, 100g) in Cove colorway:
- XS: 4 skeins
- S: 5 skeins
- M: 5 skeins
- L: 6 skeins
- XL: 6 skeins
- 2XL: 7 skeins
- 3XL: 7 skeins
- 4XL: 8 skeins
- 5XL: 8 skeins
- Tapestry needle to weave in the ends. I love this set as it has different eye sizes for different yarn thicknesses and it comes in a small tube which is very convenient so I don’t lose them.
- 4 stitch markers
Size
The sweater is available in the following sizes: XS to 5XL. Sizes are noted throughout the pattern in the following way: M (XS, S, L, XL, 2XL, 3XL, 4XL, 5XL). The pictures illustrate the medium size.
Tip: Don’t want to get confused by all these numbers. Get the ad-free PDF version and start by highlighting your size throughout the pattern.
Final sweater bust measurements are: 126 (105, 116, 137, 147, 158, 168, 179, 189.5) cm or 49.5 (41.25, 45.5, 54, 57.75, 61.75, 66, 70.5, 74.5)”
The sweater is designed with an oversized fit 25 – 30 cm / 10” – 12” ease.
Sick of all the yarn jargon and conversions?
US vs UK, abbreviations, imperial vs metric, yarn weights, etc?

Gauge
The gauge for this pattern, in garter stitch, is 19 st by 27 rows for a 10 cm by 10 cm square (4” by 4”).

Abbreviations & Instructions
- st = stitch
- k = knit
- p = purl
- yo = yarn over
- k2tog = knit 2 stitches together
Sick of all the yarn jargon and conversions?
US vs UK, abbreviations, imperial vs metric, yarn weights, etc?
Repeat instructions between [] the indicated number of times or until the end of the round.
The final number of stitches is indicated at the end of the row between < >.
Special Stitches and Techniques
- Garter stitch = knit on both sides of the project.
- Stockinette stitch = knit on the right side and purl on the wrong side of the project.
- Add a stitch at the end of a row = cast on one stitch at the end of the row. Using your left hand, create a loop by flipping your wrist counter-clockwise. Slip the needle through the loop that you just created. The video below shows you how.
- Eyelets can look impressive but they are actually much easier to make than you’d think. This short video shows you how to make them.
Tips and Tricks
- When using hand-dyed yarn, each skein is different. Alternate skeins by knitting 2 rows with one skein then changing skeins to have a more uniform color throughout your project.
The Actual Sweater Pattern
The Sweater Front Panel
On 4.5mm / US 7 needles cast on 120 (100, 110, 130, 140, 150, 160, 170, 180) st.
[k1, p1] repeat across for 6 rows.
I use a stitch marker between the eyelets and stockinette sections so I don’t need to count on every row. Place your stitch markers as follows: 10 st, 44 (34, 39, 49, 54, 59, 64, 69, 74) st, 12 st, 44 (34, 39, 49, 54, 59, 64, 69, 74) st, 10 st.

Eyelet Repeat:
Row 1: K2, [yo, k2tog, k2] twice, k44 (34, 39, 49, 54, 59, 64, 69, 74), [yo, k2tog, k2] 3 times, k44 (34, 39, 49, 54, 59, 64, 69, 74), [yo, k2tog, k2] twice, k2
Row 2 – 4: Stockinette st for 3 rows (ie, p 1 row, k 1 row, p 1 row).
Row 5: K2 [k2, yo, k2tog] twice, k44 (34, 39, 49, 54, 59, 64, 69, 74), [k2, k2tog, yo] 3 times, k44 (34, 39, 49, 54, 59, 64, 69, 74), [k2, yo, k2tog] twice, k2.
Row 6 – 8: Stockinette st for 3 rows (i.e., p 1 row, k 1 row, p 1 row).


Repeat eyelet sections until your work is 40 cm /15.75” long. Repeat rows 1 to 4 one more time.
From now on, only the middle section is worked with eyelets. The sides are done in simple stockinette st. This part is where the armholes will be.
Tip: Keep your stitch markers in place as you will need them again later.
Row 1: K54 (44, 49, 59, 64, 69, 74, 79, 84), [k2, yo, k2tog] 3 times, k54 (44, 49, 59, 64 , 69, 74, 79, 84).
Row 2 – 4: Stockinette st for 3 rows.
R5: K54 (44, 49, 59, 64 , 69, 74, 79, 84), [yo, k2tog, k2] 3 times, k54 (44, 49, 59, 64 , 69, 74, 79, 84).
Row 6 – 8: Stockinette st for 3 rows.

Repeat these 8 rows for 5 cm /2”.
The Shoulders – Right Panel
To form the opening for the neck, both sides of the sweater are worked separately from here onwards. You will add a couple of stitches in the V neck on each side to make a small garter stitch border to avoid curling:
- K54 (44, 49, 59, 64, 69, 74, 79, 84), k2, yo,
k2tog, k2. Add a stitch at the end of the row*. <61 (51, 56, 66, 71, 76, 81,
86, 91) st> - Purl across.
- K54 (44, 49, 59, 64 , 69, 74, 79, 84), k6, p1
and add a stitch at the end of the row. <62 (52, 57, 67, 72, 77, 82, 87, 92) st> - Purl across.
*Refer to the special stitches and techniques section if needed.

Repeat the following 8 rows until you reach 42 (40, 40, 42, 43, 44, 45, 45, 46) cm / 16.5 (15.75, 15.75, 16.5, 17, 17.25, 17.75, 17.75, 18)” from the neck opening:
Row 1: K54 (44, 49, 59, 64, 69, 74, 79, 84), yo, k2tog, k2, yo, k2tog, p2.
Row 2: Purl across.
Row 3: K54 (44, 49, 59, 64, 69, 74, 79, 84), k6, p2.
Row 4: Purl across.
Row 5: K54 (44, 49, 59, 64, 69, 74, 79, 84), k2, yo, k2tog, k2, p2.
Row 6: Purl across.
Row 7: K54 (44, 49, 59, 64, 69, 74, 79, 84), k6, p2.
Row 8: Purl across.

On the next row, k54 (44, 49, 59, 64, 69, 74, 79, 84), yo, k2tog, k2, yo, k2tog, p2. Turn and cast off the 2 garter stitch border stitches but don’t continue the row. Leave this panel on the side and work up the right panel.
The Shoulders – Left Panel
Join in the yarn on the side of the panel and
- Start with a purl row. Add 2 st at the end of
the row. <62 (52, 57, 67, 72, 77, 82, 87, 92) st> - P1, k1, yo, k2tog, k2, yo, k2 tog, k54 (44, 49, 59,
64, 69, 74, 79, 84). - Purl across; add 1 st at the end of the row.
<63 (53, 58, 68, 73, 78, 83, 88, 93)
st> - P2, k7, k54 (44, 49, 59, 64 , 69, 74, 79, 84).
- Purl across

Don’t worry if the V neck details aren’t perfect, we can fix that later.
Repeat the following 8 rows until you reach 42 cm / 16.5” from the neck opening. Finish on a row 4.
Row 1: P2, k3, yo, k2tog, k2, k54 (44, 49, 59, 64, 69, 74, 79, 84).
Row 2: Purl across.
Row 3: P2, k7, k54 (44, 49, 59, 64, 69, 74, 79, 84).
Row 4: Purl across.
Row 5: P2, k1, yo, k2tog, k2, yo, k2tog, k54 (44, 49, 59, 64, 69, 74, 79, 84).
Row 6: Purl across.
Row 7: P2, k7, k54 (44, 49, 59, 64, 69, 74, 79, 84).
Row 8: Purl across.
On the next row, cast off the 3 new stitches, don’t continue knitting the row.

Back Panel
It’s now time to rejoin both sections to form the back panel.

Go back to the first panel and use that yarn to knit the right panel section, joining both sides : k2, yo, k2tog, yo, k2, k54 (44, 49, 59, 64, 69, 74, 79 84). Leave a long tail of the other section’s yarn to sew the finishing touches.
The back panel is identical to the front panel but in reverse order. First the section with only the central eyelets then the panel with eyelets in the middle and on both sides.
Knit 3 rows in stockinette stitch
Row 1: K54 (44, 49, 59, 64, 69, 74, 79 84), [yo, k2tog, k2] 3 times, k54 (44, 49, 59, 64, 69, 74, 79 84).
Row 2 – 4: Stockinette st for 3 rows.
R5: K54 (44, 49, 59, 64, 69, 74, 79, 84), [k2, yo, k2tog] 3 times, k54 (44, 49, 59, 64, 69, 74, 79, 84).
Row 6 – 8: Stockinette st for 3 rows.
Repeat these 8 rows for 5 cm / 2”.
From now on add back the eyelets on the edges.
Eyelet Repeat (identical to front panel):
Row 1: K2, [yo, k2tog, k2] twice, k44 (34, 39, 49, 54, 59, 64, 69, 74), [yo, k2tog, k2] 3 times, k44 (34, 39, 49, 54, 59, 64, 69, 74), [yo, k2tog, k2] twice, k2.
Row 2 – 4: Stockinette st for 3 rows (i.e., p 1 row, k 1 row, p 1 row).
Row 5: K2 [k2, yo, k2tog] twice, k44 (34, 39, 49, 54, 59, 64, 69, 74), [k2, k2tog, yo] 3 times, k44 (34, 39, 49, 54, 59, 64, 69, 74), [k2, yo, k2tog] twice, k2
Row 6 – 8: Stockinette st for 3 rows (i.e., p 1 row, k 1 row, p 1 row).
Repeat this eyelet section for 40 cm / 15.75”.
Finish with a 1 by 1 ribbing section similar to the start of the front panel:
[k1, p1] repeat across for 6 rows
Cast off and leave a long tail for sewing
Sleeves
On 4.5mm / US 7 knitting needles cast on 70 (64, 66, 74, 82, 91, 98, 105, 110) st.
Repeat the following 5 times:
- Knit 6 rows in stockinette st.
- Decrease row: k, k2tog, k across until last 3st,
k2tog, k. - Purl 1 row.
Then repeat 4 times:
- Knit 4 rows in stockinette st.
- Decrease row: k, k2tog, k across until last 3st,
k2tog, k. - Purl 1 row.

Finally, repeat 3 times:
- Knit 2 rows in stockinette st.
- Decrease row: k, k2tog, k across until last 3st,
k2tog, k. - Purl 1 row.
Continue knitting in stockinette stitch without decreases until you reach a total length of 42 (41, 42, 43, 43, 44, 44, 46, 46) cm/ 16.5 (16, 16.5, 17, 17, 17.25, 17.25, 18, 18)”.
Finish with a 1*1 ribbing section:
[k1, p1] repeat across
Repeat for 6 rows total.
Blocking and Sewing
Carefully wet block the different parts before sewing.
Don’t skip this step as it can make a huge difference. Read my detailed tutorial on why block, how-to, and all my tips and tricks if you need help.
With the wrong sides of your project on the outside, sew the sides up until the end of the eyelet section, but don’t weave in the end just yet.
Attach the sleeve to the main panel. I like to fold the sleeve in half and start at the top to make sure it’s positioned in the middle.
Go back to your yarn for the side and sew up until the sleeve. Close the sleeve.
Repeat the process for the other sleeve.
The front V neck might need a stitch to close up any gap before the start of the garter edges.
On the back side, make a stitch or two to attach the cast-off stitches.
Enjoy your sweater! I LOVE seeing what you make so tag me @knittingwithchopsticks or use #knittingwithchopsticks and share a pic!