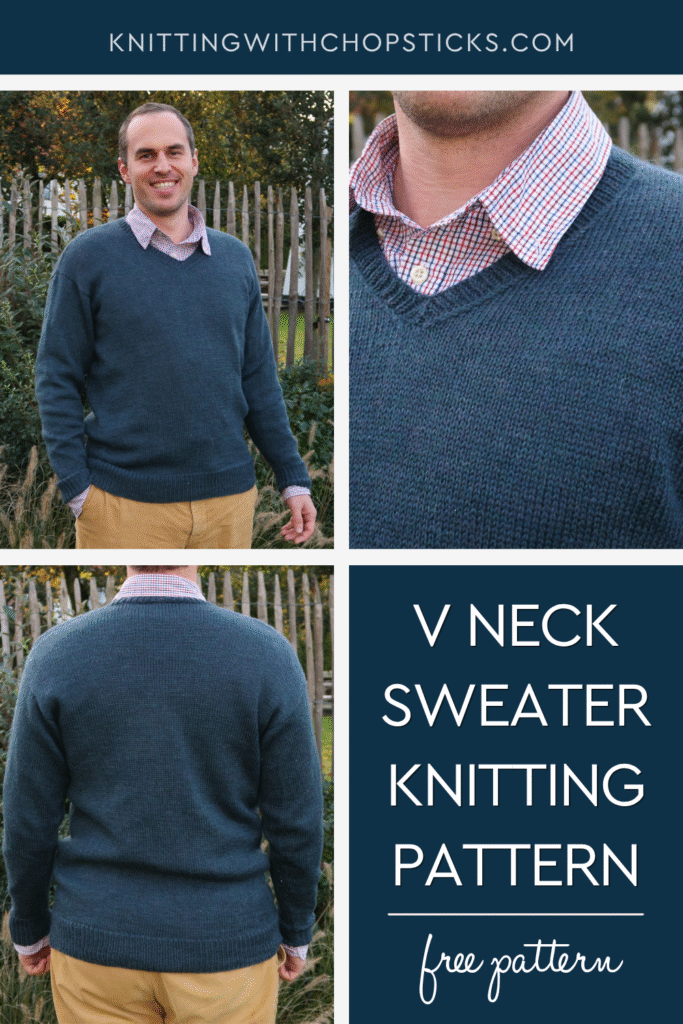
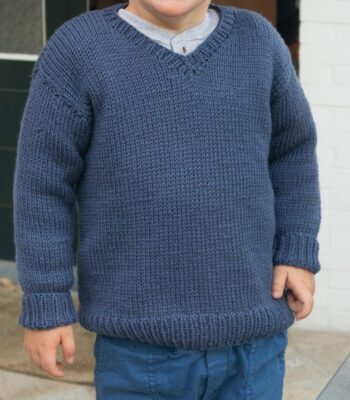
Arnaud’s Classic V-Neck Sweater

A new men’s sweater knitting pattern, Arnaud’s Classic V Neck Sweater, is now a free knitting blanket pattern here on the blog. Read all about this free knitting patterns for men inspiration, scroll down to view the full free pattern or purchase an ad free PDF from the links below.
No time right now? Pin this pullover knitting pattern free for later!
*This post contains affiliate links (only for products I love, use and spend my own money on obviously). This means I earn some yarn money if you make a purchase through one of these links (of course at no extra cost for you!), which I promise to use to create more awesome patterns like this one. All opinions are my own. See my full disclosure here.
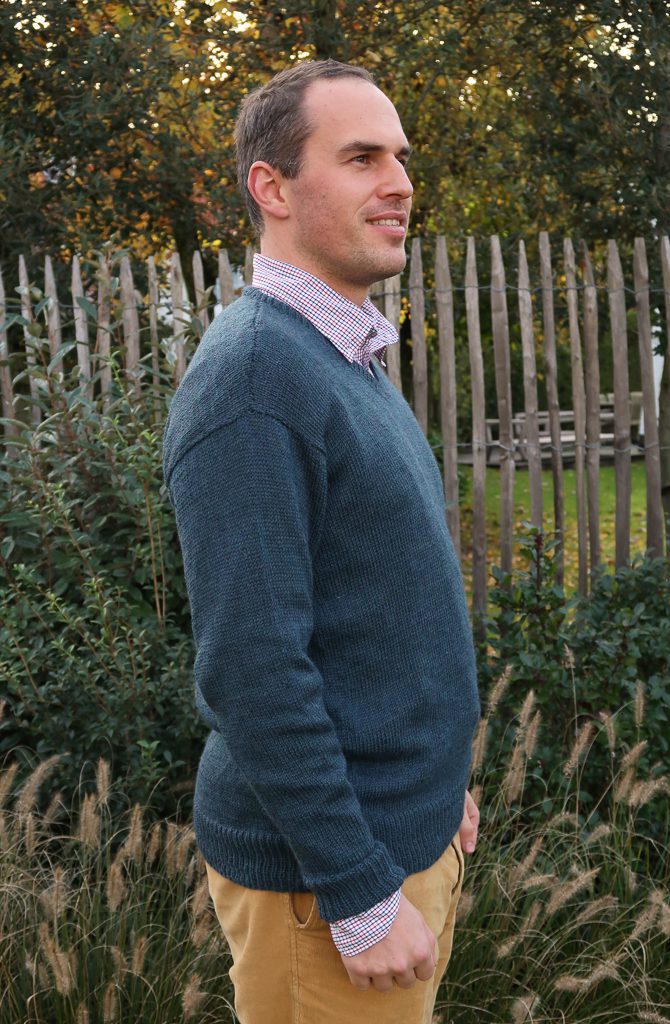
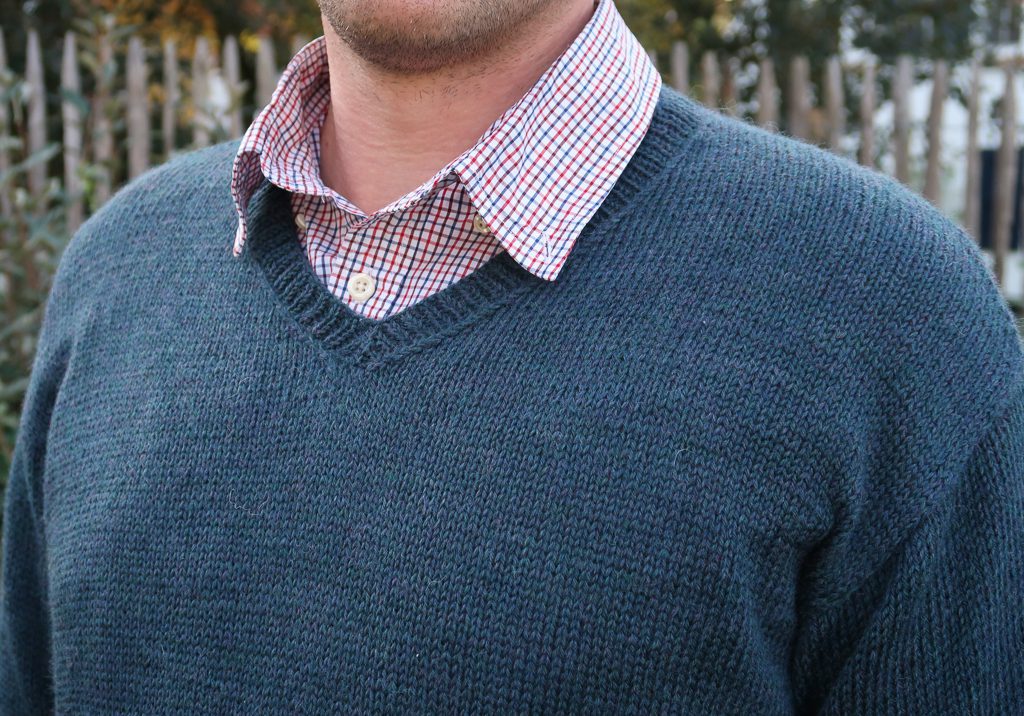
It’s so hard to find what to make to the special men in your life! This V neck men sweater knitting pattern isn’t just any sweater. Classic and elegant, this is the pattern for the simple everyday v neck sweater. Worn with a shirt or polo for a more formal look or over a simple T-shirt and jeans, it fits for any occasion.
With its simple construction and detailed step-by-step instructions, the Arnaud’s Classic V Neck Sweater is an easy-level knitting pattern available in sizes S to 5XL
Handmade Yet Looking Storebought!
It doesn’t get much more storebought looking than that! The Arnaud Classic V Neck Sweater pattern is a handmade version of your classic, timeless V neck men sweater.
My hubby will model any handmade items I ask him to, but when it comes to actually wearing them, he usually finds them too warm and not as comfortable. So when I decided to make him a new sweater I knew I had to level up my game if he was going to actually wear it.
I took his favorite sweaters (the same one he has in 5 different colors) and based the Arnaud Classic V Neck Sweater fit and shaping on it to ensure a good and comfortable fit and I couldn’t be happier with the final result!
Both my dad and brothers asked me to make them one when I told them it wasn’t a storebought sweater but I made it!
Perfect Fit Guide
Always guessing your size when knitting or crocheting garments?

V Neck Sweater Pattern Knitting Construction
The men’s sweater is knitted from the bottom up. Both front and back panels are worked in one piece knitting in the round until the underarm. The piece is then divided in 2 parts working the front and back panel separately. A few stitches are cast off on each side of the panels for simple square armhole shaping. The back panel is then worked straight with some shoulder shaping. The front panel is divided in 2 parts to shape the V-neck and shoulders.
Both panels are then sewed together at the shoulders.
Sleeves are worked separately, from the cuff up and sewed to the sweater body. Finally, stitches are picked up to form the V-neck shaping.


Downloadable PDF Arnaud’s Classic V Neck Sweater Pattern Knitting
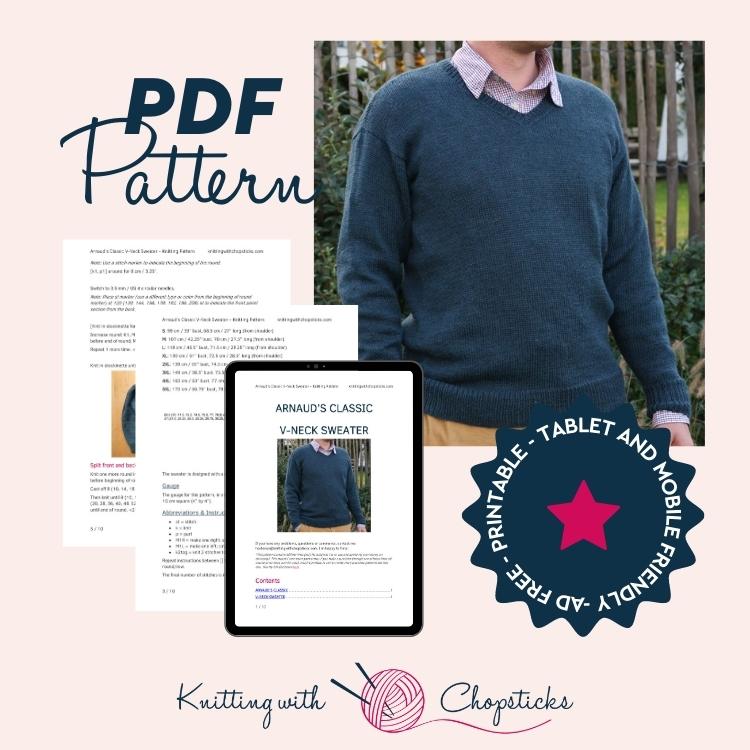
Grab the printable PDF of the Arnaud’s Classic V Neck Sweater knitting pattern now in my shop, Etsy shop or on Ravelry:
2025 Knit Bestseller Pattern Collection
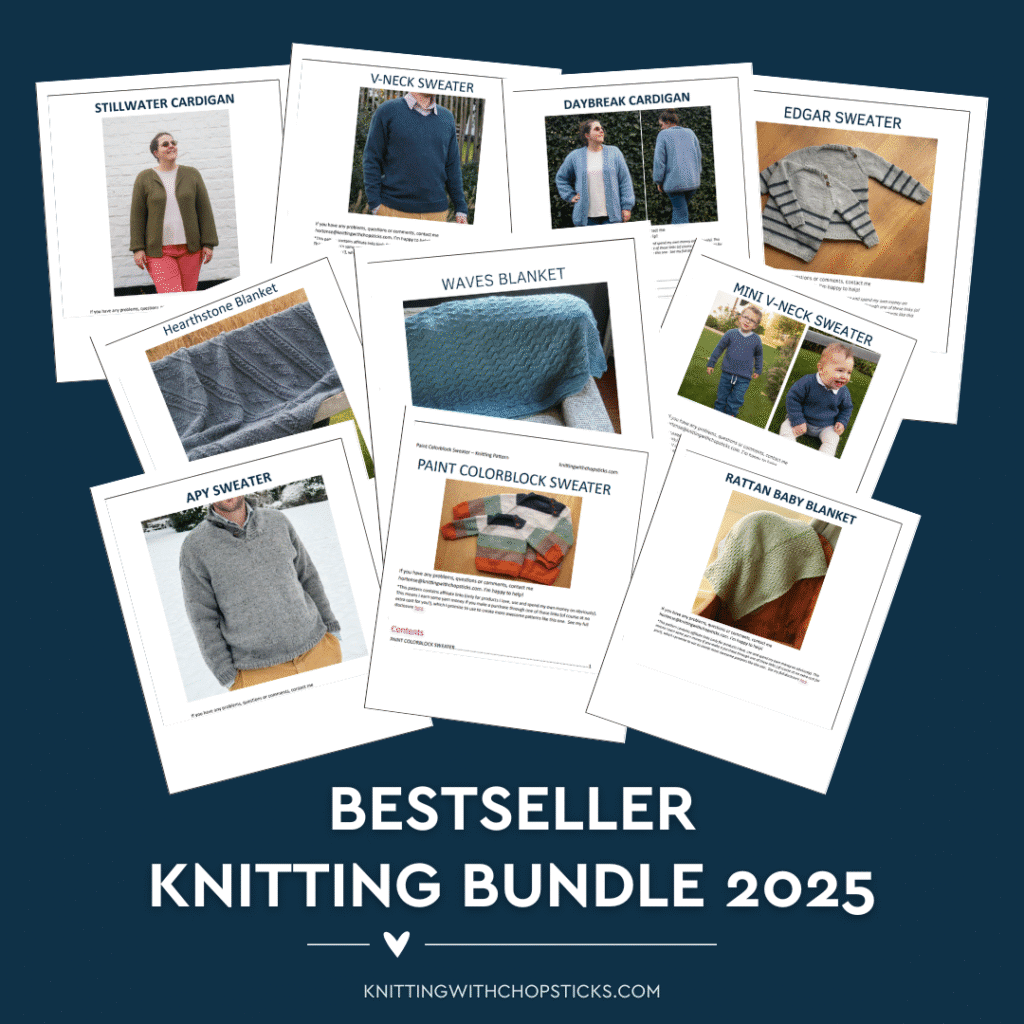
If this design caught your eye, you’re going to love the 2025 Knit Bestseller Pattern Collection — a handpicked set of this year’s most-made and most-loved knit designs.
You’ll get 10 top-selling knitting patterns that struck a chord with makers all year long: wearable sweaters, classic cardigans, and cozy blankets that are simple, satisfying, and easy to follow.
Each design builds confidence without overcomplicating things, making this collection perfect for knitters who want relaxing projects that turn out beautifully every time.
Sick of all the yarn jargon and conversions?
US vs UK, abbreviations, imperial vs metric, yarn weights, etc?

Grab the 2025 Knit Bestseller Pattern Collection here >>
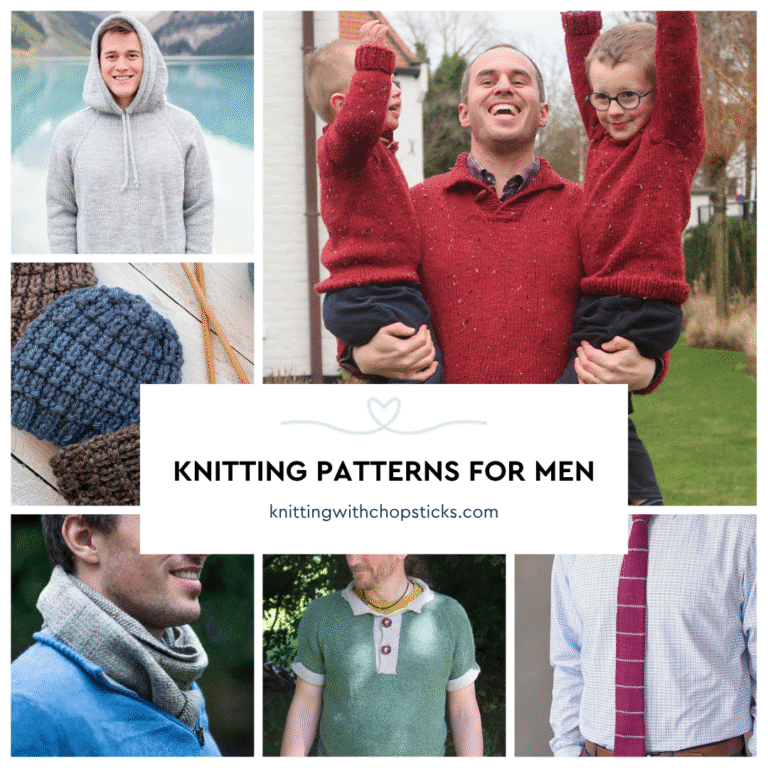
More Knitted Sweater patterns you'll Love


Before You Start Your Arnaud’s Classic V Neck Pullover Knitting Pattern Free
Materials
- 3 mm / US 2 circular knitting needles.
- 3.5 mm / US 4 circular knitting needles.
- Hobbii Highland Wool (Light weight (3), 100% Peruvian highland wool, 175 m / 191 yd, 50 g / 1.75 oz) in Wild River (14) colorway: 7 (8, 9, 10, 10, 11, 12, 13) skeins
- Tapestry needle to weave in the ends
- 2 Stitch markers
- Stitch holder. I like to use an unused cable from my interchangeable needle set but you can also use a scrap of yarn.
Sizes
The sweater knitting pattern is available in the following men sizes: S to 5XL. Sizes are noted throughout the pattern in the following way: S (M, L, XL, 2XL, 3XL, 4XL, 5XL). The pictures illustrate the Medium size.
Final garment measurements are:
S: 99 cm / 39” bust, 68.5 cm / 27” long (from shoulder)
M: 107 cm / 42.25” bust, 70 cm / 27.5” long (from shoulder)
L: 118 cm / 46.5” bust, 71.5 cm / 28.25” long (from shoulder)
XL: 130 cm / 51” bust, 72.5 cm / 28.5” long (from shoulder)
2XL: 139 cm / 55” bust, 74.5 cm / 29.25” long (from shoulder)
3XL: 149 cm / 58.5” bust, 75.5 cm / 29.75” long (from shoulder)
4XL: 160 cm / 63” bust, 77 cm / 30.25” long (from shoulder)
5XL: 170 cm / 66.75” bust, 78.5 cm / 31” long (from shoulder)

The sweater is designed with a classic fit 5 – 10 cm / 2” – 4” ease at the bust.
Gauge
The gauge for this pattern, in stockinette stitch, is 25 st by 30 rows for a 10 cm by 10 cm square (4” by 4”).
Abbreviations & Instructions
- st = stitch
- k = knit
- p = purl
- M1R = make one right; single right-leaning knit increase
- M1L = make one left; single left-leaning knit increase
- k2tog = knit 2 stitches together
Repeat instructions between [] the indicated number of times or until the end of the round/row.
The final number of stitches is indicated at the end of the round/row between < >.
Sick of all the yarn jargon and conversions?
US vs UK, abbreviations, imperial vs metric, yarn weights, etc?
Special Stitches and Techniques
- Stockinette stitch:
- In the round: knit continuously
- Worked flat: alternate knit rows on the right side and purl rows on the wrong side of your project.
- M1R: Insert your left needle from back to front, under the bar between the stitches (thus lifting it onto the left needle). Knit this bar through the front loop (this twists it into a nice little tight loop)
- M1L: Insert the left needle from front to back, under the bar between the stitches (thus lifting it onto the left needle). Knit this bar through the back loop (this twists it into a nice little tight loop).
If you are not familiar with this increase technique, I find this video tutorial very helpful.
- Picking up stitches: if you’re not familiar with this technique, this tutorial is very helpful.
- I recommend using the sloped bind off technique for the shoulder shaping. If you’re not familiar with this technique, this tutorial is very helpful.
- V-neck ribbing. The pattern includes complete instructions for the V-neck but if you’re new to V-neck ribbing shaping, this video tutorial will give you a more visual guide for the technique used here. (note, the number of stitches picked up is very different due to the difference in yarn and V-neck size).
Construction
The men’s sweater is knitted from the bottom up. Both front and back panels are worked in one piece knitting in the round until the underarm. The piece is then divided in 2 parts working the front and back panel separately. A few stitches are cast off on each side of the panels for simple square armhole shaping. The back panel is then worked straight with some shoulder shaping. The front panel is divided in 2 parts to shape the V-neck and shoulders.
Both panels are then sewed together at the shoulders.
Sleeves are worked separately, from the cuff up and sewed to the sweater body. Finally, stitches are picked up to form the V-neck shaping.
The Actual Arnaud’s Classic V Neck Sweater Knitting Pattern Free
Sweater Body
With your 3 mm / US 2 circular needles, cast on 240 (260, 288, 316, 340, 364, 392, 416) st and join in the round.
Note: Use a stitch marker to indicate the beginning of the round.
[k1, p1] around for 8 cm / 3.25”.
Switch to 3.5 mm / US 4 circular needles.
Note: Place st marker (use a different type or color from the beginning of round marker) at 120 (130, 144, 158, 170, 182, 196, 208) st to indicate the front panel section from the back panel section. Increases are worked on the sides.
[Knit in stockinette for 9 rounds.
Increase round: K1, M1R, knit until 1 st before marker, M1L, k2, M1R, knit until 1 st before end of round, M1L, k1] <244 (264, 292, 320, 344, 368, 396, 420) st>
Repeat 1 more time. <248 (268, 296, 324, 348, 372, 400, 424) st>
Knit in stockinette until total length reaches 48 cm / 19” (including ribbed edge).
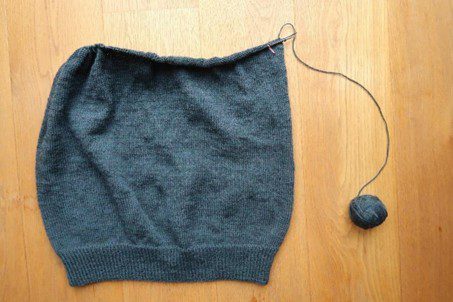
Split Front and Back
Knit one more round in stockinette st until last 8 (10, 14, 18, 20, 24, 26, 30) st before beginning of round marker, cast off 8 (10, 14, 18, 20, 24, 26, 30) st.
Cast off 8 (10, 14, 18, 20, 24, 26, 30) first st of the next round.
Then knit until 8 (10, 14, 18, 20, 24, 26, 30) st from middle st marker, cast off 16 (20, 28, 36, 40, 48, 52, 60) st (half before the marker and half after marker), knit until end of round. <216 (228, 240, 252, 268, 276, 296, 304) st>

You will now knit each side separately. Leave first half of the stitches on a stitch holder (front panel). Make sure you secure them.
Back Panel
Work with the other half of the stitches (back panel) in stockinette (alternating knit and purl rows) until you reach 68.5 (70, 71.5, 72.5, 74.5, 75.5, 77, 78.5) cm / 27 (27.5, 28, 28.5, 29.25, 29.75, 30.25, 31)”. <108 (114, 120, 126, 134, 138, 148, 152) st>
Note: Use slanted bind off to shape for shoulders leaving middle st untouched.
Cast off 3 st at the beginning of every row for 12 rows. <72 (78, 84, 90, 98, 102, 112, 116) st>
Bind off remaining st and leave a long tail for sewing.
Front Panel
Go back to the front panel stitches, join yarn starting on a RS row
Tip: When joining yarn leave a tail you’ll use to sew the sleeve.
Knit 3.5 (5, 6.5, 7.5, 9.5, 10.5, 12, 13.5) cm / 1.25 (2, 2.5, 3, 3.75, 4.25, 4.75,
5.25)” in stockinette stitch.
Divide stitches in half, you’ll work each side separately to form the V neck.
Shoulder 1:
Row 1: Sl1k, k50 (53, 56, 59, 63, 65, 70, 72), k2tog, k1. <53 (56, 59, 62, 66, 68, 73, 75) st>
Row 2: Sl1p, purl across.
Row 3: Sl1k, k until last 3 st, k2tog, k1. <52 (55, 58, 61, 65, 67, 72, 74) st>
Repeat Row 2 and 3 fourteen times. <38 (41, 44, 47, 51, 53, 58, 60) st>
Row 4: Sl1p, purl across.
Row 5: Sl1k, k across.
Row 6: Sl1p, purl across.
Row 7: Sl1k, k until last 3 st, k2tog, k1. <37 (40, 43, 46, 50, 52, 57, 59) st> Repeat Row 4 to 7 once. <36 (39, 42, 45, 49, 51, 56, 58) st>
Row 8: Sl1p, purl across.
Row 9: Cast off 3 st, k until end of row. <33 (36, 39, 42, 46, 48, 53, 55) st>
Note: Use sloped bind off to cast off the first 3 stitches which are for the shoulder shaping.
Row 10: Sl1p, purl across.
Row 11: Cast off 3 st, k until last 3 st, k2tog, k1. <29 (32, 35, 38, 42, 44, 49, 51) st>
Note: Use sloped bind off to cast off the first 3 stitches which are for the shoulder shaping.
Repeat Row 8 to 11 twice. <15 (18, 21, 24, 28, 30, 35, 37) st>
Shoulder 2:
Go back to the other half of the front panel stitches and join yarn at the V neck.
Row 1: Sl1k, k2tog, k51 (54, 57, 60, 64, 66, 71, 73). <53 (56, 59, 62, 66, 68, 73, 75) st>
Row 2: Sl1p, purl across.
Row 3: Sl1k, k2tog, k across. <52 (55, 58, 61, 65, 67, 72, 74) st>
Repeat Row 2 and 3 fourteen times. <38 (41, 44, 47, 51, 53, 58, 60) st>
Row 4: Sl1p, purl across.
Row 5: Sl1k, k across.
Row 6: Sl1p, purl across.
Row 7: Sl1k, k2tog, k across. <37 (40, 43, 46, 50, 52, 57, 59) st>
Repeat Row 4 to 7 once. <36 (39, 42, 45, 49, 51, 56, 58) st>
Row 8: Cast off 3 st, purl until end of row. <33 (36, 39, 42, 46, 48, 53, 55) st>
Note: Use sloped bind off to cast off the first 3 stitches which are for the shoulder shaping.
Row 9: Sl1k, k until end of row.
Row 10: Cast off 3 st, purl across. <30 (33, 36, 39, 43, 45, 50, 52) st>
Note: Use sloped bind off to cast off the first 3 stitches which are for the shoulder shaping–––
Row 11: Sl1k, k2tog, k across. <29 (32, 35, 38, 42, 44, 49, 51) st>
Repeat Row 8 to 11 twice. <15 (18, 21, 24, 28, 30, 35, 37) st>
Sleeves
Make 2.
With your 3 mm / US 2 knitting needles cast on 50 (50, 52, 54, 56, 60, 64, 70) st.
[k1, p1] across for 8 cm / 3.25”.
Switch to 3.5 mm / US 4 knitting needles.
Knit 1 row.
[Knit in stockinette for 3 rows.
Increase round: k1, M1R, knit until last st, M1L, k1]. <52 (52, 54, 56, 58, 62, 66, 72) st>
Repeat until you have 102 (110, 118, 122, 124, 128, 132, 138) st.
For sizes 2XL to 5XL only [Knit 1 row.
Increase round: k1, M1R, knit until last st, M1L, k1] <52 st> Repeat until you have X (X, X, X, 132, 138, 144, 152) st.
Knit in stockinette until total sleeve length is 57 (58, 60, 61, 62, 63, 64.5, 66) cm /
22.5 (22.75, 23.5, 24, 24.5, 24.75, 25.5, 26)”.
V-Neck
Before knitting the V neck, sew shoulders seams together.
With your 3 mm / US 2 circular needles pick up 146 st evenly around the neck opening (approximately 1 st per row / st around). Place a stitch marker at the V neck central stitch.
Neck Row: [K1, p1] until st before marked st, slip next 2 st as if to k2tog, make next st in pattern, pass first of the sl stitches over those 2 stitches, continue [k1, p1] in pattern until end of round. <145 st> Work Neck Row five more times.
Cast off.
Assembly
Attach the sleeves to the sweater body as follows.
Fold the sleeve in half and start by sewing the middle to the shoulder seam. Sew down on both sides. Be careful to sew the sleeve to the shoulder shaping indent in the body correctly. Finish sewing the sides together and close the sleeves all the way to the end of the cuffs
Blocking
You are done with the knitting part. Make sure to weave in all the ends.
To make your top even prettier, help even your stitches and open up your eyelets, wet block your project.
Don’t skip this step as it can make a huge difference. Read my detailed tutorial on why block, how-to, and all my tips and tricks if you need help.
Copyright 2023 of Knitting with Chopsticks.