Twinfold Cowl Knitting Pattern

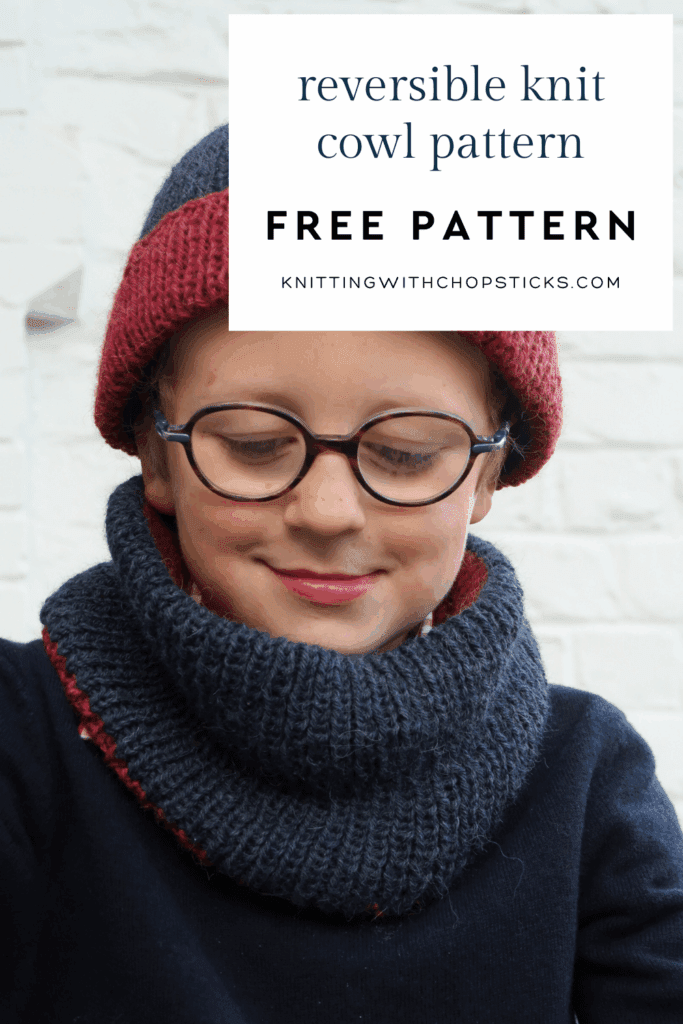
A new knit cowl pattern – the Twinfold Cowl – is now a free knitting pattern here on the blog. Read all about this reversible knit cowl pattern, scroll down to view the full free pattern or purchase an ad free PDF from my shop, Etsy shop or Ravelry shop.
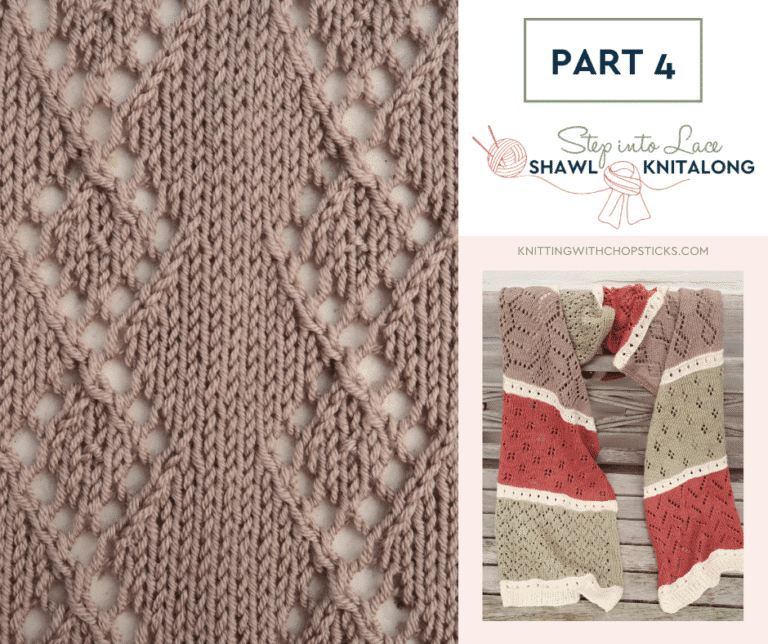
No time right now? Pin this free knitting pattern cowl scarf for later!
*This post contains affiliate links (only for products I love, use and spend my own money on obviously). This means I earn some yarn money if you make a purchase through one of these links (of course at no extra cost for you!), which I promise to use to create more awesome patterns like this one. All opinions are my own. See my full disclosure here.
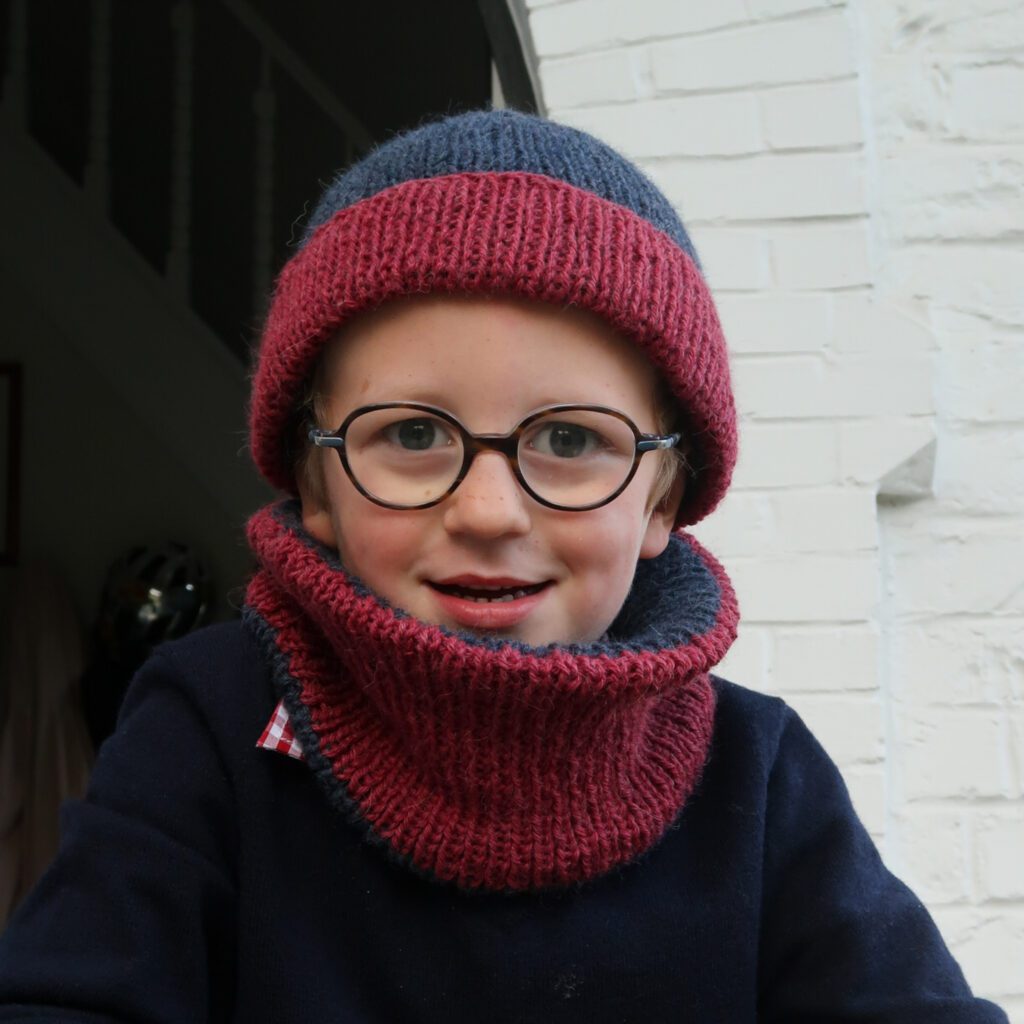
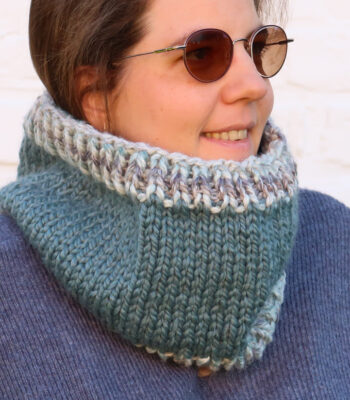
The Twinfold Cowl is a cozy, fully reversible knit that gives you options: you can keep things simple, or use it as a gentle way to try a new technique without pressure. The cowl is worked seamlessly and built entirely from soft, stretchy ribbing, which means it fits almost anyone. I’m wearing the small size, and so are my toddlers. If you like practical, flexible knits or need a quick handmade gift, this one is a great choice.
The pattern includes two construction paths. You can work a classic cast-on and seam the cowl closed, or you can try the provisional cast-on with a grafted join for a smooth, uninterrupted finish. Both versions are included, and every technique has a video linked. If the new skills don’t click right away, you can switch back to the simpler option and still end up with a polished result.
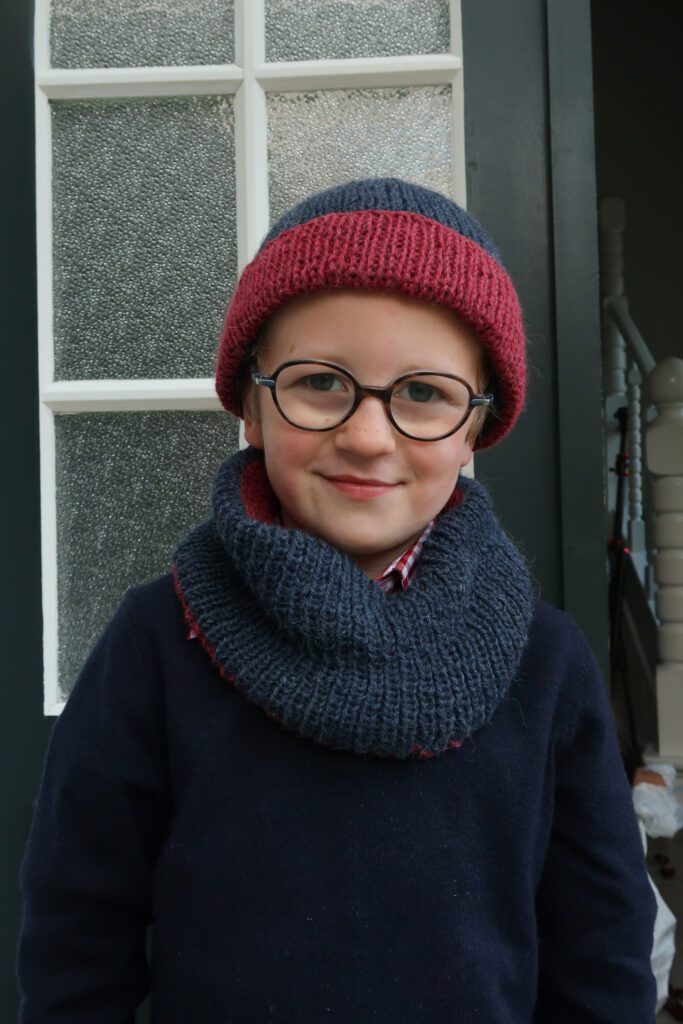
Designed in two colors, the Twinfold Cowl is completely reversible, and there’s a neat color-change trick inside the pattern that gives the transition a clean, seamless look. It’s a small detail that makes the finished piece feel extra professional while staying easy enough for adventurous beginners.
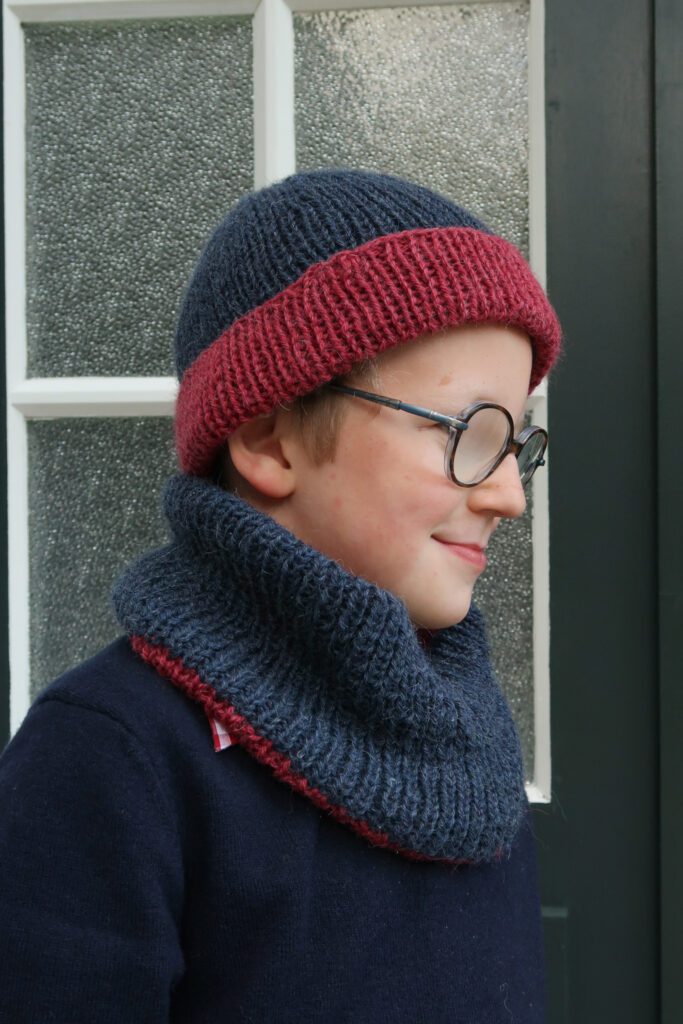
There’s also a matching hat to complete the set. The hat pattern will be free on the blog next week, and it comes in newborn through adult large. If you prefer having everything in one place, the PDF already includes both the cowl and the hat so you can cast on the full set right away.
Twinfold Cowl Knitting Pattern Construction
The cowl is worked from bottom-up in the round. I recommend a provisional cast on for the most seamless look (sewed option also included). You’ll work each color for the same height and when you reach the joining point, you’ll graft the stitches together with the cast on stitches for a perfectly seamless look. Alternatively you can use a classic cast on and cast off and sew both ends together for an easier knit.
Downloadable PDF for Twinfold Cowl and Hat Pattern Set
The PDF pattern includes both the Twinfold Cowl and matching hat (coming to the blog soon) instructions in one PDF.
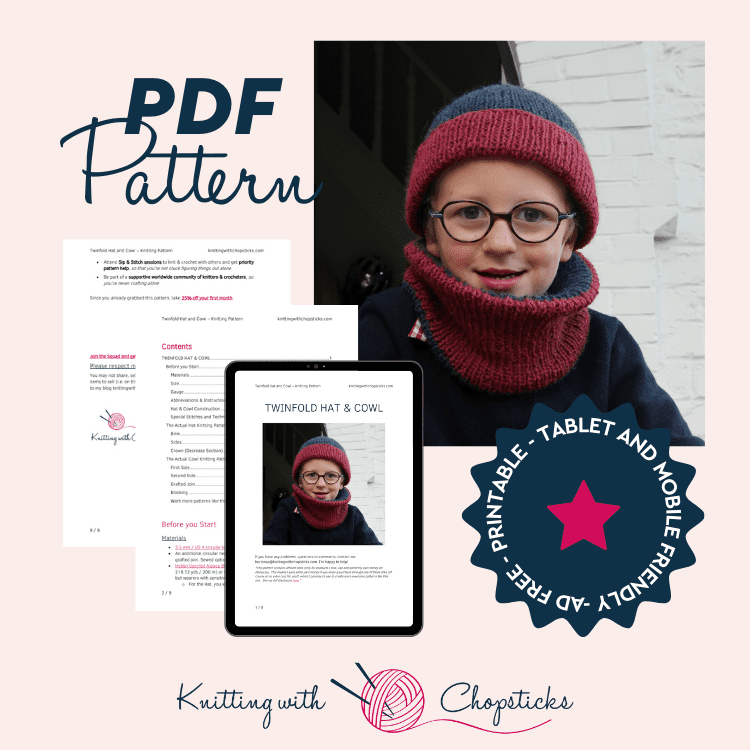
Grab the printable PDF of the Twinfold Cowl and Hat Pattern Set now in my shop, Etsy shop or on Ravelry shop:
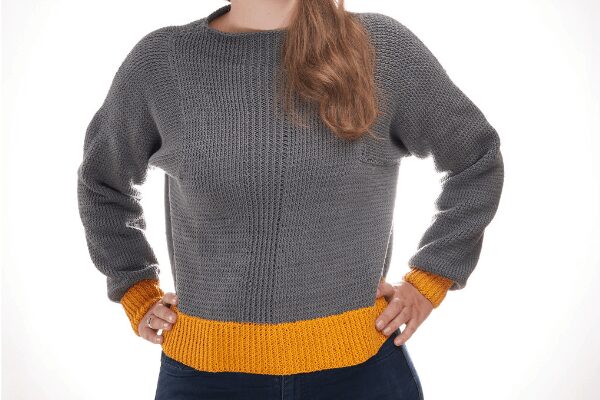
More Cowl Knitting Pattern you'll love

Before You Start Your Twinfold Knit Cowl Pattern
Materials
- 3.5 mm / US 4 circular knitting needles or DPNs.
- An additional circular needle (similar size or smaller size) if working the grafted join. Sewed option also detailed below.
- Hobbii Upcyled Alpaca Blend (100g, 34% Acrylic, 33% Alpaca, 33% Wool, 218.72 yds / 200 m) or similar yarn. This makes beautifully warm accessories but wearers with sensitive skin may prefer to substitute a less fluffy yarn. For the Cowl, you will need 1 skein / 90 (110) m / 100 (120) yds in each of the two colors
- Tapestry needle to weave in the ends
- Tape measure
- 4 Stitch markers (for the hat)
Size
The cowl knitting pattern is provided in two sizes, each of which can be worn by an adult or child depending on fit preference.
Sizes are noted throughout the pattern in the following way: small cowl (large cowl).
The pictures illustrate the small cowl size.
Final measurements are:
- Cowl circumference: 37.5 (45) cm / 15 (17.5)”
- Height: 15 cm / 6”.
The cowl is designed to be adjustable and worn with the wearer’s preferred ease. It is easy to adjust to any dimension you like; just add or subtract multiples of 2 stitches.
Gauge
The gauge for this pattern with 3.5 mm / US 4 needles, in [k1, p1] ribbing, is 32 st by 26 rows for a 10 cm by 10 cm square (4” by 4”).
Abbreviations & Instructions
- st = stitch
- k = knit
- p = purl
- k2tog = knit 2 stitches together; right leaning decrease
- ssk = slip, slip, knit; left leaning decrease
Repeat instructions between [] the indicated number of times or until the end of the round/row.
The final number of stitches is indicated at the end of the round/row between < >.
Reversible Cowl Knit Pattern Construction
Sick of all the yarn jargon and conversions?
US vs UK, abbreviations, imperial vs metric, yarn weights, etc?

The cowl is worked from bottom-up in the round. I recommend a provisional cast on for the most seamless look (sewed option also included). You’ll work each color for the same height and when you reach the joining point, you’ll graft the stitches together with the cast on stitches for a perfectly seamless look. Alternatively you can use a classic cast on and cast off and sew both ends together for an easier knit.
Special Stitches and Techniques
- Grafting in stockinette (aka kitchener stitch) (for the cowl – optional):
This graft will create a knit row on the RS, to match the knit row created during the colour change on the cowl (which creates a neat color change):
P-wise = purl-wise
K-wise = knit-wise
- Setup Step A: Go through front first st P-wise, leaving st on needle.
- Setup Step B: Go through back first st K-wise, leaving st on needle.
- Step 1: Go through front first st K-wise, dropping st off needle.
- Step 2: Go through front next st P-wise, leaving st on needle.
- Step 3: Go through back first st P-wise, dropping st off needle.
- Step 4: Go through back next st K-wise, leaving st on needle.
Repeat steps 1-4 until all stitches to be grafted are secured and removed from the needles. On the final pair of sts, there will be no next st to work into, so steps 2 and 4 aren’t needed.
- Secured brim (for the hat – optional): Stitches for the side of the hat are worked to the same length as the brim and attached to the cast on edge of the brim to ensure the color change and fold remain at the exact same spot, as follows:
- optionally mark the first stitch of the cast on edge so it’s easy to find,
- fold the brim to the sides of the hat so the purl row is concealed on the inside and the cast on edge is level with the next round to be worked,
- insert needle through both the marked/corresponding st on the cast on edge and the next st to be worked in the usual manner according to whether the next stitch is a knit or purl stitch and knit or purl both together until all cast on sts are joined.
- Provisional cast on (for the cowl – optional): I like the crocheted provisional cast on but you can use any provisional cast on method. Using a similar size crochet hook and a piece of scrap yarn you’ll chain the same number of chains as you need stitches. Then with your working yarn you’ll pick up a stitch in each chain. If you’re not familiar with this technique, refer to this detailed video tutorial.
The Actual Twinfold Free Cowl Knitting Pattern
First Side
With your 3.5 mm / US 4 needles and blue yarn, cast on 120 (136) st using a provisional cast on technique and join in the round.
Note: If you’re not comfortable using a provisional cast on and grafting to close the cowl, you can substitute for a regular cast on and cast off then sew the ends together instead. This will create a seam on the inside of the cowl making it a tiny bit less polished and seamless but shouldn’t be too visible.
[K1, p1] around for 15 cm / 6”.
Second Side
Switch to red yarn.
Purl around for one round to create a smooth color change.
[K1, p1] around for 15 cm / 6”.
Crafted Join
Remove the provisional cast on, placing stitches on an additional circular needle (of similar or smaller size).
Turn and fold the cowl along the color change so that the purl row is concealed on the inside.
Matching each stitch with the corresponding stitch on the additional needle graft the final row stitches to the cast on stitches following the instructions provided in the techniques section.
Blocking
You are done with the knitting part. Make sure to weave in all the ends.
To make your accessories even prettier and help even your stitches wet block your project.
Don’t skip this step as it can make a huge difference. Read my detailed tutorial on why block, how-to, and all my tips and tricks if you need help.