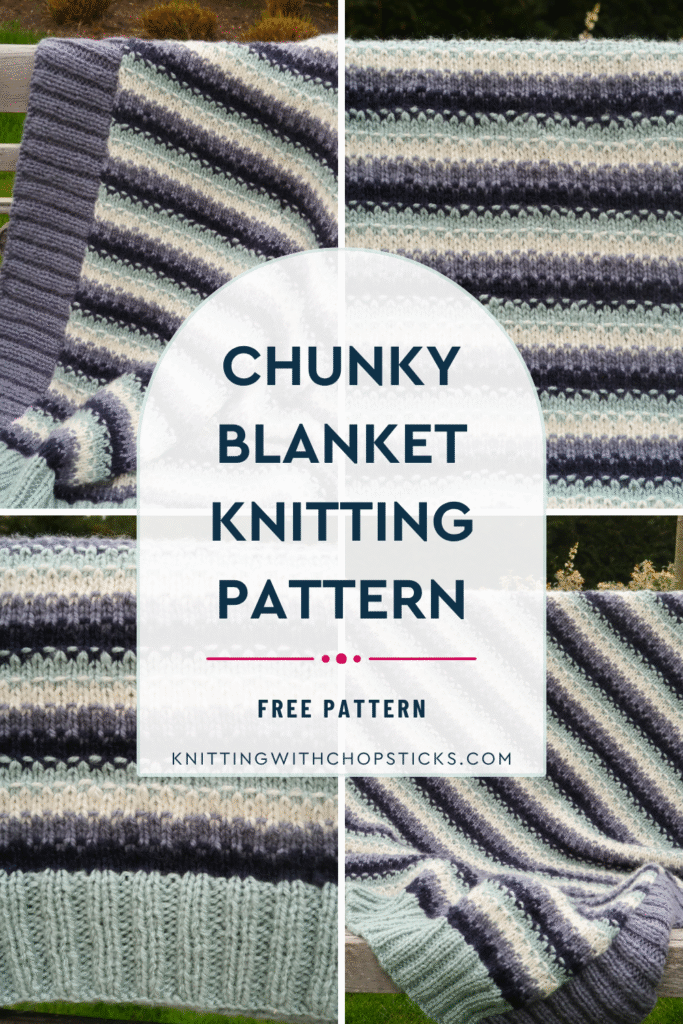
Hygge Chunky Blanket Knitting Pattern Free

A new striped blanket knitting pattern – the Hygge Blanket – is now a free knitting blanket pattern here on the blog. Read all about this chunky blanket knitting pattern inspiration, scroll down to view the full free pattern or purchase an ad free PDF from the links below.
No time right now? Pin this chunky blanket knitting pattern free for later!
*This post contains affiliate links (only for products I love, use and spend my own money on obviously). This means I earn some yarn money if you make a purchase through one of these links (of course at no extra cost for you!), which I promise to use to create more awesome patterns like this one. All opinions are my own. See my full disclosure here.
Wrap yourself in cozy comfort with this easy chunky blanket knitting pattern, perfect for knitters of all levels. Designed with soft, bulky yarn and a timeless stripy pattern, this blanket works up quickly while still delivering beautiful texture and warmth. The simple stitch design lets the yarn shine, creating a modern, relaxed look that’s ideal for gifting or adding a handmade touch to your home.
This free pattern includes 10 versatile sizes to suit every need—from stroller and baby (receiving) sizes all the way up to toddler, crib (small and regular), throw, twin, double, queen, and king. Whether you’re knitting a sweet baby blanket or a full-size statement piece, you’ll love how customizable and satisfying this project is from start to finish.
Inspiration
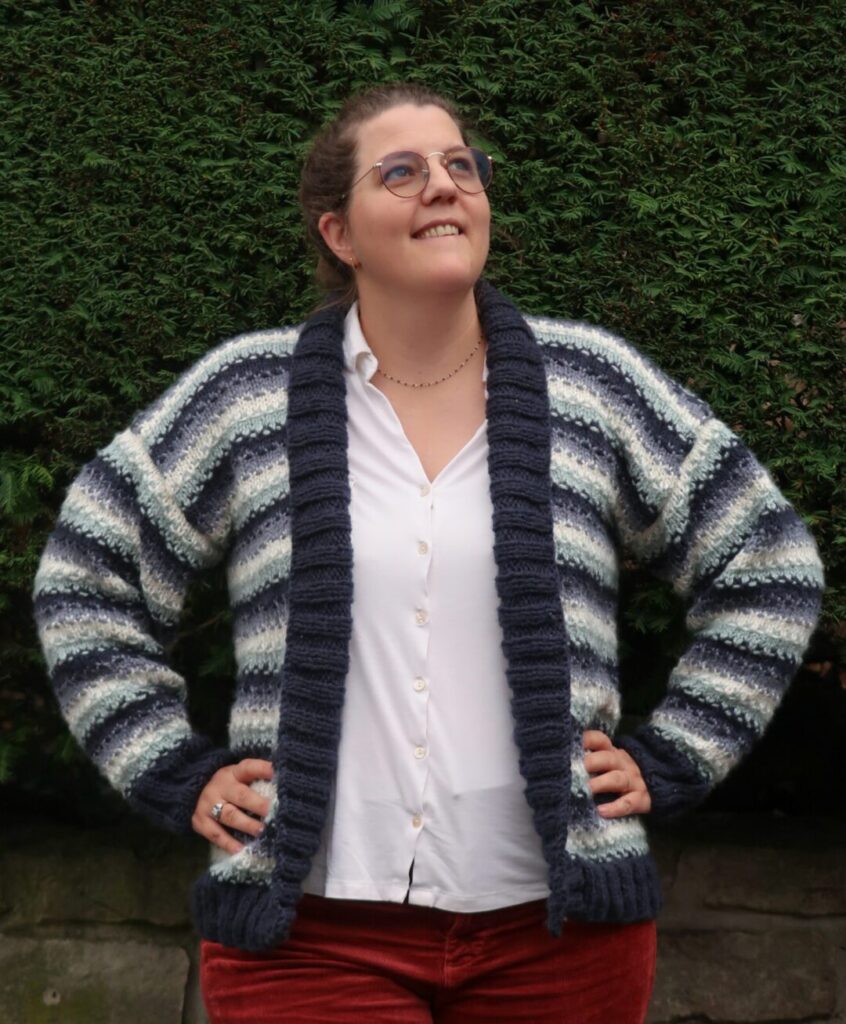
This chunky blanket design was inspired by the same cozy, relaxed feel as the Hygge Mood Cardigan, taking its signature striped look and translating it into a warm, oversized blanket. Just like the cardigan, which features playful stripes and an easygoing construction focused on comfort and simplicity, this blanket embraces that same “hygge” spirit: soft textures, soothing colors, and a design that’s as enjoyable to knit as it is to use.
By reimagining those stripes in chunky yarn, this pattern creates a bold yet calming piece that feels like wrapping yourself in your favorite handmade garment. It’s a natural extension of the cardigan’s aesthetic: cozy, modern, and effortlessly comforting, perfect for bringing that same sense of warmth and contentment into your home.
Construction
The Hygge blanket is worked flat in rows, from the bottom up. You will start by knitting the bottom ribbing then work the main slip stitch body upward, changing colors as you go.
Once the main body and top border are complete, you will pick up stitches along both side edges and work the side borders outward. All four borders use the same K2, P2 ribbing, which gives the blanket a neat, cohesive frame. No seaming is required.
Downloadable PDF for Hygge Blanket Pattern
Grab the printable PDF of the Bits & Blocks Crochet Blanket Pattern now in my shop, Etsy shop or on Ravelry shop:
More Knitted Blanket Patterns you'll love

Before You Start Your Bits & Blocks Corner To Corner Crochet Blanket
Materials
You may be able to fit the smaller blankets on long straight knitting needles but you’ll need a long circular needle to be able to fit all the stitches for bigger sizes. If using interchangeable circular needles, I recommend using swivel cords as they’ll help reduce strain on your wrists.
- Lion Brand Jiffy (Bulky weight 5, 100% acrylic, 410g, 681 yds / 623 m): you will need:
- 1 (1, 1, 1, 1, 1, 2, 2, 2, 3) skeins in Deep Indigo [451-110AJ]1 (1, 2, 1, 2, 2, 3, 5, 6, 6) skeins in Seafoam [451-108AG]1 (1, 1, 1, 1, 1, 2, 2, 2, 3) skeins in Cream [451-098W]
- 1 (2, 2, 2, 2, 2, 4, 6, 6, 7) skeins in Coastal [451-109AD]
- Tapestry needle to weave in the ends.
- Tape measure
Size
The blanket pattern comes in ten sizes, noted: stroller / baby (receiving, toddler, crib small, crib regular, throw, twin, double, queen, king) throughout the pattern. Pictures illustrate the throw blanket size.
| Blanket sizes | Inches | Centimeters | ||||
| Width | Length | Width | Length | |||
| Stroller / Baby | 30.5 | 36 | 78 | 91 | ||
| Receiving | 40.5 | 39.5 | 103 | 100 | ||
| Toddler | 41.5 | 53.5 | 106 | 136 | ||
| Crib – Small | 35.5 | 53.5 | 90 | 136 | ||
| Crib – Regular | 44.5 | 60 | 113 | 153 | ||
| Throw | 52 | 60 | 132 | 153 | ||
| Twin | 65.5 | 91.5 | 167 | 233 | ||
| Double | 90 | 109.5 | 228 | 278 | ||
| Queen | 96 | 109.5 | 244 | 278 | ||
| King | 107.5 | 109.5 | 273 | 278 | ||
If the table isn’t easy for you to read, here are the dimensions for the different sizes:
- Width: 78 (103, 106, 90, 113, 132, 167, 228, 244, 273) cm/30.5 (40.5, 41.5, 35.5, 44.5, 52, 65.5, 90, 96, 107.5)”
- Length: 91 (100, 136, 136, 153, 153, 233, 278, 278, 278) cm/36 (39.25, 53.5, 53.5, 60.25, 60.25, 91.75, 109.5, 109.5, 109.5)”
You can easily adapt your blanket to any width by increasing or decreasing your cast-on by multiples of 4 sts (approx. 3 cm/1.25”) and to any length by working the main section repeat until your blanket is about 10 cm/4” shorter than you’d like it to be when it’s complete.
Gauge
The gauge for this pattern, in slip stitch pattern is 12.5 st by 18 rows for a blocked 10 cm/4” square.
Abbreviations
- st = stitch
- k = knit
- Sl1p = slip one stitch purlwise
- p = purl
- wyif = with yarn in front of work
Notes
Work instructions between [] the indicated number of times or until the end of the row / round.
The final number of stitches is indicated at the end of the row / round between < >.
Special Stitches / Techniques
Picking up stitches: if you’re not familiar with this technique, this tutorial is very helpful.
Stitch Pattern
Sick of all the yarn jargon and conversions?
US vs UK, abbreviations, imperial vs metric, yarn weights, etc?

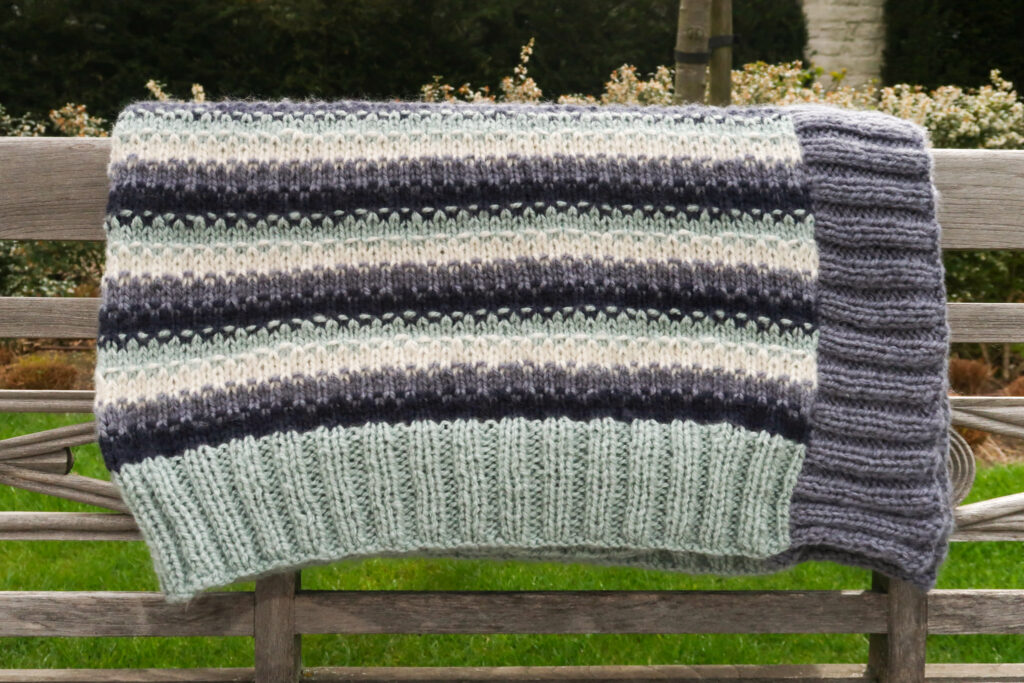
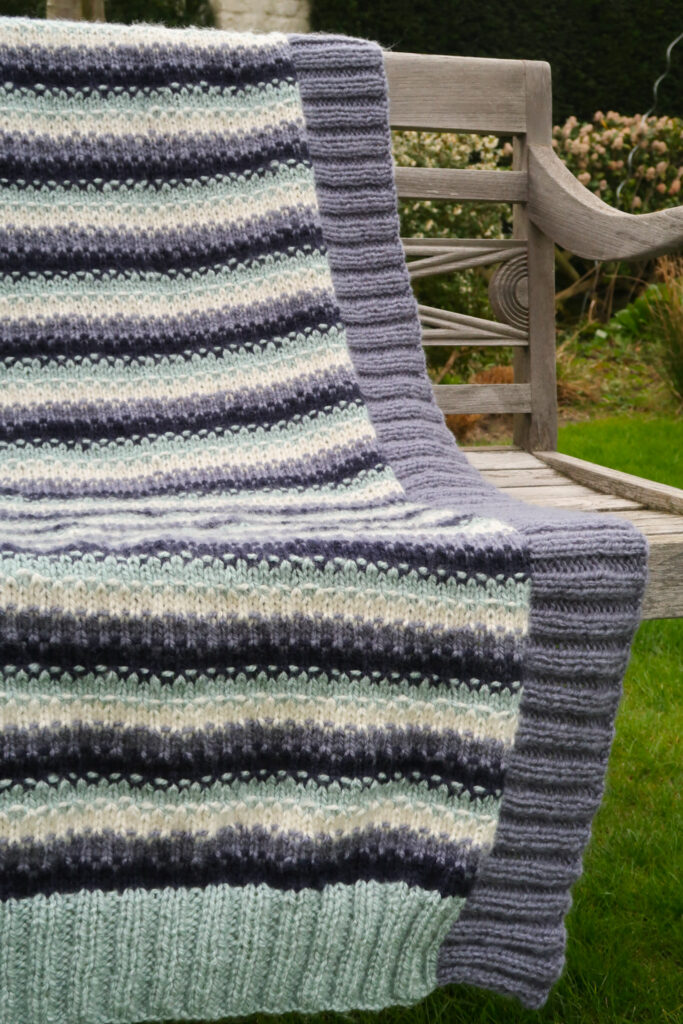
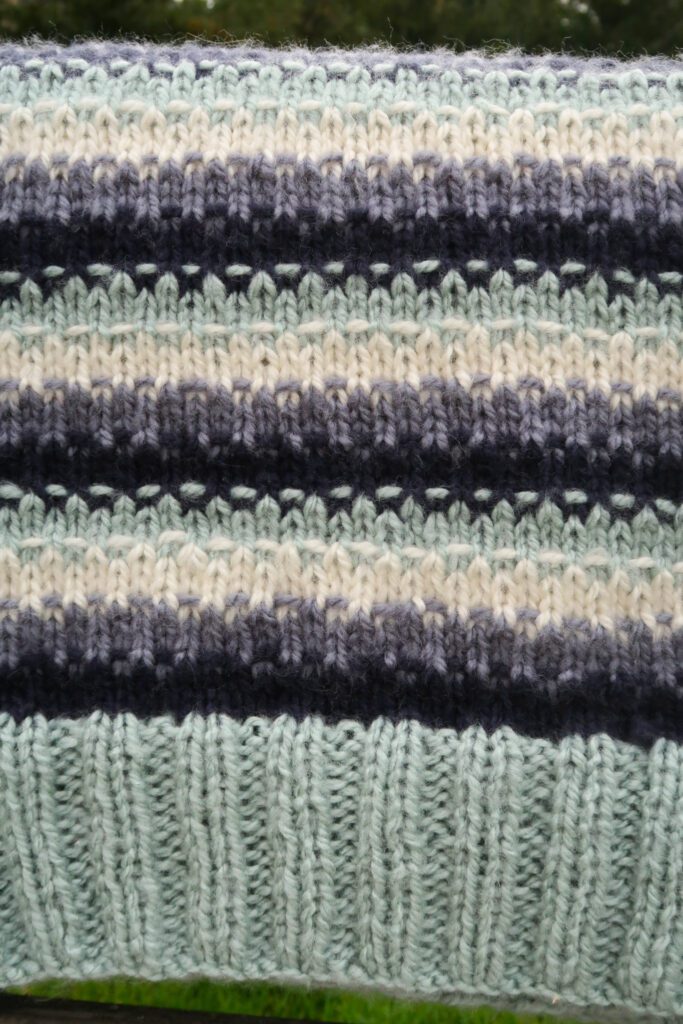
The blanket is designed with a striped slip stitch pattern mimicking colorwork. However, only one color is used at a time to achieve this effect.

Construction
The Hygge blanket is worked flat in rows, from the bottom up. You will start by knitting the bottom ribbing then work the main slip stitch body upward, changing colors as you go.
Once the main body and top border are complete, you will pick up stitches along both side edges and work the side borders outward. All four borders use the same K2, P2 ribbing, which gives the blanket a neat, cohesive frame. No seaming is required.
The Actual Hygge Striped Blanket Knitting Pattern
Bottom Border
In Seafoam, cast on 72 (104, 108, 88, 116, 140, 184, 260, 280, 316) st.
[K2, p2] across for 10 cm / 4”.
Main Pattern Section
Switch to cream color yarn.
Work 4 rows stockinette.
This is the start of the stripe pattern
Switch to Coastal yarn.
Row 1: Sl1p, [wyif sl1p, k1] until last st, k1.
Row 2: Sl1p, purl across.
Row 3: Sl1p, knit across.
Row 4: Sl1p, purl across.
Switch to Deep Indigo color yarn.
Row 5: Sl1p, [k1, wyif sl1p] until last st, k1.
Rows 6 – 8: Repeat Rows 2 – 4.
Switch to Seafoam color yarn.
Repeat Rows 1 – 4.
Switch to cream color yarn.
Repeat Rows 5 – 8.
Repeat these 4 color stripes until you reach a total length of 81 (90, 126, 126, 143, 143, 223, 268, 268, 268) cm/32 (35.5, 49.5, 49.5, 56.25, 56.25, 87.75, 105.5, 105.5, 105.5)” finishing on a Deep Indigo blue stripe.
Top Border
Switch to Seafoam yarn.
[K2, p2] across for 10 cm/4”.
Cast off in pattern, i.e. cast off knit stitches knitwise and purl stitches purlwise.
Weave in the ends.
Side Border (work on both sides)
Switch to Coastal yarn
Pick up a st in three row end sts and skip the next row end st along the sides of the blanket including the top and bottom border ribbing rows, adjusting at the end to make sure you have a multiple of 4 stitches. You can expect to have around 124 (136, 184, 184, 208, 208, 316, 376, 376, 376) sts but an exact match isn’t essential as the ribbing stitch is very flexible.
[K2, p2] across for 10 cm/4”.
Cast off in pattern, i.e. cast off knit stitches knitwise and purl stitches purlwise.
Weave in the ends.
Blocking
You’re done with the knitting part. Make sure to weave in all the ends.
To make your stitch pattern even prettier, help straighten your edges and flatten the corners, block your project.
Don’t skip this step as it can make a huge difference. Read my detailed tutorial on why block, how-to, and all my tips and tricks if you need help.