Apy Mens Sweater Knitting Pattern

A new easy men’s sweater knitting pattern, the Apy Sweater, is now a modern knit sweater pattern here on the blog. Read all about the easy bottom up construction and what you need to make it, scroll down to view the full free pattern or purchase an ad free PDF from the links below.
No time right now? Pin this easy mens sweater knitting pattern for later!

*This post contains affiliate links (only for products I love, use and spend my own money on obviously). This means I earn some yarn money if you make a purchase through one of these links (of course at no extra cost for you!), which I promise to use to create more awesome patterns like this one. All opinions are my own. See my full disclosure here.
This timeless tweed men’s sweater knitting pattern is designed for warmth, comfort, and classic style. Featuring a cozy shawl collar with a button closure, this pullover is perfect for layering on chilly days. The textured tweed fabric adds a rugged yet refined touch, making it an excellent choice for both casual and dressier occasions. With a classic fit that complements all body types, this sweater is as practical as it is stylish.
Knit from the bottom up in the round, this mostly seamless design ensures a smooth and polished finish. The pattern includes men’s sizes ranging from S to 5XL, providing a versatile option for a wide range of wearers. Whether you’re knitting for yourself or a loved one, this project offers a satisfying blend of structure and ease. Plus, a kid’s version of this beloved sweater will be available soon—perfect for a matching father-and-son look!

Matching Baby And Child Sweater
The Apy Sweater also comes in a baby and child sweater knitting pattern, sized 3 months to 16 years old so you can make a matching set for all the men in the family.
Find the baby and child sweater knitting pattern here >>


The Apy Mens Sweater Knitting Pattern Construction
The men’s sweater is knitted from the bottom up. Both front and back panels are worked in one piece knitting in the round until the underarm. The piece is then divided in 2 parts working the front and back panel separately. A few stitches are cast off on each side of the panels for simple square armhole shaping. The back panel is then worked straight with some shoulder shaping. The front panel is divided in 2 parts to shape the neck opening.
Both panels are then sewed together at the shoulders.
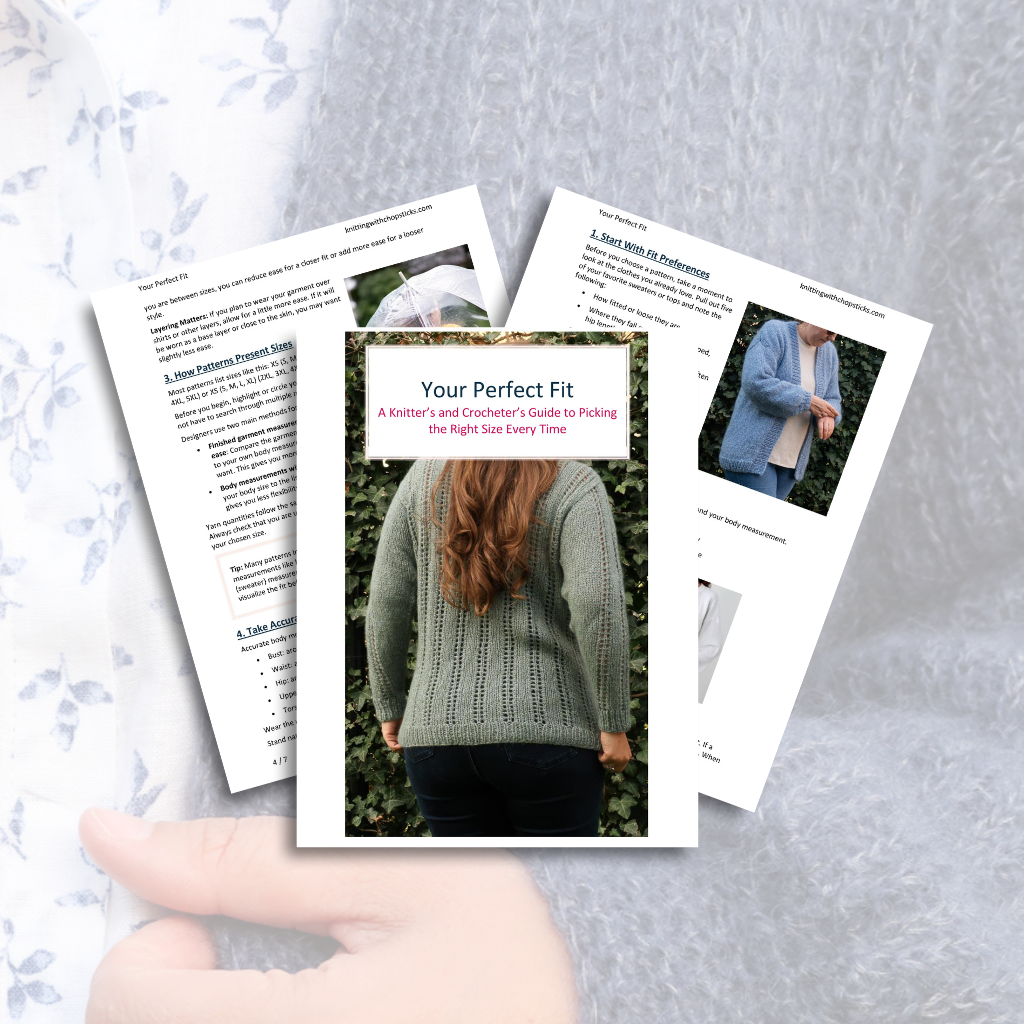
Perfect Fit Guide
Always guessing your size when knitting or crocheting garments?
Stitches for the sleeves are then picked up and worked downwards to the cuff. Finally, stitches are picked up for the neck ribbing, first around the back, then along the front opening (adding buttonholes). Lastly, you’ll add the buttons for the finishing touch.

Downloadable PDF Apy Men’s Sweater Knitting Pattern

Grab the printable PDF of the Apy Men’s Sweater knitting pattern now in my shop, Etsy shop or on Ravelry shop:
2025 Knit Bestseller Pattern Collection
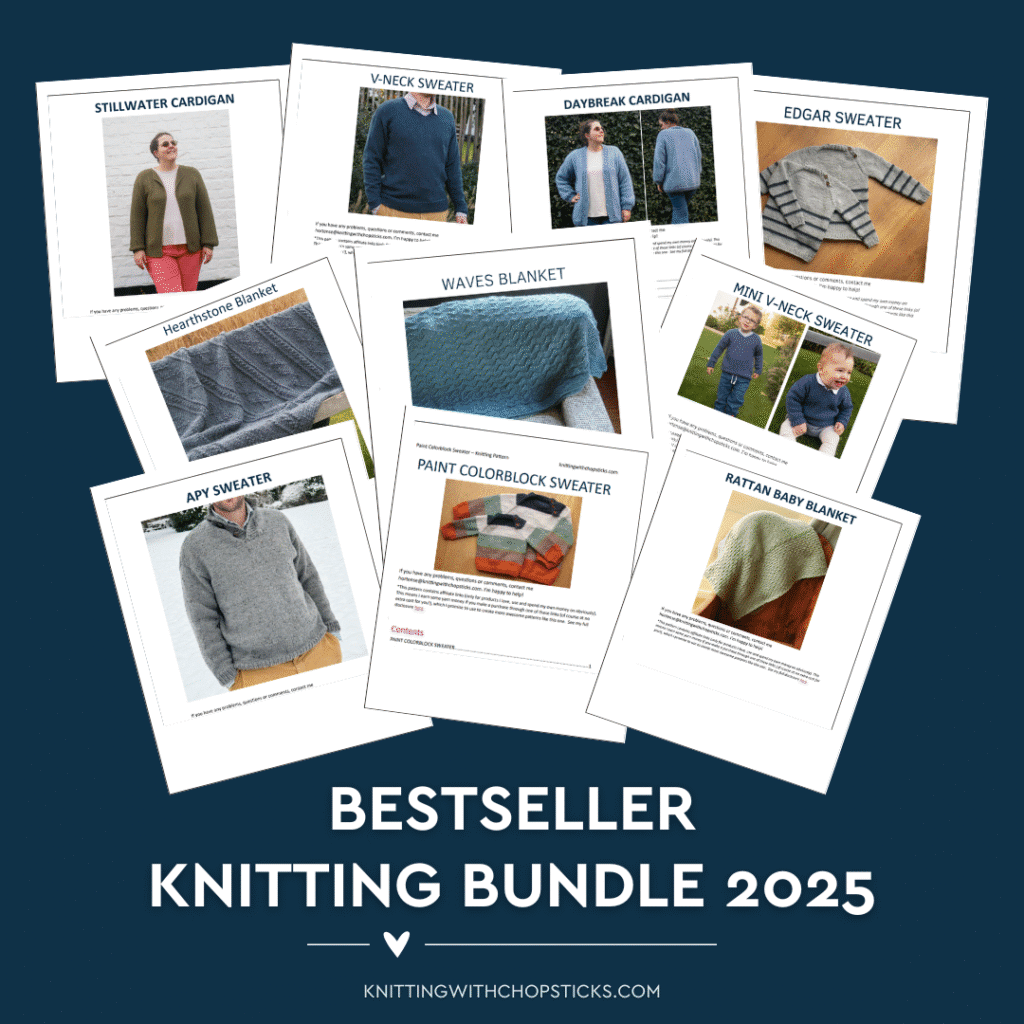
If this design caught your eye, you’re going to love the 2025 Knit Bestseller Pattern Collection — a handpicked set of this year’s most-made and most-loved knit designs.
You’ll get 10 top-selling knitting patterns that struck a chord with makers all year long: wearable sweaters, classic cardigans, and cozy blankets that are simple, satisfying, and easy to follow.
Each design builds confidence without overcomplicating things, making this collection perfect for knitters who want relaxing projects that turn out beautifully every time.
Grab the 2025 Knit Bestseller Pattern Collection here >>
Materials You Will Need For The Apy Mens Sweater Knitting Pattern
Materials
- 5.5 mm / US 9 circular knitting needles.
- 6 mm / US 10 circular knitting needles.
- Zeeman Tweed (chunky weight 5, 100g, 72% Acrylic, 24% Wool, 3% viscose, 110m/120yds): 5 (5, 6, 6) (7, 8, 8, 9) skeins
Since the original yarn used for this pattern is not available anymore then here are some yarn substitutes suggestions:
- Tapestry needle to weave in the ends
- Stitch marker
- 3 26-mm leather covered buttons
Note: I used short circular needles for the sleeves and cuffs but you can use the magic loop or DPN if you prefer.
Size
The sweater knitting pattern is available in the following men sizes: S to 5XL. Sizes are noted throughout the pattern in the following way: S (M, L, XL) (2XL, 3XL, 4XL, 5XL). The pictures illustrate the Large size.
Final garment measurements are:
S: 95 cm / 37.25” bust, 44.5 cm / 17.5” sleeve length (from underarm), 61 cm / 24” long (from shoulder)
M: 104 cm / 40.75” bust, 46 cm / 18” sleeve length (from underarm), 64.5 cm / 25.5” long (from shoulder)
L: 116 cm / 45.5” bust, 48.5 cm / 19” sleeve length (from underarm), 66 cm /26” long (from shoulder)
XL: 125 cm / 49” bust, 49.5 cm / 19.5” sleeve length (from underarm), 69 cm / 27.25” long (from shoulder)
2XL: 136 cm / 53.75” bust, 51 cm / 20” sleeve length (from underarm), 72 cm / 28.5” long (from shoulder)
3XL: 145 cm / 57.25” bust, 51 cm / 20” sleeve length (from underarm), 73 cm / 28.75” long (from shoulder)
4XL: 156 cm / 61.35” bust, 52 cm / 20.5” sleeve length (from underarm), 75.5 cm / 29.75” long (from shoulder)
5XL: 166 cm / 65.25” bust, 53 cm / 20.75” sleeve length (from underarm), 77 cm / 30.25” long (from shoulder)
The sweater is designed with a classic fit 5 – 10 cm / 2” – 4” ease at the bust.

Gauge
The gauge for this pattern, in stockinette stitch, is 13.5 st by 20 rows for a 10 cm by 10 cm square (4” by 4”).
Abbreviations & Instructions
- st = stitch
- k = knit
- p = purl
- M1R = make one right; single right-leaning knit increase
- M1L = make one left; single left-leaning knit increase
- k2tog = knit 2 stitches together; right-leaning decrease
- ssk = slip slip knit; left-leaning decrease
Repeat instructions between [] the indicated number of times or until the end of the round/row.
The final number of stitches is indicated at the end of the round/row between < >.
Special Stitches and Techniques
- Stockinette stitch:
- In the round: knit continuously
- Worked flat: alternate knit rows on the right side and purl rows on the wrong side of your project.
- M1R: Insert your left needle from back to front, under the bar between the stitches (thus lifting it onto the left needle). Knit this bar through the front loop (this twists it into a nice little tight loop)
- M1L: Insert the left needle from front to back, under the bar between the stitches (thus lifting it onto the left needle). Knit this bar through the back loop (this twists it into a nice little tight loop).
If you are not familiar with this increase technique, I find this video tutorial very helpful.
- Picking up stitches: if you’re not familiar with this technique, this tutorial is very helpful.
I recommend using the sloped bind off technique for the shoulder shaping. If you’re not familiar with this technique, this tutorial is very helpful.

Sweater Construction
The men’s sweater is knitted from the bottom up. Both front and back panels are worked in one piece knitting in the round until the underarm. The piece is then divided in 2 parts working the front and back panel separately. A few stitches are cast off on each side of the panels for simple square armhole shaping. The back panel is then worked straight with some shoulder shaping. The front panel is divided in 2 parts to shape the neck opening.
Both panels are then sewed together at the shoulders.
Stitches for the sleeves are then picked up and worked downwards to the cuff. Finally, stitches are picked up for the neck ribbing, first around the back, then along the front opening (adding buttonholes). Lastly, you’ll add the buttons for the finishing touch.
The Actual Apy Men’s Sweater Free Knitting Pattern
Sweater Body
With your 5.5 mm / US 9 circular needles, cast on 128 (140, 156, 168) (184, 196, 210, 224) and join in the round.
[k1, p1] around for 5 cm / 2”.
Switch to 6 mm / US 10 needles.
Knit in stockinette stitch until total length is 40 (42, 42, 44) (45, 45, 46, 46) cm / 15,75 (16.5, 16.5, 17.25) (17.75, 17.75, 18, 18)”.
Split front and back and cast-off stitches at the armholes:
- S: cast off 6, knit 58, cast off 6, knit 58
- M: cast off 8, knit 62, cast off 8 st, knit 62
- L: cast off 10, knit 68, cast off 10, knit 68
- XL: cast off 16, knit 68, cast off 16 st, knit 68
- 2XL: cast off 18, knit 74, cast off 18, knit 74
- 3XL: cast off 24, knit 74, cast off 24, knit 74
- 4XL: cast off 26, knit 79, cast off 26, knit 79
- 5XL: cast off 28, knit 84, cast off 28, knit 84
Front Panel
Knit 7 (8.5, 10, 11) (13, 14, 15.5, 17) cm / 2.75 (3.25, 4, 4.25, 5, 5.5, 6, 6.75)” in stockinette stitch.
Split front in 2 panels to form the buttonband opening:
- S: knit 26, cast off middle 6 st, knit 26
- M: knit 28, cast off middle 6 st, knit 28
- L: knit 31, cast off middle 6 st, knit 31
- XL: knit 31, cast off middle 6 st, knit 31
- 2XL: knit 34, cast off middle 6 st, knit 34
- 3XL: knit 34, cast off middle 6 st, knit 34
- 4XL: knit 37, cast off middle 5 st, knit 37
- 5XL: knit 39, cast off middle 6 st, knit 39
Knit both parts separately from here onwards.
First front panel
Knit 14 cm / 5.5” in stockinette before starting to shape the shoulders and round neck.
Shoulder & round neck shaping:
On the next RS row, cast off 2 st, knit across. <24 (26, 29, 29) (32, 32, 35, 37) st>
Note: Use sloped bind off to cast off stitches which are for the shoulder shaping.
Cast off 4 (6, 8, 8) (8, 8, 10, 10) st purlwise, knit across. <20 (20, 21, 21) (24, 24, 25, 27) st>
[Cast off 1st, knit across.
Cast off 4 st purlwise, knit across] three times. <5 (5, 6, 6) (9, 9, 10, 14) st>
Cast off remaining st and leave a tail for sewing.
Second front panel
Go back to the stitches you left on the side for the other shoulder and join yarn at the buttonband opening area.
Purl across.
Knit in stockinette until length from buttonband opening cast off st is 14 cm / 5.5”.
Shoulder & round neck shaping:
On the next RS row, cast off 2 st, knit across. <24 (26, 29, 29) (32, 32, 35, 37) st>
Note: Use sloped bind off to cast off stitches which are for the shoulder shaping.
Cast off 4 (6, 8, 8)(8, 8, 10, 10) st purlwise, purl across. <20 (20, 21, 21) (24, 24, 25, 27) st>
Cast off 1st, knit across.
Cast off 4 st purlwise, purl across] three times. <5 (5, 6, 6) (9, 9, 10, 14) st>
Cast off remaining st and leave a tail for sewing.
Back Panel
Go back to the stitches you left on the side for the back panel.
Knit in stockinette for 21 (22.5 24, 25) (27, 28, 29.5, 31) cm / 8.25 (8.75, 9.5, 9.75) (10.5, 11, 11.5, 12)”.
On the next RS row, cast off 8 st, knit across. <50 (54, 60, 60) (66, 66, 71, 76) st>
Cast off 8 st purlwise, purl across. <42 (46, 52, 52) (58, 58, 63, 68) st>
[Cast off 4 st, knit across
Cast off 4 st, purl across] three times. <18 (22, 28, 28) (34, 34, 39, 44) st>
Cast off remaining stitches and leave a tail for sewing.
Assembly
Sew up the shoulder seams.
Sleeves
Pick up 54 (58, 62, 66) (70, 74, 78, 82) stitches around the armhole (not considering the indent).
Note: leave a tail for sewing to the indent
Knit in stockinette for 5 (6, 8, 12) (14, 18, 20, 21) rows.
Join in the round and knit 18 (9, 10, 8) (7, 7, 7, 5) rounds.
[Decrease Round: k1, k2tog, knit until last 3 st, ssk, k1.
Knit for 5 rounds] 10 (12, 10, 8) (8, 4, 3, 1) times. <34 (34, 42, 50) (54, 66, 72, 80) st>
[Decrease Round followed by 3 knit rounds] 0 (0, 4, 8) (9, 15, 17, 21) times. <34 (34, 34, 34) (36, 36, 38, 38) st>
Repeat one more decrease. <32 (32, 32, 32) (34, 34, 36, 36) st>
Switch to 5.5 mm / US 9 needles.
[k1, p1] around for 5cm / 2”.
Cast off and weave in the end.
Repeat for the second sleeve.
Collar
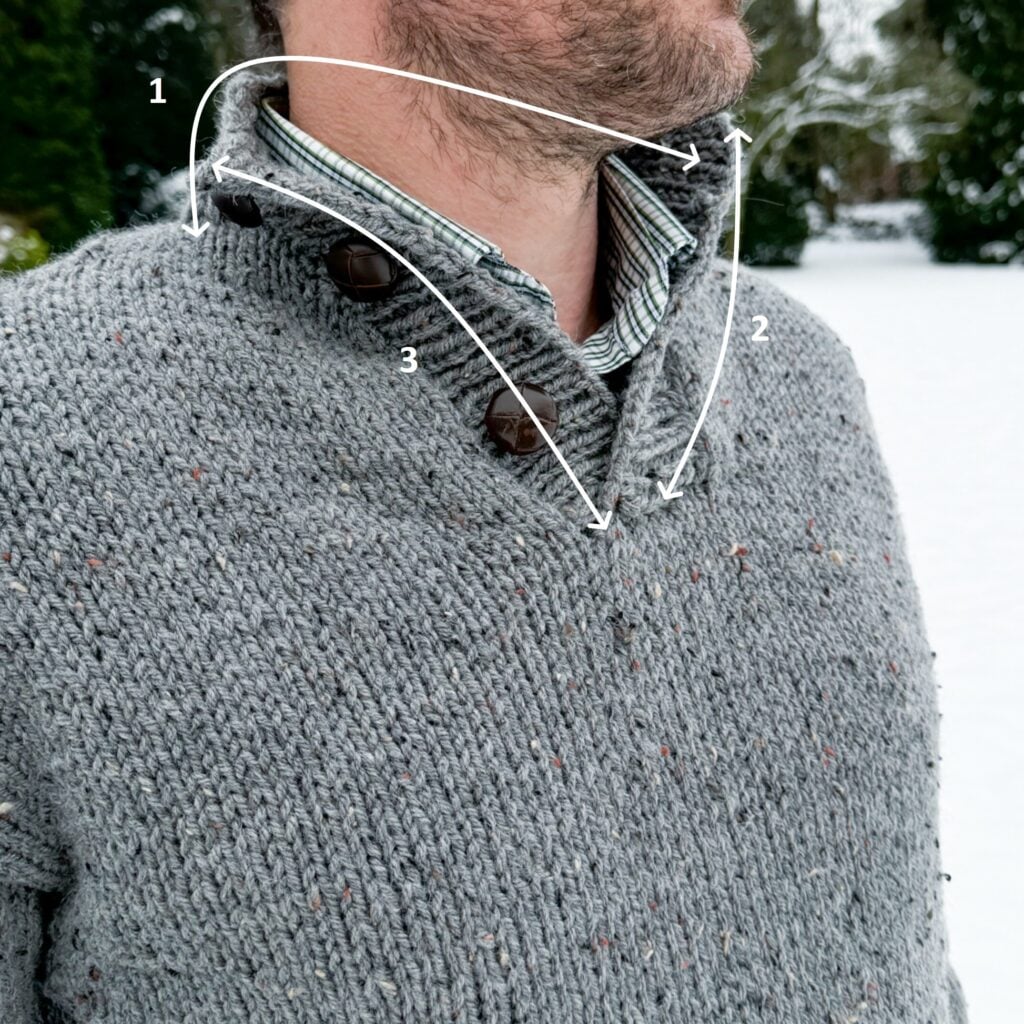
Part 1: Back
With your 5.5 mm / US 9 needles, pick up 42 st along the collar edge (not the straight vertical opening, only the round neck part)
[K1, p1] across for 16 rows.
Cast off.
Part 2: Left side (when worn)
Pick up 36 st along the vertical edge from the bottom upwards.
[K1, p1] across for 4 rows.
Buttonholes Row 1: Keep working in k1, p1 ribbing pattern: work 2 st, [cast off 2, work 8 st] repeat 3 times, work until end of row.
Buttonholes Row 2: Keep working in k1, p1 ribbing pattern: work until cast off st, [add 2st, work 8 st] twice, add 2st, work until end of row.
[K1, p1] across for 4 rows.
Cast off.
Part 3: Right side (when worn)
Pick up 36 st along the vertical edge.
[K1, p1] across for 10 rows. Cast off and weave in the ends.
Finishing Touches
At the underarm sew up the indent to the start of the sleeves that has been knit flat.
Sew the bottom of the ribbed buttonband and opposite section to the bottom of the neck opening.
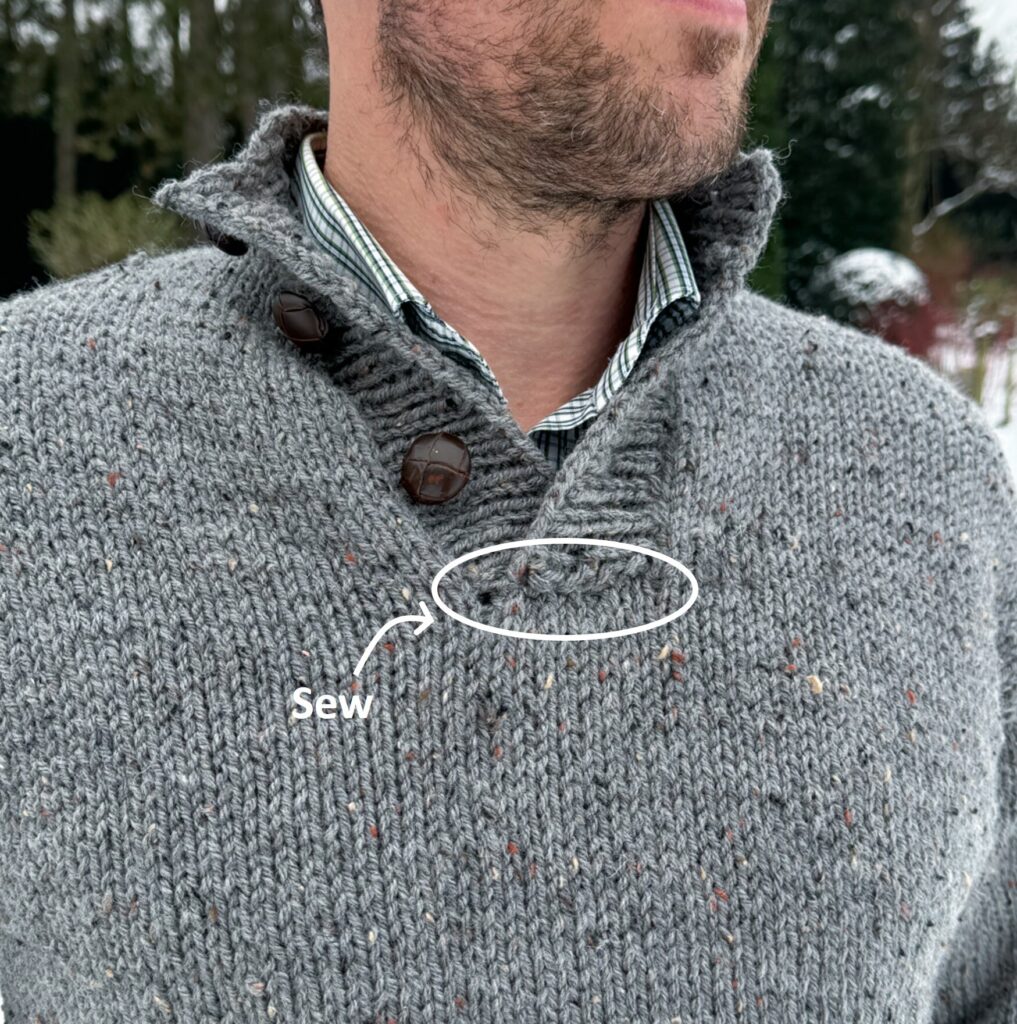
Attach buttons in front of the buttonholes (depending on the type of buttons & material, you may prefer to attach them after blocking).
Weave in all your ends.
Blocking
You are done with the knitting part. Make sure to weave in all the ends.
To make your sweater even prettier, help even your stitches, block your project. Don’t skip this step as it can make a huge difference. Read my detailed tutorial on why block, how-to, and all my tips and tricks if you need help.