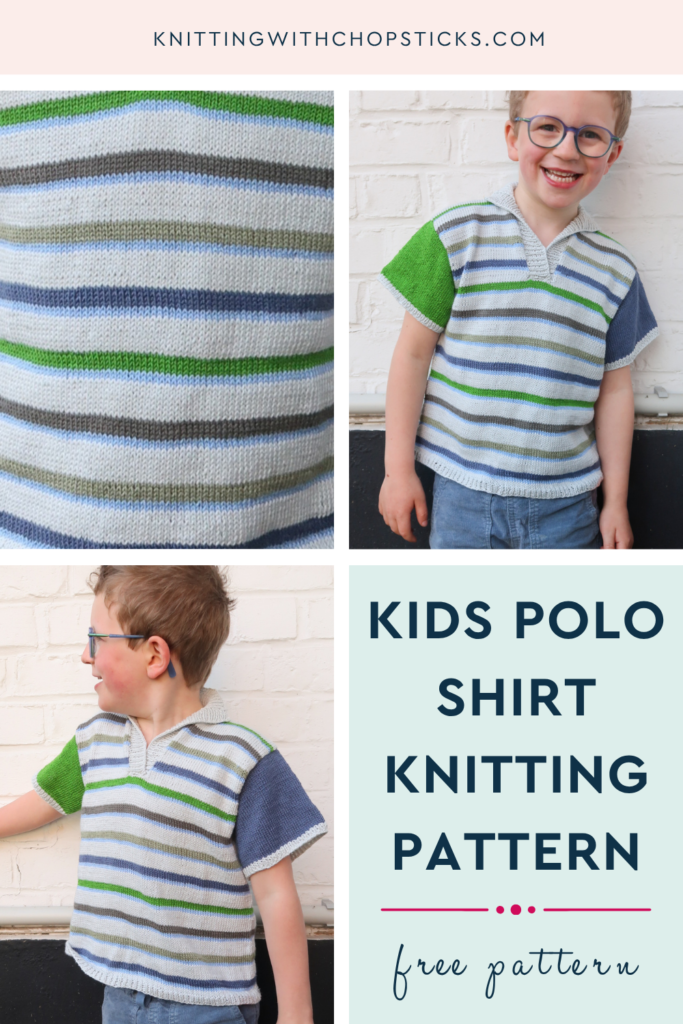
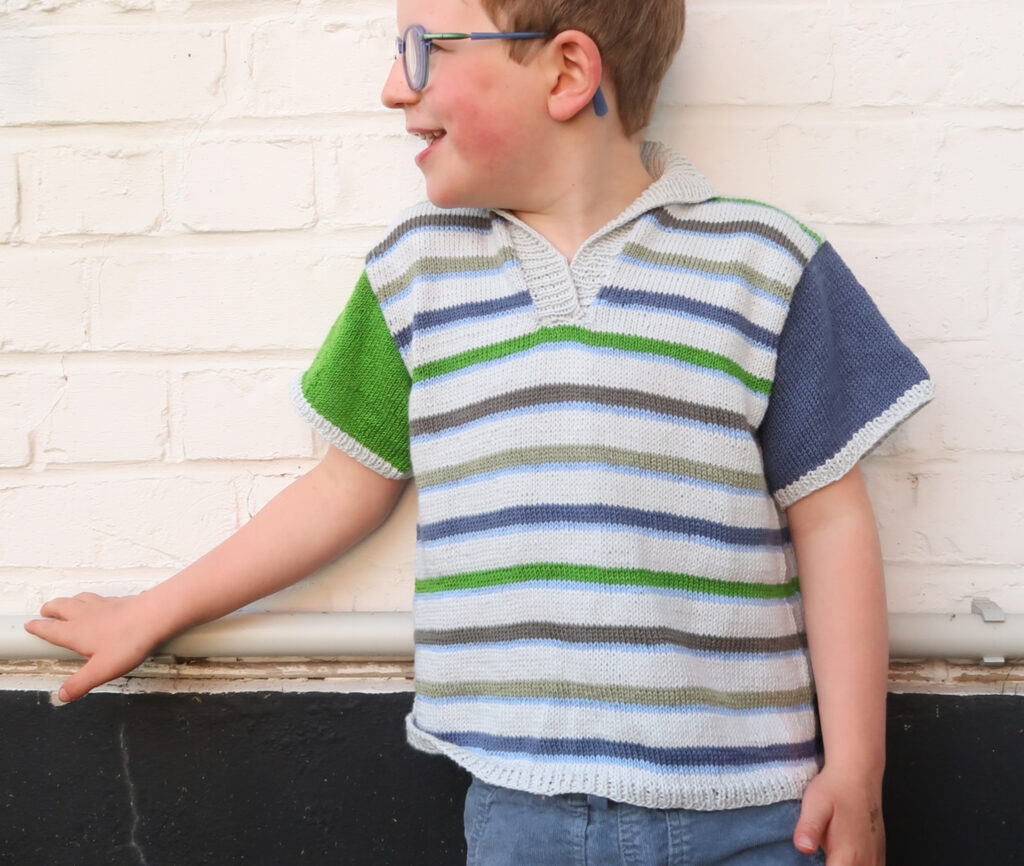
Sidekick Polo Shirt Knitting Pattern
A new striped children’s knitting pattern – the Sidekick Polo– is now a free knitting pattern here on the blog. Read all about this polo shirt knitting pattern and construction, scroll down to view the full free pattern or purchase an ad free PDF from the links below.
No time right now? Pin this Easy Children’s Polo Shirt Knitting Pattern for later!
*This post contains affiliate links (only for products I love, use and spend my own money on obviously). This means I earn some yarn money if you make a purchase through one of these links (of course at no extra cost for you!), which I promise to use to create more awesome patterns like this one. All opinions are my own. See my full disclosure here.
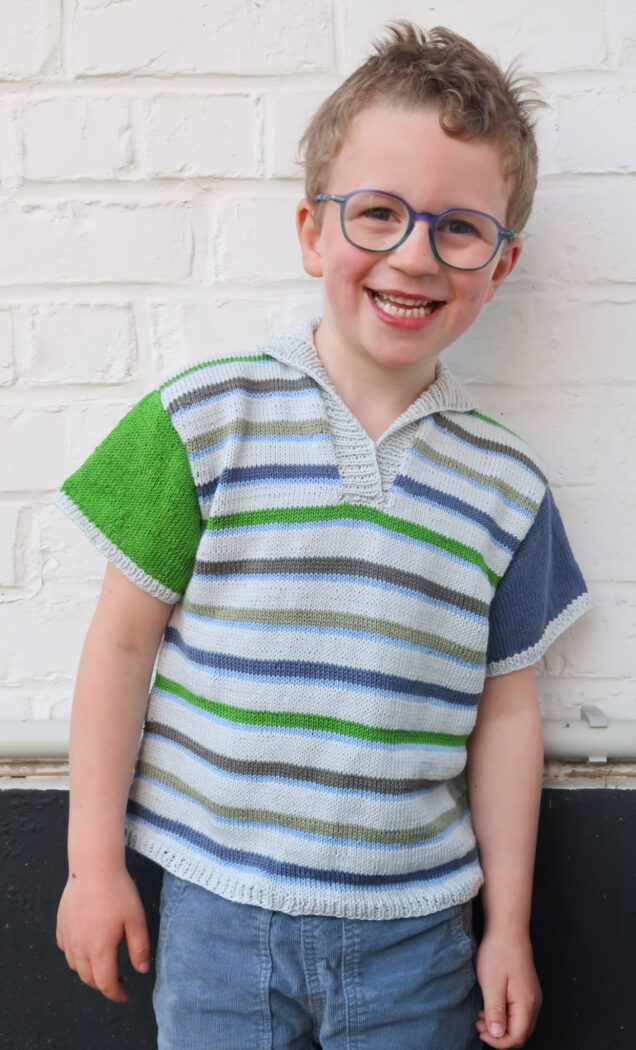
The Kiddo Polo Shirt is a timeless knitting pattern that’s perfect for little ones who love to play in comfort and style. Designed in breathable cotton yarn, this classic polo is ideal for warmer weather and can be customized with fun stripes or knit in a single color for a clean, everyday look. Whether you’re knitting for your own child or creating a thoughtful handmade gift, this versatile polo is sure to become a wardrobe favorite.
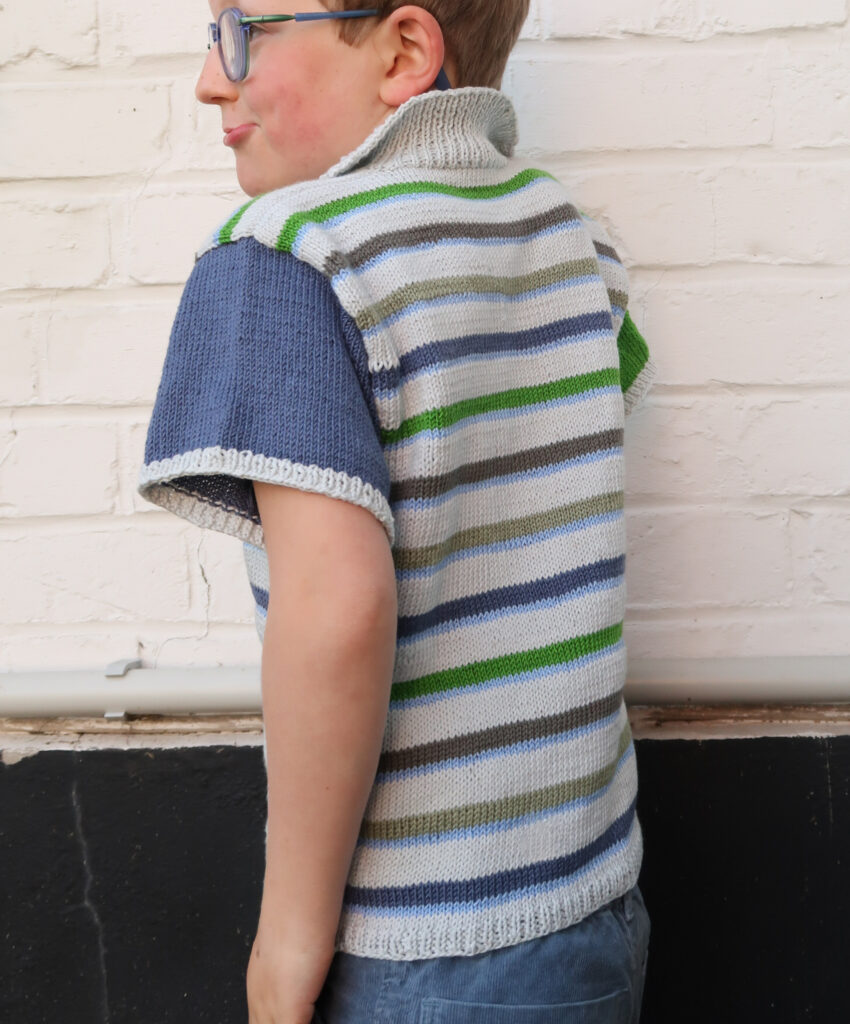
This free knitting pattern is worked from the bottom up, beginning with the body in the round before separating into front and back panels at the armholes. Stitches are then picked up for the sleeves, and the traditional polo collar is worked in sections to create a polished, folded finish. With clear construction and endless color possibilities, the Kiddo Polo Shirt is an enjoyable project for knitters looking to make a classic children’s garment.
Construction
You’ll work this polo in one piece from the bottom up. You start the body in the round with a k1, p1 ribbed hem, then keep going flat in stockinette up to the armhole split. At that point the body splits into a front panel and a back panel, and you work each one flat up to the top.
The front gets a center neck cast-off and some shaping around the neckline; the back stays straight the whole way. Once both panels are done, you seam the shoulders at the outer edges, and the middle of the back panel becomes your back neckline.
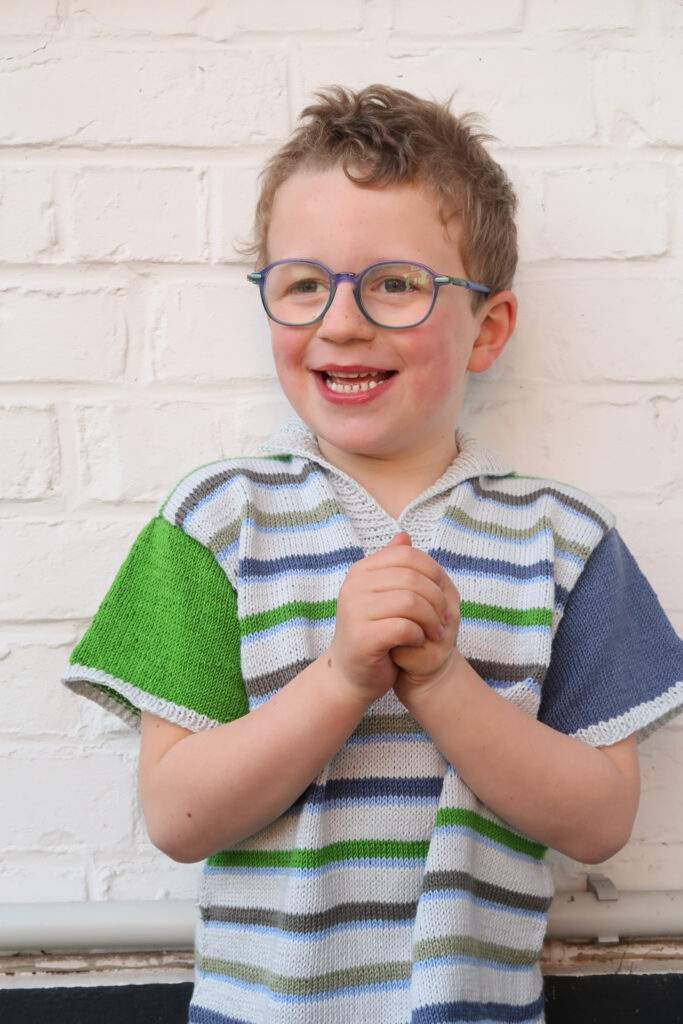
For the sleeves, you pick up stitches around each armhole and work in the round down to a ribbed cuff. The collar is picked up in three flat sections (back, right front, left front) and seamed at the corners so it folds naturally to the outside.
Downloadable PDF for Sidekick Polo Knitting Pattern

Grab the printable PDF of the Kiddo Polo Shirt Knitting Pattern now in my shop, Etsy shop, on Ravelry shop:
More Children's Knitting Patterns you'll love


Before You Start Your Sidekick Polo Shirt Knitting Pattern
Materials
- 2.5 mm/US 1.5 circular needles (40 cm/16″ cable for smallest sizes, 60 cm/24″ cable for larger sizes), plus a short DPN set or a second short circular for knitting sleeves in the round.
- 2 mm/US 0 circular needles (same cable lengths as above) for the hem and sleeve ribbing.
- Yarn: Schachenmayr Organic Cotton (light/DK weight, 100% organic cotton, 50 g/1.76 oz, 142 m/155 yd per skein). Yardage required per size:
- MC (main color, shown in light gray): 1 (1, 2, 2, 2) (2, 3, 3, 3) (4, 4, 5) skeins. Approximately 140 (154, 182, 202, 227) (275, 333, 396, 457) (520, 571, 621) yd/128 (141, 167, 184, 208) (252, 305, 363, 419) (476, 522, 568) m.
- CC1 (thin stripe color, shown in blue): 1 skein, all sizes.
Approximately 24 (26, 35, 37, 46) (56, 70, 88, 104) (119, 133, 148) yd/22 (24, 31, 34, 42) (52, 64, 80, 95) (109, 123, 136) m.
- CC2 (wide stripe color, shown in navy): 1 skein, all sizes.
Approximately 6 (9, 9, 12, 12) (16, 19, 22, 25) (31, 34, 37) yd/6 (9, 9, 11, 11) (14, 17, 20, 23) (28, 31, 34) m.
- CC3 (wide stripe color, shown in khaki): 1 skein, all sizes.
Approximately 6 (9, 9, 12, 12) (16, 19, 22, 25) (31, 34, 37) yd/6 (9, 9, 11, 11) (14, 17, 20, 23) (28, 31, 34) m.
- CC4 (wide stripe color, shown in dark gray): 1 skein, all sizes.
Approximately 28 (31, 37, 43, 50) (59, 71, 87, 99) (115, 127, 136) yd/26 (28, 34, 40, 45) (54, 65, 80, 91) (105, 116, 125) m.
- CC5 (wide stripe color, shown in green): 1 skein, all sizes.
Approximately 6 (9, 9, 12, 12) (16, 19, 22, 25) (31, 34, 37) yd/6 (9, 9, 11, 11) (14, 17, 20, 23) (28, 31, 34) m.
- Stitch markers (at least 4).
- A tapestry needle for seaming and weaving in ends.
- Scissors.
Size
The polo shirt is available in the following sizes: 3 months to 16 years.
Sizes are written as 3 mo (6 mo, 12 mo, 18 mo, 24 mo) (4 y, 6 y, 8 y, 10 y) (12 y, 14 y, 16 y) throughout the pattern. Pictures show the 6 y size.
The polo shirt is designed with classic fit, 7 to 9 cm/2.75 to 3.5″ ease at the bust.
Perfect Fit Guide
Always guessing your size when knitting or crocheting garments?

Finished polo measurements:
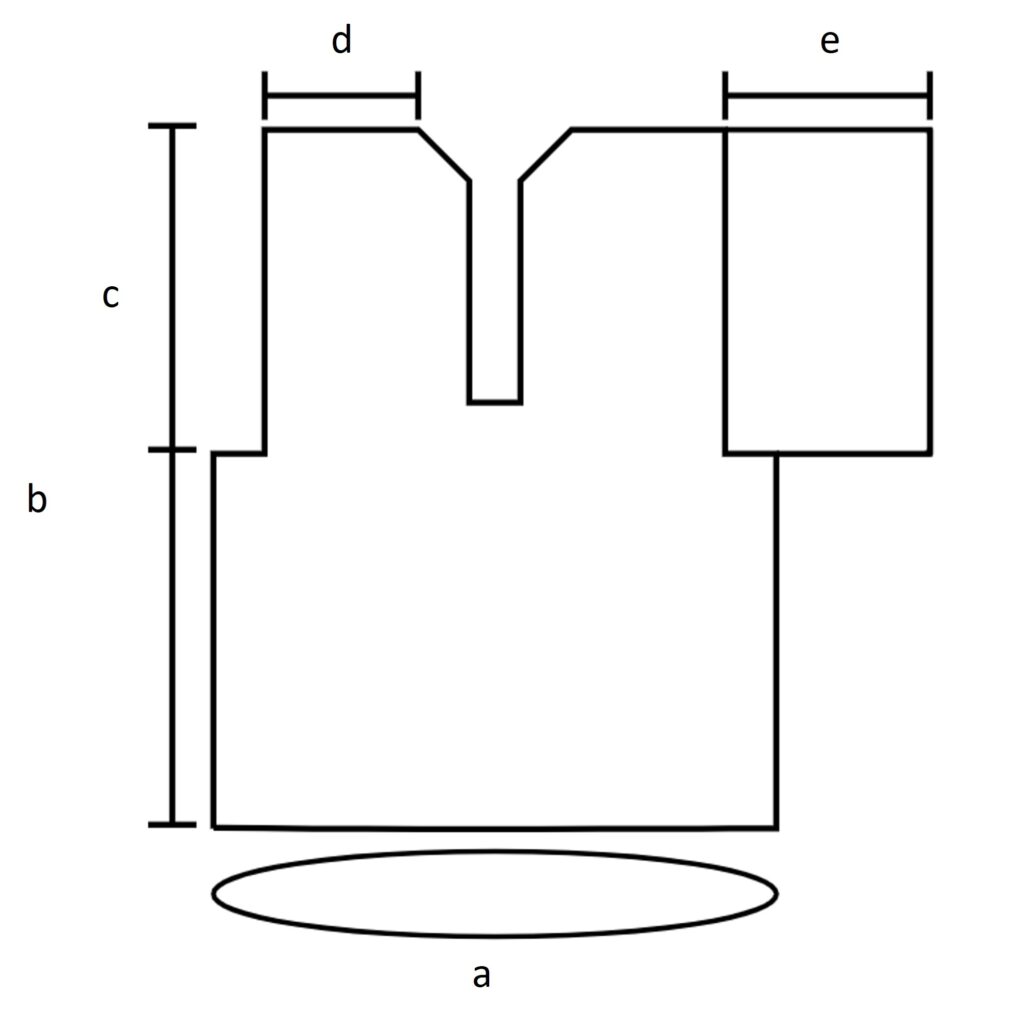
- Bust circumference (a): 49 (52, 56, 59, 61) (66.5, 74, 79, 84) (89.5, 92, 94.5) cm / 19.25 (20.5, 22, 23.25, 24) (26.25, 29.25, 31, 33) (35.25, 36.25, 37.25)”.
- Total length (b): 24.5 (26.5, 30, 32.5, 35) (40.5, 45, 51.5, 56.5) (61.5, 65.5, 69.5) cm / 9.75 (10.5, 11.75, 12.75, 13.75) (16, 17.75, 20.25, 22.25) (24.25, 25.75, 27.25)”.
- Armhole depth (c): 14.5 (15, 16, 16.5, 17.5) (18.5, 20, 21.5, 23) (24, 25.5, 26.5) cm / 5.75 (6, 6.25, 6.5, 7) (7.25, 7.75, 8.5, 9) (9.5, 10, 10.5)”.
- Shoulder width, each (d): 6 (6.5, 7, 8, 8.5) (9.5, 10.5, 11.5, 12.5) (14, 14, 14.5) cm / 2.25 (2.5, 2.75, 3.25, 3.25) (3.75, 4.25, 4.5, 5) (5.5, 5.5, 5.75)”.
- Total sleeve length (e): 10.5 (10.5, 11, 11.5, 13) (13.5, 14, 15, 15.5) (16, 17, 17.5) cm / 4.25 (4.25, 4.25, 4.5, 5) (5.25, 5.5, 6, 6) (6.25, 6.75, 7)”.
Gauge
The gauge for this pattern, in stockinette stitch in the round on 2.5 mm/US 1.5 needles, is 29 st by 38.5 rows for a 10 cm by 10 cm / 4″ by 4″ square, blocked.
Abbreviations
- k: knit
- p: purl
- st(s): stitch(es)
- RS: right side
- WS: wrong side
- beg: beginning
- MC: main color
- CC1-CC5: contrast colors (see Materials for specific colors assigned to each)
Repeat instructions between [] the indicated number of times or until the end of the round/row.
The final number of stitches is indicated at the end of the round/row between < >.
Notes
Carry the MC up the inside of the work between stripes to reduce the number of ends to weave in. Cut the CC yarns at the end of each stripe.
Block your finished pieces before seaming so the dimensions settle and the measurements match.
When picking up stitches around the armhole and neckline, try to pick up evenly by dividing the edge into quarters and spacing picks within each quarter for a clean line.
Construction
You’ll work this polo in one piece from the bottom up. You start the body in the round with a k1, p1 ribbed hem, then keep going flat in stockinette up to the armhole split. At that point the body splits into a front panel and a back panel, and you work each one flat up to the top.
The front gets a center neck cast-off and some shaping around the neckline; the back stays straight the whole way. Once both panels are done, you seam the shoulders at the outer edges, and the middle of the back panel becomes your back neckline.
For the sleeves, you pick up stitches around each armhole and work in the round down to a ribbed cuff. The collar is picked up in three flat sections (back, right front, left front) and seamed at the corners so it folds naturally to the outside.
The Actual Free Polo Shirt Knitting Pattern for Children
Body
With 2 mm/US 0 circular needles and MC, cast on 142 (150, 162, 172, 176) (192, 214, 230, 244) (260, 266, 274) st. Place a marker and join to work in the round, being careful not to twist.
Rounds 1 to 6: [K1, p1] to end of round.
Switch to 2.5 mm/US 1.5 circular needles. Continue in MC.
Work in stockinette stitch (knit every round) in the stripe sequence below until the body measures 10 (11.5, 14, 16, 17.5) (22, 25, 30, 33.5) (37.5, 40, 43) cm/4 (4.5, 5.5, 6.25, 7) (8.75, 9.75, 11.75, 13.25) (14.75, 15.75, 17)” from the cast-on edge, ending on the last row of a stripe group.
Stripe sequence (13-round repeat):
- Rounds 1 to 7: MC.
- Rounds 8 to 9: CC1.
- Rounds 10 to 13: CC2.
- Repeat the sequence, replacing CC2 with CC3, CC4, CC5, then CC2 again on each subsequent 13-round repeat. CC1 and MC remain the same colors for each repeat.
Armhole split (work in MC): cast off 12 (13, 14, 14, 15) (16, 18, 19, 21) (22, 22, 23) st, k 59 (62, 67, 72, 73) (80, 89, 96, 101) (108, 111, 114) (this is the front panel), cast off 12 (13, 14, 14, 15) (16, 18, 19, 21) (22, 22, 23) st, k 59 (62, 67, 72, 73) (80, 89, 96, 101) (108, 111, 114) (this is the back panel).
You now have two separate panels of 59 (62, 67, 72, 73) (80, 89, 96, 101) (108, 111, 114) st each. Break the MC. Set the back panel aside on a stitch holder or spare cable and work the front panel first.
Front Panel
Working flat, with WS facing for the first row, continue the stripe sequence starting with the next row of MC (or whatever came next in your sequence).
Row 1 (WS): P 59 (62, 67, 72, 73) (80, 89, 96, 101) (108, 111, 114) st.
Row 2 (RS): K 59 (62, 67, 72, 73) (80, 89, 96, 101) (108, 111, 114) st.
Repeat Rows 1 to 2 for a total of 12 rows (approximately 3 cm/1.25″).
Neck split (RS row): K 27 (28, 30, 32, 33) (36, 40, 43, 45) (49, 50, 51) st, cast off the center 5 (6, 7, 8, 7) (8, 9, 10, 11) (10, 11, 12) st, k to end. You now have two sets of 27 (28, 30, 32, 33) (36, 40, 43, 45) (49, 50, 51) st, one for each shoulder.
Break the yarn. Place the right shoulder sts on a holder and work the left shoulder first.
Left shoulder, straight section:
Rejoin yarn at the neck edge with WS facing. Work in stripe pattern, purling WS rows and knitting RS rows, until the shoulder section measures 8.5 (9, 10, 10.5, 11.5) (12.5, 14, 15.5, 17) (18, 19.5, 20.5) cm/3.25 (3.5, 4, 4.25, 4.5) (5, 5.5, 6, 6.75) (7, 7.75, 8)” from the neck split, ending with a RS row.
Neck shaping (worked at the open neck edge on WS rows):
Cast off 2 st at the beg of the next 3 WS rows. <21 (22, 24, 26, 27) (30, 34, 37, 39) (43, 44, 45) st>
Cast off 1 st at the beg of the next 3 WS rows. <18 (19, 21, 23, 24) (27, 31, 34, 36) (40, 41, 42) st>
Work 1 more row. Cast off all 18 (19, 21, 23, 24) (27, 31, 34, 36) (40, 41, 42) st loosely.
Right shoulder, straight section:
Return the held right shoulder sts to the needle. Rejoin yarn at the armhole edge with RS facing. Work in stripe pattern for 8.5 (9, 10, 10.5, 11.5) (12.5, 14, 15.5, 17) (18, 19.5, 20.5) cm/3.25 (3.5, 4, 4.25, 4.5) (5, 5.5, 6, 6.75) (7, 7.75, 8)” from the neck split, ending with a WS row.
Neck shaping (worked at the open neck edge on RS rows):
Cast off 2 st at the beg of the next 3 RS rows. <21 (22, 24, 26, 27) (30, 34, 37, 39) (43, 44, 45) st>
Cast off 1 st at the beg of the next 3 RS rows. <18 (19, 21, 23, 24) (27, 31, 34, 36) (40, 41, 42) st>
Work 1 more row. Cast off all 18 (19, 21, 23, 24) (27, 31, 34, 36) (40, 41, 42) st loosely.
Back Panel
Return the held back panel sts to the needle. Rejoin yarn with WS facing and continue the stripe sequence.
Work the back panel straight (no shaping), matching the stripe pattern on the front, until it measures 14.5 (15, 16, 16.5, 17.5) (18.5, 20, 21.5, 23) (24, 25.5, 26.5) cm/5.75 (6, 6.25, 6.5, 7) (7.25, 7.75, 8.5, 9) (9.5, 10, 10.5)” from the armhole split, ending with a WS row.
Cast off all 59 (62, 67, 72, 73) (80, 89, 96, 101) (108, 111, 114) st loosely on the next RS row.
Assembly
Line up the front panel over the back panel, right sides together. Seam each front shoulder to the top of the back panel using mattress stitch, matching the shoulder width (18 (19, 21, 23, 24) (27, 31, 34, 36) (40, 41, 42) st on each side). The center 23 (24, 25, 26, 25) (26, 27, 28, 29) (28, 29, 30) st of the back form the back neckline.
Sleeves (Make 2)
Sleeve 1 is worked in CC1, sleeve 2 is worked in CC4. Both sleeves are solid (no stripes) and both sleeves use MC for the ribbed cuff. Work each sleeve separately, following the same instructions below.
With 2.5 mm/US 1.5 needles and CC1 (for sleeve 1) or CC4 (for sleeve 2), with RS facing, pick up and knit 68 (70, 76, 78, 82) (86, 94, 102, 108) (112, 120, 124) st evenly around one armhole opening, beginning and ending at the underarm cast-off (don’t pick up stitches along the cast-off edge).
Note: Leave a long tail so you can use it to seam the underarm split.
Working back and forth (flat), purl WS rows and knit RS rows.
Continue flat for 3 (3, 3, 3, 4) (4, 4, 4, 4) (4, 4, 4) cm/1.25 (1.25, 1.25, 1.25, 1.5) (1.5, 1.5, 1.5, 1.5) (1.5, 1.5, 1.5)”, ending with a WS row.
Join to work in the round and continue in stockinette in the round until the sleeve measures 9.5 (9.5, 10, 10.5, 12) (12.5, 13, 14, 14.5) (15, 16, 16.5) cm/3.75 (3.75, 4, 4.25, 4.75) (5, 5, 5.5, 5.75) (6, 6.25, 6.5)” from the pickup edge.
Switch to 2 mm/US 0 needles and MC.
Rounds 1 to 4: [K1, p1] to end of round.
Cast off all st loosely in pattern.
Go back to your tail from the pick up stitches and seam the row edges to the underarm cast off stitches to close the sleeve.
Collar
The collar is worked in three flat sections, picked up from the neckline in MC. Work each section separately, picking up fresh stitches from the garment each time.
Back collar:
With RS facing and 2 mm/US 0 needles, pick up and 23 (24, 25, 26, 25) (26, 27, 28, 29) (28, 29, 30) st evenly along the back neck edge (between the two shoulder seams). Work in stockinette stitch (p WS, k RS) for 14 (14, 14, 14, 18) (18, 18, 18, 20) (20, 20, 20) rows. Cast off all st loosely.
Right front collar side:
With RS facing, pick up and knit 30 (30, 34, 34, 38) (40, 44, 48, 52) (54, 58, 60) st evenly along the right front neck edge (from the shoulder seam down to the neck cast-off). Work in stockinette stitch for 8 (8, 8, 8, 10) (10, 10, 10, 10) (10, 10, 10) rows. Cast off all st loosely.
Left front collar side:
With RS facing, pick up and knit 30 (30, 34, 34, 38) (40, 44, 48, 52) (54, 58, 60) st evenly along the left front neck edge (from the neck cast-off up to the shoulder seam). Work in stockinette stitch for 8 (8, 8, 8, 10) (10, 10, 10, 10) (10, 10, 10) rows. Cast off all st loosely.
Seam the three collar sections together at the corners so they meet at the shoulder seam, letting the collar fold naturally to the outside.
Blocking
You are done with the knitting part. Make sure to weave in all the ends.
To make your polo even prettier and help even out your stitches, block your project.
Don’t skip this step as it can make a huge difference. Read my detailed tutorial on why block, how-to, and all my tips and tricks if you need help.