Woven Scrap Yarn Crochet Blanket Free Pattern
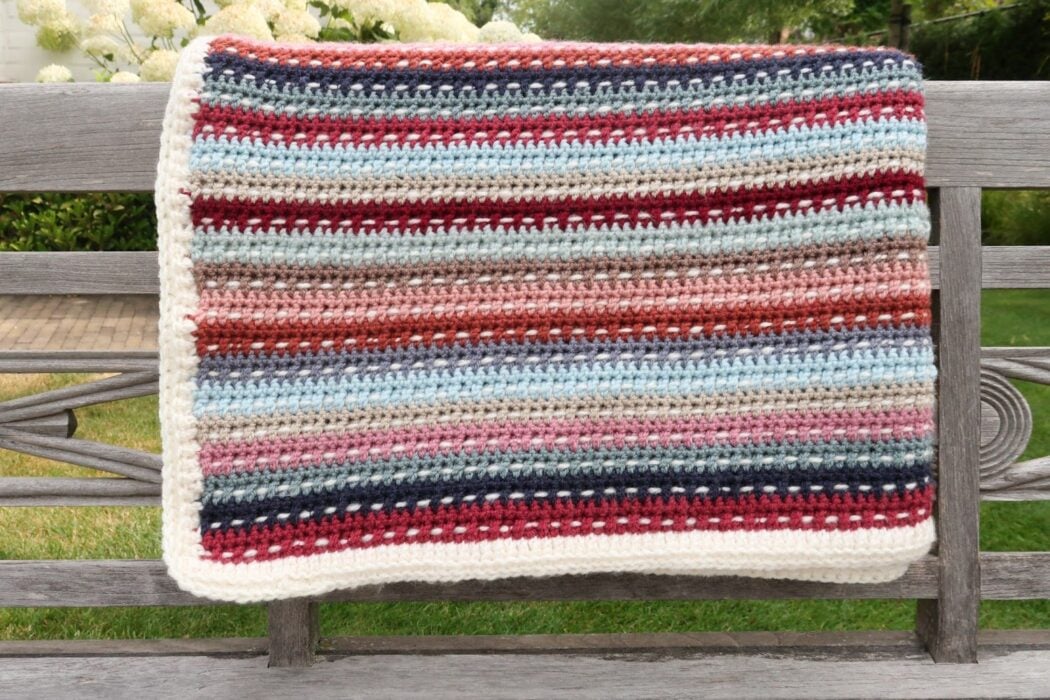
A new scrap yarn crochet blanket pattern, the Woven Scrap Blanket, is now a free crochet pattern here on the blog. Read all about the two colorways, how the woven threads work, and the two ways to finish it, or scroll down to view the full free pattern below.
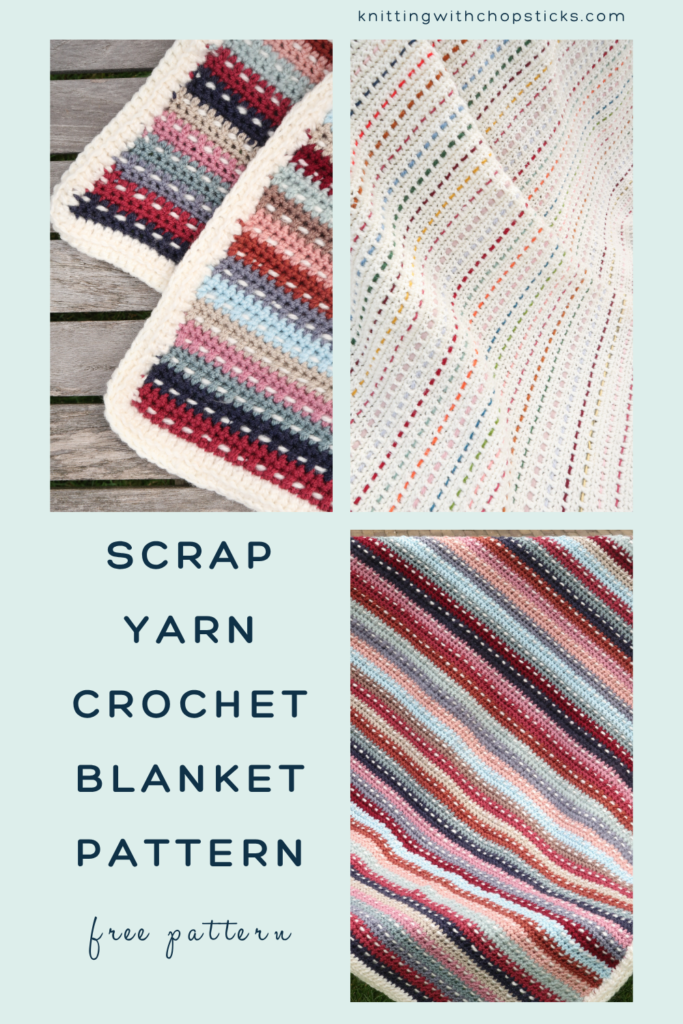
No time right now? Pin this stash buster crochet blanket for later!
*This post contains affiliate links (only for products I love, use and spend my own money on obviously). This means I earn some yarn money if you make a purchase through one of these links (of course at no extra cost for you!), which I promise to use to create more awesome patterns like this one. All opinions are my own. See my full disclosure here.
A scrappy blanket that finally uses up your whole stash
If your yarn bins are overflowing with odds and ends, this is the project that clears them out. The Woven Scrap Blanket is a true stash buster crochet blanket, built from a simple crocheted fabric with strands of scrap yarn woven through it. Two rows of every color, in whatever order your bin hands you, and those leftovers finally get to shine.
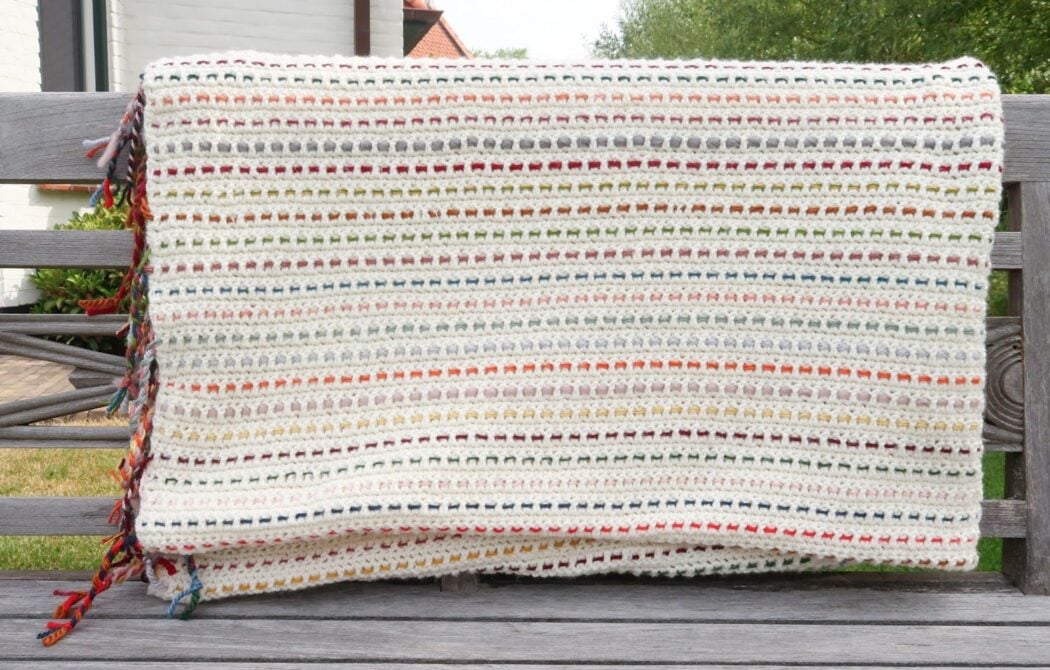
It comes in two looks and you get to pick. Work the fabric in one calm neutral like white and weave your colorful scraps through for pops of color, or crochet a stripy scrappy fabric and thread one single color through to pull it all together. Both use exactly the same pattern, so choose whichever your stash points you toward.
Any worsted weight yarn works for the fabric, and the woven threads can be anything from DK to super bulky, mixed however you like. It is a super beginner friendly make with no fancy stitches, just easy rows of double crochet and single crochet.
How the Woven Threads Work
Here is the clever part. You crochet a plain blanket first, working simple rows back and forth in double crochet and single crochet, with no color changes at all if you do not want them. Once the fabric is done and blocked, you thread a strand of scrap yarn onto a tapestry needle and weave it over and under the double crochet posts, one strand per row.
That is the whole technique. It is the same weaving used on the Winterlight Sleeveless Cardigan, just scaled up to blanket size. The threads add color, texture, and a little extra weight, and they gently stretch the blanket about ten percent longer as they go in.
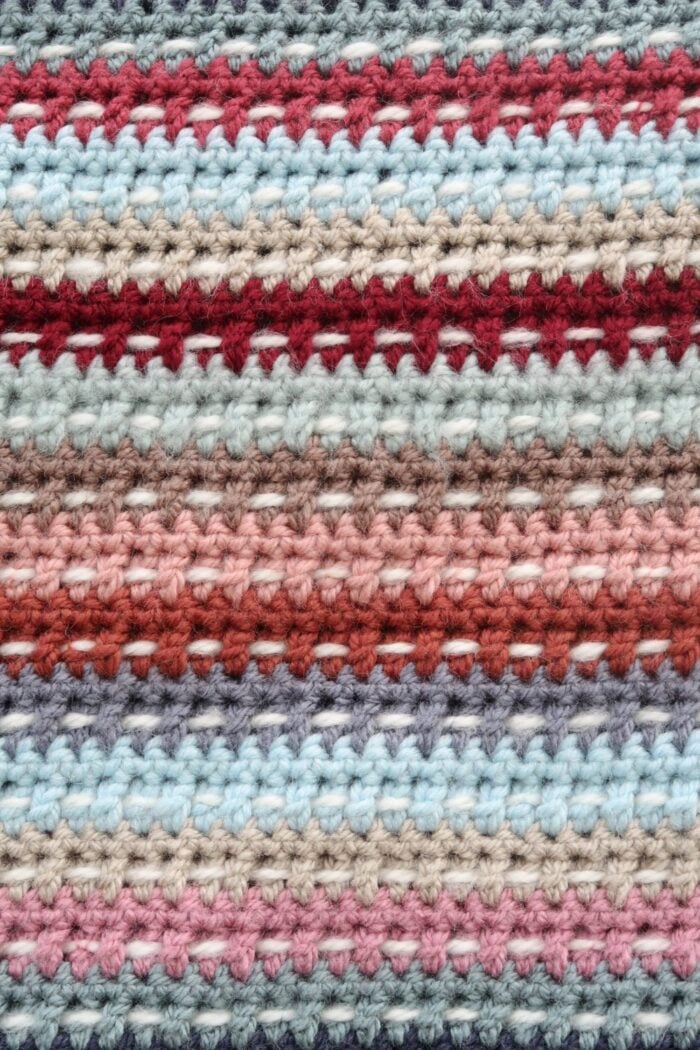
Woven Stash Busting Crochet Blanket Construction
The blanket is worked simply in rows back and forth. Once the fabric is done, you thread strands of scrap yarn over and under the double crochet posts, one strand per double crochet row.
This design comes with a lot of variations so you have two choices to make. Neither one changes a single stitch of the pattern, so pick whatever your stash points you toward, and feel free to mix them however you like.
Choice 1: the fabric and the threads
- Plain fabric, colorful threads. Work the whole blanket in one color, white or whatever neutral is most abundant in your stash, then weave your scraps through it. The threads become the sparks of color in the piece.
- Striped fabric, plain threads. Work the blanket in your scraps, changing color every 2 rows, then weave one single color through the whole thing to tie it together. Use a magic knot for the color changes so you have no ends to weave in later (see the tips and tricks section below).
Choice 2: the finish
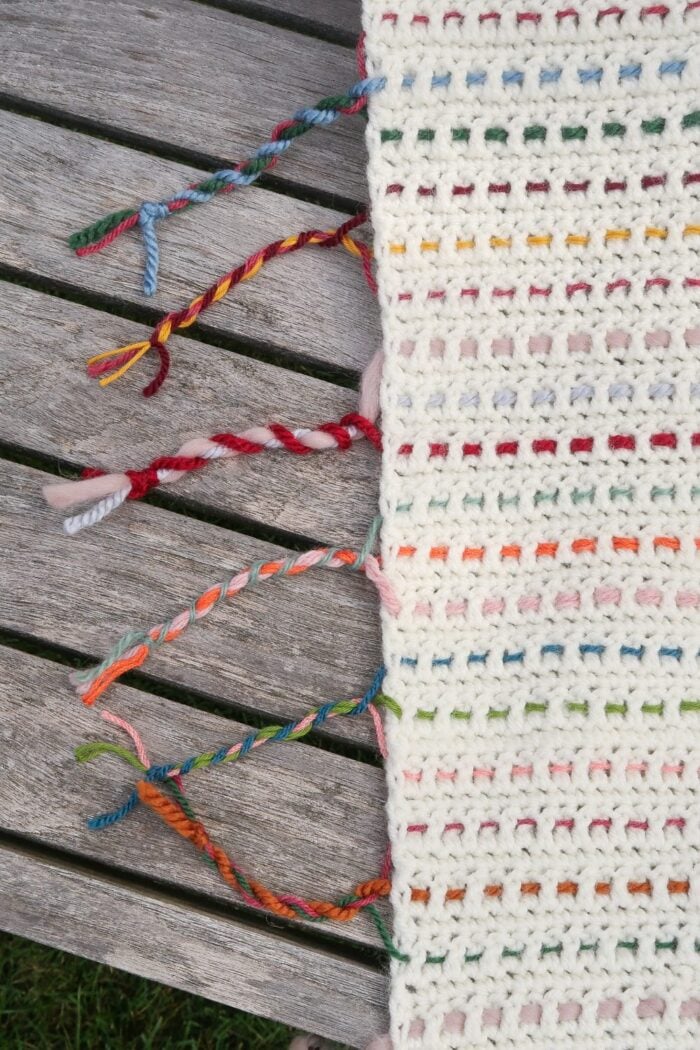
- Option 1: Twisted fringe. Leave the thread tails long and twist them into a fringe along the two side edges. Casual, and no extra yarn needed.
- Option 2: Envelope border. Knot the thread tails off short and hide them inside a double crochet border worked on both faces of the blanket and joined all the way around. Tidy, fully enclosed, and it works in white or in color.
Two Ways to Finish Your Scrap Yarn Blanket
Once your threads are woven in, you have long tails hanging off both long sides and two pretty ways to deal with them.
The twisted fringe is the casual, no extra yarn option. You take the tails in little groups, twist them into a tidy fringe, and trim them even. Fast, playful, and it uses up the very last scraps.
The envelope border is the neat option. You crochet a double crochet border on each face of the blanket and join them all the way around, sealing every thread end inside. It looks clean on both sides and works in white or in color. Mix and match however you like, either colorway can wear either finish.
Downloadable PDF for the Woven Scrap Blanket
Want to make this scrap yarn blanket away from your screen? Grab the printable, ad free PDF of the Woven Scrap Blanket pattern in my shop, on Etsy, or on Ravelry. It has every size from baby to king, both finishes, and all the numbers laid out so you can print it and go.
Grab the printable PDF of the I-Cord Bound Top Knitting Pattern now in my shop, Etsy shop, on Ravelry shop:
More Crochet Blanket Patterns You'll Love
Before You Start
Materials
- 6 mm / US J-10 hook
- Tapestry needle to weave the threads and the ends.
- Scissors.
- Worsted weight yarn: Royal Zeeman (4 – worsted weight, 100% acrylic, 100 g/3.5 oz, 240 m/262 yd). Any worsted weight yarn works.
- Scrap yarn for the woven threads: anything from DK to super bulky weight. Thinner than DK gets lost in the fabric. You can mix weights and fibers freely.
Because the yarn I used is not available everywhere, and I know how painful it is to try to find equivalent yarn which will give you the same effect, I have selected a few equivalent yarns for you. I haven’t tried them out myself, but they look so pretty, check them out!
- Lion Brand Wool-Ease. They have this yarn in about 20 colors, I’m sure you’ll fall in love with more than one.
- RED HEART Super Saver Yarn. This yarn also exists in more than 60 colors.
Sick of all the yarn jargon and conversions?
US vs UK, abbreviations, imperial vs metric, yarn weights, etc?
This is a scrap buster, so the numbers below are total yarn for the whole blanket rather than skein counts.
Main fabric: 475 (730, 975, 870, 1205) (1400, 2670, 4360, 4645, 5215) g/1140 (1755, 2340, 2090, 2895) (3360, 6410, 10465, 11150, 12520) m/1250 (1920, 2560, 2290, 3170) (3675, 7015, 11445, 12195, 13695) yd
Woven threads: 25 (40, 50, 45, 60) (70, 125, 195, 210, 230) g/60 (100, 120, 110, 145) (170, 300, 470, 505, 555) m/70 (110, 135, 125, 160) (190, 330, 515, 555, 610) yd
Envelope border: 60 (75, 90, 85, 95) (105, 140, 180, 185, 200) g/145 (180, 220, 205, 230) (255, 340, 435, 445, 480) m/160 (200, 245, 225, 255) (280, 375, 480, 490, 525) yd. Skip this one if you are making the twisted fringe ending.
Size
The blanket is available in the following sizes: Baby to King.
Sizes are written as Baby (Receiving, Toddler, Crib small, Crib regular) (Throw, Twin, Double, Queen, King) throughout the pattern. Pictures illustrate the Receiving size (colorful fabric, white threads) and the throw size (white fabric, colorful threads).
Final blanket sizes with the twisted fringe finish (fringe is not counted in the sizing):
| Size | Width (in) | Length (in) | Width (cm) | Length (cm) |
|---|---|---|---|---|
| Stroller / Baby | 30.0 | 35.5 | 76 | 90 |
| Receiving | 40.0 | 40.5 | 102 | 103 |
| Toddler | 42.0 | 52.5 | 107 | 133 |
| Crib – Small | 36.0 | 53.5 | 91 | 136 |
| Crib – Regular | 45.0 | 59.5 | 114 | 151 |
| Throw | 52.0 | 59.5 | 132 | 151 |
| Twin | 66.0 | 90.5 | 168 | 230 |
| Double | 90.0 | 108.5 | 229 | 275 |
| Queen | 96.0 | 108.5 | 244 | 275 |
| King | 108.0 | 108.5 | 274 | 275 |
Final blanket sizes with the envelope border:
| Size | Width (in) | Length (in) | Width (cm) | Length (cm) |
|---|---|---|---|---|
| Stroller / Baby | 32.5 | 38.0 | 82 | 96 |
| Receiving | 42.5 | 43.0 | 108 | 109 |
| Toddler | 44.5 | 54.5 | 113 | 139 |
| Crib – Small | 38.0 | 56.0 | 97 | 142 |
| Crib – Regular | 47.0 | 62.0 | 120 | 157 |
| Throw | 54.5 | 62.0 | 138 | 157 |
| Twin | 68.5 | 93.0 | 174 | 236 |
| Double | 92.5 | 110.5 | 235 | 281 |
| Queen | 98.5 | 110.5 | 250 | 281 |
| King | 110.0 | 110.5 | 280 | 281 |
If you want to adjust the size:
- This blanket has no stitch multiple and no row multiple beyond working in pairs of rows.
- Weaving the threads in stretches the blanket lengthwise by roughly 10%. The width does not change, so you stop crocheting 10% before your finished desired length.
- The envelope border adds 3 cm/1.25″ on every side. The twisted fringe is not counted in the sizing.
Gauge
The gauge for this pattern, blocked, in the dc and sc pattern, before weaving in the threads, is 13 st by 12 rows for a 10 cm by 10 cm/4″ by 4″ square.
After weaving in the threads, the same 10 cm by 10 cm/4″ by 4″ square needs 13 st by 10.5 rows.
The threads sit between the dc posts and push the rows apart, so the blanket grows about 10% longer once they go in. See the pattern instructions for the measurement to stop at.
Abbreviations
This pattern uses US notations.
- st = stitch
- ch = chain
- sl st = slip stitch
- sc = single crochet
- dc = double crochet
- dc2tog = double crochet 2 stitches together
- RS = right side
- WS = wrong side
- FLO = front loop only
Notes
- Work instructions between [ ] the indicated number of times or until the end of the row / round.
- The final number of stitches is indicated at the end of the row/round between < >.
- The turning ch 1, ch 2 don’t count as a stitch throughout the pattern except if mentioned otherwise.
The pattern is written in crochet shorthand. For example:
- “sc 1” means to single crochet in the next stitch,
- “sc 2” means to single crochet in each of the next 2 stitches,
- and “2 sc” means to single crochet twice in the next st.
The blanket has no right or wrong side until you add a border. Pick whichever face you like best.
Construction
The blanket is worked simply in rows back and forth. Once the fabric is done, you thread strands of scrap yarn over and under the double crochet posts, one strand per double crochet row.
This design comes with a lot of variations so you have two choices to make. Neither one changes a single stitch of the pattern, so pick whatever your stash points you toward, and feel free to mix them however you like.
Choice 1: the fabric and the threads
- Plain fabric, colorful threads. Work the whole blanket in one color, white or whatever neutral is most abundant in your stash, then weave your scraps through it. The threads become the sparks of color in the piece.
- Striped fabric, plain threads. Work the blanket in your scraps, changing color every 2 rows, then weave one single color through the whole thing to tie it together. Use a magic knot for the color changes so you have no ends to weave in later (see the tips and tricks section below).
Choice 2: the finish
- Option 1: Twisted fringe. Leave the thread tails long and twist them into a fringe along the two side edges. Casual, and no extra yarn needed.
- Option 2: Envelope border. Knot the thread tails off short and hide them inside a double crochet border worked on both faces of the blanket and joined all the way around. Tidy, fully enclosed, and it works in white or in color.
Special Stitches & Techniques
dc2tog
Yarn over, insert your hook in the next st, yarn over and pull up a loop, yarn over and pull through 2 loops. Yarn over, insert your hook in the following st, yarn over and pull up a loop, yarn over and pull through 2 loops. Yarn over and pull through all 3 loops on your hook. This turns 2 stitches into 1.
Magic knot color change
If you choose to work the fabric of the blanket in multiple colors, join a new color to the old one with a magic knot instead of fastening off and weaving in two ends. Here is a video tutorial to show you how to do the magic knot and have the color change land exactly at the end of the row. It’s demonstrated on a knitting project, but the technique is identical here. Place the knot at the very start of a row so it sits at the edge of the blanket, where the border or the fringe will hide it.
Weaving the threads
Each strand of scrap yarn is woven over and under the dc posts of one dc row. Same technique as the Winterlight Sleeveless Cardigan, if you want to see it on a garment.
Twisted fringe
Here is a video tutorial showing you how to construct it.
Tips & Tricks
- Color choices: this project is a great place to play with your scraps. You can stick to a single color family for a subtle look, or go bold with high contrast shades. If you are unsure, lay out your scraps next to the main fabric to check how well they pop against the background. If you use several colors for the main fabric, adding that neutral thread really brings it all together and lets a slightly bolder combination shine.
- Thickness: different yarn weights give slightly different effects in the woven threads. Thinner yarns blend into the fabric, thicker ones stand out more and add extra texture. Mixing thicknesses gives it a beautiful modern vibe.
- Fiber content: any fiber can work here.
- Two ways to build it: Version 1 is a white fabric with colored threads woven through. Version 2 is a striped fabric in your scraps with white threads woven through. Both use exactly the same pattern.
- Mix and match the finishes. Either version can end in a twisted fringe or an envelope border, in white or in color.
The Woven Scrap Blanket Crochet Pattern
The Blanket Fabric
With your 6 mm / US J-10 hook, ch 100 (134, 141, 120, 150) (173, 221, 301, 320, 360) + 2.
Row 1: Dc in the 3rd ch from your hook, dc across, turn. <100 (134, 141, 120, 150) (173, 221, 301, 320, 360) st>
Note for the striped version: work Rows 2 and 3 in one color, then change color with a magic knot.
Row 2: Ch 1, sc across, turn.
Row 3: Ch 2, dc across, turn.
Repeat Rows 2 and 3 until you reach approximately 81.5 (93.5, 120.5, 124, 137.5) (137.5, 209, 249.5, 249.5, 249.5) cm/32 (36.75, 47.5, 48.75, 54.25) (54.25, 82.25, 98.25, 98.25, 98.25)” ending after a Row 2.
Fasten off.
Blocking
You are done with the crocheting part for now. Make sure to weave in all the ends.
To help even out your stitches, block your blanket before you thread the scraps through. Don’t skip this step as it can make a huge difference. Read my detailed tutorial on why to block, how to do it, and all my tips and tricks if you need help.
Weaving in the Threads
Cut 48 (55, 71, 73, 81) (81, 123, 147, 147, 147) strands of scrap yarn, one per dc row, of 125 (155, 165, 145, 170) (195, 240, 315, 335, 370) cm/49.25 (61, 65, 57, 67) (76.75, 94.5, 124, 132, 145.75)”.
You will need one strand per dc row in your blanket.
Thread a strand on your tapestry needle. Working across the first dc row, take the needle over and under the dc posts, one by one, all the way to the other side. Skip the sc row above it entirely. Move on to the next dc row with a new strand.
Leave the tails hanging on both short edges for now. Once you’ve woven in all your threads, pick your finish.
Finish 1: Twisted Fringe
Working along one side, take the thread tails in groups of 3 and make a twisted fringe of approximately 10 cm/4″ from each group. You may need one group of 2 or 4 to finish. Repeat along the other side.
Trim your ends even and steam block the fringe for a tidy result.
Finish 2: Envelope Border
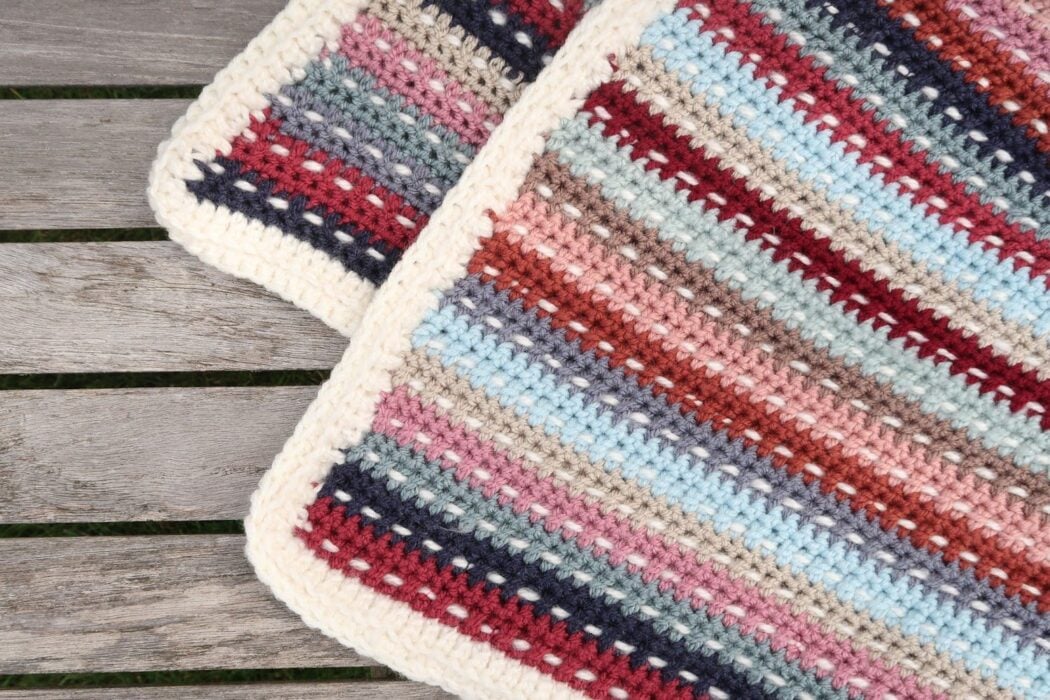
First, secure the threads. Knot each thread tail against the edge of the fabric with a simple knot, then trim it to about 3 cm/1″. The border will cover all of it.
You are going to work two separate borders, one on each face of the blanket, and then join them together so all the ends end up sealed inside.
Border A
Join your yarn in the first st of the last row.
Round 1:
- Ch 2, along the last row, work in the front loop only of each st: [FLO dc 8, FLO dc2tog] across, working any leftover stitches as FLO dc.
- Work 3 dc in the corner.
- Along the row-end edge, work about 9 dc for every 10 rows, spaced evenly.
- Work 3 dc in the corner.
- Along the starting chain, work in the third loop of each ch: [dc 8, dc2tog] across, working any leftover chains as dc.
- Work 3 dc in the corner.
- Work the second row-end edge to match the first.
- Work 3 dc in the last corner. Join with a sl st to the first dc.
Fasten off.
Border B
Turn the blanket over. Join your yarn in the same place on the other face.
Round 1: Work exactly as Border A. Along the row-end edges, work into the same row ends, on the other side of the edge. Join with a sl st to the first dc. Fasten off.
Joining the two borders
The two borders now stand up around the blanket like two flaps. Bring them together so the WS of each faces the other.
Join your yarn through both borders at any corner. Sc all the way around through the two loops that sit closest to each other, so the back loop of the near border and the front loop of the far border. Join with a sl st to the first sc.
Fasten off and weave in your last ends between the two layers. If you want the border to sit perfectly square, give the edges a light steam block.