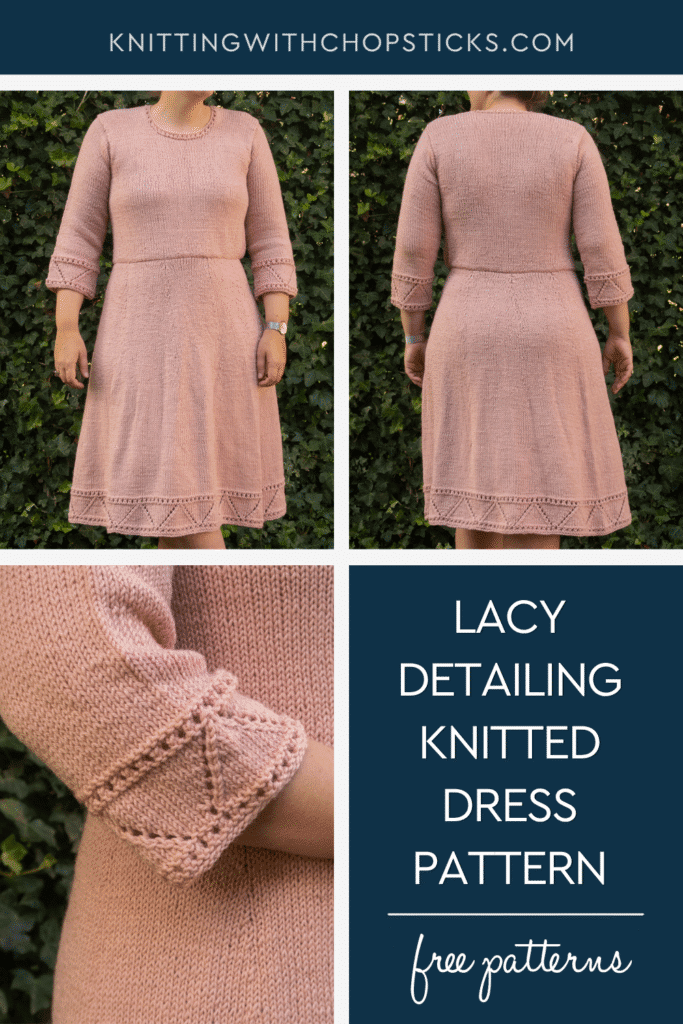
Anastasia Knit Dress

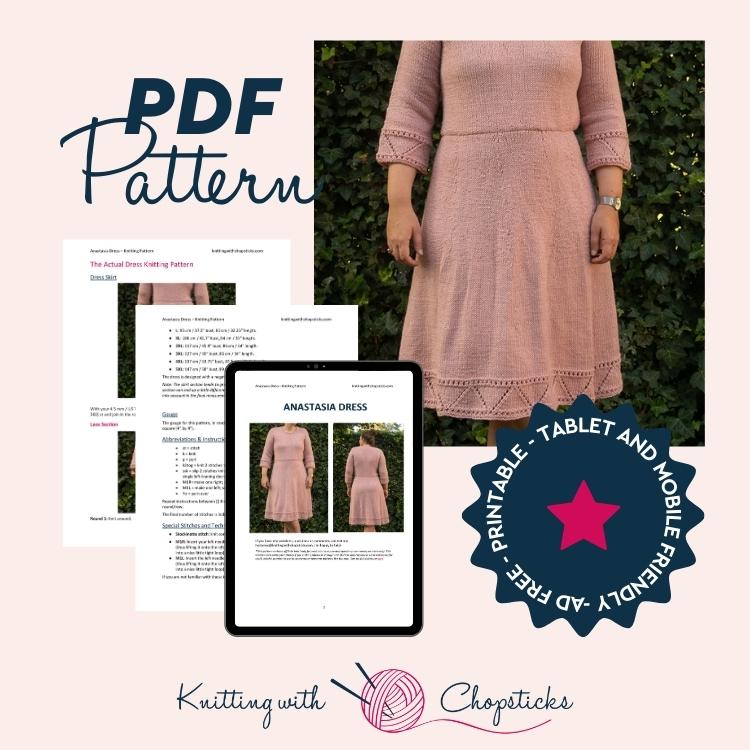
A new dress knitting pattern – the Anastasia Knit Dress – is now a free knitting pattern here on the blog. Read all about the structured construction and the delicate lace details, scroll down to view the full free pattern or purchase an ad free PDF from the links below.
No time right now? Pin this knitted dress pattern free for later!
*This post contains affiliate links (only for products I love, use and spend my own money on obviously). This means I earn some yarn money if you make a purchase through one of these links (of course at no extra cost for you!), which I promise to use to create more awesome patterns like this one. All opinions are my own. See my full disclosure here.

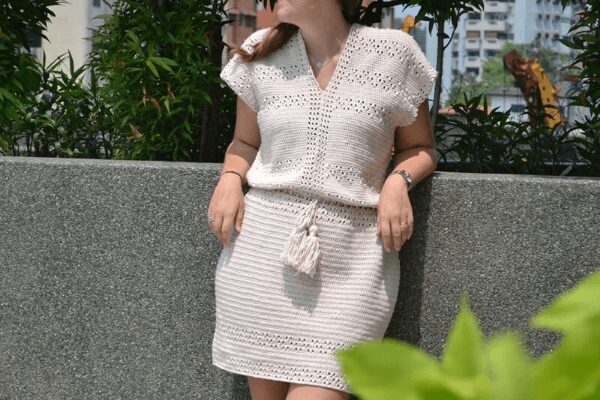
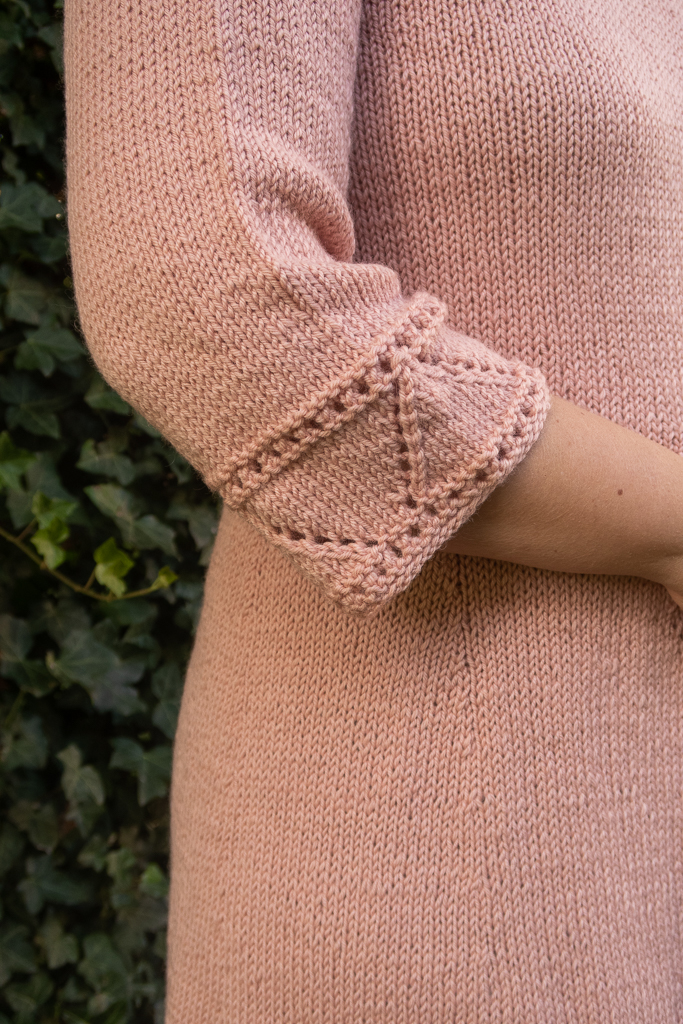
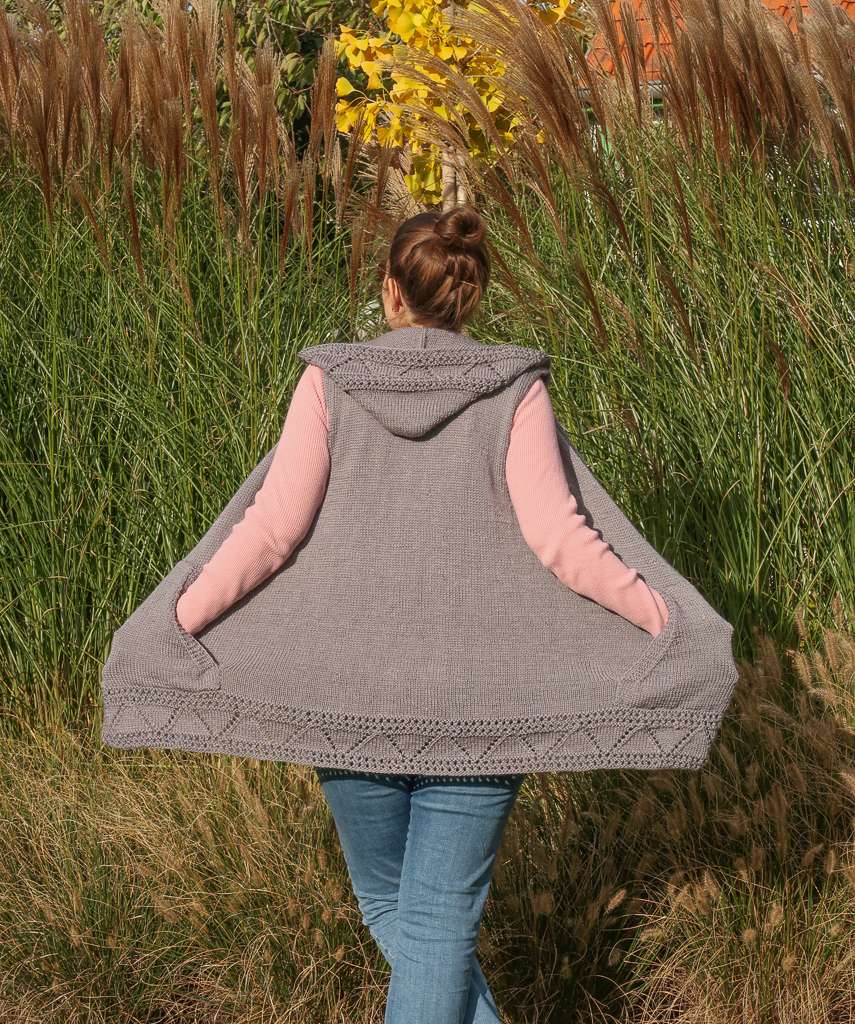
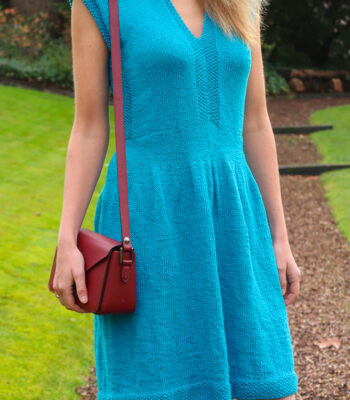
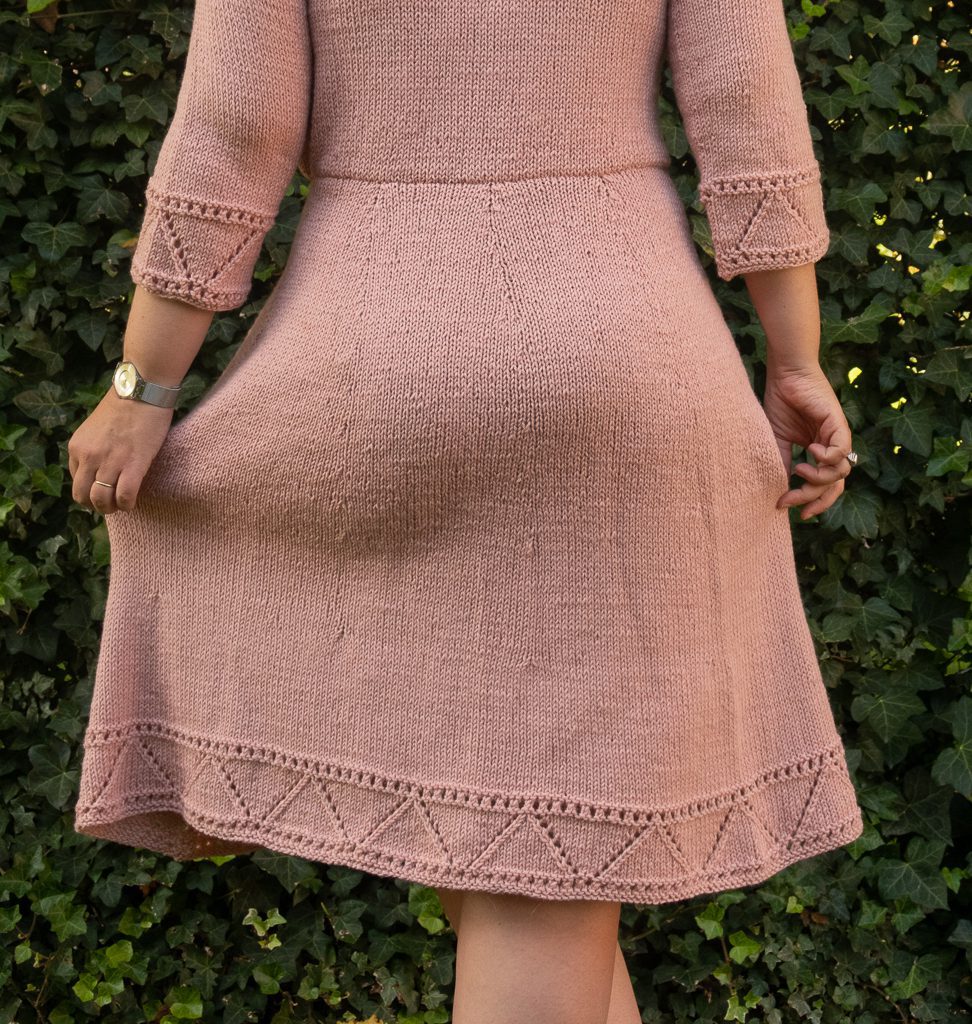
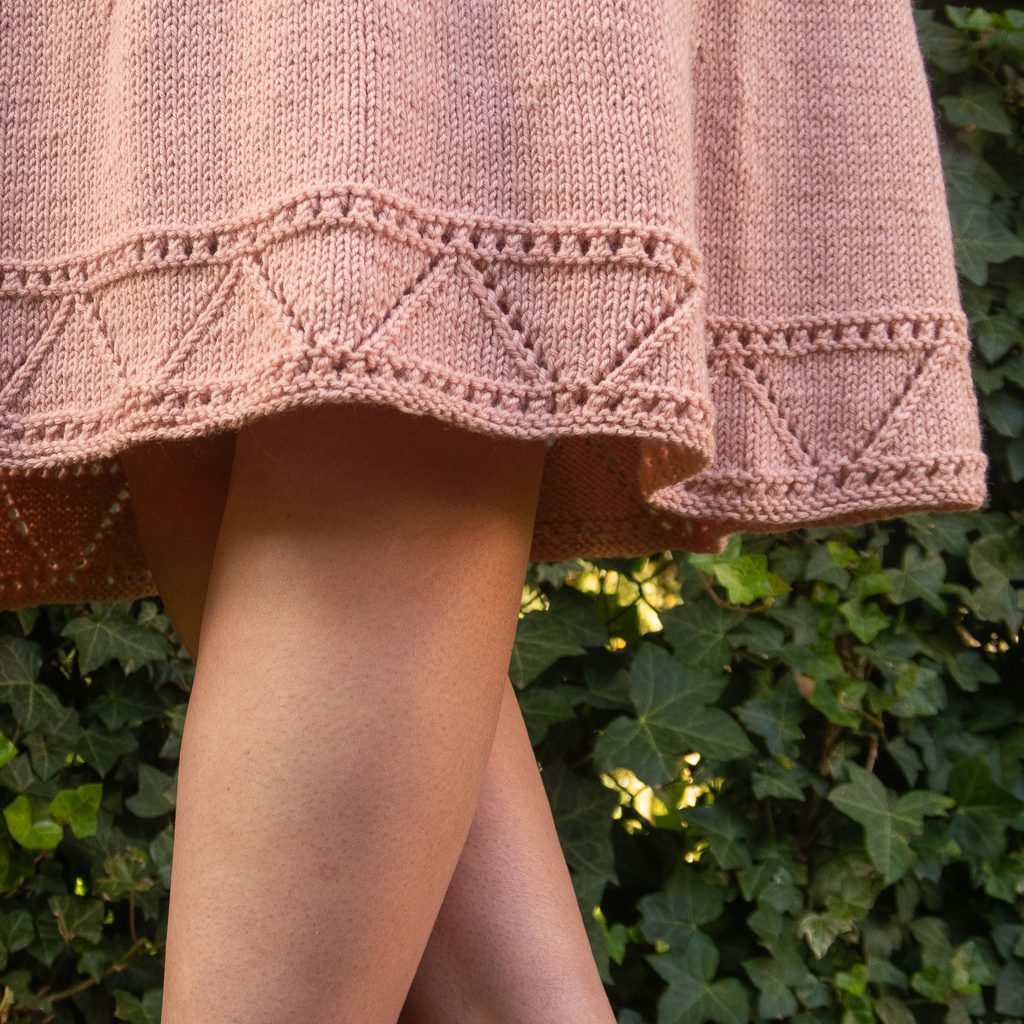
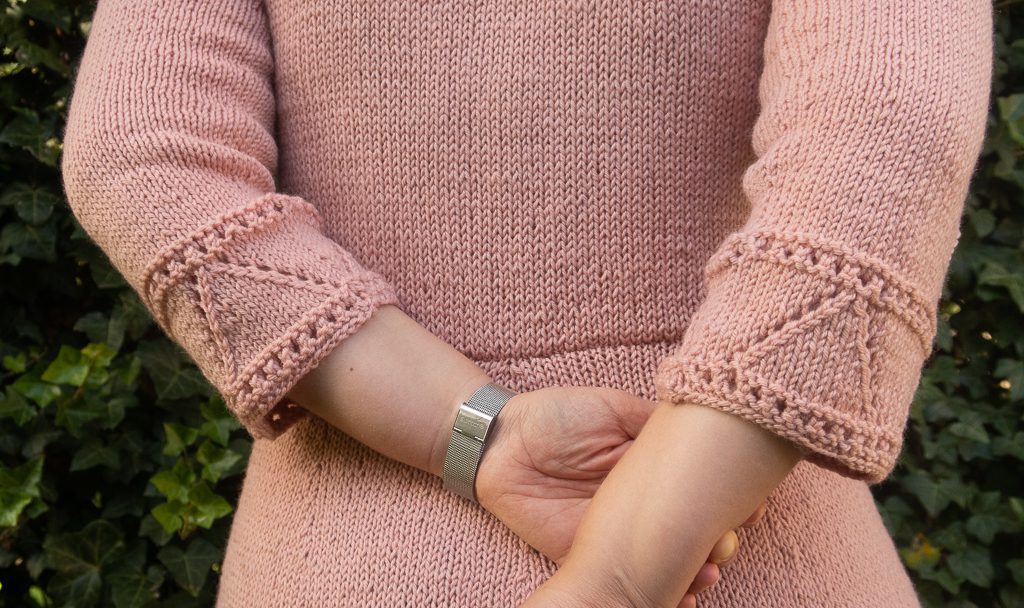
Experience the joy of creating your own fashion with the Anastasia Dress knitting pattern! The simple lines of this dress make it comfy and easy to wear, while the delicate lace detail at the bottom of the skirt and the sleeves add a touch of feminine sophistication. The wool yarn used, along with the 3/4 sleeves and mid-length skirt make it a perfect fit for those crisp fall days.
Although it might not look easy, the Anastasia dress pattern is an easy level, the lace sections are separate from any shaping so you can focus on one or the other. The pattern comes in sizes ranging from XS to 5XL, ensuring that anyone can enjoy the cozy comfort of this handmade knit dress.
Get your knitting needles ready and start creating your new favorite fall outfit with the Anastasia knitted dress pattern free.
The Knit Dress Construction
Perfect Fit Guide
Always guessing your size when knitting or crocheting garments?

The Anastasia dress is worked in several pieces which are then sewed together to ensure this garment will keep its form and fit through time. Sewing the pieces together adds structure to the dress and prevents excessive stretching.
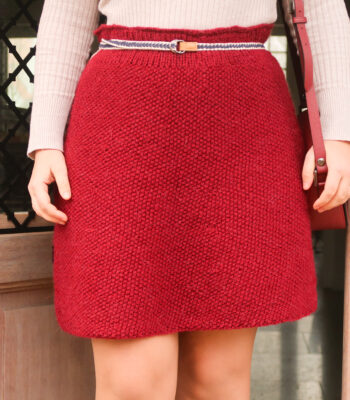
The skirt is knitted first, up to the waist. Then, the top section is knitted as a separate piece, from the waist up. Stitches are split to form the armholes. When knitting the front section of the top you’ll add some shaping for the neck. The sleeves are knitted separately. Skirt, top section and sleeves are all worked in the round, from bottom-up.
Shoulders are sewn together and then the sleeves and skirt are attached to the dress body. Finally, stitches are picked up around the neckline to add the eyelet collar.
The Yarn
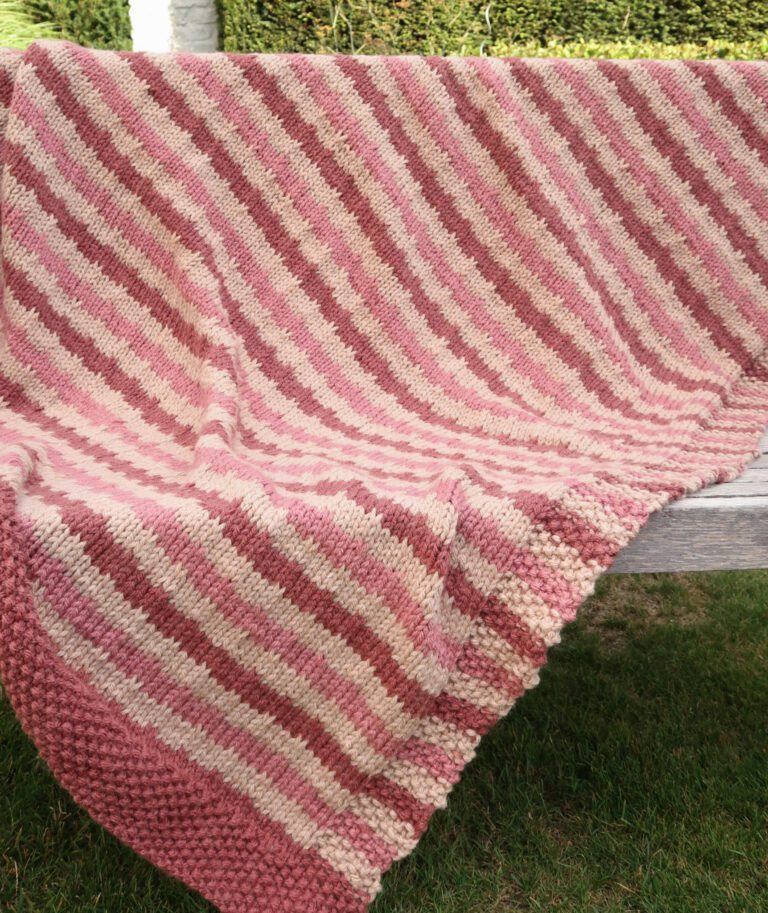
I used the Hobbii Friends Wool, a worsted weight (4) yarn, made of 100% wool. This yarn is elastic, strong, warm, and breathable, which make it ideal for a fall and winter knit dress. It is made out of 4 threads spun together and is available in an array of colors. So unleash you creativity!
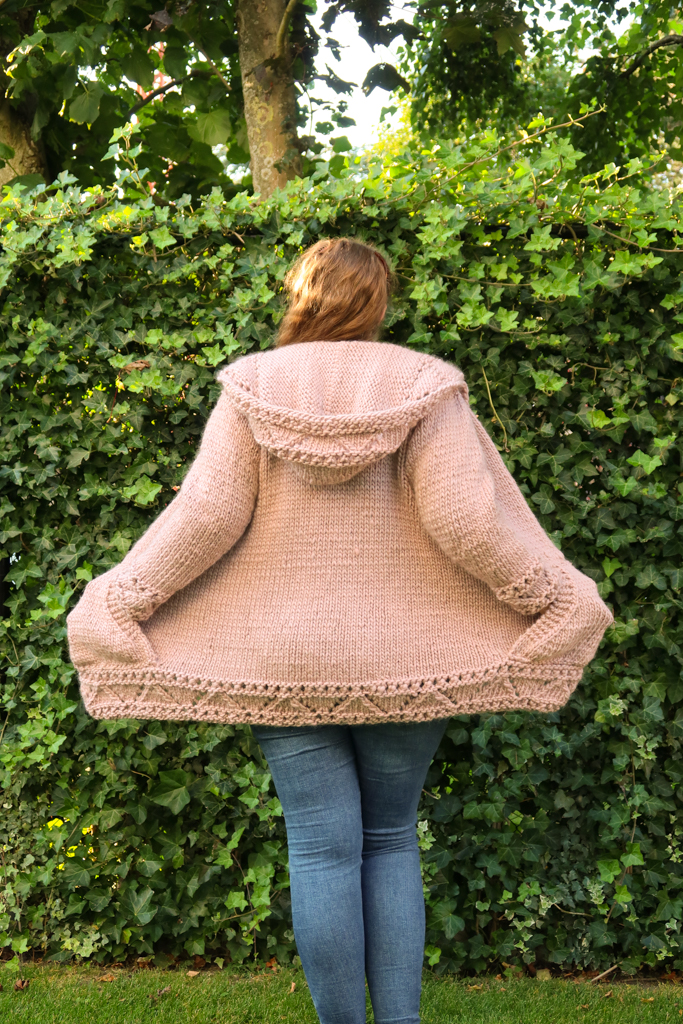
The dress knitting pattern pictured above was made with their Dusty Rose shade. This warm and soothing color reminds me of the avocado hand-dyed yarn showcased a few weeks ago in my Drapey Boxy Sweater, but without the peachy hint.
And you, what color and yarn would you choose to knit this dress?
Tip: When substituting yarn, make sure you check the yardage per skein of the yarn you’re planning to use and calculate how many skeins you’ll need based on the pattern yarn yardage per skein.
Also make sure your gauge matches the pattern’s so the sizing comes out right 😉.
The Anastasia Collection
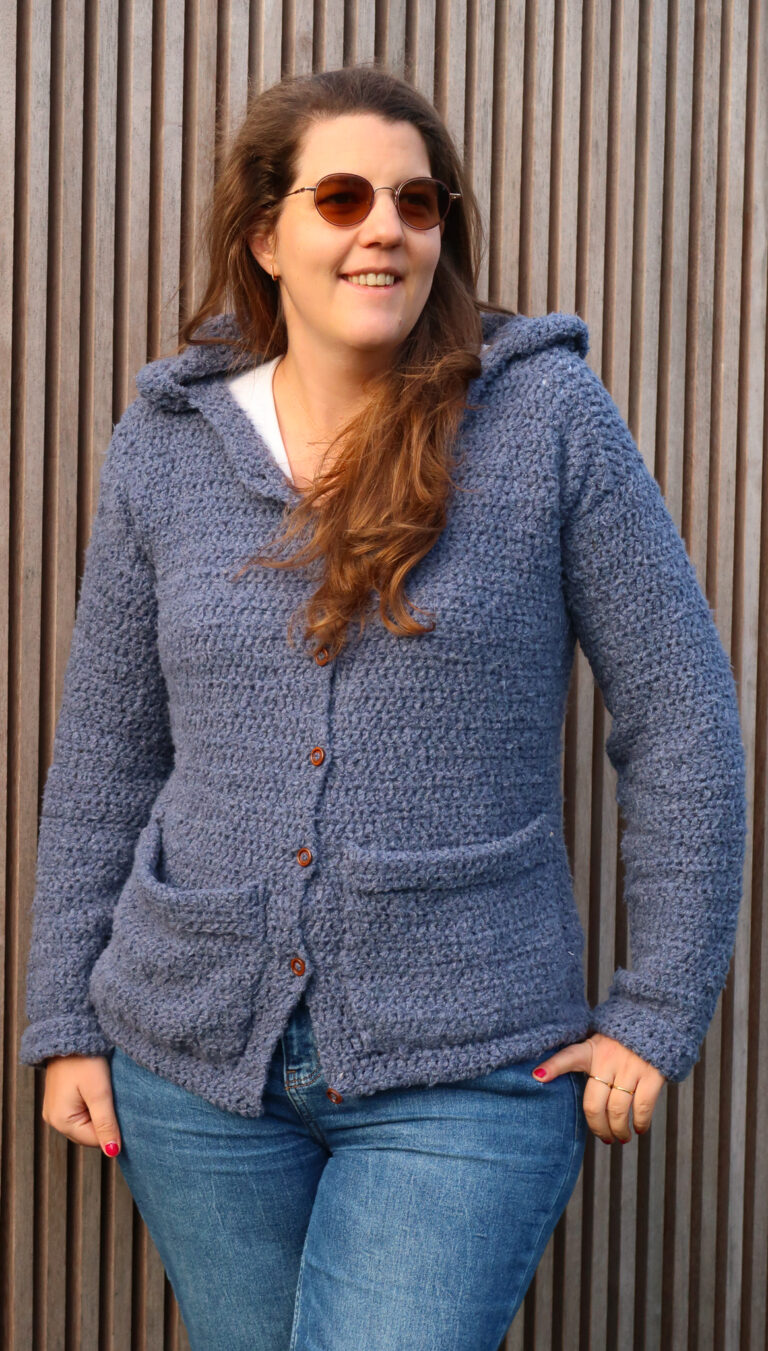
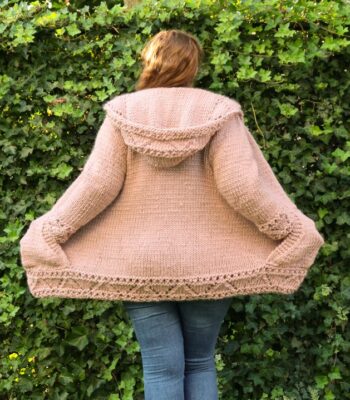
I love this lace detail so much that it’s the 3rd design I made featuring it. Originally used in the Anastasia Hoodie (super bulky) then in the worsted weight version I loved translating it into a dress for this design. Maybe a baby cardigan is in the future ;).
Downloadable Anastasia Dress Knitting Pattern
More Easy Garments Knitting Patterns View All
Before You Start the Anastasia Knitted Dress Pattern Free
Materials
- 4.5 mm / US 7 knitting needles
- Hobbii Friends Wool (worsted weight (4), 100% wool, 100 m / 109 yd, 50 g / 1.75 oz): 12 (13, 14, 15, 17) (19, 20, 21, 22) skeins in color Dusty Rose (52)
- Tapestry needle to weave in the ends.
- Stitch holder
Size
Sick of all the yarn jargon and conversions?
US vs UK, abbreviations, imperial vs metric, yarn weights, etc?

The free dress knitting pattern is available in the following sizes: XS to 5XL. Sizes are noted throughout the pattern in the following way: XS (S, M, L, XL) (2XL, 3XL, 4XL, 5XL). The pictures illustrate the L size.
Final garment measurements are:
- XS: 65 cm / 25.5” bust, 79 cm / 31” length.
- S: 75 cm / 29.5” bust, 80 cm / 31.5” length.
- M: 85 cm / 33.25” bust, 81 cm / 32” length.
- L: 95 cm / 37.5” bust, 82 cm / 32.25” length.
- XL: 106 cm / 41.7” bust, 84 cm / 33” length.
- 2XL: 117 cm / 45.9” bust, 86 cm / 34” length.
- 3XL: 127 cm / 50” bust, 86 cm / 34” length.
- 4XL: 137 cm / 53.75” bust, 87.5 cm / 34.5” length.
- 5XL: 147 cm / 58” bust, 89 cm / 35” length.
The knit dress is designed with a negative ease of 2-4” ease at the bust.
Note: The skirt section tends to grow more when blocking so the row height gauge on this section can end up a little different from the one given in the pattern, this has been taken into account in the final measurements.

Gauge
The gauge for this pattern, in stockinette stitch, is 17 st by 24 rows for a 10 cm by 10 cm square (4” by 4”).
Abbreviations & Instructions
- st = stitch
- k = knit
- p = purl
- k2tog = knit 2 stitches together, single right-leaning decrease
- ssk = slip 2 stitches knitwise, knit these 2 stitches together through back loops; single left-leaning decrease.
- M1R= make one right; single right-leaning knit increase
- M1L = make one left; single left-leaning knit increase
- Yo = yarn over
Yarn Jargon Cheatsheets
Whether you knit, crochet, or both, these are a necessity.
Repeat instructions between [] the indicated number of times or until the end of the round/row.
The final number of stitches is indicated at the end of the round/row between < >.
Special Stitches and Techniques
- Stockinette stitch: knit continuously in the round.
- M1R: Insert your left needle from back to front, under the bar between the stitches (thus lifting it onto the left needle). Knit this bar through the front loop (this twists it into a nice little tight loop).
- M1L: Insert the left needle from front to back, under the bar between the stitches (thus lifting it onto the left needle). Knit this bar through the back loop (this twists it into a nice little tight loop).
If you are not familiar with these increase techniques, I find this video tutorial very helpful.
- Picking up stitches: If you’re not familiar with this technique, this tutorial is very helpful.
- I recommend using the sloped bind off technique for the neck shaping. If you’re not familiar with this technique, this tutorial is very helpful.
Dress Construction
The dress is worked in several pieces sewed together for added structure and to avoid stretching out.
The skirt is knitted first, bottom-up and in the round, to the waist. The top section is then knitted in the round from the waist up as a separate piece. Stitches are split to form the armholes. When knitting the front section of the top you’ll add some shaping for the neck.
The sleeves are worked bottom up in the round and then sewed to the dress body.
Finally, after blocking and assembling all the parts, stitches are picked up around the neckline to add the eyelet collar.
The Actual Anastasia Dress Free Knitting Pattern
Dress Skirt
With your 4.5 mm / US 7 knitting needles, cast on 234 (252, 270, 288, 306) (324, 324, 342, 360) st and join in the round.
Lace Section
Round 1: Knit around.
Round 2: Purl around.
Round 3: [Yo, k2tog] around.
Round 4: Knit around.
Round 5: Purl around.
Round 6: [K1, yo, ssk, k12, k2tog, yo, k1] around.
Round 7: Knit around.
Round 8: [K2, yo, ssk, k10, k2tog, yo, k2] around.
Round 9: Knit around.
Round 10: [K3, yo, ssk, k8, k2tog, yo, k3] around.
Round 11: Knit around.
Round 12: [K4, yo, ssk, k6, k2tog, yo, k4] around.
Round 13: Knit around.
Round 14: [K5, yo, ssk, k4, k2tog, yo, k5] around.
Round 15: Knit around.
Round 16: [K6, yo, ssk, k2, k2tog, yo, k6] around.
Round 17: Knit around.
Round 18: [K7, yo, ssk, k2tog, yo, k7] around.
Round 19 – 23: Repeat Rounds 1 to 5.
Plain body
Knit in stockinette until total length is 20 cm / 7.75”.
Place 9 markers: one every 26 (28, 30, 32, 34) (36, 36, 38, 40) st.
Round definitions:
- Decrease round :[K2tog, k until next marker] around.
- Double decrease round: [Ssk, k2tog, k until next marker] around.
[Work decrease round. Knit in stockinette for 5 cm / 2”] three times. <207 (225, 243, 261, 279) (297, 297, 315, 333) st>
[Repeat decrease round. Knit in stockinette for 3 cm / 1.25”] five times. <162 (180, 198, 216, 234) (252, 252, 270, 288) st>
[Repeat decrease round. Knit in stockinette for 1 cm / 0.5”] five times. <117 (135, 153, 171, 189) (207, 207, 225, 243) st>
[Work double decrease round. Knit in stockinette for 1 cm / 0.5”] 1 (2, 2, 2, 2) (2, 1, 1, 2) times. <99 (99, 117, 135, 153) (171, 189, 189, 207) st>
Cast off and leave a long tail for sewing.
Dress Top Section
With your 4.5 mm / US 7 knitting needles cast on 110 (128, 144, 162, 180) (198, 216, 232, 250) st and join in the round.
Note: The top has more stitches than the skirt waist on purpose, refer to the assembly section note.
Knit in the round for 22 cm / 8.5”.
You will now divide your stitches in 2 parts to create the armholes. Stitches are cast off in between panels to create an indent for the sleeves.
Cast off 12 (13, 15, 16, 17) (16, 17, 19, 20) st, knit 43 (51, 57, 65, 73) (83, 91, 97, 105) (place stitches on holder), cast off 12 (13, 15, 16, 17) (16, 17, 19, 20), knit 43 (51, 57, 65, 73) (83, 91, 97, 105).
Back Panel
Knit in stockinette until total length is 37 (38, 39, 40, 42, 44, 44, 46, 47) cm / 14.25 (17.75, 15.25, 15.75, 16.25) (17, 17.25, 17.75, 18.25).
Front panel
Knit in stockinette until total length is 28 (29, 30, 31, 33) (35, 35, 37, 38) cm / 10.75 (11.25, 11.75, 12.25, 12.75) (13.5, 13.75, 14.25, 14.75)”.
Neck Shaping
Knit 14 (18, 21, 25, 29) (34, 38, 41, 45), cast off 15, knit 14 (18, 21, 25, 29) (34, 38, 41, 45).
Work both sides separately.
[Purl 1 row.
Shaping row: Cast off 1 st knitwise, knit across] 3 times. <11 (15, 18, 22, 26) (31, 35, 38, 42) st>
Knit in stockinette until total length is 37 (38, 39, 40, 42, 44, 44, 46, 47) cm / 14.25 (17.75, 15.25, 15.75, 16.25) (17, 17.25, 17.75, 18.25)”.
Cast off.
Go back to the stitches for the other shoulder, join yarn at the shoulder.
[Knit 1 row.
Shaping row: Cast off 1 st purlwise, p across] 3 times. <11 (15, 18, 22, 26) (31, 35, 38, 42) st>
Knit in stockinette until total length is 37 (38, 39, 40, 42, 44, 44, 46, 47) cm / 14.25 (17.75, 15.25, 15.75, 16.25) (17, 17.25, 17.75, 18.25)”.
Cast off.
Sleeves
Cast on 36 (36, 54, 54, 54) (54, 72, 72, 72) st and join in the round, add a stitch marker to mark the rounds.
Repeat Dress Skirt Lace Section rounds 1 to 23.
[Knit in stockinette for 8 (6, 8, 8, 8) (4, 8, 8, 8) rounds.
Increase: k1, M1, knit until last st, M1, k1] 7 (9, 2, 4, 7) (10, 2, 4, 6) times. <50 (54, 58, 62, 68) (74, 76, 80, 84) st>
Knit in stockinette until total length is 38 cm / 15”.
At the end of the round, work flat in rows back and forth in stockinette for 3.5 (4, 4.5, 4.5, 5) (4.5, 5, 5.5, 6) cm / 1.5 (1.5, 1.75, 1.75, 1.75) (1.75, 2, 2.25, 2.25) (to cover the indent)
Blocking
Before assembling all your parts, carefully block them.
This will make your dress even prettier, help even your stitches and open up the lace section.
Don’t skip this step as it can make a huge difference. Read my detailed tutorial on why block, how-to, and all my tips and tricks if you need help.
Assembly
Sew the shoulder seams then attach the sleeves at the armholes.
Attach the skirt and top section together.
Note: The top has more stitches than the skirt section (on purpose) so you need to skip approximately every 9 (8, 7, 6, 6) (6, 6, 7, 7) th stitch of the top when attaching both parts together. Start by connecting the top to the skirt with detachable stitch markers to match up stitches around and make sure they’re not skipping too many / too few. This will make it easier when sewing.
Collar

Pick up 76 st knitwise around the neck and join in the round.
Round 1: Purl around.
Round 2: [Yo, k2tog] around.
Round 3: Knit around.
Cast off purlwise.
Weave in all your ends.
Copyright 2023 of Knitting with Chopsticks.