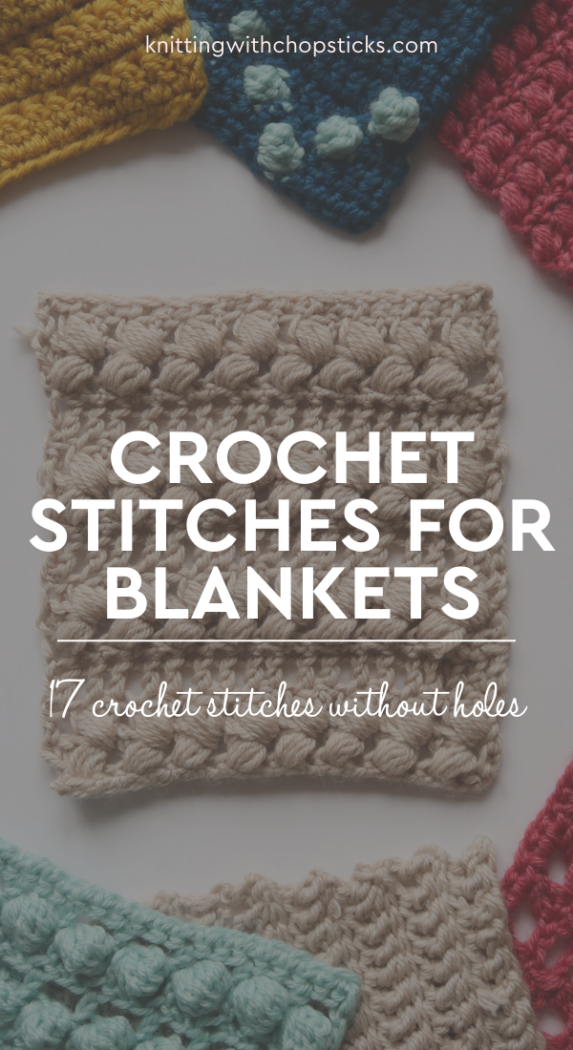
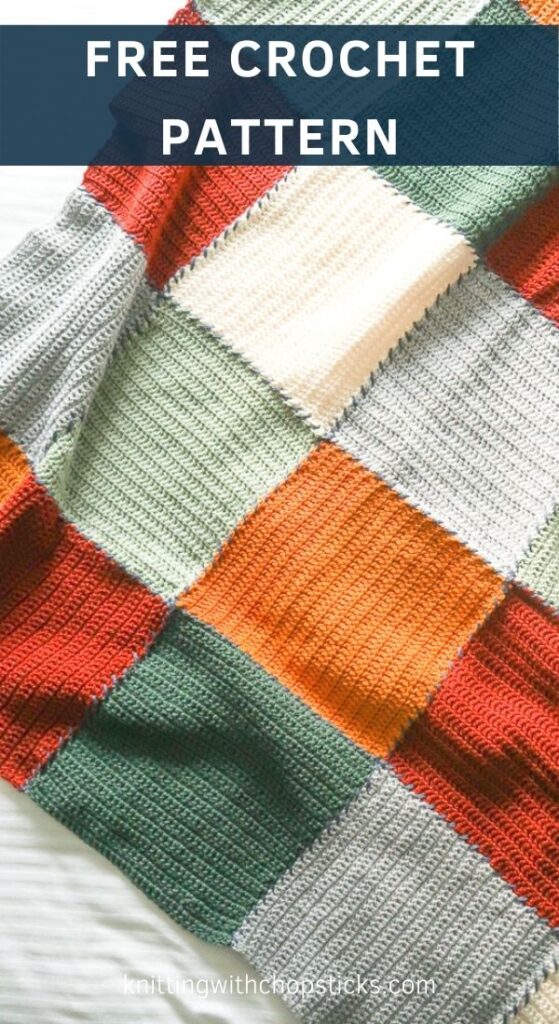
Block Blanket Crochet Pattern
The Block Blanket is a new free crochet pattern here on the blog! Read all about the decorative seams, how to make it from your stash, or scroll down to view the full free pattern or purchase an ad free PDF from the links below.
Choose your own adventure with this customizable beginner crochet blanket pattern. My step-by-step instructions will guide you through the entire project, but this pattern is so flexible, you can switch things up with any yarn, any stitch, and any size you’d like.
No time right now? Pin this beginner crochet blanket pattern for later!
*This post contains affiliate links (only for products I love, use and spend my own money on obviously). This means I earn some yarn money if you make a purchase through one of these links (of course at no extra cost for you!), which I promise to use to create more awesome patterns like this one. All opinions are my own. See my full disclosure here.
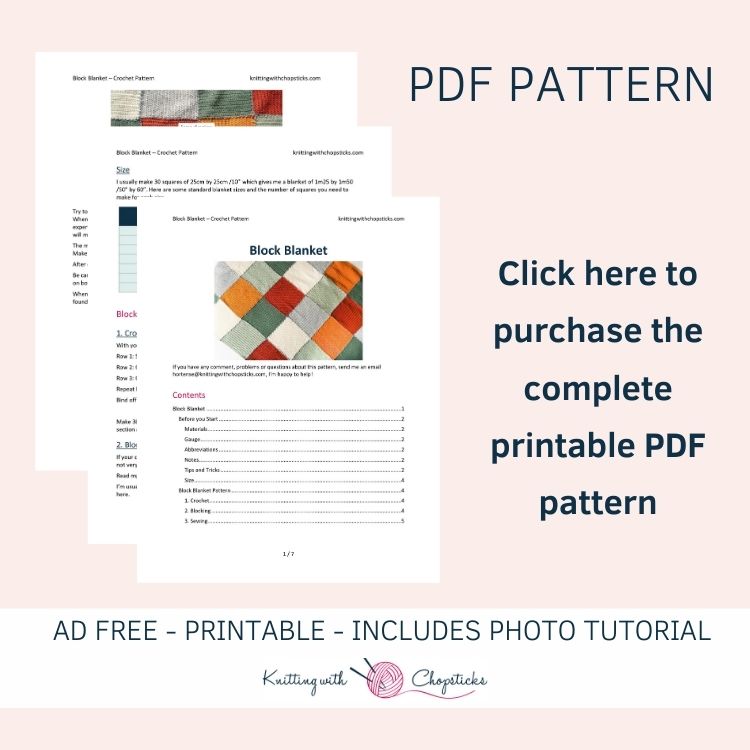
If you prefer to purchase the cheap ad-free PDF Pattern to get all the instructions and pictures in a nice PDF you can print and take notes on without relying on your phone or an internet connection, I’ve got you covered!
Grab the PDF of the Block Blanket beginner crochet blanket pattern in my shop, on Ravelry or in my Etsy shop.
2025 Crochet Bestseller Pattern Collection

If this design caught your eye, you’re going to love the 2025 Crochet Bestseller Pattern Collection — a curated bundle of the year’s most-popular crochet patterns.
Inside are 10 crowd-favorites that crocheters kept returning to: modern blankets, easy garments, and texture-rich pieces that work up smoothly and look great in any yarn.
Every pattern is written to be approachable and confidence-boosting, ideal for crocheters who want fun, reliable projects they can finish and enjoy without stress.
Grab the 2025 Crochet Bestseller Pattern Collection here >>
More Crochet Blankets you'll Love
My Favorite (Least-Favorite) Part
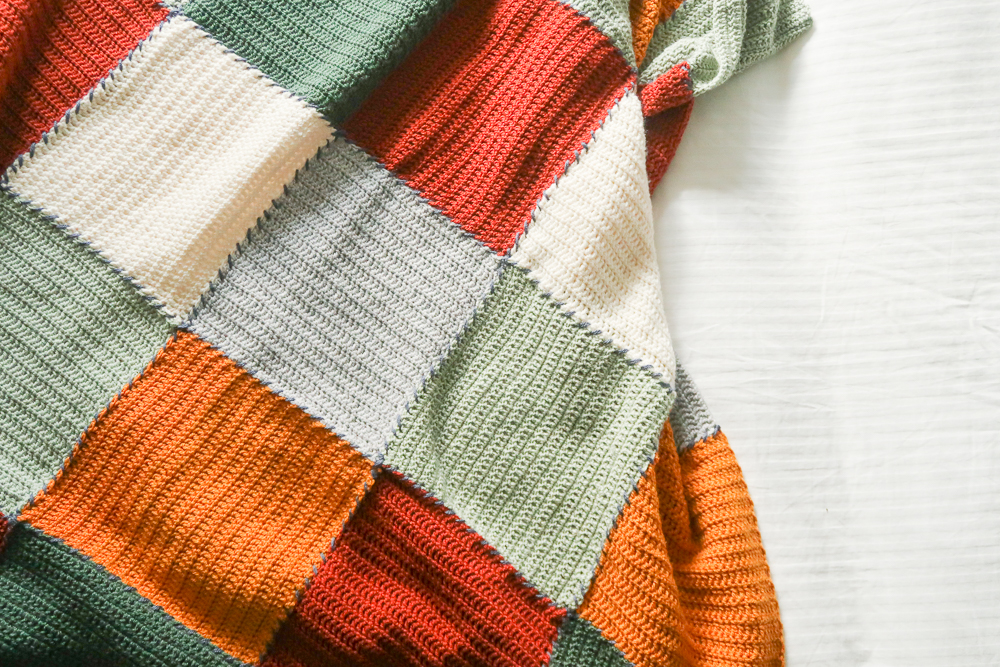
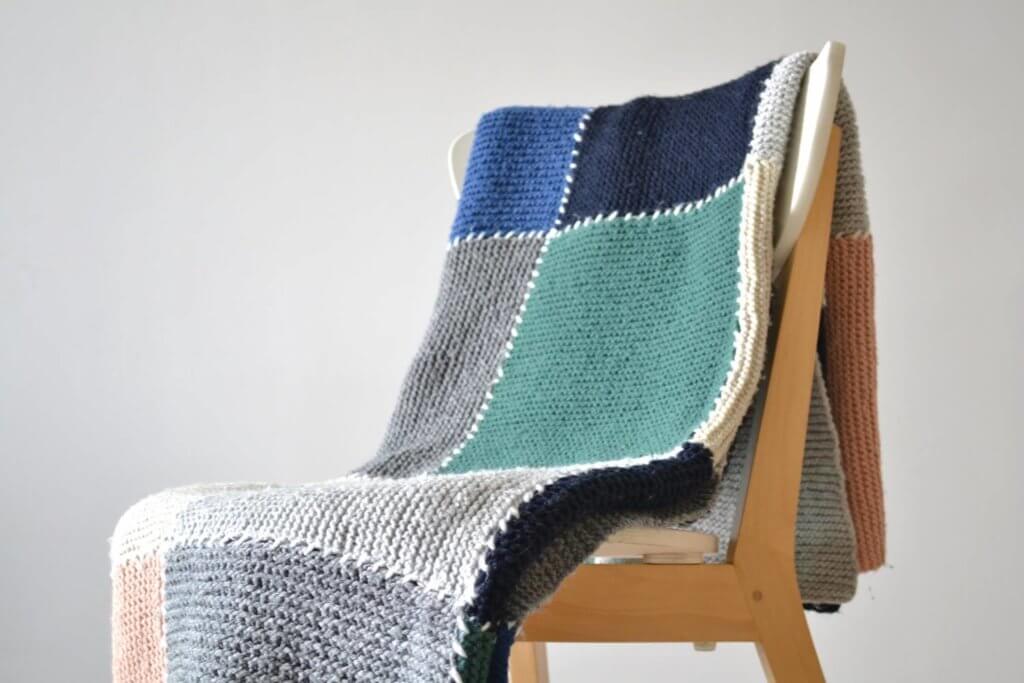
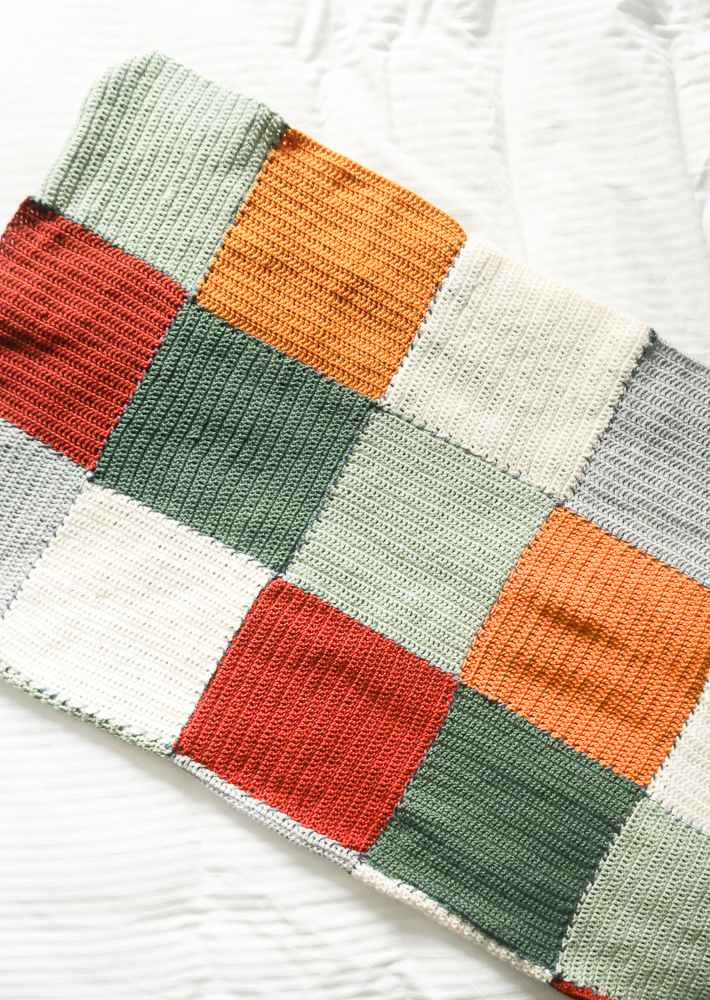
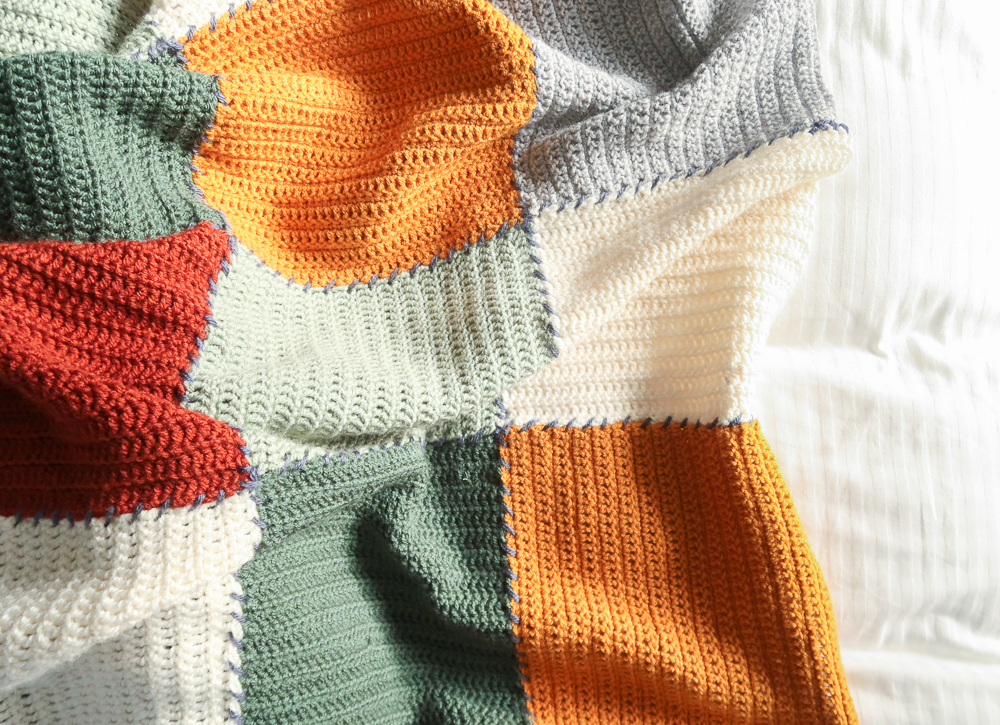
The thing that makes this beginner blanket pattern extra special is its striking seams. Wherein crocheters are usually trying to hide their seams, these are meant to stand out. I used thick strands of contrasting yarn to make the seams pop.
While sewing is still my least favorite part of any project, at least I can have a little fun on this one!
Crafting Blanket
Ready to make your own blanket design without a pattern?
Great for Using Up Your Yarn Stash
The Block Blanket crochet pattern is a wonderful way to use up scrap yarn you have laying around. The great this is it can be worked up with any yarn! Just figure out how many stitches and rows you need for a 25 cm / 10″ square.
I recommend using at least 5 different colors if you want them to alternate nicely in this beginner crochet blanket.
Looking for a Knit version?
If you want to learn how to knit, my knit block blanket is the perfect project to get started.
Crafting Crossroads Guide
You knit and crochet, but have you ever considered combining both crafts in a single project?
Before you Start the Block Blanket Crochet Pattern
- Add it to your Ravelry queue HERE
- Grab it on Etsy HERE
- Pin it to your blanket board HERE
Materials
- Worsted weight yarn: Royal Zeeman yarn (100% acrylic, 100g/3.5oz, 241m/264yd) :
- 2 (2, 3, 3, 7, 10, 13) skeins in each of the 6 colors: white, sage, mustard, rusty orange, green and light grey.
- 50m / 55yd of a contrasting color (blue) for the seams (held double).
- 6 mm / US J – 10 hook.
- Tapestry needle. As there is quite a lot of sewing involved, I recommend using stainless steel needles. I have done it with cheap plastic ones in the past but they kept breaking and got stuck in the fabric more easily. I love this set as it has different eye sizes for different yarn thicknesses and it comes in a small tube which is very convenient so I don’t lose them.
Because the yarn I used is not available everywhere, and I know how painful it is to try to find equivalent yarn which will give you the same effect I have selected a few equivalent yarns for you. I haven’t tried them out myself, but they look so pretty, check them out!
- Lion Brand Wool-Ease They have this yarn in about 20 colors, I’m sure you’ll fall in love with more than one.
- La Mia Just Wool
elann Wool Mate- RED HEART Super Saver Yarn. This yarn also exists in more than 60 colors.
Gauge
The gauge for this pattern is 14.5 st by 13 rows in stitch pattern (alternating sc and dc rows) for a 10 cm by 10 cm square (4” by 4”).
Abbreviations
This pattern uses US notations.
- st = stitch
- ch = chain
- sc = single crochet
- dc = double crochet
Notes
Work instructions between [ ] the indicated number of times or until the end of the row / round.
The final number of stitches is indicated at the end of the row / round between < >.
The turning ch 1, ch 2 don’t count as stitches throughout the pattern except if mentioned otherwise.
The pattern is written in crochet shorthand. For example:
- “sc 1” means to single crochet in the next stitch,
- “sc 2” means to single crochet in each of the next 2 stitches,
- and “2 sc” means to single crochet twice in the next st.
Tips and Tricks
- Colors: I have made this block-style beginner crochet blanket about 15 times already, using many different color combinations.
- I recommend picking at least 5 different colors. This way no 2 touching squares have the same color. Picking 9 or more colors prevents having the same color blocks from touching, even diagonally, but it is not always practical to find so many matching colors of the same yarn.
- I recommend picking at least one or 2 light and neutral colors such as white, off white, light grey, or beige. This helps lighten up the blanket and makes the other colors come out better.
- Seams: The color of the yarn used for the sewing makes a big difference! Choose something contrasting. Using a very bright fun color with more sober block colors or the other way around gives great results. This is a perfect solution to use up some of your leftover yarn as you only need about 50m. I have even done it with a different color for each seam which gave a very funky but nice result. Avoid using one of the colors of the blocks as it will not look very nice.
- Use thick yarn for the seams, the same size as the crocheted yarn or bigger. I used the same worsted weight yarn held double. You want the seams to stand out. But be careful it still fits in your tapestry needle.
- Shape: Here also you have a lot of flexibility and can let your creativity run loose. I have made some with 20cm, 25cm or 30cm / 6, 8 or 10” squares. All turned out beautifully. I find smaller squares are more playful and fun while bigger squares give a more elegant sober look. I have even tried one with stripes instead of squares and the result was great too. This is a good option if you don’t want to choose too many different colors as you only need a minimum of 2. The pictures show 25 cm / 10” squares.
- Stitch: Most of the time I keep it very simple and alternate rows of sc and dc for all my squares (as I did for this one) but you can use different stitches, as long as they are reversible. When I want to try out a new stitch, instead of just making a swatch that I will rip after, I make a blanket square, this way my efforts are not wasted. You get the best results with one stitch per color but there are no rules here.
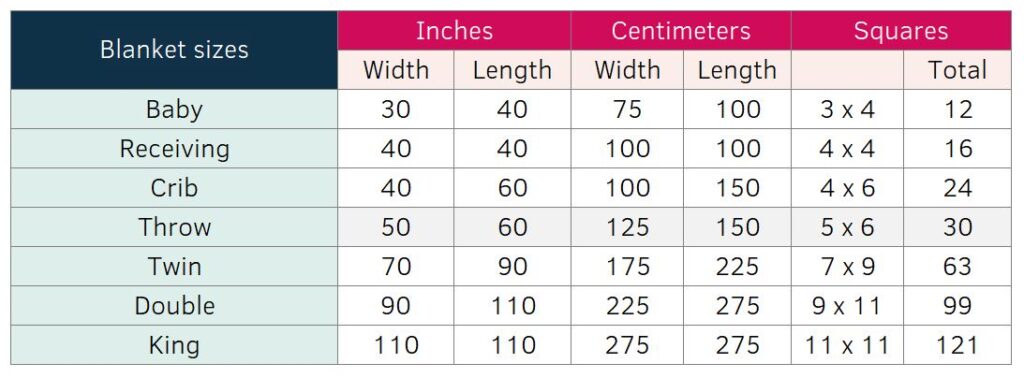
Size
I usually make 30 squares of 25cm by 25cm /10” which gives me a blanket of 1m25 by 1m50 /50” by 60”. Here are some standard blanket sizes and the number of squares you need to make for each size.
The Actual Block Blanket Crochet Pattern
1. Crochet
With your 6 mm / US J – 10 hook, chain 32 + 1.
Row 1: Sc in the 2nd chain from the hook, sc across, turn. <32 st>
Row 2: Ch 2, dc in every stitch, turn.
Row 3: Ch 1, sc in every stitch, turn.
Repeat Rows 2 and 3 until you reach 25 cm / 10”.
Bind off and weave in the ends.
Make 30 of these in different colors (or the quantity you need for your desired size, refer to size section above).
2. Blocking
If your crochet is not too regular yet and you see your squares end up not all the same size and not very square you can block them to fix this.
Read my detailed tutorial on why block, how-to, and all my tips and tricks if you need help.
I’m usually a bit lazy and skip blocking for this blanket and find it is not absolutely necessary here.
3. Sewing
Usually, the seams are the less fun part of a project and you try your very best to make them as discrete as possible. In this case, it is the opposite, they are what makes this blanket fun, different and stand out. Ok, I admit, they are still not my favorite part of the project to make but at least here you will see them.
The important thing here is to be as regular as you can manage!
First, weave in the ends of all your squares. Cut any remaining ends nicely.
Clear out a big area, somewhere in your home where you can fit the entire blanket flat and sit around it to sew. I usually move the living room table and put my blanket on the floor right in the middle of the way. It doesn’t make Mr. Artichoke very happy but I don’t have a better spot.
It might stay there for a few days as there are a lot of long seams and it is not the most comfortable position, so plan ahead, do your cleaning so you don’t need to move it. You want a clean surface anyway to assemble your hard work.
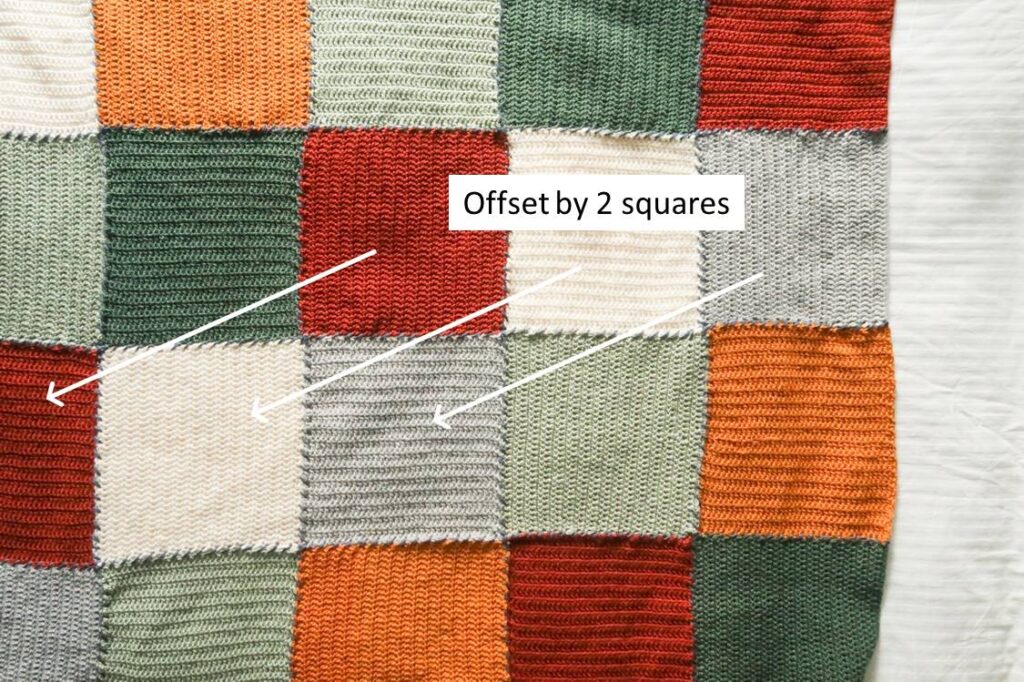
Arrange the squares the way you want alternating colors. This part takes some time and some trial and error can be necessary. You can either go at it randomly or decide on one row and then do the same but offset by 2 squares for each following row. This way, no squares of the same color touch.
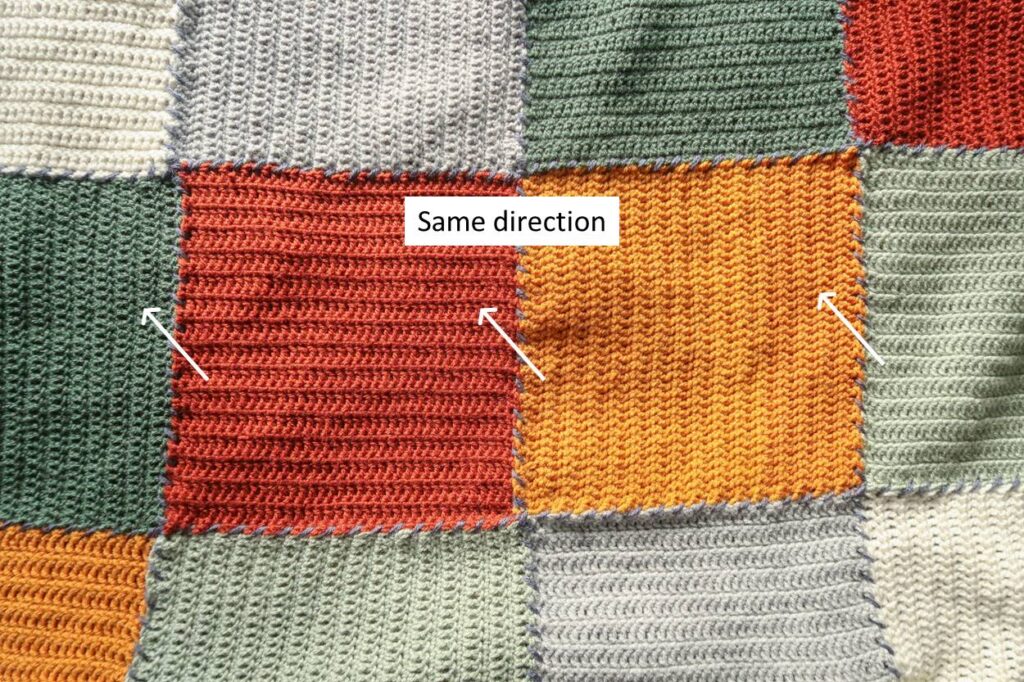
Once you like what you see, start sewing. I usually do all seams in one direction then start on the other direction. This helps me stay consistent.
Try to cut one long enough thread of yarn so you can finish one whole seam with one piece. When you use more pieces it creates weak spots which can come loose (even if you are an expert at weaving in ends). And, you will see the different layers of yarn at the junction which will make your blanket a tiny bit less pretty. That would be a pity!
The most important thing here is to be as regular as you can manage! Did I say that already? Make the seam tight so there are no big holes to get your fingers or toes stuck.
After each stitch, pull lightly on the yarn to tighten up the stitch.
Be careful to sew through the entire thickness of the blanket so that the seam is nice and visible on both sides. I like my blankets to be perfectly reversible.
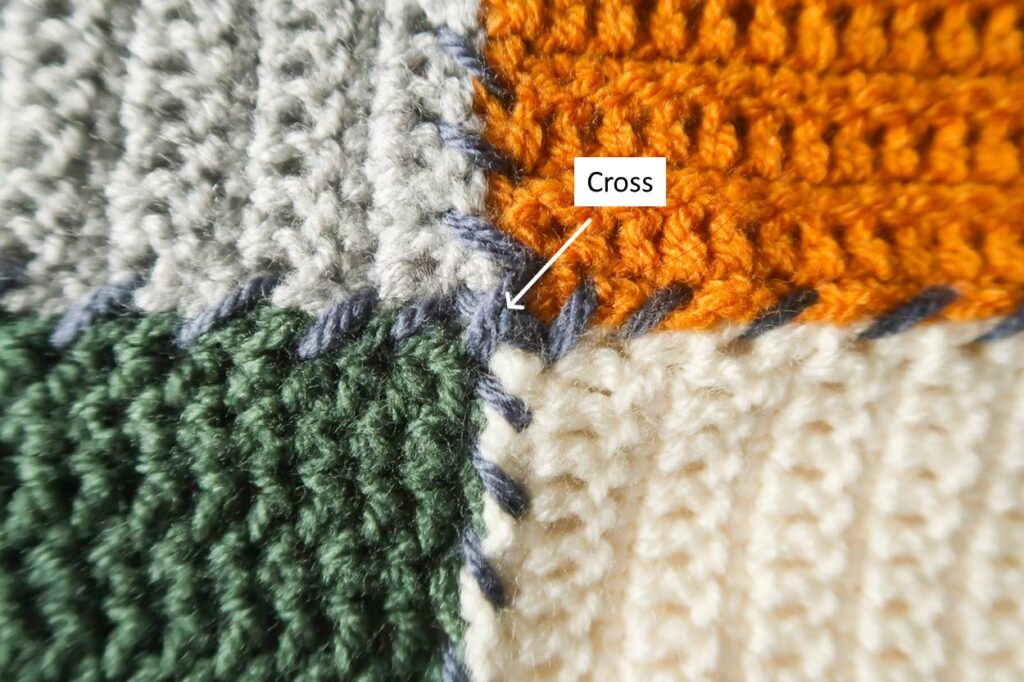
When you reach the junction of 4 squares try to tie them together with a nice cross. It’s what I found out gives the best results.
When starting a next row keep the same direction, if your seam is going from right to left do the same here so all seams are uniform.
Once you’ve done all seams, weave in all the ends. Double check the entire blanket for loose ends on both sides, I always end up with a few.