How to Dye Yarn with Avocados ?
I love cooking. Besides yarn, it’s my greatest hobby. You can imagine then, how much fun I had cooking my yarn. Don’t worry, I didn’t eat it! For the first time, I dyed my own yarn. I used avocados, and had so much fun doing it, I wanted to share how to dye yarn with avocados with you.
When you picture avocados, green comes to mind, but that’s not the color you’ll end up with when you use them to dye yarn. Surprisingly, avocados result in the prettiest shade of peachy pink. Both the pits and peels can be used for dyeing, which means it’s a super eco-friendly way to dye yarn. You get to eat your deliciously ripe avocados, and then use the leftover pits and peels for a fun project.
No time right now? Pin this yarn dyeing tutorial for later.

*This post contains affiliate links (only for products I love, use and spend my own money on obviously). This means I earn some yarn money if you make a purchase through one of these links (of course at no extra cost for you!), which I promise to use to create more awesome patterns like this one. All opinions are my own. See my full disclosure here.
What do You Need to Dye Yarn with Avocado?
I’ve always been intimidated at the thought of dyeing my own yarn, imaging all the materials I’d need to get, but I couldn’t have been more wrong! All you need to dye with avocados are the following items:
- Undyed Yarn – I used yarn from the May Knitcrate DIY dye kit. Make sure you choose a natural animal fiber yarn, or else your dye won’t hold. Unfortunately, that means no cotton or bamboo yarn. I made this experiment extra challenging by dyeing 6 skeins of 2-ply superwash undyed sock yarn at one time. I wanted to use mine for a sweater, and needed to ensure all the yarn would be a perfect match. Call me crazy, but it worked!
- Large Pot – My pot had to be really big to fit all 6 skeins. Test yours out before you start to make sure it’s big enough for your yarn to be fully submerged, while still having some wiggle room. Because our dye is chemical-free, any pot will do, but in general, it’s best to use separate tools for dyeing that you won’t use for cooking afterwards.
- Avocados – It’s kind of hard to make avocado dye without avocados. You can use both the peels and pits to make your dye, so save everything! For my experiment, I used the peels and pits of 7 avocados. Note that the peels and cores give off slightly different hues, so you can play around with the quantities to vary your end result (cfr Dye color chapter below)
That’s it! No need for a mordant or any other chemicals or strange tools.
The Dye Process
Creating your dye and dyeing your yarn follows a very simple 5 step process:
- Simmer your avocado peels and pits in water (do not boil)
- Soak your undyed yarn in plain water
- Add your yarn to the dye and simmer (do not boil)
- Let the yarn cool before rinsing
- Let the yarn dry
My Yarn Dyeing Experiment
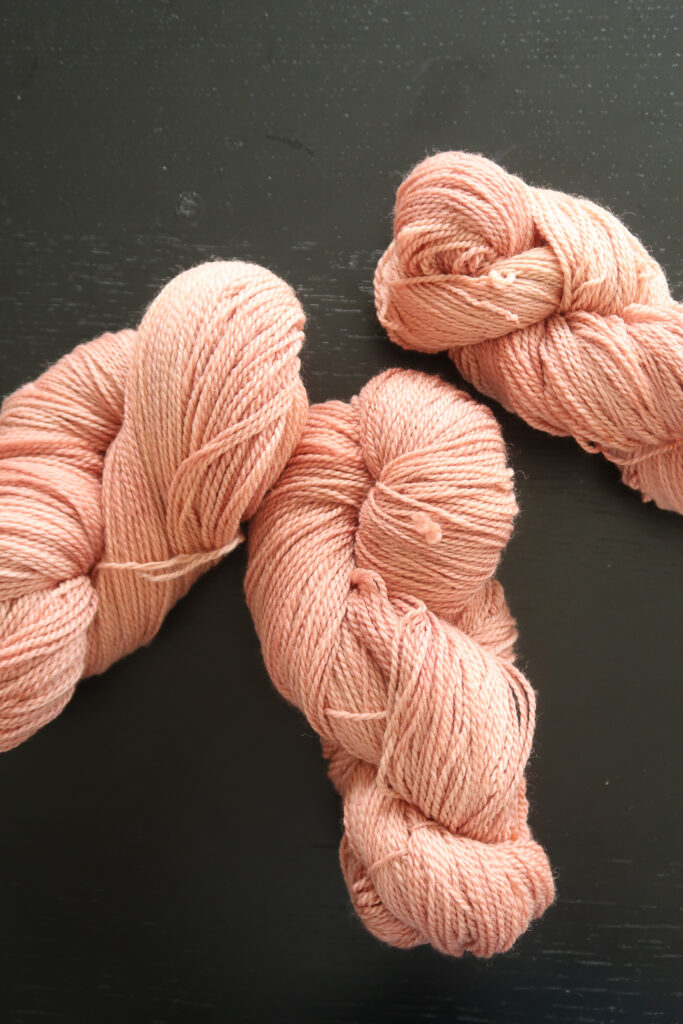
Playing with the quantity of avocados and the timing of everything will give you different results. Here’s what I did to get the shade of pink shown here.
I used the peels and pits from 7 avocados. Make sure you rinse everything and scrape off any leftover avocado flesh, as you don’t want it to gunk up your pretty yarn. I placed them in about 10L (or 2.5 gallons) of water, and brought them to simmer for 3 hours. After that, I left the pot cool overnight with the peels and pits still in it.

A little trick: I added 4 tablespoons of baking soda to give my dye more of a pink shade and less of a peachy color.

The next morning, I removed the pits and peels. If you end up with some bits and pieces of avocado flesh floating around, you can filter the water so it doesn’t get on your yarn. Mine wasn’t too murky, so I left it alone.
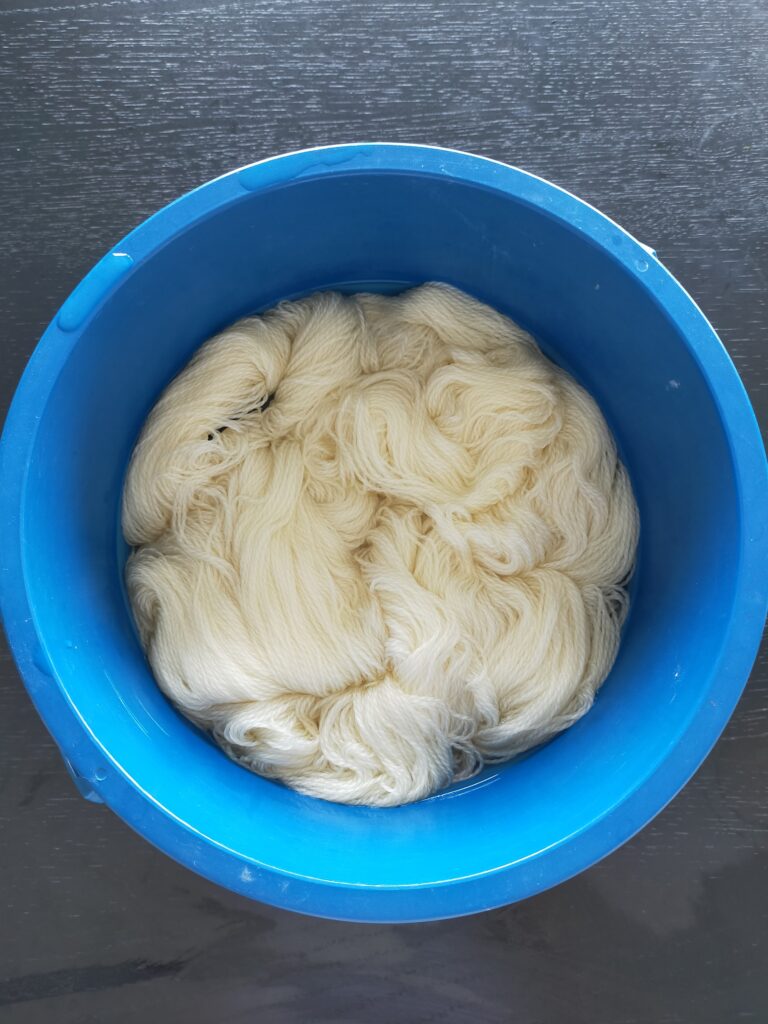
Before soaking your skeins, attach a cable tie to each one. This will make it easier to pull the skeins out of the pot when the time comes without burning yourself. You could also use a piece of rope or plastic, just make sure they won’t leak any color in boiling water. I put my skeins in a big bucket of water and let them soak for an hour, making sure all the fiber was gorged with water.
I added my skeins to the dye water and brought it back to a simmer. Be careful not to boil the yarn or move the skeins around too much, as this can lead to the yarn felting! All the skeins should be completely covered with the dye water. I let mine simmer for 4 hours. You can see how the color changed during the process. The longer you simmer the yarn, the deeper the color will get.


After the 4 hours, I turned off the heat and let everything cool overnight in the pot. This helps to soak up more color and deepen the pink hues even more.
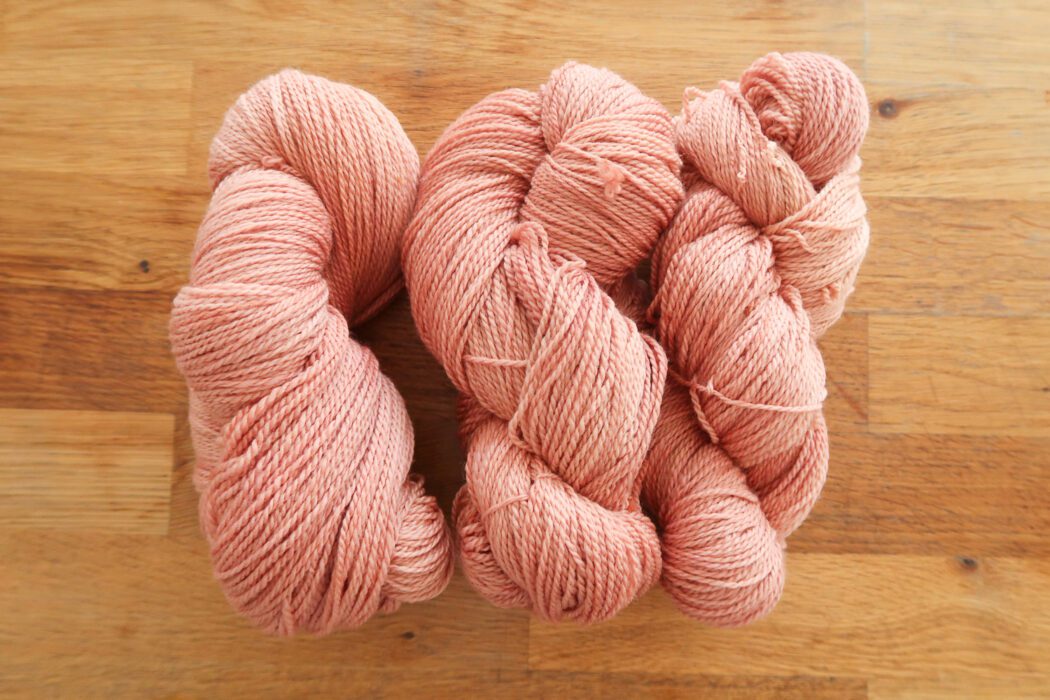
Once it was completely cool, I rinsed off each skein and hung them to dry.

I absolutely love the color I ended up with, and I’m so excited to cast on this yarn! All 6 skeins are the same shade, which is exactly what I wanted. The one surprise is that the color isn’t 100% uniform across each skein. Some areas have a deeper shade of pink than others. I’m not sure why this happened. Maybe I had too many skeins in one pot, or maybe the pieces that floated to the surface ended up darker for some reason. Either way, it’s a nice surprise. Now I have a variegated color, even if it was totally unintentional.

Playing with Shades
There are a few factors that influence the final color of your skeins. You can play around with them to get different shades of peachy pink.
- Type of Avocados – Some avocados give a more orange-brown hue, while others give off more pink. Unfortunately, it’s really hard to tell just by looking at the avocado what color it will make.
- Pits vs Peels – The pits and peels both give slightly different shades. Using more pits or more peels will give you a different result, but you’ll just need to play around to find out what the results will be.
- Yarn Composition – The composition of your bare yarn will change the final color. Depending on the fiber content, it might hold more or less of the dye and pigments.
- Simmer Time – The longer you let the pits and peels simmer, the darker and deeper a color you’ll get.
- Cool Time – The longer you let the yarn cool, the deeper the shade.
- Baking Soda – Adding baking soda to the dye will make it more pink. I used this trick and could instantly see the difference in the color of the dye.
Tips & Tricks
- No need for a giant avocado feast! You can freeze your avocado peels and pits until you have enough and are ready to start dyeing. I mean, if you still want the feast, go for it. I won’t tell anyone.
- You can pull out some dye or take out the yarn at any point to get a better idea of the color you’ll get.
- Remember that the color will lighten up a little when you rinse the yarn, and even more when you dry it. Take this into account when you look at the color to decide when to stop.
Overall, dyeing my own yarn was an amazing experience! I can’t wait to play around with these different factors and tricks to make all sorts of peachy pink shades. Maybe I’ll even try some other natural dyes. Who knows!
Sick of all the yarn jargon and conversions?
US vs UK, abbreviations, imperial vs metric, yarn weights, etc?

If you try dyeing your own yarn with avocado, share your results and tag me @knittingwithchopsticks, I’d love to see what pretty shades of peachy pink you come up with!


Absolutely love this shade. I was thinking perhaps for the coming wee one but you deserve beautiful sweaters too. You’ll have to dye some more natural colors for baby. Anxious to see your new creation when you release it. Thank you for sharing.
How does the yarn hold onto the color after dying? I saw there wasn’t a mordant used in your directions. I am very interested in dying yarn and have read many tutorials all have a mordant which, if I understand correctly, keeps the color in the yarn. When you wash your piece made from the dyed yarn does it hold its color well? I have many avocado pits ready to go 😁