I love DIY scrunchies, they add a bit of fun and color to my hair and dress up a messy bun like nothing else. But I’m not a fan of velvet and honestly, it’s way too hot out here to wear velvet anything. So I’ve made those cute summer hair scrunchie crochet patterns with some texture.
No time right now? Pin this free scrunchie crochet pattern for later.
The pattern includes 3 versions of how to make scrunchies diy with 3 different yarn weights: Raspberry (DK weight), Blueberry (fingering weight) and Mulberry (worsted weight). Perfect to use up any leftover yarn!
Scroll down for the free version but I recommend you purchase the ad-free PDF Pattern to get all the instructions and pictures in a nice PDF you can print and take notes on without relying on your phone or an internet connection, I’ve got you covered!
The Summer Berries hair scrunchies crochet pattern is now available in my Etsy shop and on Ravelry. Add it to your favorites before you forget.

I think you might like these other scrap yarn project ideas.


*This post contains affiliate links (only for products I love, use and spend my own money on obviously). This means I earn some yarn money if you make a purchase through one of these links (of course at no extra cost for you!), which I promise to use to create more awesome patterns like this one. All opinions are my own. See my full disclosure here.
Before you Start your Scrunchies DIY
Materials
Raspberry Scrunchie:
- 4 mm / US G – 6 crochet hook.
- DK weight (3): LionBrand Coboo (50% Cotton, 50% Rayon from Bamboo, 232yds/ 212m, 100g) in Mauve color. I used about 34g.
- Tapestry needle to weave in the ends. I love this set as it has different eye sizes for different yarn thicknesses and it comes in a small tube which is very convenient so I don’t lose them.
- An elastic hairband

Blueberry Scrunchie:
- 3.5 mm / US D – 3 crochet hook.
- Fingering weight (1): Knitcrate Audine Wools Luxury Sock (75% Superwash Merino, 15% Nylon, and 10% Cashmere, 400 yards (365 m) / 100 g) in Dew color. I used about 14g. This yarn comes from my Knitcrate membership. If you haven’t heard from it yet, read my detailed review here.
- Tapestry needle to weave in ends
- An elastic hairband

Mulberry Scrunchie:
- 5 mm / US H – 8 crochet hook.
- Worsted weight (4): LionBrand 24/7 Cotton (100% cotton, 186yds/ 170m) in Sky color. I used about 27g.
- Tapestry needle to weave in ends
- An elastic hairband

Gauge
Gauge is not important for this pattern. If you want your stitches tighter, use a smaller hook. If you want your stitches looser, use a bigger hook.
Abbreviations
This pattern follows US notations
- st = stitch
- ch = chain
- sc = single crochet
- dc = double crochet
- skip = miss stitch
- sl st = slip stitch
Special stitches
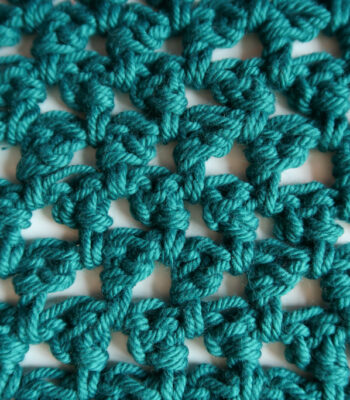
- Puff stitch = Yo, insert hook in indicated st, yo, pull up a loop, (yo, insert hook in same st, yo, pull up a loop) twice, yo, pull through all 7 loops on hook, ch 1 to close the puff stitch.
- Bead stitch: The bead stitch is similar to a puff stitch but done horizontally. It’s worked up around a dc stitch.
Bead stitch = Work dc in indicated stitch, [yo, working around the dc post just made pull up a loop] repeat 3 times, yo and pull through the next 6 loops on the hook. This leaves 2 loops on the hook. Yarn over and pull through the remaining 2 loops. The bead stitch has a width of 2 stitches.
- Bobble stitch (detailed tutorial with video):
- Start with the first half of a dc st: Yarn over, insert hook into stitch and pull up a loop. Yarn over, pull through two loops.
- Repeat in the same stitch/space until you have a total of 6 loops on your hook.
- Yarn over, pull through all loops then secure the stitch with a ch 1.
Notes
Work instructions between [] the indicated number of times or until the end of the round.
The final number of stitches is indicated at the end of the round between < >.
The turning ch 1, ch 2 doesn’t count as stitches throughout the pattern.
Stitches above a ch-1 are worked in the ch-1 space.
The pattern is written in crochet shorthand. For example:
- “sc 1” means to single crochet in the next stitch,
- “sc 2” means to single crochet in each of the next 2 stitches,
- and “2 sc” means to single crochet twice in the next st.

Tips and Tricks
- Depending on the size of your headband and how wrinkled you like your scrunchie you might need to add or remove some repeats. Just make sure that you have enough fabric to stretch the elastic
- You can easily use one of the patterns and switch the yarn weight. Your scrunchie will be more or less wide and you might need more or less repeats but it will look great.
- To adjust the
width of the scrunchies add/remove st to the starting chain as follows:
- Raspberry: multiple of 2 + 1
- Blueberry: multiple of 4 + 3
- Mulberry: multiple of 3 + 1
The Actual DIY Scrunchie Crochet Pattern
Raspberry Scrunchie Pattern
With a 4 mm / US G – 6 crochet hook, chain 18 + 1.
Making a loop around the hairband join in the round with a sl st.

Round 1: ch2, dc around, join with a sl st in the 2nd ch. <18 st>

Round 2: ch2, [puff st, close it with a ch1, skip 1] repeat around; join with a sl st in the 2nd ch. <9 puff st>

Round 3 – 44: Repeat round 1 and 2 21 times.

Bind off and leave a long tail for sewing. With a tapestry needle, sew both sides together to close the scrunchie.
Blueberry Scrunchie
With a 3.5mm / US D – 3 crochet hook, ch 18 + 1.
Making a loop around the hairband join in the round with a sl st.
Round 1: ch2, dc around, join with a sl st in the 2nd ch. <18 st>
Round 2: ch1, sc, [sc 3, bobble] repeat around, sc; join with a sl st in the ch-1.
Round 3: Repeat round 1
Round 4: ch2, sc, [sc, bobble, sc 2] around, sc, join with a sl st in the 2nd ch.
Round 5 – 96: Repeat rounds 1 to 4 23 times.
Bind off and leave a long tail for sewing. With a tapestry needle, sew both sides together to close the scrunchie.

Mulberry Scrunchie
With a 5 mm / US H – 8 crochet hook, ch 15 +1.
Join in the round around the hairband with a sl st.
Round 1: ch1, sc around, join with a sl st in the ch-1. <15 st>
Round 2: ch2, [bead st, ch1, skip 2] repeat around, join with a sl st in the 2nd ch.
Round 3 – 5: Repeat round 1 three times
Round 6 – 45: Repeat rounds 2 to 5 10 times

Bind off and leave a long tail for sewing. With a tapestry needle, sew both sides together to close the scrunchie.
If you’ve enjoyed this free scrunchie crochet pattern, share it with your yarn loving friends!


