Bonbon Cardigan Knitting Pattern
A new cardigan knitting pattern – the Bonbon Cardigan – is now a free knitting cardigan pattern here on the blog. Read all about this cardigan knitting pattern inspiration, scroll down to view the full free pattern or purchase an ad free PDF from the links below.
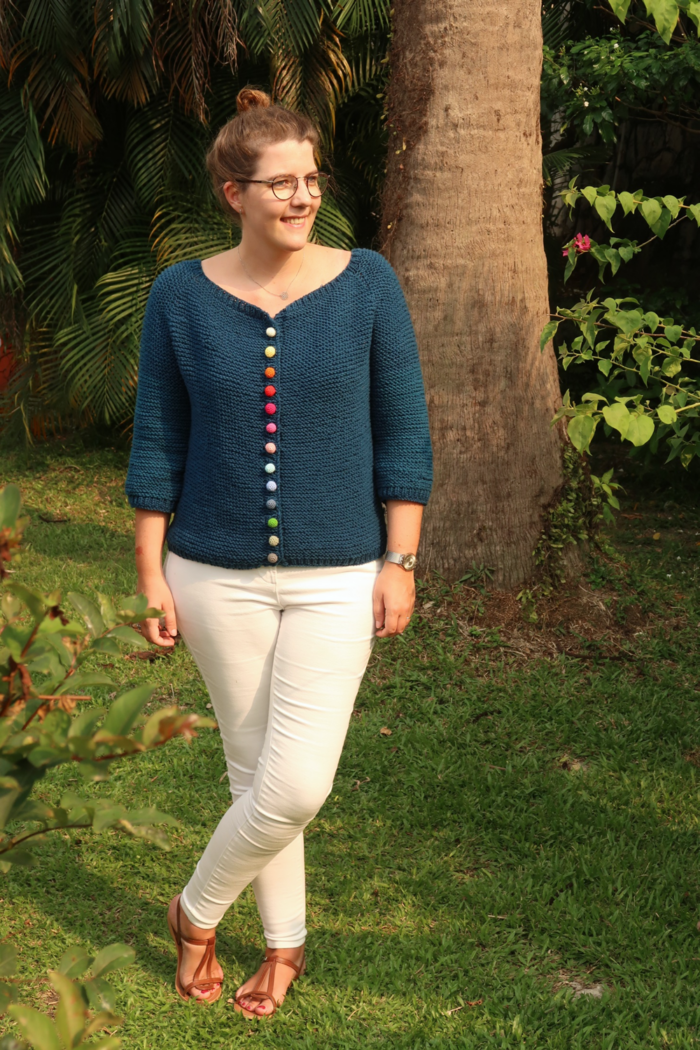
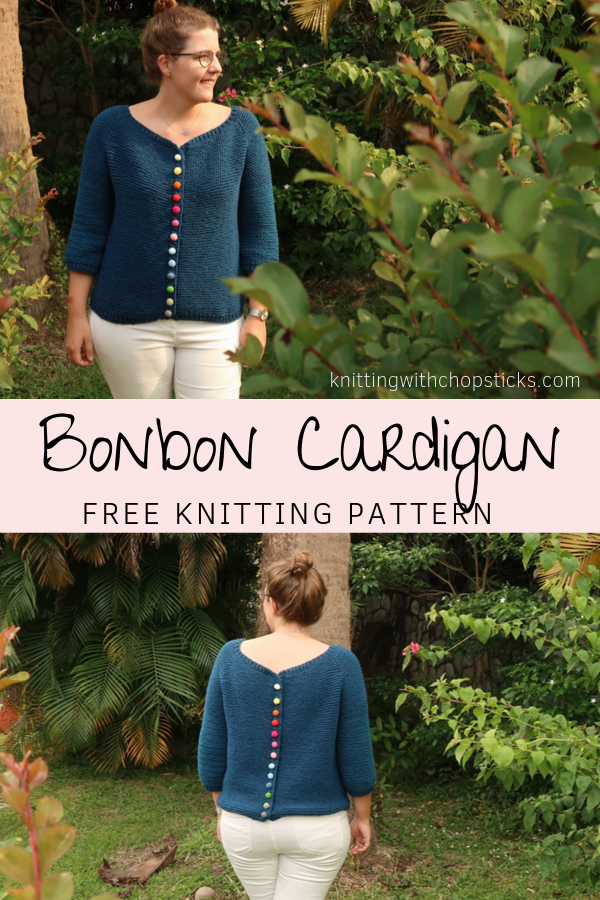
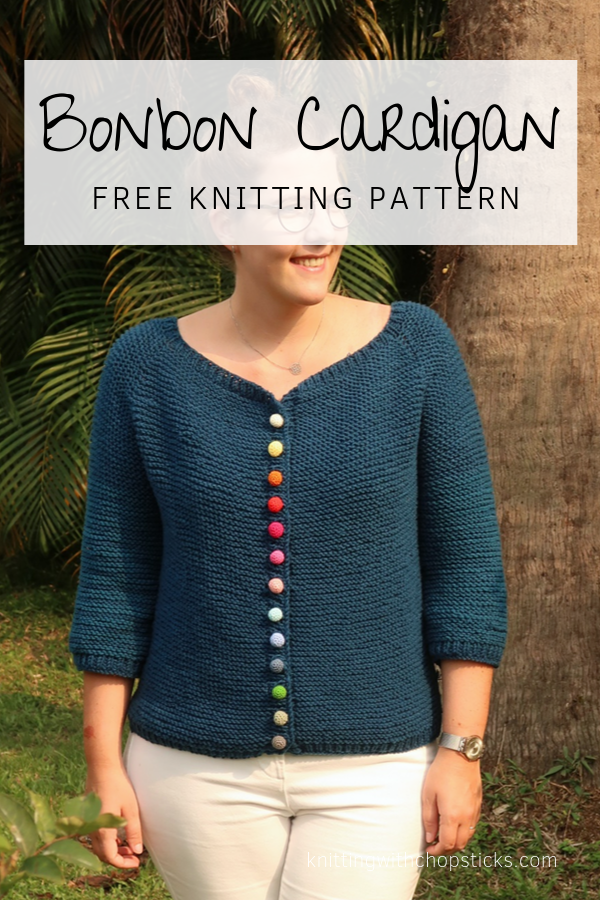
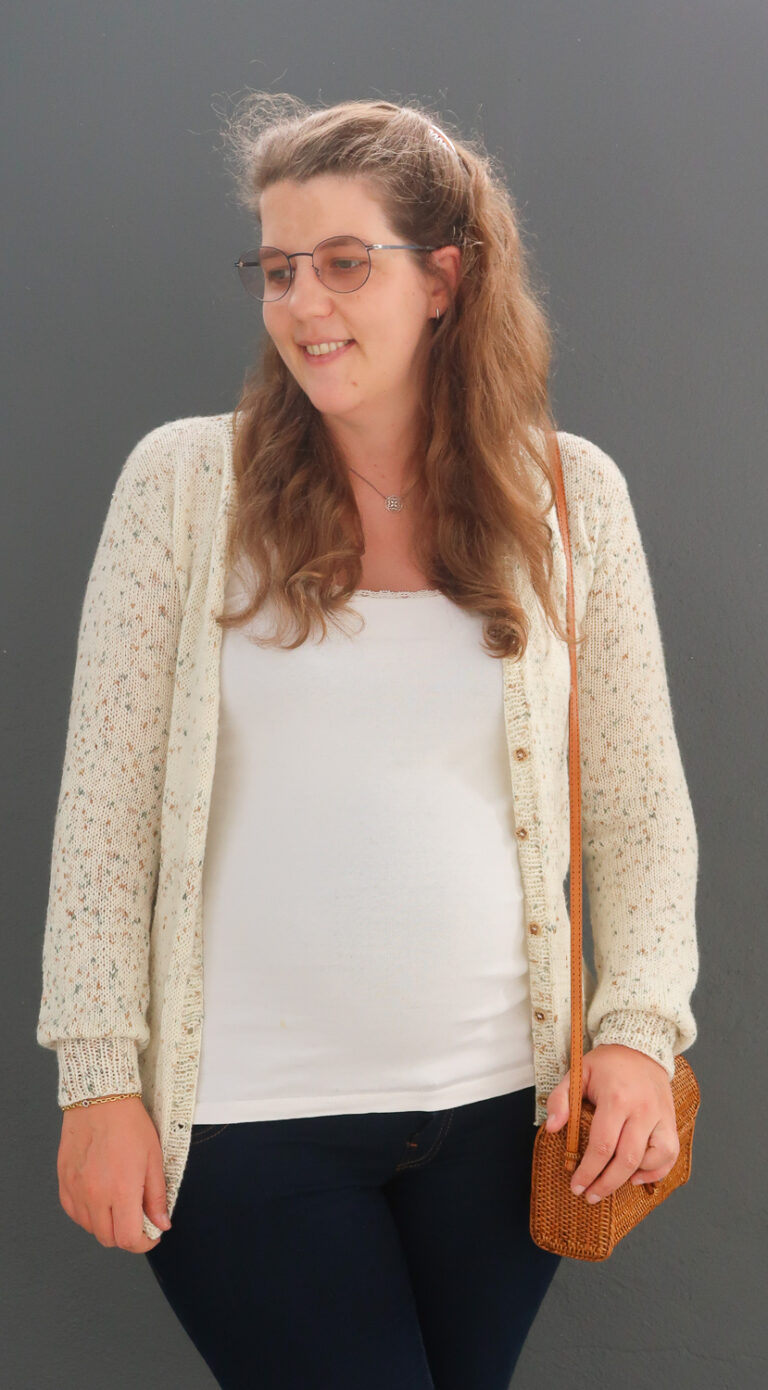
The Bonbon easy cardigan knitting pattern is a raglan cardigan pattern which means it is knitted from the collar down. But don’t worry, it’s a very simple construction with minimal shaping.
This also means it is completely reversible and you can wear it with the buttons in the front or in the back. I’ve actually designed it with the idea to wear it with the buttons in the back.
No time right now? Pin this easy cardigan knitting pattern for later!
*This post contains affiliate links (only for products I love, use and spend my own money on obviously). This means I earn some yarn money if you make a purchase through one of these links (of course at no extra cost for you!), which I promise to use to create more awesome patterns like this one. All opinions are my own. See my full disclosure here.
The Bonbon Cardigan is made with worsted weight milk cotton yarn. If you haven’t tried milk cotton yarn before, it’s really soft and sort of half velvety. It has the soft side of velvet yarn without the shiny aspect that I don’t really like. Btw, it’s really cheap. You can make this sweater for about 20 USD.
Scroll down for the free version but I recommend you purchase the ad-free PDF Pattern to get all the instructions and pictures in a nice PDF you can print and take notes on without relying on your phone or an internet connection, I’ve got you covered!
Add your PDF Bonbon cardigan knitting pattern from my store, my Etsy or Ravelry store to your cart now before you forget. Or grab the discounted pattern set including the Bonbon crochet buttons here.

More Sweater Patterns You'll Love View All


Before you Start your Easy Cardigan Knitting Pattern
Materials
- 5.5 mm/ US 9 knitting needles. I use circular needles for convenience but you can use straight needles for this pattern. If you’re confused about all these types of knitting needles, here’s a complete overview that will answer all your questions.
- Worsted weight milk cotton yarn (80m / 87 yards, 50g):
- XS: 9 skeins
- S: 10 skeins
- M: 11 skeins
- L: 11 skeins
- XL: 12 skeins
- 2XL: 13 skeins
- 3XL: 14 skeins
- 4XL: 15 skeins
- 5XL: 16 skeins
I had some issues with different dye lots so I had to improvise and alternate skeins as you can see on the sleeves and bottom edge.

- 13 Buttons (about 2.5cm / 1” diameter). You can make your own colorful Bonbon buttons with this pattern.
- 4 stitch markers
- Tapestry needle to weave in the ends. I love this set as it has different eye sizes for different yarn thickness and it comes in a small tube which is very convenient so I don’t lose them.
Size
The Bonbon cardigan is available in the following sizes: XS to 5XL. Sizes are noted throughout the pattern in the following way: M (XS, S, L, XL, 2XL, 3XL, 4XL, 5XL). The pictures illustrate the medium size.
Perfect Fit Guide
Always guessing your size when knitting or crocheting garments?

Tip: Don’t want to get confused by all these numbers. Get the ad-free PDF version and start by highlighting your size throughout the pattern.
Final bust measurements are: 100 (80, 92, 113, 122, 132, 141, 153, 165) cm or
39.3 (31.5, 36.25, 44.5, 48.2, 51.8, 55.5, 60.2, 64.8)”
The cardigan is designed with a classic fit 5 – 10 cm / 2” – 4” ease.
Gauge
The gauge for this pattern, in garter stitch, is 17 st by 31 rows for a 10 cm by 10 cm square (4” by 4”).
Abbreviations & Instructions
- st = stitch
- k = knit
- kfb = knit into front and back of the stitch,
single knit increase - k2tog = knit 2 stitches together
- p = purl
- garter stitch = knit on both sides of the
project.
Sick of all the yarn jargon and conversions?
US vs UK, abbreviations, imperial vs metric, yarn weights, etc?

Repeat instructions between ** the indicated number of times or until the end of the round.

The Actual Easy Cardigan Knitting Pattern
1. The Easy Cardigan Knitting Pattern Collar
On 5.5mm / US 9 knitting needles, cast on 128 (92, 116, 158, 180, 212, 232, 256, 284) st.
Knit 2cm / ¾” in 1×1 ribbing by repeating the following row 4 times: * k1, p1 * repeat from * to * across.

From now on, knit in garter stitch (knit on both sides).
On the next row, place your 4 stitch markers. This will help you know when to increase without needing to count. Each stitch marker divides the stitches between the front / back panels and the sleeves. Refer to each size below for their position; replace each comma with a stitch marker.

- XS: k17, k12, k34, k12, k17
- S: k21, k14, k46, k14, k21
- M: k25, k15, k48, k15, k25
- L: k30, k19, k60, k19, k30
- XL: k33, k24, k66, k24, k33
- 2XL: k37, k32, k74, k32, k37
- 3XL: k40, k36, k80, k36, k40
- 4XL: k44, k40, k88, k40, k44
- 5XL: k49, k44, k98, k44, k49
From now on, you will increase regularly to shape the shoulders. If you’re not used to work with stitch markers, refer to below’s quick video.
Increase Row: On the next row, make one kfb before each stitch marker and one after each stitch marker (8 increases total).

Knit one row.
Work * 1 increase row + 1 knit row*, repeat from * to * 4 more times (for a total of 10 rows).
Work * 1 increase row + 3 knit rows*, repeat form * to * 12 (11, 11, 12, 13, 13, 14, 15, 15) times.

You now have 272 (228, 252, 302, 332, 364, 392, 424, 452) stitches.
From here on, the sleeves will be knit separately from the body of the cardigan.
2. Separate the Sleeves
To do so, on the next row slip the stitches between markers 1 and 2 and between markers 3 and 4 on stitch holders. I’m using cables from my interchangeable needles but if you don’t have these you can use one of the following:
- A piece of yarn with a tight knot
- Another circular needle (be careful not to lose
stitches while you work on the body if you don’t secure them) - A piece of rope
Basically, anything, where you can slip those stitches on and secure them, will work.

These secured stitches will form the sleeves of the cardigan while the rest are the front and back panels.
3. The Body of the Easy Cardigan Knitting Pattern
For the body section of the top-down knit cardigan pattern, ignore the stitches you have placed on the holders. Keep working in garter stitch with the remaining stitches (front and back panels together).

Keep knitting until you reach 50 (48.5, 49.5, 51.5, 52, 52.5, 52.5, 53.5, 53.5) cm / 19.75 (19, 19.25, 20.25, 20.5, 20.5, 21, 21)” from the top of the collar.

You can also try the cardigan on and see how you want to adjust the length (take into account about 2.5cm / 1” for the edge).
Finish the body section with a 1*1 ribbing similar to the collar:
*k1, p1* repeat from * to * across for 4 rows.
Cast off and weave in the ends.
4. The Sleeves of the Sweater
Both sleeves are identical.
In this case, you can choose either to work in the round alternating knit and purl rows to form the garter stitch or knit back and forth in rows and seam your sleeve when it’s done.
Personally, I’ve chosen to knit back and forth in rows to avoid purling.
Go back to the stitches you left on your stitch holder and start working with these.

Knit in garter stitch until the sleeve is 26 (25, 26, 27.5, 27.5, 28.5, 28.5, 30, 30) cm / 10.25” (9.75”, 10.25”, 10.75”, 10.75”, 11.25”, 11.25”, 11.75”, 11.75”) long.

You can also try the cardigan on and adjust the sleeve length to your desired length (take into account about 2.5cm / 1” for the edge).
If you want to adapt the cardigan for long sleeves, knit until the following dimensions:
43 (42, 43, 44.5, 44.5, 45.5, 47, 47) cm / 17 (16.5, 17, 17.5, 17.5, 18, 18, 18.5, 18.5)”.
Finish the sleeve with a 1*1 ribbing similar to the collar:
*k1, p1* repeat from * to * across for 4 rows total.
5. The Edges of the Main Panels
To add the edges, pick up 85 (82, 84, 88, 88, 89, 89, 91, 91) stitches along the edge of the right panel.
If you’re not comfortable picking up stitches, I recommend this tutorial.

*k1, p1* repeat from * to * across for 1 row.
On the next row, continue working in 1*1 ribbing and make the buttonholes by casting off 2 stitches as follows:
Work 3 st in ribbing pattern, *cast off 2 st, work 4 sts in ribbing pattern,* repeat from * to * 13 times, Work 4 (1, 3, 7, 7, 8, 8, 10, 10) st in ribbing pattern.
On the next row, close the buttonholes by adding 2 stitches above the cast off stitches:
To do so, work ribbing pattern to buttonhole, *cast on 2 sts, work 4 sts in ribbing pattern between buttonholes, repeat from * for all buttonholes, work in ribbing pattern to end of row.
Then finish with 1 row 1×1 ribbing: *k1, p1* repeat from * to * across.
Pick up 85 (82, 84, 88, 88, 89, 89, 91, 91) stitches along the edge of the left panel.
*k1, p1* repeat from * to * across for 4 rows.
6. Blocking and Sewing your Easy Cardigan
Sew the sleeves up and block your cardigan carefully.
Don’t skip this step as it can make a huge difference. Read my detailed tutorial on why block, how-to, and all my tips and tricks if you need help.
After blocking add the buttons in front of the buttonholes.
Don’t forget to share this free cardigan knitting pattern with your yarn loving friends!


Absolutely gorgeous sweater! And the buttons!! I can’t wait to make this. I just have one question – in the body and sleeve sections, the XS has bigger measurements than the S. Is this a typo? Thanks again!
I’m not sure where exactly you are referring to in the pattern. I rechecked and don’t see the issue. Please not sizes are noted M (XS, S, L, XL, 2XL, 3XL, 4XL, 5XL) throughout the pattern. That’s why the first size noted is bigger than the next 2. I hope this clarifies your question.