Linen Potholder Crochet Pattern

This easy crochet potholder – my Linen Potholder – is a free crochet pattern here on the blog! Read through my inspiration and why I chose the yarn I did for this project. Or scroll on down for the free pattern.
No time right now? Pin this easy crochet potholder pattern for later!

The Very Best Potholder
Is it too much to say I’m in love with a potholder? You’ll see why when you check out this super fast crochet potholder pattern.
A good potholder needs to be 2 things: thick enough to protect your hands, and resistant to heat. This Linen Potholder uses t-shirt yarn, which, beyond being super soft and fun to play with, creates a nice thick hot pad that won’t melt like synthetic yarn or felt like wool yarn.
Because the yarn is so thick, it also works up super fast. You could receive a dinner invitation in the morning, and have a lovely set of potholders to present your hosts by evening. But you’ll also want to make a set for yourself that matches your kitchen decor. And maybe another set for Christmas. And another for Halloween. You get the idea – with this 2 color design, you can create a potholder to match any style or holiday.

This potholder crochet pattern is also great for using up scrap yarn. I actually created the one you see here using leftover yarn from my chunky knit rug pattern. The linen stitch is perfect for beginners, so even if you’re new to crochet, you too can start making your own home decor!
Scroll down for the free version but if you prefer to purchase the cheap ad-free PDF Pattern to get all the instructions and pictures in a nice PDF you can print and take notes on without relying on your phone or an internet connection, I’ve got you covered!
The Linen Potholder crochet pattern is now available on my shop, on Ravelry. Add it to your favorites before you forget.

*This post contains affiliate links (only for products I love, use and spend my own money on obviously). This means I earn some yarn money if you make a purchase through one of these links (of course at no extra cost for you!), which I promise to use to create more awesome patterns like this one. All opinions are my own. See my full disclosure here.
Before you Start
Materials
- 12 mm / US O – 13 crochet hook
- Knitznpurlz t-shirt yarn: 10 m / 11 yd London Blue and 30 m / 33yd wine color.
- Tapestry needle to weave in the ends. I love this set as it has different eye sizes for different yarn thicknesses and it comes in a small tube which is very convenient so I don’t lose them.
Size
The potholder is a 23 cm / 9” square.
Abbreviations
This pattern uses US notations.
- st = stitch
- ch = chain
- sc = single crochet
- skip = miss
Work instructions between [ ] the indicated number of times or until the end of the row / round.
The final number of stitches is indicated at the end of the row / round between < >.
The turning ch 1 doesn’t count as stitches throughout the pattern except if mentioned otherwise.
Stitches above a ch-1 space are worked in the ch-1 space.
The pattern is written in crochet shorthand. For example:
- “sc 1” means to single crochet in the next stitch,
- “sc 2” means to single crochet in each of the next 2 stitches,
- and “2 sc” means to single crochet twice in the next st.
Tips and Tricks
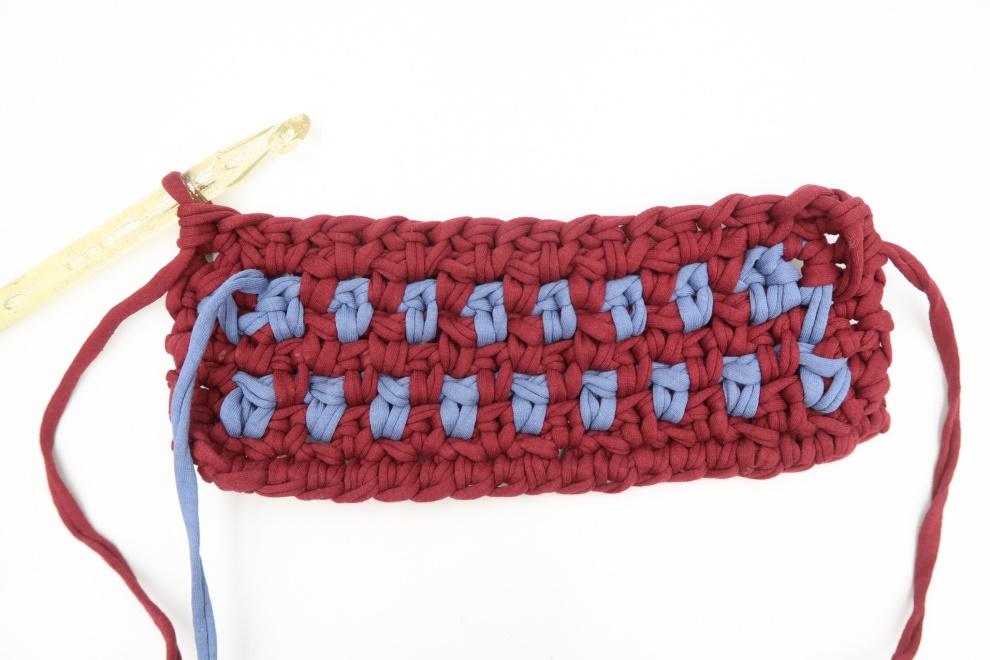
To avoid endless ends to weave in I carried over the yarn from one row to the next.
Sick of all the yarn jargon and conversions?
US vs UK, abbreviations, imperial vs metric, yarn weights, etc?

I used 2 threads of blue color as they alternate sides.
The Actual Potholder Crochet Pattern
With your 12 mm / US 0- 13 hook with wine color yarn ch 19 + 1,
Row 1: In the 2nd ch from the hook sc, sc across, turn.
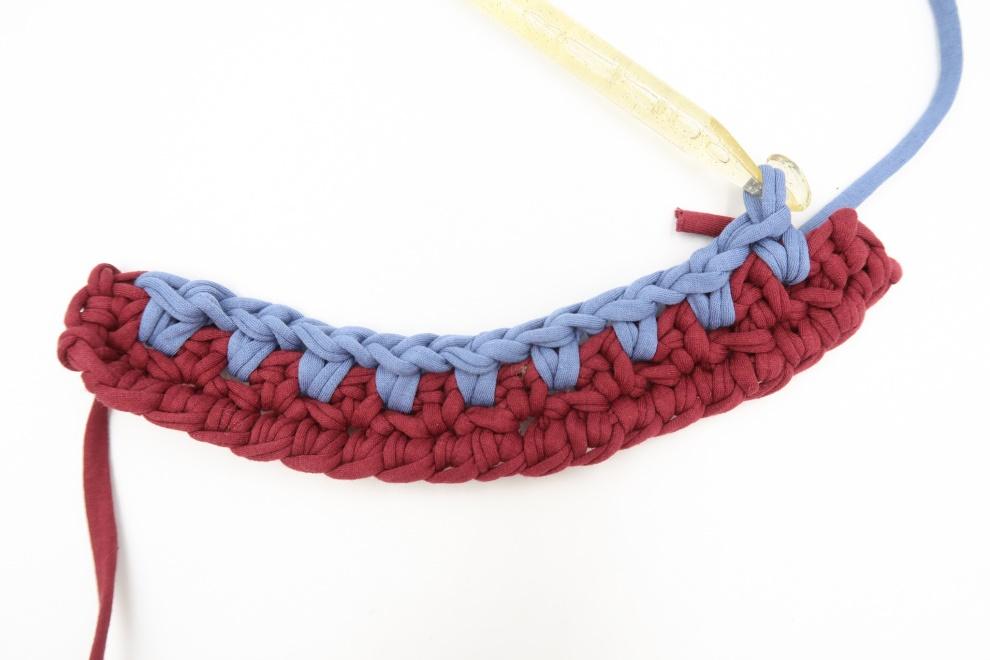
Row 2: ch 1, [sc, ch 1, skip 1] repeat until last st, sc, turn.
Switch to your blue yarn.
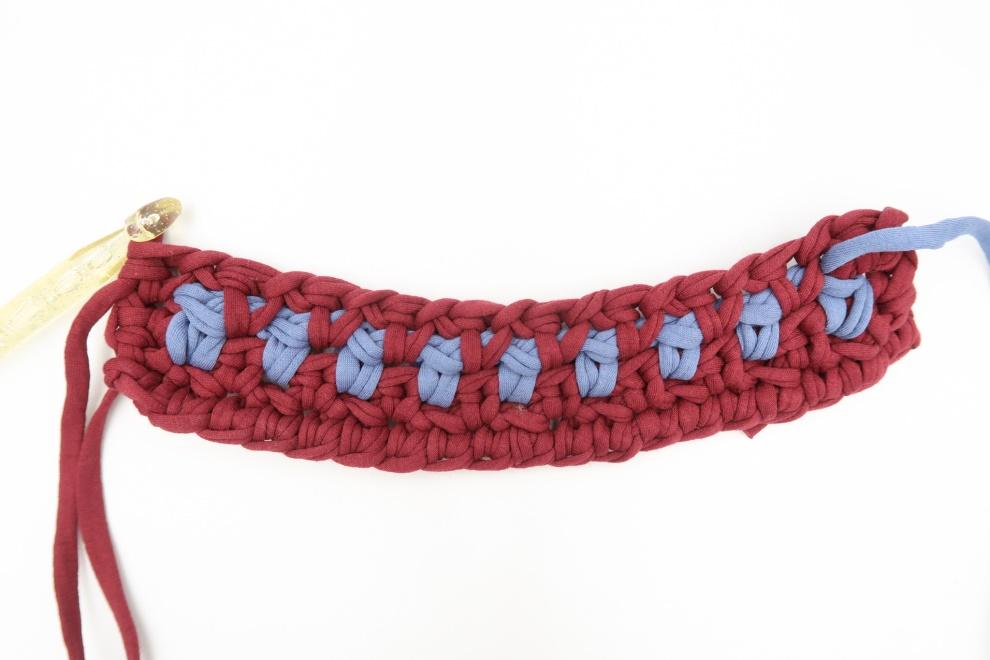
Row 3: ch 1, sc, [sc in the ch-1 space, ch 1, skip 1] until last 2 st, sc 2, turn.
Switch back to your wine color yarn.
Row 4: Repeat Row 2.
Row 5: Repeat Row 3.
Switch to your blue color yarn.
Row 6: Repeat Row 2.
Switch to your wine color yarn.
Row 7: Repeat Row 3.
Row 8: Repeat Row 2.
Switch to your contrasting color.
Row 9 – 19: Repeat Rows 3 to 8. Then repeat Rows 3 to 7 one more time.
Row 20: Ch 1, sc across.
Bind off and weave in the ends.
Blocking
You’re done with the crocheting part. Make sure to weave in all the ends.
To make your stitch pattern even prettier, help straighten your edges, and flatten the corners, block your project.
Don’t skip this step as it can make a huge difference. Read my detailed tutorial on why block, how-to, and all my tips and tricks if you need help.


Hi Hortense! Thank you for sharing a gift with Janne from Joy of Motion. I have already bought this pattern but I do thank you for the suggestion of making a rug with this stitch. I am going to try it!!!
Hope you had a marvelous Christmas and enjoyed the holiday.
Linda H.