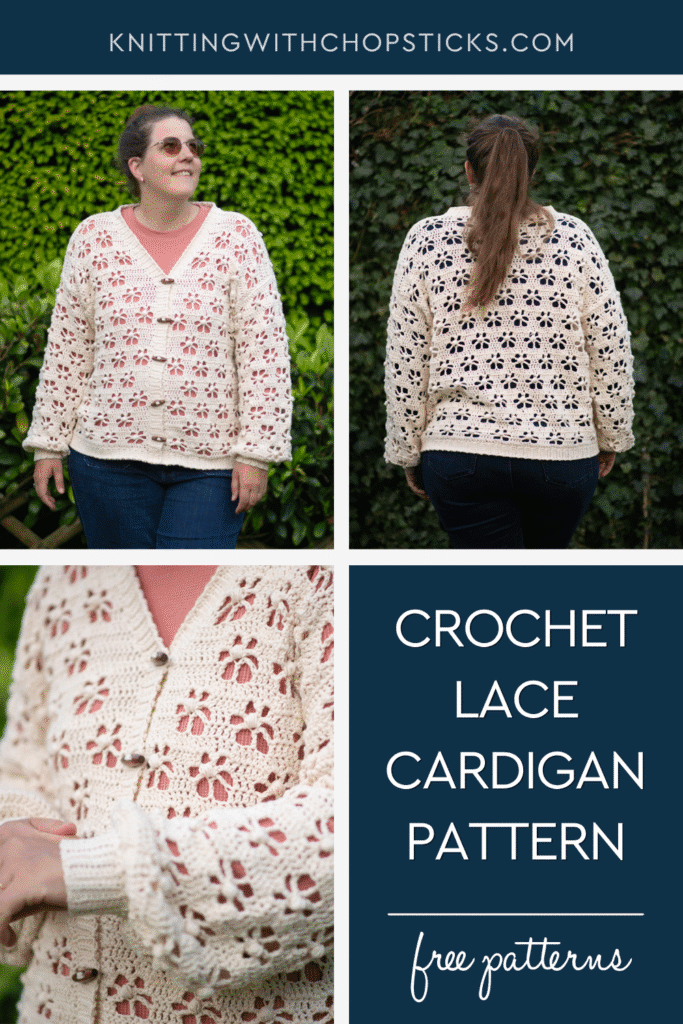
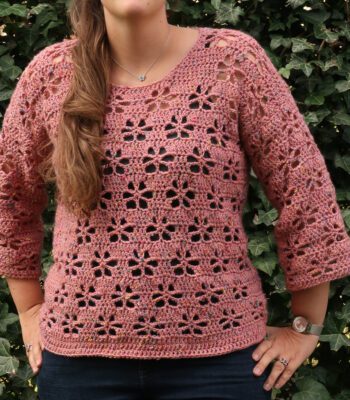
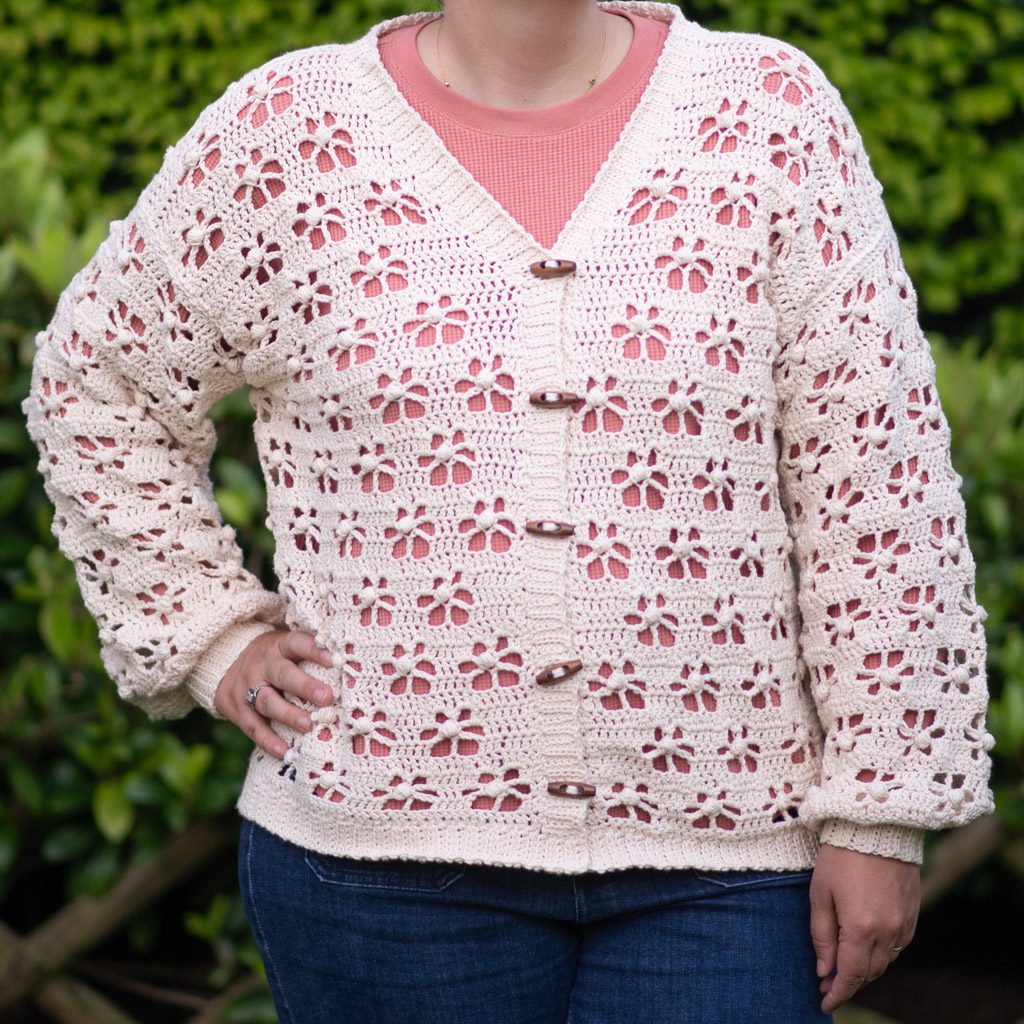
Floral Cardigan

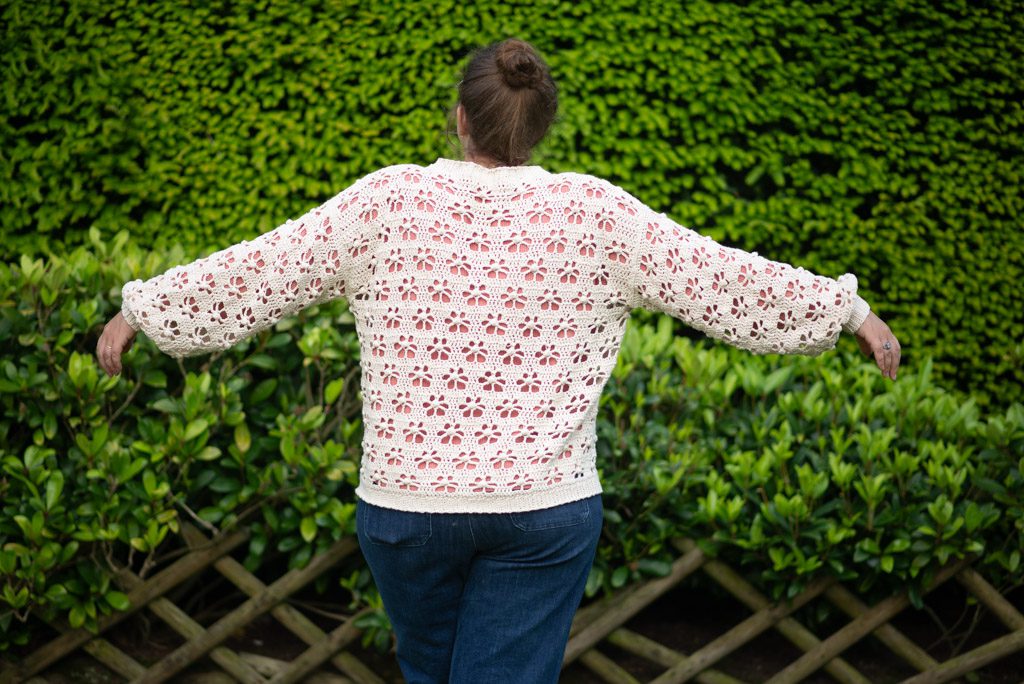
A new easy lacy crochet sweater pattern – the Floral Cardigan – is now a free crochet cardigan pattern here on the blog. Read all about the inspiration, soft yarn, the cardigan construction, scroll down to view the full free pattern or purchase an ad free PDF from my shop, Etsy shop or Ravelry shop.
No time right now? Pin this crochet lace cardigan pattern free for later!
*This post contains affiliate links (only for products I love, use and spend my own money on obviously). This means I earn some yarn money if you make a purchase through one of these links (of course at no extra cost for you!), which I promise to use to create more awesome patterns like this one. All opinions are my own. See my full disclosure here.

The Inspiration For the Lacy Crochet Sweater Pattern
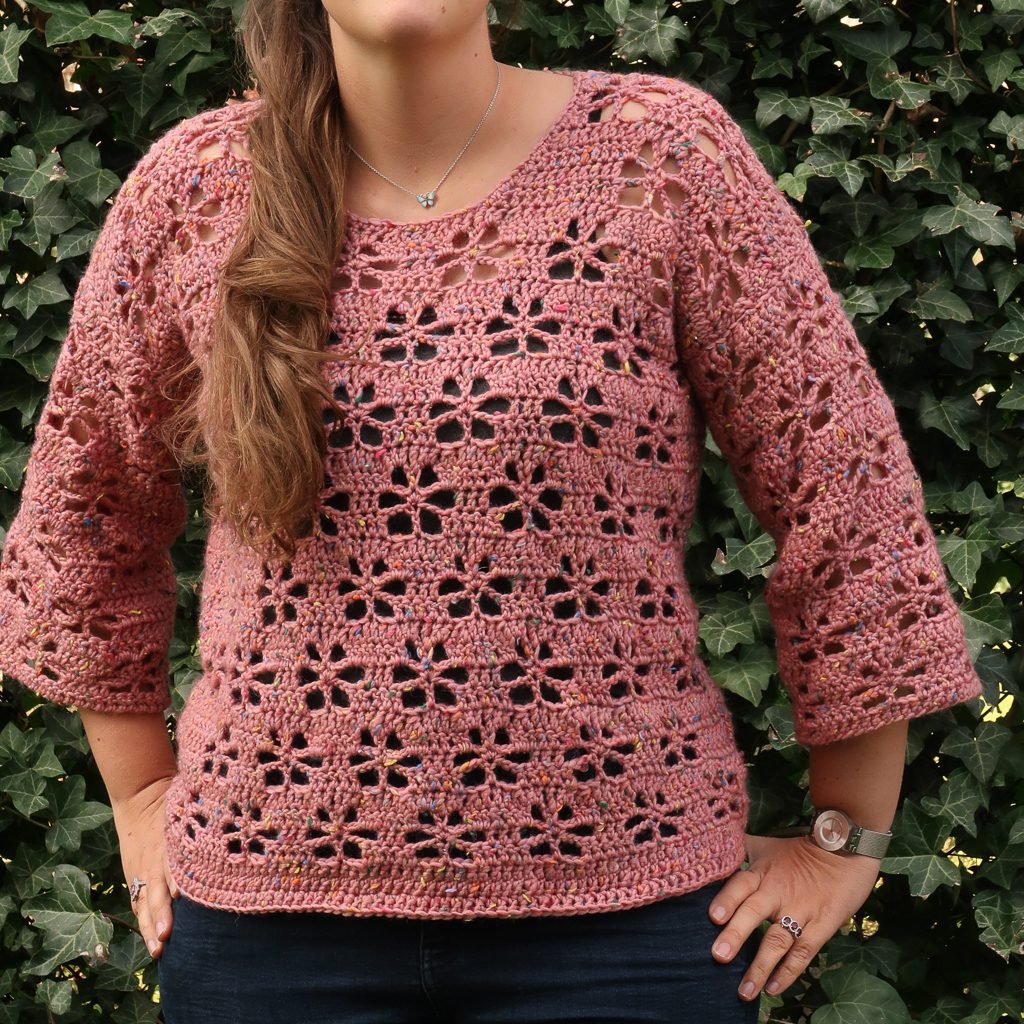
My Fleur Sweater, a well-loved previous design of mine, is a love letter to blooming flowers, an ode to Spring’s florals and a refreshing reminder of the brighter days ahead. This spring I felt inspired to brush up on this classic design to tweak it so that I could present you its cousin, the Floral Cardigan. This new design is a lacy crochet cardigan pattern that features a similar flower lace stitch as the Fleur Sweater.
Don’t worry, as striking as it may look, this adorable crochet lace design is still an easy project as I’ll provide you with all the needed charts and written explications.
May flowers are peeking through the surface at last and putting bright smiles on everyone’s faces. Similarly, the Floral Cardigan is ready to emerge from your hooks and bring you and your loved ones its blossoming joy.
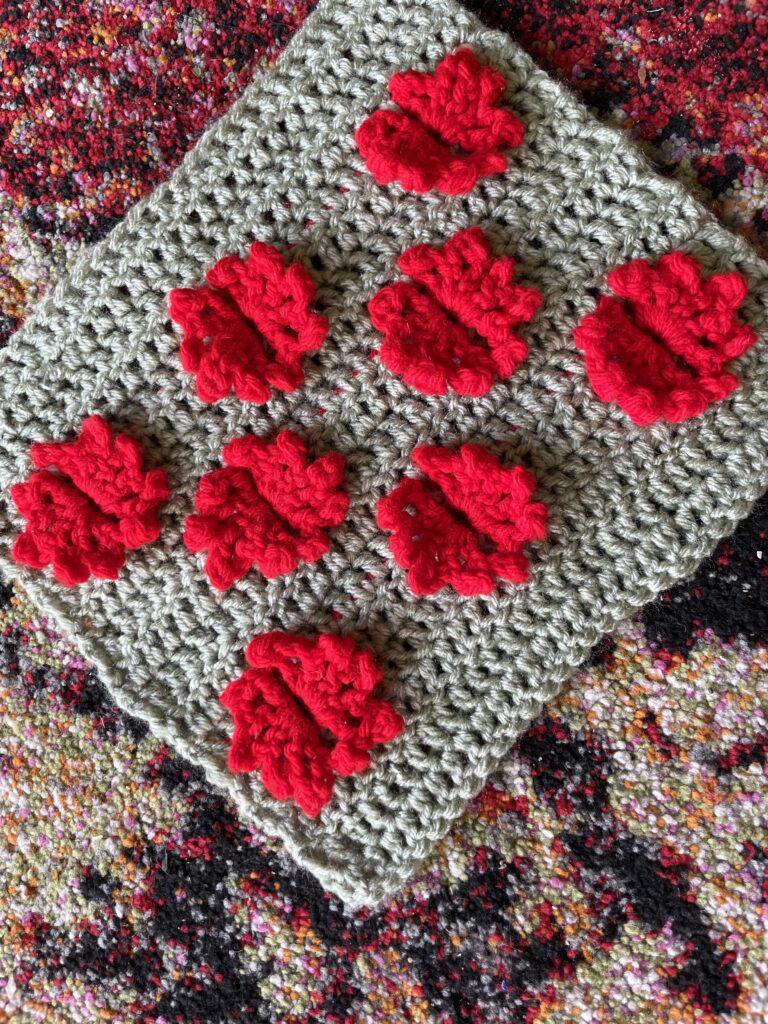
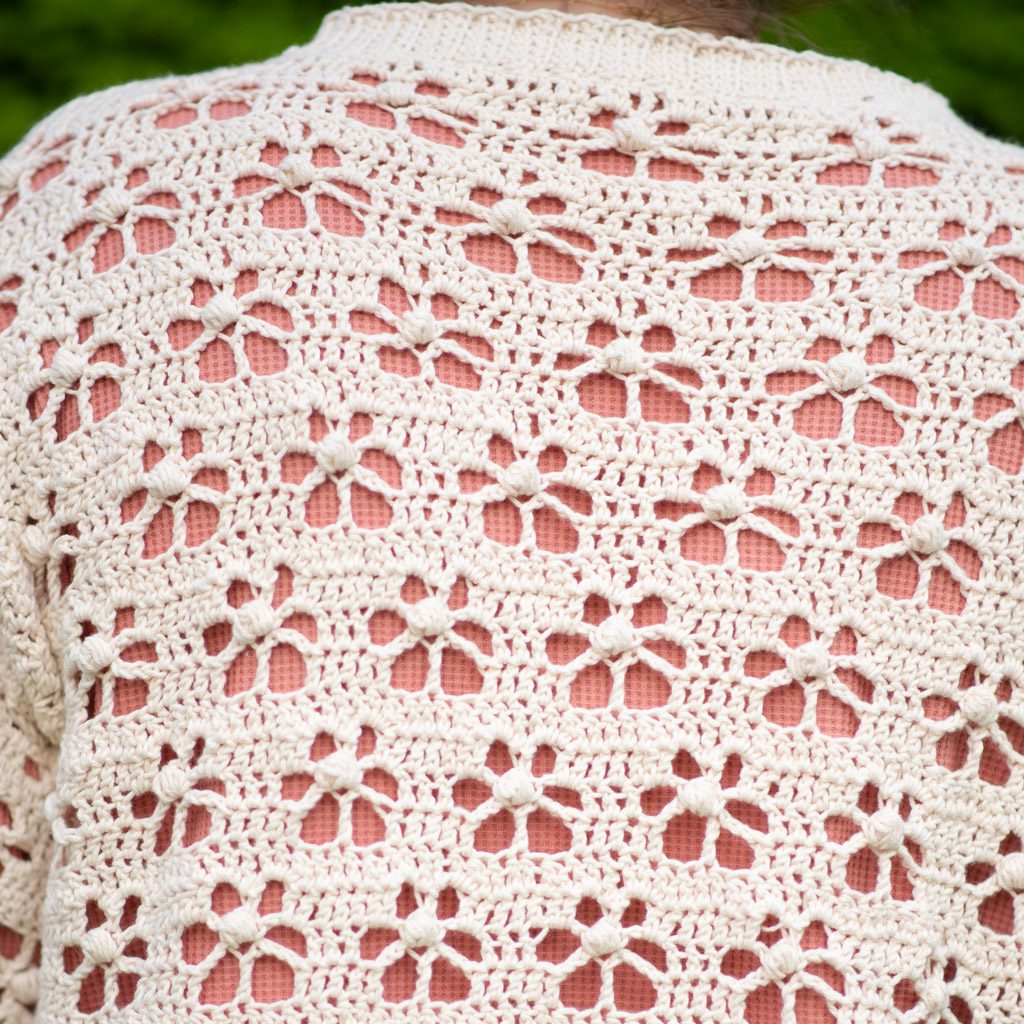
The Flower Lace Stitch
This flower lace pattern is a simple combination of the basic stitches (ch, sc, dc, tr) and skipped stitches. Yes, you need to count a little to keep track of what you’re doing but after a few repeats it’s a breeze. Find out all about this lace stitch (including the chart!) at the bottom of this post.
The Yarn Used for the Lacy Crochet Sweater Pattern
This lacy crochet sweater pattern is designed with the lovely Hobbii Friends Cotton 8/6 yarn. It is made out of 6 cotton threads spun together. Cotton is a great, strong, durable, breathable, absorbent, and lightweight natural fiber. So it’s a great choice for spring & summer makes!
Cotton yarn is also easy to take care of and blocks very well, making Friends Cotton 8/6 yarn so versatile that you can craft anything with it, including garments for babies through adults.
I especially like that Hobbii Friends Cotton 8/6 yarn comes in a complete range of shades that spans from bright to pastel and darker colors. This makes it easy to find exactly the color you are looking for to complement your style. The cherry on top is that cotton has a great stitch definition and works amazingly well with textured and lace stitches!
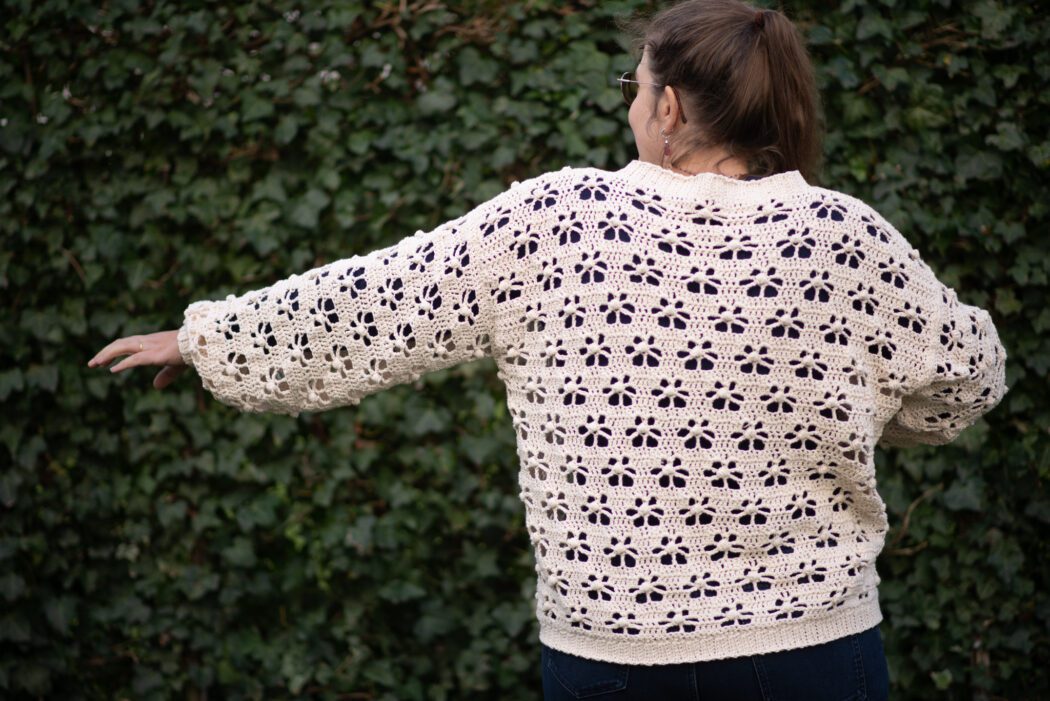
Lacy Crochet Cardigan Pattern Construction
This lacy crochet sweater pattern is worked in panels. The entire body is worked in one piece, from the bottom up then dividing the panel in 3 pieces to form both front panels and the back panel. You’ll sew the shoulder seams together to finish off the cardigan body.
The sleeves are then worked as separate pieces before getting sewed to the body. Both sleeves and the back panels are simple rectangles while the front sections have some shaping to form a beautiful v-neck cardigan shape. Charts as well as written instructions are included for these shaping sections.
Finally, you’ll add a ribbing edge all around the cardigan body with buttonholes to finish off your crochet summer cardigan.
Downloadable Lacy Crochet Summer Cardigan Pattern

Grab the printable PDF of the lacy crochet sweater pattern now in my shop, Etsy shop or on Ravelry.
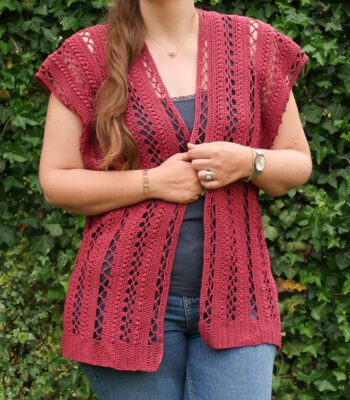
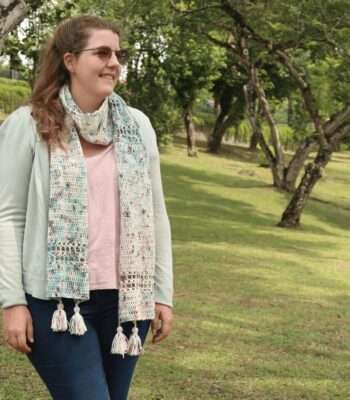
More Lacy Crochet Summer Patterns You'll Love
Before you Start Your Floral Free Crochet Cardigan Pattern
Materials
- 4.5 mm / US G+ hook
- Hobbii Friends Cotton 8/6 (50 g / 1.75 oz, 100% Cotton, 105 m / 115 yd) in Oatmilk (03). You will need 10 (11, 13, 14, 16) (17, 19, 21, 22) skeins
- Tapestry needle to weave in the ends.
- 5 buttons
Size
The crochet sweater pattern is available in 9 sizes: XS, S, M, L, XL, 2XL, 3XL, 4XL, 5XL. Sizes are written as XS (S, M, L, XL) (2XL, 3XL, 4XL, 5XL) throughout the pattern. Pictures illustrate the L size.
The sweater is designed with a loose fit, 10 – 20 cm / 4” to 8” ease at the bust.
Below are the final lace sweater measures for the different sizes.
- Bust: 99 (106, 121, 128, 142) (149, 156, 171, 178) cm / 39 (42, 47.5, 50.5) (56, 58.75. 61.5, 67.25, 70)”
- Upper arm circumference: 42 (42, 42, 49, 49) (49, 56, 56, 56) cm / 16.5 (16.5, 16.5, 19.5, 19.5) (19.5, 22.25, 22.25, 22.25)”
- Length: 55 (55, 55, 60, 60) (60, 65, 65, 65) cm / 21.75 (21.75, 21.75, 23.5, 23.5) (23.5, 25.5, 25.5, 25.5)”
Gauge
The gauge for this pattern (blocked!), in flower lace pattern, is 14 st by 8 rows for a 10 cm by 10 cm / 4” by 4” square.
Abbreviations
Sick of all the yarn jargon and conversions?
US vs UK, abbreviations, imperial vs metric, yarn weights, etc?

This pattern uses US notations.
- st = stitch
- ch = chain
- yo = yarn over
- sl st = slip stitch
- sc = single crochet
- hdc = half double crochet
- dc = double crochet
- dc2tog = double crochet 2 stitches together (decrease)
- tr = treble crochet
- sp = space
- RS = Right Side
Notes
Work instructions between [] the indicated number of times or until the end of the row / round.
The final number of stitches is indicated at the end of the row / round between < >.
The turning ch 2, ch 3 don’t count as stitches throughout the pattern except if mentioned otherwise.
The pattern is written in crochet shorthand. For example:
- “sc 1” means to single crochet in the next stitch,
- “sc 2” means to single crochet in each of the next 2 stitches,
- and “2 sc” means to single crochet twice in the next st.
Construction
The sweater is worked in panels. The entire body is worked in one piece, from the bottom up then dividing the panel in 3 pieces to form both front panels and the back panel. You’ll sew the shoulder seams together to finish off the cardigan body. The sleeves are then worked as separate pieces before getting sewed to the body. Both sleeves and the back panels are simple rectangles while the front sections have some shaping to form a beautiful v neck cardigan shape.
Finally, you’ll add a ribbing edge all around the cardigan body with buttonholes to finish off your cardigan.
Special Stitches
Puff stitch (5 hdc puff worked all in one st) = yo, insert hook in indicated st, yo, pull up a loop, [yo, insert hook in same st, yo, pull up a loop] 4 times, yo, pull through all 11 loops on the hook. (No ch to close)
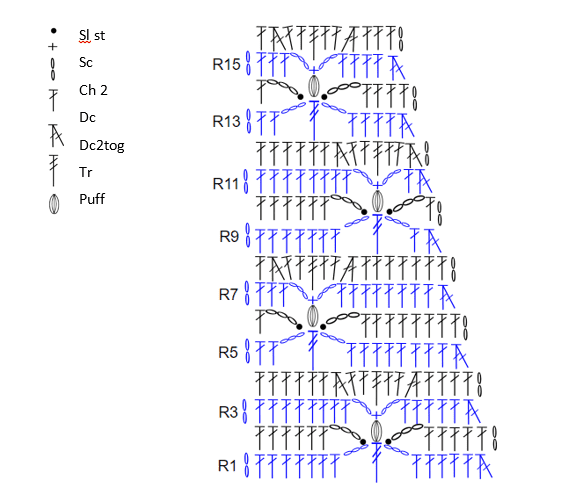
Repeated Lace Patterns

All panels of the Floral Cardigan are made with this flower lace stitch. The stitch uses a multiple of 10 + 9 st.
For the visual learners, there is a chart of the stitch pattern below the text version.

Row 1: Ch 2, dc 2, [ch 3, skip 2, tr, ch 3, skip 2, dc 5] until last 7 st, ch 3, skip 2, tr, ch 3, skip 2, dc 2, turn.
Row 2: Ch 2, dc, [ch 3, skip 1 dc, sl st in ch-3 sp below, puff st in tr below, sl st in ch-3 sp below, ch 3, skip 1 dc, dc 3] until last 6 st, ch 3, skip 1 dc, sl st in ch-3 sp below, puff st in tr below, sl st in ch-3 sp below, ch 3, skip 1 dc, dc, turn.
Row 3: Ch 2, dc, [2 dc in ch-3 sp, ch 3, sc in puff st below, ch 3, 2 dc in ch-3 sp, dc 3] to end omitting last 2 dc at end, turn.
Row 4: Ch 2, dc, [dc2tog, 2 dc in ch-3 sp, tr in sc below, 2 dc in ch-3 sp, dc2tog, dc 3] to end omitting last 2 dc at end, turn
Row 5: Ch 2, dc 7, [ch 3, skip 2, tr, ch 3, skip 2, dc 5] until last 2 st, dc 2, turn.
Row 6: Ch 2, dc 6, [ch 3, skip next 1 dc, sl st in ch-3 sp below, puff st in tr below, sl st in ch-3 sp below, ch 3, skip 1 dc, dc 3] until last 3 st, dc 3, turn.
Row 7: Ch 2, dc 6, [2 dc in ch-3 sp, ch 3, sc in puff st below, ch 3, 2 dc in ch-3 sp, dc 3] until last 3 st, dc 3, turn.
Row 8: Ch 2, dc 6, [dc2tog, 2 dc in ch-3 sp, tr in sc below, 2 dc in ch-3 sp, dc2tog, dc 3] until last 3 st, dc 3, turn.
If you need help learning to read crochet charts, my online course Conquer Charts & Graphs is a great place to start!
The Actual Floral Crochet Lace Cardigan Pattern Free
Body Panel
With your 4.5 mm crochet hook, ch 139 (149, 169, 179, 199) (209, 219, 239, 249) + 2.
Base Row: Dc in 3rd ch from hook, dc across. <139 (149, 169, 179, 199) (209, 219, 239, 249) st>
Work 3 repeats of the flower lace pattern.
Work Row 1 – 4 of the flower lace pattern once more.
Now you need to split your work in 3 sections: both front panels and the back panel. This way you create the armholes
Divide as follows (add a marker at each ,):
- XS: 29 st, 6 st (will not get worked), 69 st, 6 st (will not get worked), 29 st.
- S: 29 st, 6 st, 79 st, 6 st, 29 st
- M: 39 st, 6 st, 79 st, 6 st, 39 st
- L: 39 st, 6 st, 89 st, 6 st, 39 st.
- XL: 49 st, 6 st, 89 st, 6 st, 49 st.
- 2XL: 49 st, 6 st, 99 st, 6 st, 49 st.
- 3XL: 49 st, 6 st, 109 st, 6 st, 49 st.
- 4XL: 59 st, 6 st, 109 st, 6 st, 59 st.
- 5XL: 59 st, 6 st, 119 st, 6 st, 59 st.
Work each part separately.
Front part 1
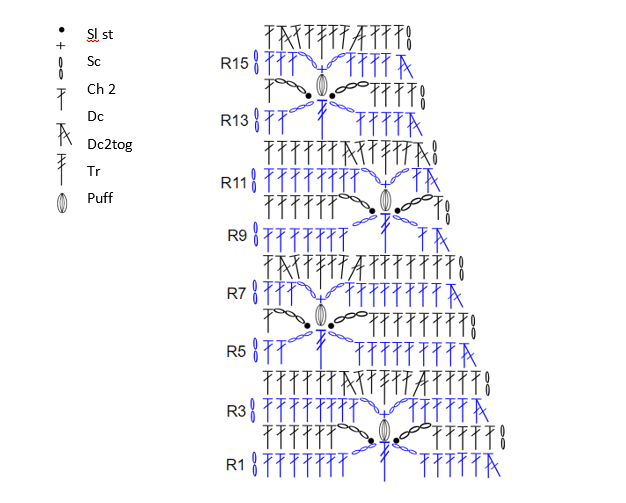
Keep working in flower lace pattern while decreasing at the outer edge on every RS row as follows (for visual learners refer to the chart below the written instructions):
Row 1: Ch 2, dc2tog, dc 5, [ch 3, skip 2, tr, ch 3, skip 2, dc 5] until last 2 st, dc 2, turn.
Row 2: Ch 2, dc 6, [ch 3, skip next 1 dc, sl st in ch-3 sp below, puff st in tr below, sl st in ch-3 sp below, ch 3, skip next 1 dc, dc 3] until last 2 st, dc 2, turn.
Row 3: Ch 2, dc2tog, dc 3, [2 dc in ch-3 sp, ch 3, sc in puff st below, ch 3, 2 dc in ch-3 sp, dc 3] until last 3 st, dc 3, turn.
Row 4: Ch 2, dc 6, [dc2tog, 2 dc in ch-3 sp, tr in sc below, 2 dc in ch-3 sp, dc2tog, dc 3] until last st, dc, turn.
Row 5: Ch 2, dc2tog, dc 8, [ch 3, skip 2, tr, ch 3, skip 2, dc 5] until last 7 st, ch 3, skip 2, tr, ch 3, skip 2, dc 2, turn.
Row 6: Ch 2, dc, [ch 3, skip 1 dc, sl st in ch-3 sp below, puff st in tr below, sl st in ch-3 sp below, ch 3, skip next 1 dc, dc 3] until last 5 st, dc until end of row, turn.
Row 7: Ch 2, dc2tog, dc 6, [2 dc in ch-3 sp, ch 3, sc in puff st below, ch 3, 2 dc in ch-3 sp, dc 3] to end omitting last 2 dc at end, turn.
Row 8: Ch 2, dc, [dc2tog, 2 dc in ch-3 space, tr in sc below, 2 dc in ch-3 space, dc2tog, dc 3] until last 4 st, dc to end of row, turn
Row 9: Ch 2, dc2tog, dc, [ch 3, skip 2, tr, ch 3, skip 2, dc 5] until last 2 st, dc 2, turn.
Row 10: Ch 2, dc 6, [ch 3, skip next 1 dc, sl st in ch-3 sp below, puff st in tr below, sl st in ch-3 below, ch 3, skip next 1 dc, dc 3] to end omitting last 2 dc at end, turn.
Row 11: Ch 2, dc2tog (one leg in dc and one leg in ch-3 sp), dc in ch-3 sp, ch 3, sc in puff st below, ch 3, 2 dc in ch-3 sp, dc 3, [2 dc in ch-3 sp, ch 3, sc in puff st below, ch 3, 2 dc in ch-3 sp, dc 3] until last 3 st, dc 3, turn.
Row 12: Ch 2, dc 6, [dc2tog, 2 dc in ch-3 sp, tr in sc below, 2 dc in ch-3 sp, dc2tog, dc 3] to end omitting last 3 dc at end, turn.
Row 13: Ch 2, dc2tog, dc 4, [ch 3, skip 2, tr, ch 3, skip 2, dc 5] until last 7 st, ch 3, skip 2, tr, ch 3, skip 2, dc 2, turn.
Row 14: Ch 2, dc, [ch 3, skip 1 dc, sl st in ch-3 below, puff st in tr below, sl st in ch-3 below, ch 3, skip next 1 dc, dc 3] until last st, dc, turn.
Row 15: Ch 2, dc2tog, dc 2, [2 dc in ch-3 sp, ch 3, sc in puff st below, ch 3, 2 dc in ch-3 sp, dc 3] omitting last 2 dc at the end, turn.
Row 16: Ch 2, dc, [dc2tog, 2 dc in ch-3 sp, tr in sc below, 2 dc in ch-3 sp, dc2tog, dc 3] to end.
Repeat Row 5 – 8 (8, 8, 12, 12) (12, 16, 16, 16).
Fasten off and leave a long tail for sewing.
Middle Panel
Skip 6 st from end of front panel 1 on the separation row and join yarn (aka at the 2nd st marker)
Work 2 (2, 2, 3, 3) (3, 3, 3, 3) repeats of the lace flower pattern.
For sizes XS, S, M, 3XL, 4XL and 5XL only: Repeat flower lace pattern rows 1 – 4 once more.
Fasten off and leave a long tail for sewing.
Front panel 2
Front panel 2 is symmetric to Front panel 1. Join yarn at the last st marker (skip 6 st from the middle panel) work in lace flower pattern and decreasing at the outer edge on every RS row as follows:
Row 1: Ch 2, dc 7, [ch 3, skip 2, tr, ch 3, skip 2, dc 5] until last 2 st, dc2tog, turn.
Row 2: Ch 2, dc 5, [ch 3, skip next 1 dc, sl st in ch-3 sp below, puff st in tr below, sl st in ch-3 sp below, ch 3, skip 1 dc, dc 3] until last 3 st, dc 3, turn.
Row 3: Ch 2, dc 6, [2 dc in ch-3 sp, ch 3, sc in puff st below, ch 3, 2 dc in ch-3 sp, dc 3] until last 2 st, dc2tog, turn.
Row 4: Ch 2, dc 4, [dc2tog, 2 dc in ch-3 sp, tr in sc below, 2 dc in ch-3 sp, dc2tog, dc 3] until last 3 st, dc 3, turn.
Row 5: Ch 2, dc 2, [ch 3, skip 2, tr, ch 3, skip 2, dc 5] until last 5 st, dc 3, dc2tog, turn.
Row 6: Ch 2, dc 8, [ch 3, skip 1 dc, sl st in ch-3 sp below, puff st in tr below, sl st in ch-3 sp below, ch 3, skip 1 dc, dc 3] omitting last 2 dc at the end, turn.
Row 7: Ch 2, dc, [2 dc in ch-3 sp, ch 3, sc in puff st below, ch 3, 2 dc in ch-3 sp, dc 3] to last 5 st, dc 3, dc2tog, turn.
Row 8: Ch 2, dc 7, [dc2tog, 2 dc in ch-3 sp, tr in sc below, 2 dc in ch-3 sp, dc2tog, dc 3] to end omitting last 2 dc at end, turn.
Row 9: Ch 2, dc 7, [ch 3, skip 2, tr, ch 3, skip 2, dc 5] until last 7 st, ch 3, skip 2, tr, ch 3, skip 2, dc, dc2tog, turn.
Row 10: Ch 2, dc, [ch 3, skip next 1 dc, sl st in ch-3 sp below, puff st in tr below, sl st in ch-3 sp below, ch 3, skip 1 dc, dc 3] until last 3 st, dc 3, turn.
Row 11: Ch 2, dc 6, [2 dc in ch-3 sp, ch 3, sc in puff st below, ch 3, 2 dc in ch-3 sp, dc 3] until last 2 ch-3 sp, 2 dc in ch-3 sp, ch 3, sc in puff st below, ch 3, dc in ch-3 sp, dc2tog (one leg in ch-3 sp and one leg in dc), turn.
Row 12: Ch 2, [dc2tog, 2 dc in ch-3 sp, tr in sc below, 2 dc in ch-3 sp, dc2tog, dc 3] until last 3 st, dc 3, turn.
Row 13: Ch 2, dc 2, [ch 3, skip 2, tr, ch 3, skip 2, dc 5] until last 11 sts, ch 3, sk 2, tr, ch 2, sk 2, dc 4, dc2tog turn.
Row 14: Ch 2, dc 4, [ch 3, skip 1 dc, sl st in ch-3 sp below, puff st in tr below, sl st in ch-3 sp below, ch 3, skip 1 dc, dc 3] omitting last 2 dc at the end, turn.
Row 15: Ch 2, dc, [2 dc in ch-3 sp, ch 3, sc in puff st below, ch 3, 2 dc in ch-3 sp, dc 3] until last 13 st, 2 dc in ch-3 sp, ch 3, sc in puff st below, ch 3, 2 dc in ch-3 sp, dc 2, dc2tog, turn.
Row 16: Ch 2, dc 3, [dc2tog, 2 dc in ch-3 sp, tr in sc below, 2 dc in ch-3 sp, dc2tog, dc 3] to end omitting last 2 dc at end, turn.
Repeat Row 5 – 8 (8, 8, 12, 12) (12, 16, 16, 16).
Sleeves
Ch 59 (59, 59, 69, 69) (69, 79, 79, 79) +2
Work flower pattern rows 1 – 8 four times. Repeat Rows 1 – 4 once more. (a total of 9 flowers height).
End of sleeve Row 1: Ch 2, dc across, turn.
End of sleeve Row 2: Ch 2, dc, dc2tog across, turn. <30 (30, 30, 35, 35) (35, 40, 40, 40) st>
End of sleeve Row 3: Ch 1, [sc, sc2tog] across, sc 0 (0, 0, 2, 2) (2, 1, 1, 1), turn. <20 (20, 20, 24, 24) (24, 27, 27, 27) st>
Don’t cut off the working yarn as you will use it for the ribbing.
Blocking
I recommend blocking your panels before assembly. Then reblocking it when the ribbing is done for best results.
To make your lace sweater even prettier, help even your stitches and open up the lace sections, wet block your project.
Don’t skip this step as it can make a huge difference. Read my detailed tutorial on why block, how-to, and all my tips and tricks if you need help.
Assembly
Start by sewing the shoulder seams.
Attach the sleeves to the body: fold the sleeve in half and start by sewing the middle to the shoulder seam. Sew down on both sides.
Make sure your end sleeve rows are at the forearm not the shoulder side to ensure your flowers are in the same direction as on the body.
Sew down the length of the sleeves.
Weave in all your ends.
Ribbing
Cuffs
Switch to 3.5 mm / US E-4 hook to work the cuff ribbing
Ch 10, turn
Row 1: Hdc in the back loop of the 2nd ch from the hook, hdc in the back loop of the next 8 sts. Sl st in the next stitch of the sleeve, ch 1 and turn. < 9 hdc st >
Row 2: Hdc in the back loop of the 3rd st from the hook (skipping the ch-1 and sl st in the sleeve), hdc in the back loop of the next 8 sts, ch 1 and turn. < 9 hdc st >
Repeat Rows 1 and 2 around the sleeve. Sew the ribbing closed.
Front edges
Foundation row: With your 3.5 mm / US E-4 hook, sc along the entire cardigan body. Start at the bottom corner (on the left side for left-handed crocheters, in the right corner for right-handed crocheters) going up and around the neck and back down. The exact number of sc doesn’t matter, spread them out evenly, approximately 3 sc for 2 rows.
Make a ribbing following the same technique as for the cuffs.
With your 3.5 mm / US E-4 hook, ch 7, turn.
Row 1: Hdc in the back loop of the 2nd ch from the hook, hdc in the back loop of the next 5 sts. Sl st in the next foundation row sc, ch 1 and turn. < 6 hdc st >
Row 2: Hdc in the back loop of the 3rd st from the hook (skipping the ch 1 and sl st in the foundation row), hdc in the back loop of the next 5 sts, ch 1 and turn. < 6 hdc st >
Repeat Row 1 and 2 along the edge of the cardigan up to the neck and back down.
On the right side of the cardigan make 5 buttonholes (replace one repeat of row 1 and 2 by row 3 and 4 below). First indicate with a marker where you’ll make the buttonholes to ensure they are well placed. The top buttonhole should be at the end of the neck shaping decreases. The bottom buttonhole should be 1-2 cm from the bottom of the cardigan. Measure and spread them out evenly between these 2.
Row 3: Hdc in the back loop of the 2nd ch from the hook, hdc in the back loop of the next st, ch 2, skip 2, hdc in the back loop of the 2 next st. Sl st in the next foundation row sc, ch 1 and turn. < 6 st >
Row 4: Hdc in the back loop of the 3rd st from the hook (skipping the ch-1 and sl st in the foundation row), hdc in the back loop of the next st, hdc 2 in ch-2 space, hdc in the back loop of the next 2 st, ch 1 and turn. < 6 hdc st >
Bottom Edge
Working in the same manner make a ribbing along the entire bottom edge.
With your 3.5 mm / US E-4 hook, ch 7, turn.
Row 1: Hdc in the back loop of the 2nd ch from the hook, hdc in the back loop of the next 5 sts. Sl st in the next foundation row sc, ch 1 and turn. < 6 hdc st >
Row 2: Hdc in the back loop of the 3rd st from the hook (skipping the ch-1 and sl st in the foundation row), hdc in the back loop of the next 5 sts, ch 1 and turn. < 6 hdc st >
Repeat Row 1 and 2 along the entire bottom edge of the cardigan.
Copyright 2024 of Knitting with Chopsticks.