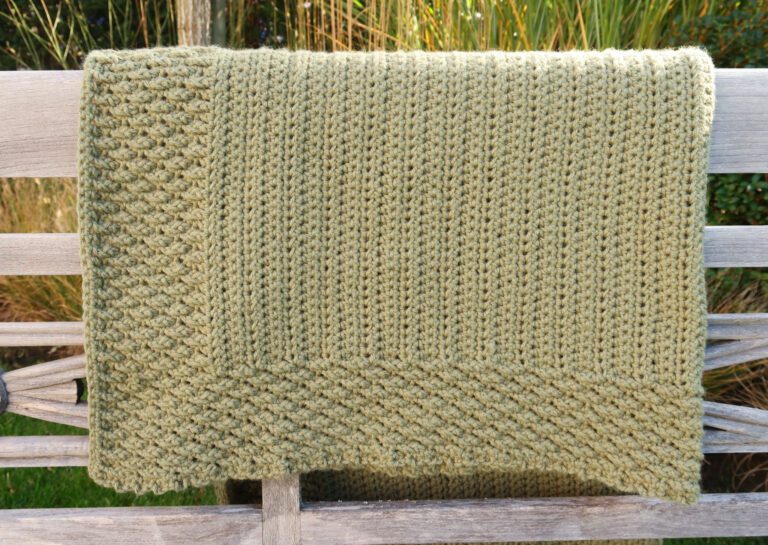
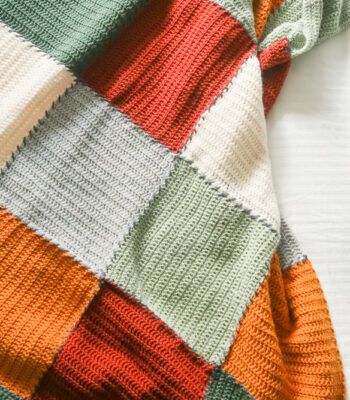
Fireside Retreat Afghan
A new chunky crochet throw pattern, the Fireside Retreat Afghan, is now a free crochet pattern here on the blog. Read all about the inspiration, my tips for color combinations and sizes or scroll down to view the full free pattern or purchase an ad free PDF from my shop, Etsy shop or Ravelry shop.
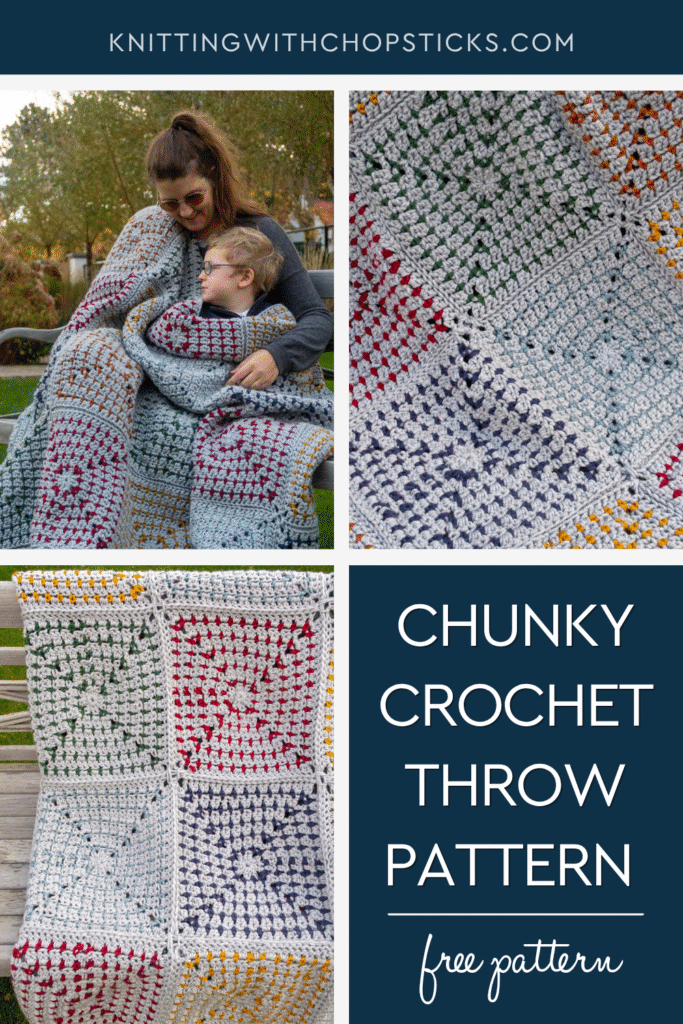
No time right now? Pin this chunky crochet throw pattern free for later!
*This post contains affiliate links (only for products I love, use and spend my own money on obviously). This means I earn some yarn money if you make a purchase through one of these links (of course at no extra cost for you!), which I promise to use to create more awesome patterns like this one. All opinions are my own. See my full disclosure here.

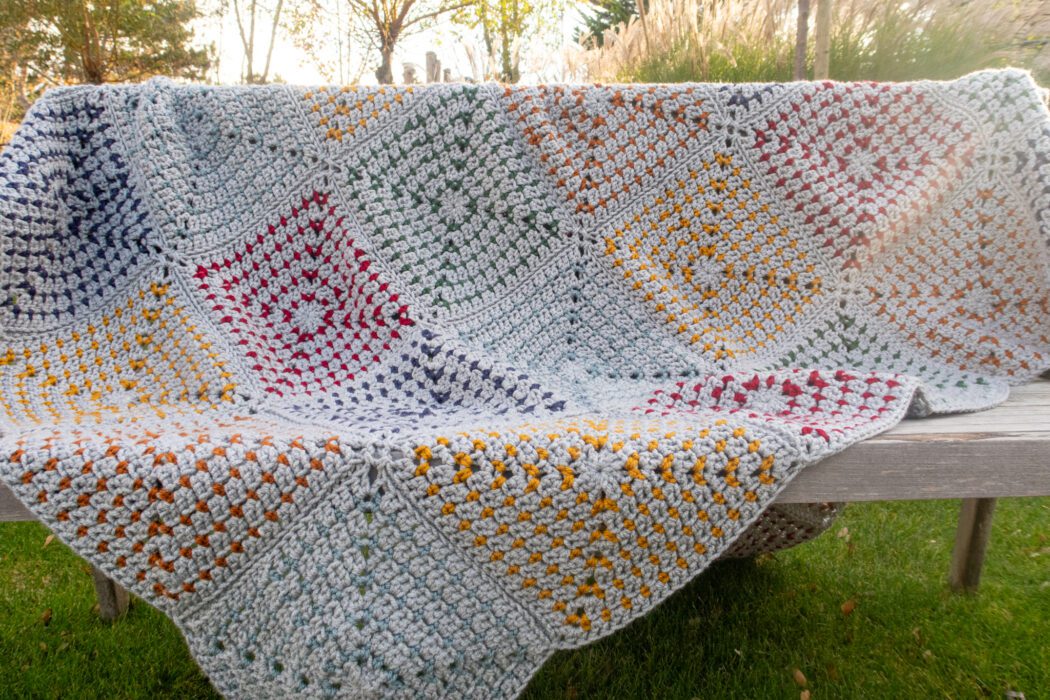
Combining modern simplicity with a pop of color, the fireside retreat afghan is an easy chunky blanket crochet pattern.
This blanket is worked in squares which are then crocheted together (no sewing required!). Each square is worked in 2 colors from the center out.
The fireside retreat afghan is a blank canvas for you to play with color combinations. No need to panic, the pattern includes my favorite tips & tricks for a modern yet personal color palette.
From lovey to king size, you’re sure to find the size you need from the pattern’s 10 sizes.
Downloadable Fireside Retreat Chunky Crochet Throw Pattern
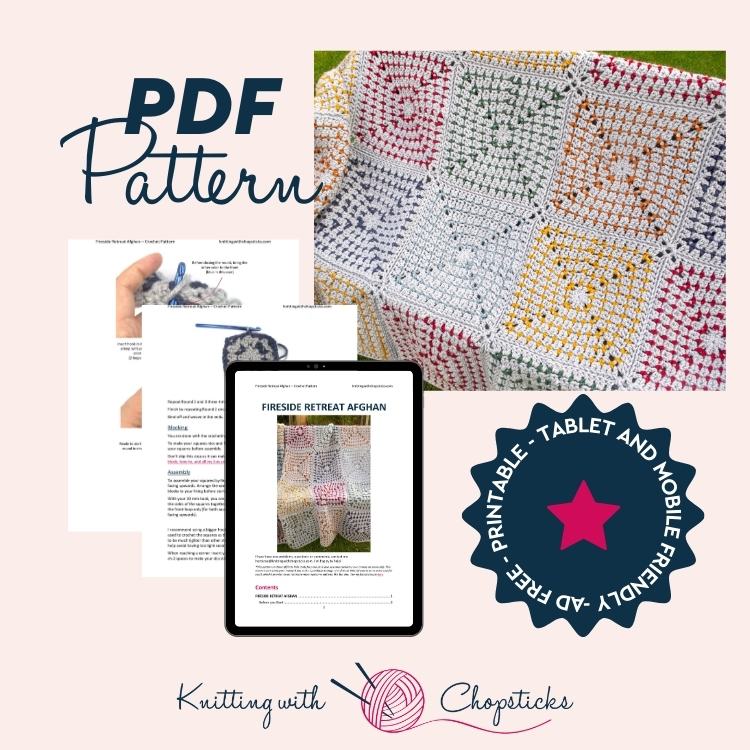
Grab the printable PDF of the Fireside Retreat Chunky Crochet Throw pattern now in my shop, Etsy shop or on Ravelry.
More Crochet Blanket Patterns you'll love

Before You Start Your Fireside Retreat Chunky Crochet Throw Pattern Free
Materials
- 8 mm / US L – 11 hook
- 10 mm / US N – 15 hook (for assembly)
- Hobbii Amigo Chunky (100% Premium Acrylic, 100 g / 16 oz, 100 m / 109 yd):
- 1 (6, 11, 13, 10, 19) (31, 51, 57, 64) skeins in MC – Light Gray Melange (A15)
- 1 (1, 1, 1, 1, 1) (2, 3, 3, 3) skeins of each of the 6 CC: Dark Blue Melange (A08), Curry (A38), Hunter green (A28), Dark Red (A41), Cognac (A39), Patina Green (A26)
Note: Refer to color section below if you choose to work with more / less contrasting colors. With one skein of contrasting color you can make up to 6 squares.
- Tapestry needle to weave in the ends.
Sizes
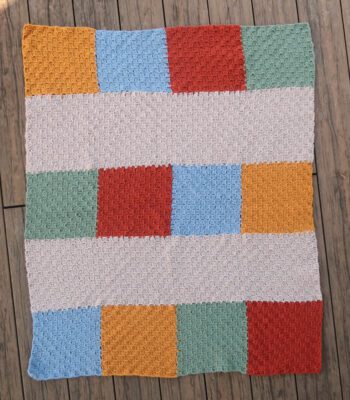
The crochet blanket pattern comes in the following sizes: Lovey (baby, receiving, toddler, crib, throw) (twin, double, queen, king). Pictures illustrate the throw size.
The table below shows the different sizes.
| Blanket sizes | Inches | Centimeters | Squares | |||
| Width | Length | Width | Length | WxL | Total | |
| Lovey | 11 | 11 | 28 | 28 | 1×1 | 1 |
| Stroller / Baby | 33 | 33 | 84 | 84 | 3×3 | 9 |
| Receiving | 44 | 44 | 112 | 112 | 4×4 | 16 |
| Toddler | 44 | 55 | 112 | 140 | 4×5 | 20 |
| Crib | 33 | 55 | 84 | 140 | 3×5 | 15 |
| Throw | 55 | 66 | 140 | 168 | 5×6 | 30 |
| Twin | 66 | 88 | 168 | 224 | 6×8 | 48 |
| Double | 88 | 110 | 224 | 280 | 8×10 | 80 |
| Queen | 99 | 110 | 252 | 280 | 9×10 | 90 |
| King | 110 | 110 | 280 | 280 | 10×10 | 100 |
One square is 28 cm / 11” square.
Colors
Picking colors for a project is very personal but can also be a big hassle. It can truly make a break your project so here are my personal recommendations when picking colors for this blanket (feel free to do whatever you want though):
- I recommend using a neutral color for the main color and have the contrasting colors be a pop of color. You can use a light neutral with rich contrast colors or a darker neutral with lighter contrast colors. Just make sure there is enough contrast between the main color and each contrast color.
- Pick at least 5 different contrasting colors for sizes receiving and above. This way no 2 touching squares have the same color. Picking 9 or more colors prevents from having same color blocks touching even diagonally but it is not always practical to find so many matching colors of the same yarn.
- For the Lovey size as there is only 1 square, you obviously need only one contrast color. While for the baby size 3 contrast colors would be enough to form a beautiful pattern.
- Depending on the blanket size and number of contrast colors you choose you will need to make a different amount of squares in each contrast color. Refer to the total number of squares in the size section for each size to calculate how many you need to make in each of your colors.
- When placing your squares before assembly you can either choose to go random or alternate colors. Decide on one row’s color order and then do the same but offset by 2 squares for each following row. This way, no squares of the same color touch.
Tips for Combining Colors
Picking colors for a project is very personal but can also be a big hassle. It can truly make a break your project so here are my personal recommendations when picking colors for this blanket (feel free to do whatever you want though):
- I recommend using a neutral color for the main color and have the contrasting colors be a pop of color. You can use a light neutral with rich contrast colors or a darker neutral with lighter contrast colors. Just make sure there is enough contrast between the main color and each contrast color.
- Pick at least 5 different contrasting colors for sizes receiving and above. This way no 2 touching squares have the same color. Picking 9 or more colors prevents from having same color blocks touching even diagonally but it is not always practical to find so many matching colors of the same yarn.
- For the Lovey size as there is only 1 square, you obviously need only one contrast color. While for the baby size 3 contrast colors would be enough to form a beautiful pattern.
- Depending on the blanket size and number of contrast colors you choose you will need to make a different amount of squares in each contrast color. Refer to the total number of squares in the size section for each size to calculate how many you need to make in each of your colors.
- When placing your squares before assembly you can either choose to go random or alternate colors. Decide on one row’s color order and then do the same but offset by 2 squares for each following row. This way, no squares of the same color touch.

Gauge
The gauge for this pattern, in dc, is 8.5 st by 6 rows for a 10 cm by 10 cm square (4” by 4”).
Diameter of rounds 1 – 3 is 12 cm / 4.75” square.
Abbreviations & Instructions
This pattern uses US notations.
- st = stitch
- ch = chain
- dc = double crochet
- sc = single crochet
Notes
Work instructions between [] the indicated number of times or until the end of the row / round.
Sick of all the yarn jargon and conversions?
US vs UK, abbreviations, imperial vs metric, yarn weights, etc?

Work instructions between () in the same stitch.
The final number of stitches is indicated at the end of the row / round between < >.
The turning ch 1, ch 2 count as stitches throughout the pattern except if mentioned otherwise.
The pattern is written in crochet shorthand. For example:
- “dc 1” means to double crochet in the next stitch,
- “dc 2” means to double crochet in each of the next 2 stitches,
- And “2 dc” means to double crochet twice in the next st.
Special Stitches and Techniques
Magic ring (aka magic circle or Magic Loop): if you’re not familiar with this technique, this detailed tutorial (includes a video) will help you.
Tips & Tricks
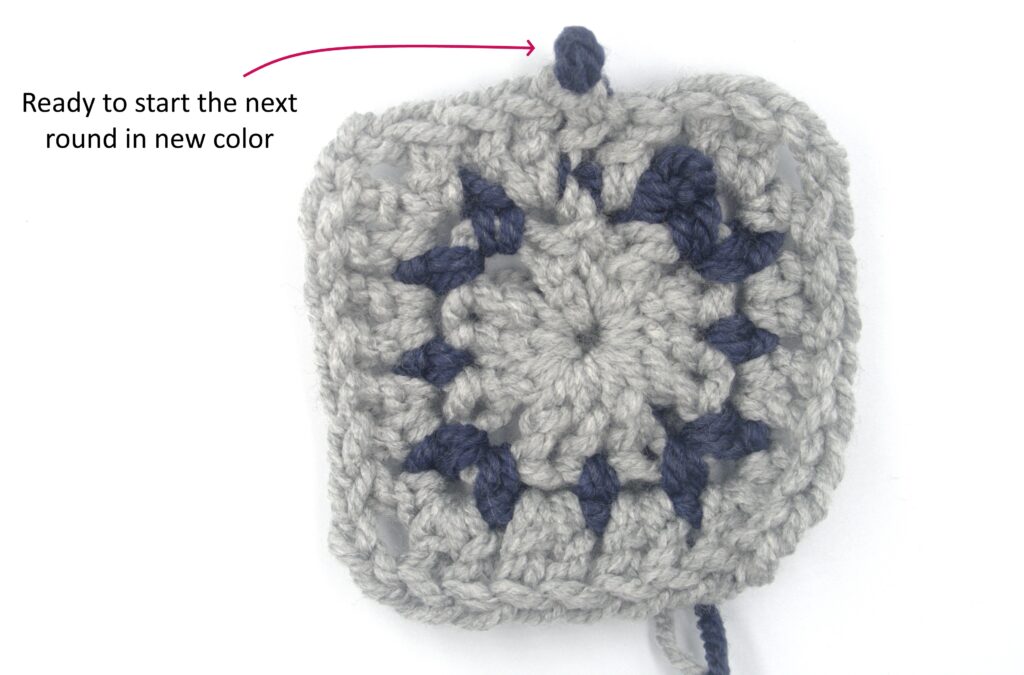
Although the squares are worked in rounds of alternating colors, you don’t need to cut your yarn after each round and weave in all the ends!
Instead, you can very discretely carry the yarn up to reuse on the next round:
- Before closing the round, bring the new color to the front.
- Insert hook in indicated ch st, pull up a loop with your current working color (2 loops on your hook).
- Finally, yarn over and pull through both loops with your new color yarn.
- You’re ready to start the next round in your new color.


The Mini V-Neck boy sweater knitting pattern is also available in German on Hobbii Plus here.
The Actual Fireside Retreat Easy Chunky Blanket Crochet Pattern Free
Make 1 (9, 16, 20, 15, 30, 48, 80, 90, 100) squares. Refer to the color choices section and sizes table above for the number of squares to make with each contrasting color.
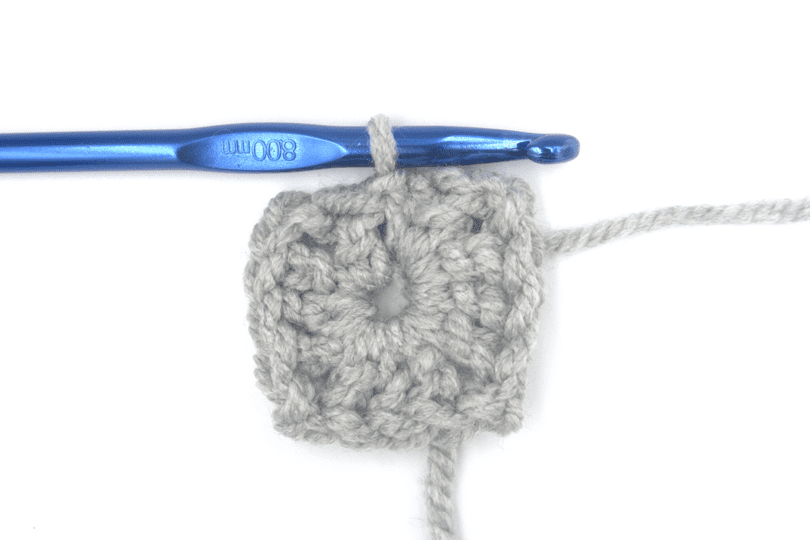
Crochet Granny Square
With your 8 mm / US L – 11 hook and your MC yarn, in a magic ring: ch 2, dc, [ch 2, 3 dc] three times, ch 2, dc, sl st in 2nd ch, turn. <12 dc, 4 ch-2 spaces>
Switch to CC yarn.
Round 1: Ch 2 (counts as 1 sc + 1 ch), skip 1, [(sc, ch 2, sc) in corner ch-2 space, ch 1, skip 1, sc, ch 1, skip 1] three times, (sc, ch 2, sc) in corner ch-2 space, ch 1, skip 1, join in the round*. <12 sc>
*Note: Refer to tips and trick section to close the round and change color without cutting your yarn and having to weave in ends.
Switch to MC yarn
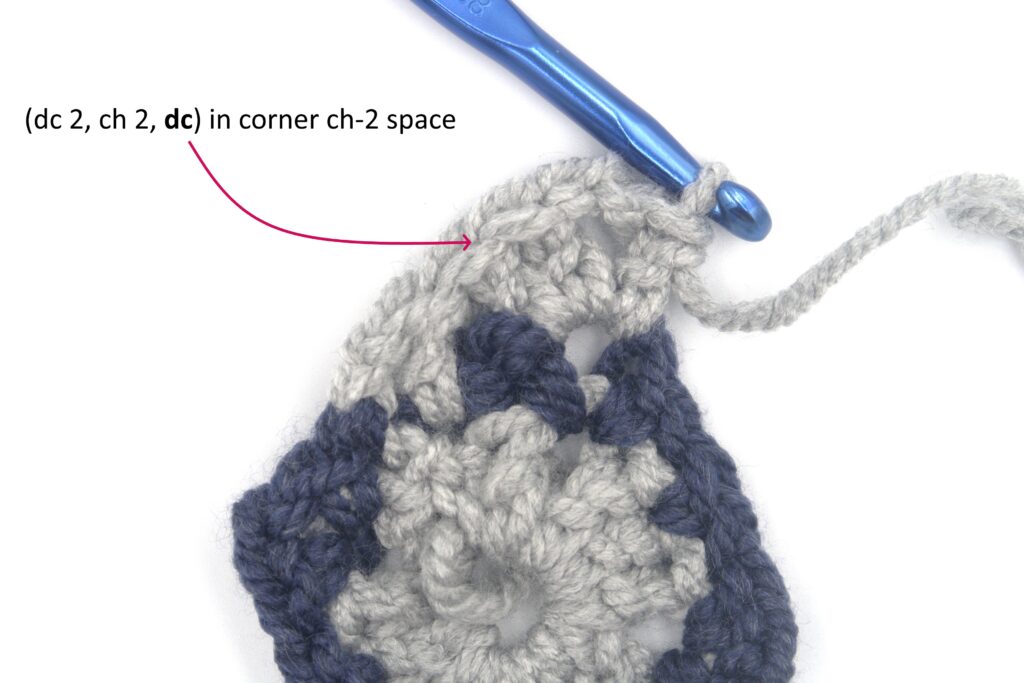
Round 2: Ch 2 (counts as 1 dc), 1 dc in ch-1 space, *[skip sc below, 2 dc in ch-1 space] until corner ch-2 space, (2 dc, ch 2, 1 dc) in corner ch-2 space, repeat from * four times, [skip sc below, 2 dc in ch-1 space] until end of round, join in the round. <28 dc>
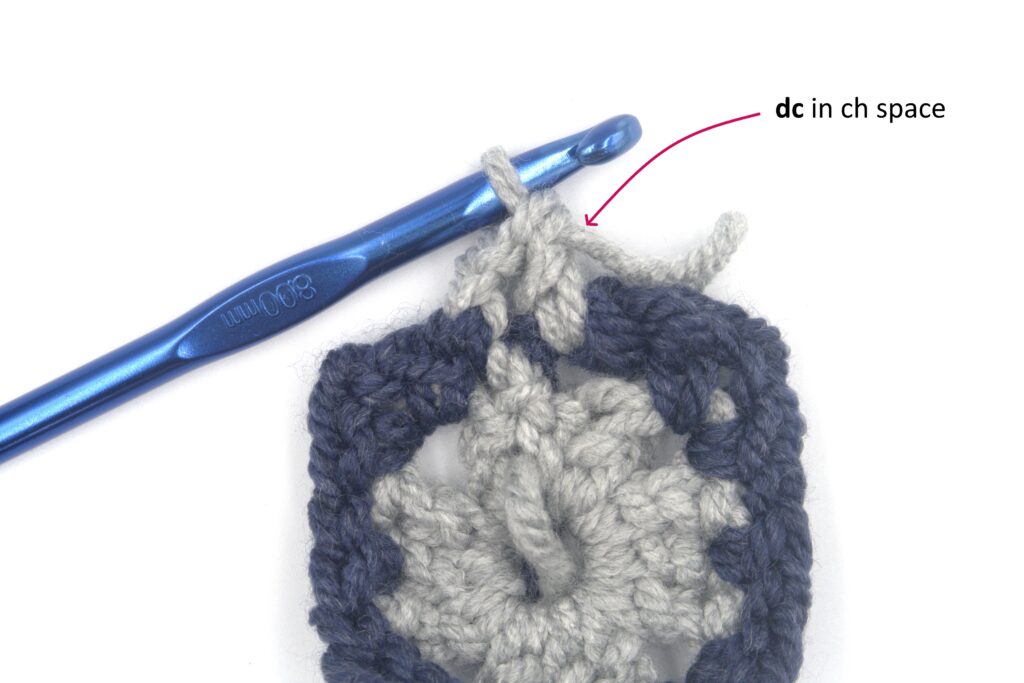
Switch to CC yarn.
Round 3: Ch 2 (counts as 1 sc + 1 ch), skip 1, *[sc, ch 1, skip 1] until corner ch-2 space, (sc, ch 2, sc) in corner ch-2 space, ch 1, skip 1, repeat from * four times, [sc, ch 1, skip 1] until end of round, join in the round. <20 sc>
Repeat Round 2 and 3 three times.
Finish by repeating Round 2 once more.
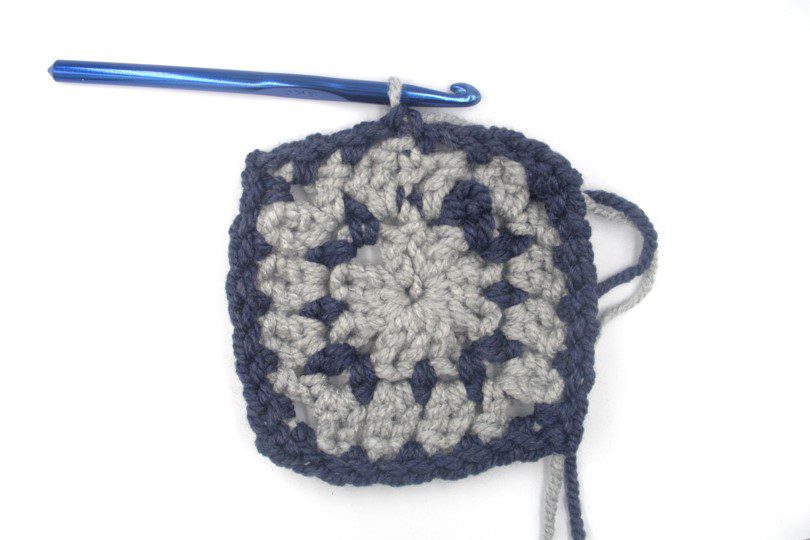
Bind off and weave in the ends.
Blocking
You are done with the crocheting part. Make sure to weave in all the ends.
To make your squares nice and flat, help even your stitches and sharpen your corners, block your squares before assembly.
Don’t skip this step as it can make a huge difference. Read my detailed tutorial on why block, how-to, and all my tips and tricks if you need help.
Assembly
To assemble your squares lay them flat, wrong side facing upwards. Arrange the contrasting color blocks to your liking before starting to assemble.
With your 10 mm hook, you are going to slip stitch the sides of the squares together working through the front loop only (for both squares use the loop facing upwards).
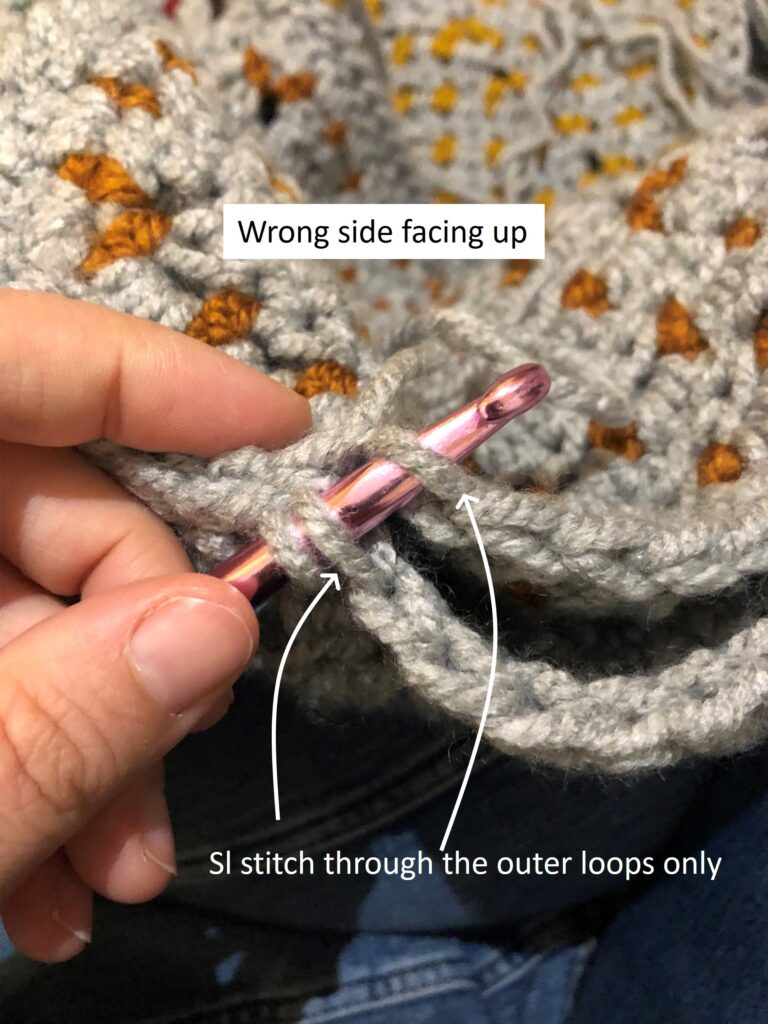
I recommend using a bigger hook than the one you used to crochet the squares as the slip stitch tends to be much tighter than other stitches. This will help avoid having too tight seams.
When reaching a corner insert your hook in both ch-2 spaces to make your slip stitch. Start by making all the joints lengthwise then make the width joints working over your previous joint in the corners. Make sure this slip stitch is very loose
Copyright 2024 of Knitting with Chopsticks.