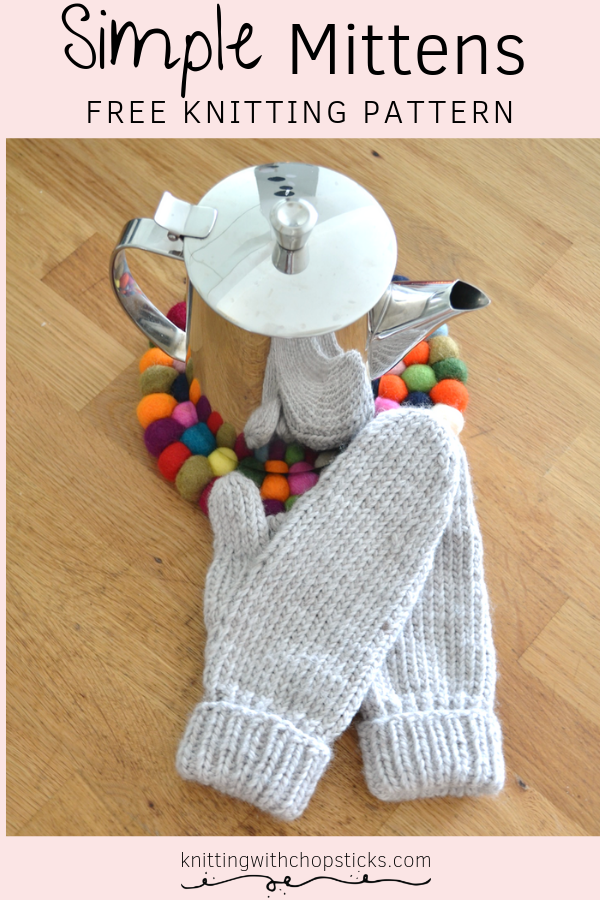
Simple Mittens Knitting Pattern

I named these the Simple Mittens because they’re just that– a simple pattern that’s perfect for beginners who want to learn how to knit mittens in the round. Whether playing in the snow or grabbing a cup of coffee, these chunky knit mittens will keep your fingers toasty. The classic, elegant design goes with any outfit or coat, and they make a wonderful holiday gift for men or women.
The Simple Mittens knitting pattern is a new free knit mittens pattern in the round here on the blog that will teach you how to knit mittens in a snap. Read about my inspiration and the simple construction, or scroll down for the free pattern.
No time right now? Pin this knitting pattern now so you can learn how to knit mittens later.

*This post contains affiliate links (only for products I love, use and spend my own money on obviously). This means I earn some yarn money if you make a purchase through one of these links (of course at no extra cost for you!), which I promise to use to create more awesome patterns like this one. All opinions are my own. See my full disclosure here.
Scroll down for the free version but I recommend you purchase the ad-free PDF Pattern to get all the instructions and pictures in a nice PDF you can print and take notes on without relying on your phone or an internet connection, I’ve got you covered!
The Simple Mittens Knitting Pattern is now available in my shop, on Ravelry and in my Etsy shop. Add it to your cart before you forget!
An Introduction to Double-Pointed Needles
We are going on a trip over Christmas and it is going to be cold. Ok, not really cold, 15 degrees Celsius (60 degrees Fahrenheit)… but coming from 32 degrees (90 degrees Fahrenheit) all day, every day, I’m worried I’ll freeze. So I thought, what’s the best solution to stay toasty warm? The obvious answer: knit myself some easy mittens, of course! This is how the Simple Mittens knitting pattern was born.
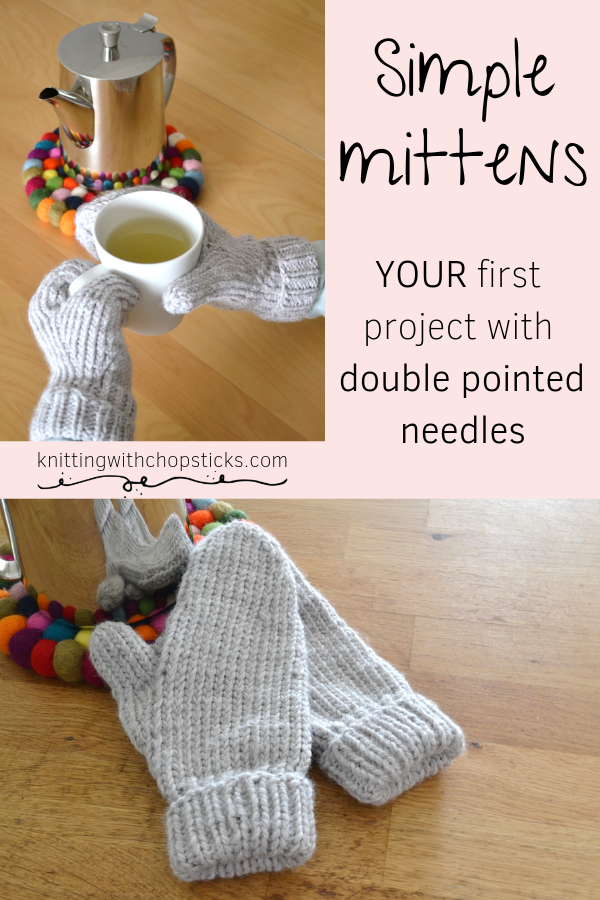
The design is worked with double-pointed needles (dpn), but don’t let that scare you off! This is actually a very easy dpn knitting pattern, so it’s a perfect way to get your feet wet. It looks hard but is quite simple, and my detailed instructions with illustrated photos will walk you through every step and help you overcome your fear.
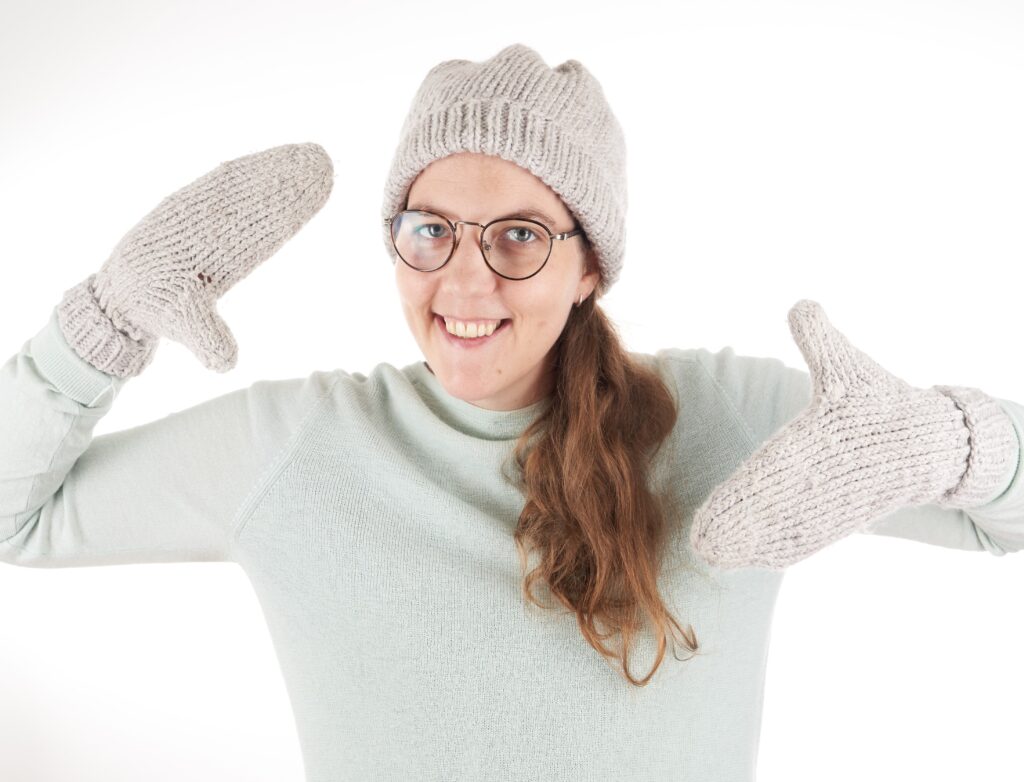
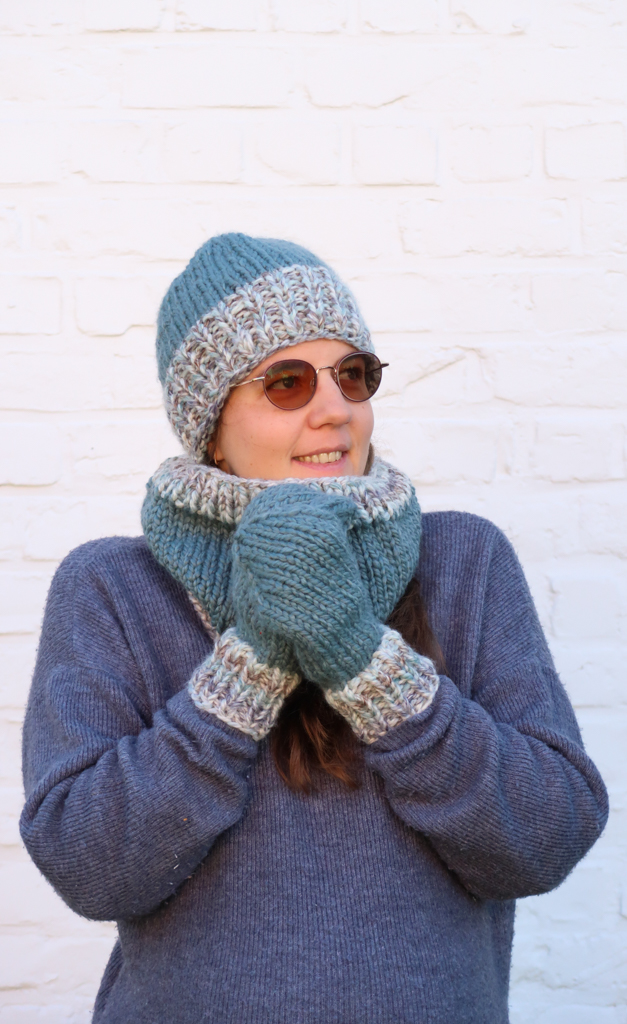
These mittens were designed with a very neutral look so they can be worn by both men and women. If you’re making these as a gift, take a look at my matching Simple Hat pattern to make a matching set.
Looking for Chunky Mittens on Circular Needles?
If you’re looking for even faster mittens to knit and worked with circular needles, the Charlie Mittens are what you need.
More Accessories You'll Love View All
Before You Start Your Easy Mittens Knitting Pattern in the Round
Materials
I used the following materials for these easy knit mittens:
- 5mm and 6mm double pointed needles. If you are new to knitting with double-pointed needles or don’t have the right size, I use and recommend this very cheap double-pointed needles set. Although they are not the prettiest, I prefer using stainless steel needles as the yarn slides better on them and with this set you have all sizes so you are set for any project. If you’re confused about the different types of knitting needles, read my complete guide to knitting needles.
- Nice, soft, bulky wool for 7 – 8 mm. I used Julia yarn from Zeeman in light grey. On the label, they recommend 7-8mm needles, but I used smaller needles on purpose because I wanted my mittens to be nice and warm and thick and cozy.
- Stitch marker
- Stitch holder
- Tapestry needle to weave in the ends. I love this set as it has different eye sizes for different yarn thickness and it comes in a small tube which is very convenient so I don’t lose them.
Because the yarn I used is not available everywhere, and I know how painful it is to try to find equivalent yarn which will give you the same effect I have selected a few equivalent yarns for you.
- Paintbox Yarns Simply Chunky: Out of the 50 shades they offer I’m sure you’ll find what you need.
- Lion Brand Color Made Easy: Soft and trendy colors
- Brava Bulky Yarn: A very affordable alternative
Abbreviations
- K = knit
- P = purl
- K2tog = knit 2 stitches together
- Ssk = slip slip knit. This is an easy method to knit 2 stitches together and get a symmetrical effect to the k2tog. If you prefer, you can substitute for a simple k2tog.
Finished Size
Below picture shows the finished size of the simple mittens knitting pattern.
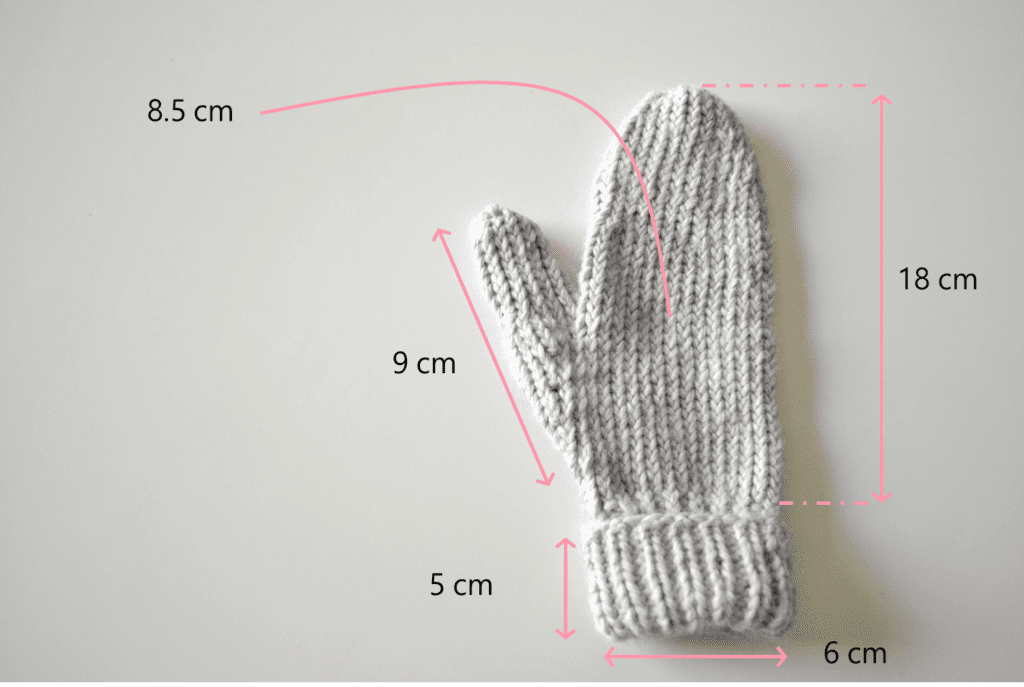
I have small hands and wanted these mittens to fit tightly to be extra warm and cozy. Don’t worry, you can easily adjust the mittens knitting pattern to fit your size. I’ll let you know where, when, and what to change to make your size. Just look out for text in italics throughout the pattern. If you need any extra help, you can always contact me, I’m happy to help.
Tips and Tricks for How to Knit Mittens with DPN
The only thing to remember when knitting with double pointed needles is to ignore the needles you are not using at that moment.

Once you only focus on the 2 needles you are using, it is just like knitting in the round. So you are always working on the right side of the project. There is no wrong side. Going from one needle to the next is exactly like starting a new row.
The Actual Mittens Knitting Pattern
- The Cuff of the Easy Knit Mittens
Sick of all the yarn jargon and conversions?
US vs UK, abbreviations, imperial vs metric, yarn weights, etc?
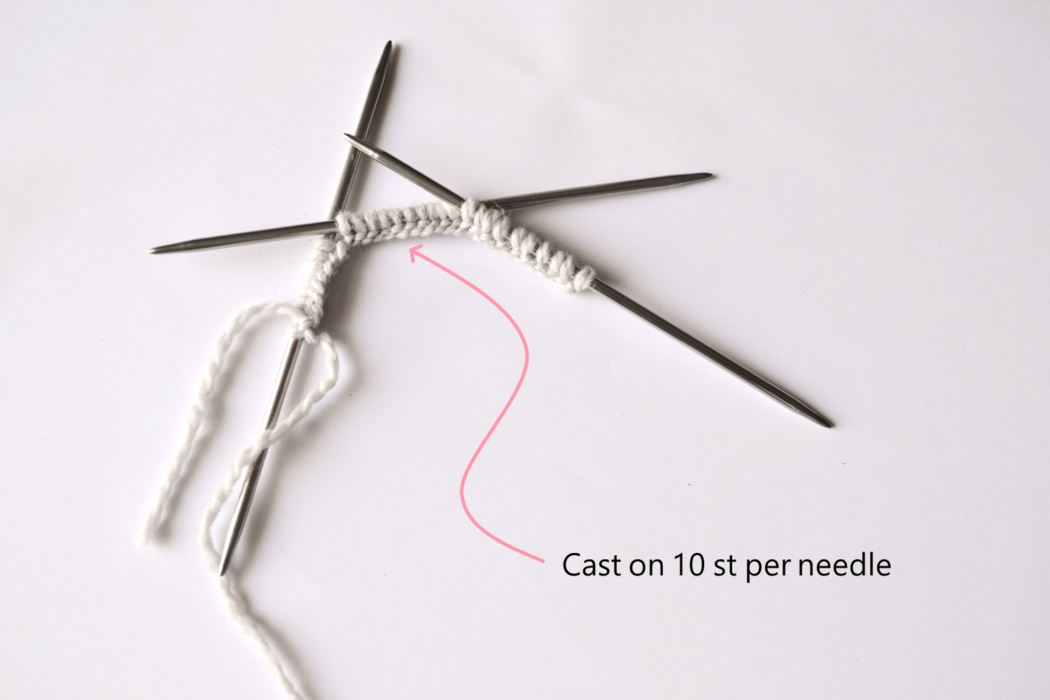
Using 3 5mm double-pointed needles, cast on 30 stitches (10st per needle).
If you want to fit a bigger wrist, you can add some stitches here. The easiest would be to add an even number and a multiple of 3 so you can easily adjust the number of stitches on each needle throughout the pattern. The palm is worked with 4 double-pointed needles. -
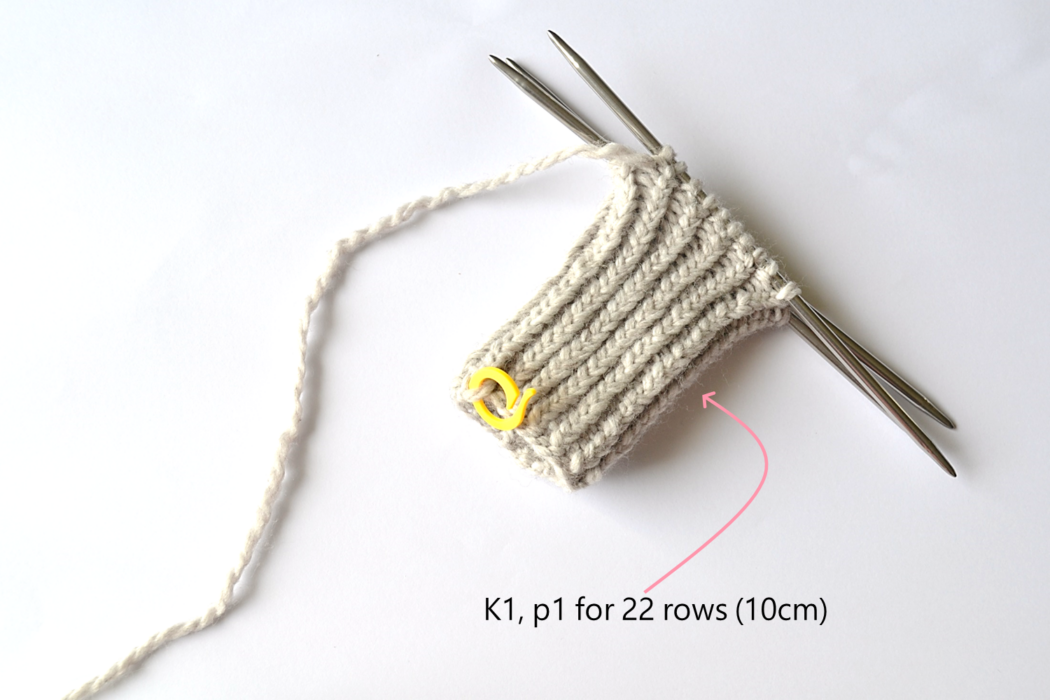
K1, P1 around for 10cm (22rows). I very rarely use stitch markers but when knitting in the round for a certain number of rows I find it easier to remember where my round start and finishes.
-
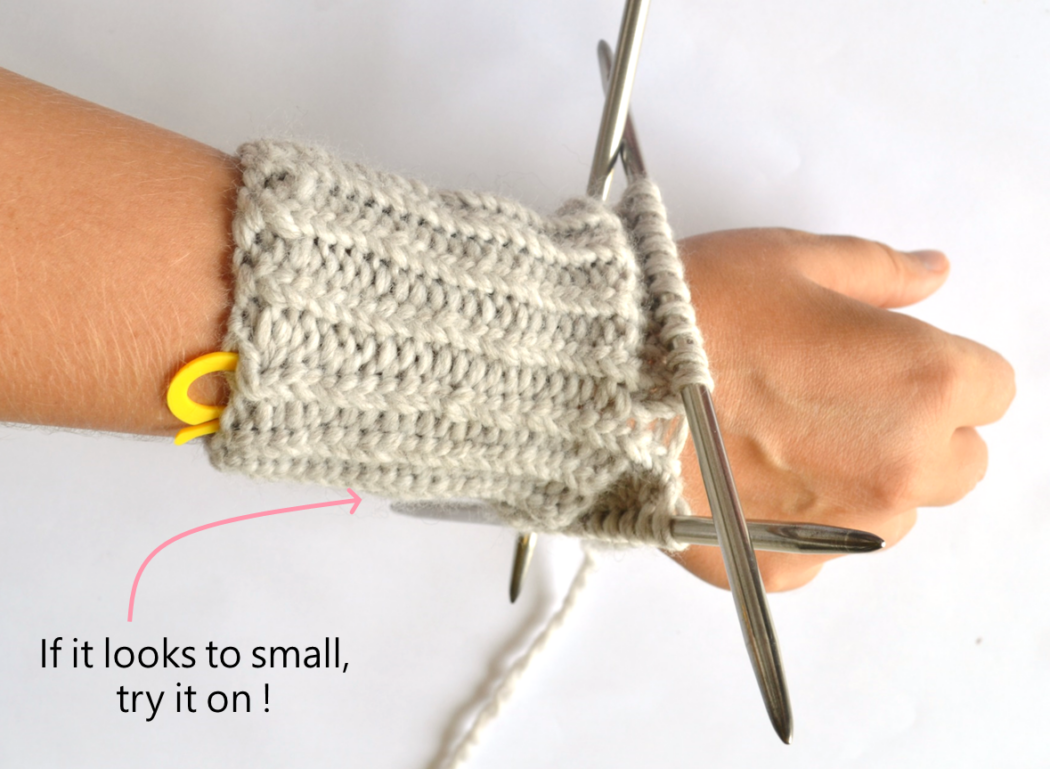
It looks very small right? Don’t worry, the ribs are very elastic and tends to loosen with time.
Not convinced? Just try it on. Slide your hand in the cuff and you’ll see how it fits. - Preparing for the Thumb
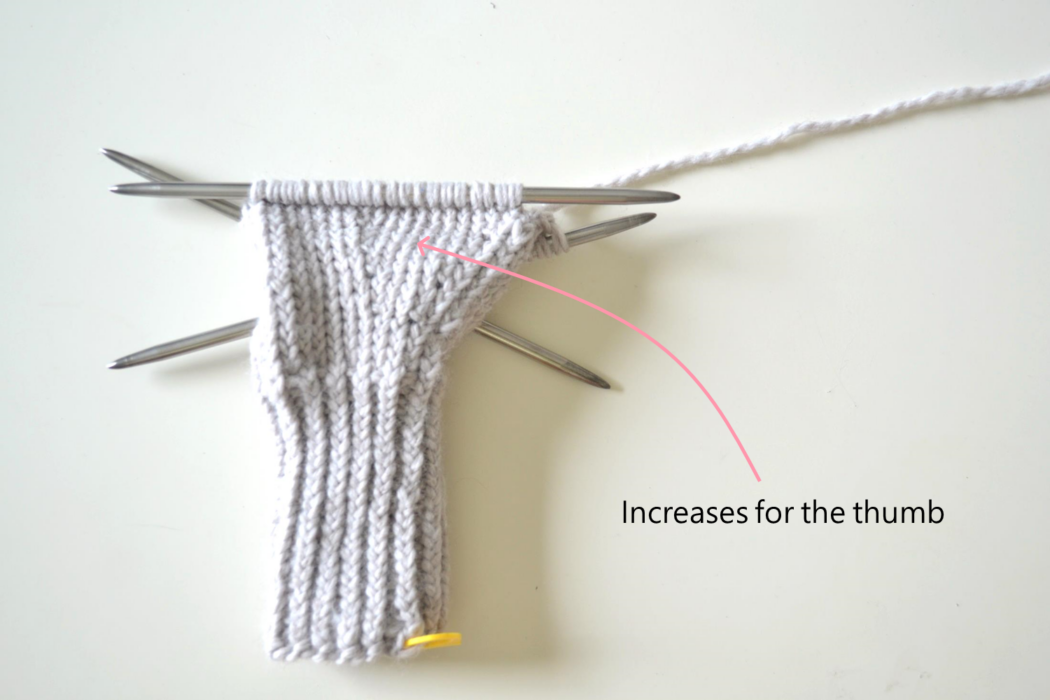
Now it’s time to do some increases to make room for your palm.
Switch to 3 6mm double pointed needles
Knit 4 rounds
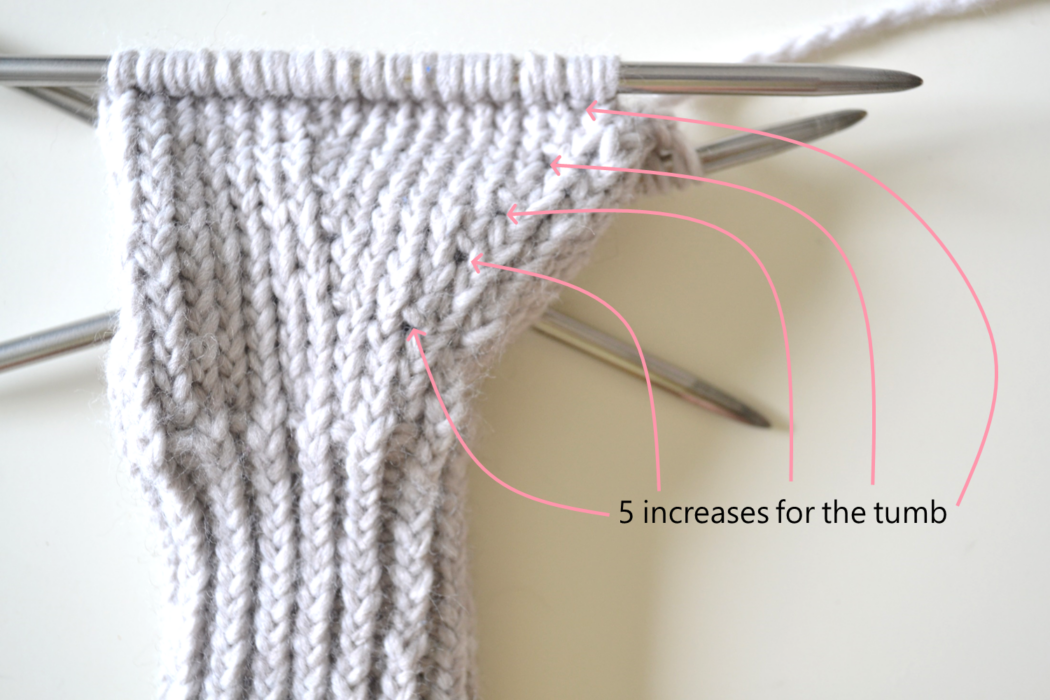
Here come the increases for thumb: -
On the 1st needle: Knit 2 st in the 1st stitch, k1, knit 2 stitches in the 3rd stitch. Knit the remaining 7 stitches on the needle. You now have 12 stitches on this needle.
-
Needle 2 and 3: knit all stitches
– Knit 2 round
– Increase again -
On the 1st needle: Knit 2 stitches in the 1st stitch, k3, knit 2 stitches in the 5th stitch. Knit the remaining 7 stitches on the needle. You now have 14 stitches on this needle.
-
Needle 2 and 3: Knit all stitches
-
Knit 1 round
-
Knit 1 round
Increase again:
On the 1st needle: Knit 2 stitches in the 1st stitch, k5, knit 2 stitches in the 7th stitch. Knit the remaining 7 stitches on the needle. You now have 16 stitches on this needle. -
Needle 2 and 3: Knit all stitches
-
Knit 2 rounds
-
Knit 2 rounds
Increase once again:
On the 1st needle: Knit 2 stitches in the 1st stitch, k7, knit 2 stitches in the 9th stitch. Knit the remaining 7 stitches on the needle. You now have 18 stitches on this needle. -
Needle 2 and 3: Knit all stitches.
-
Knit 2 rounds
-
Knit 2 rounds
Increase one last time:
On the 1st needle: Knit 2 stitches in the 1st stitch, k9, knit 2 stitches in the 11th stitch. Knit the remaining 7 stitches on the needle. You now have 20 stitches on this needle. -
Needle 2 and 3: Knit all stitches.
-
Increase 3 stitches at the end of the last round (on the 3rd needle).
-
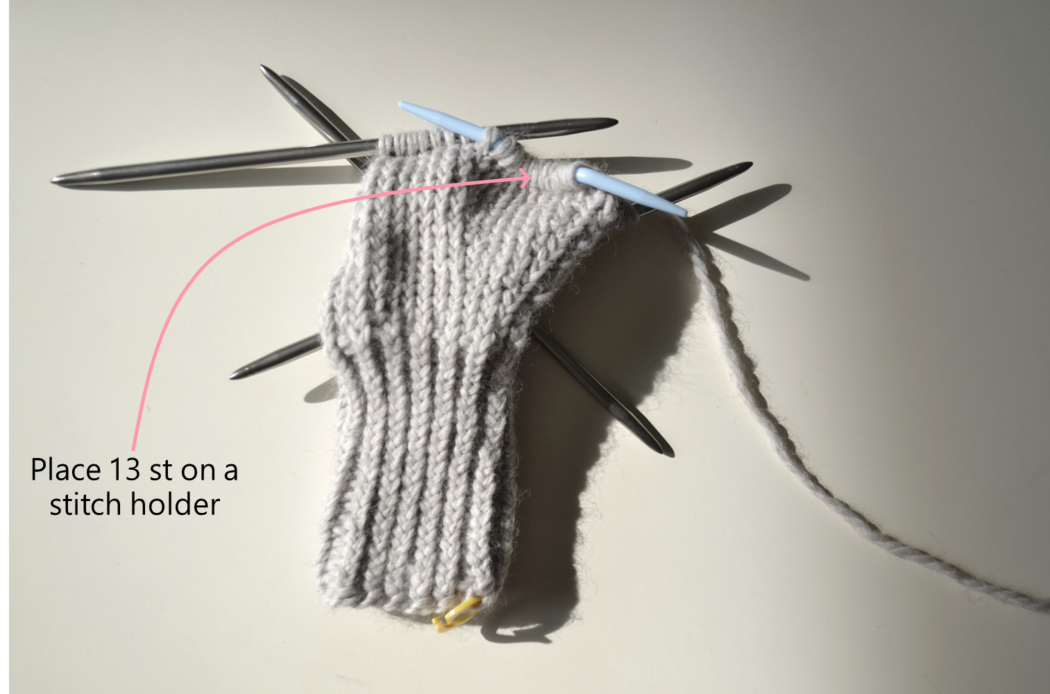
Place the 13 first stitches of the 1st needle on a stitch holder. These are the stitches of the thumb. You will get back to them later.
-
You now have once again 30 stitches on the needles + 13 on the needle holder.
- Make the Palm
Knit 9 rounds
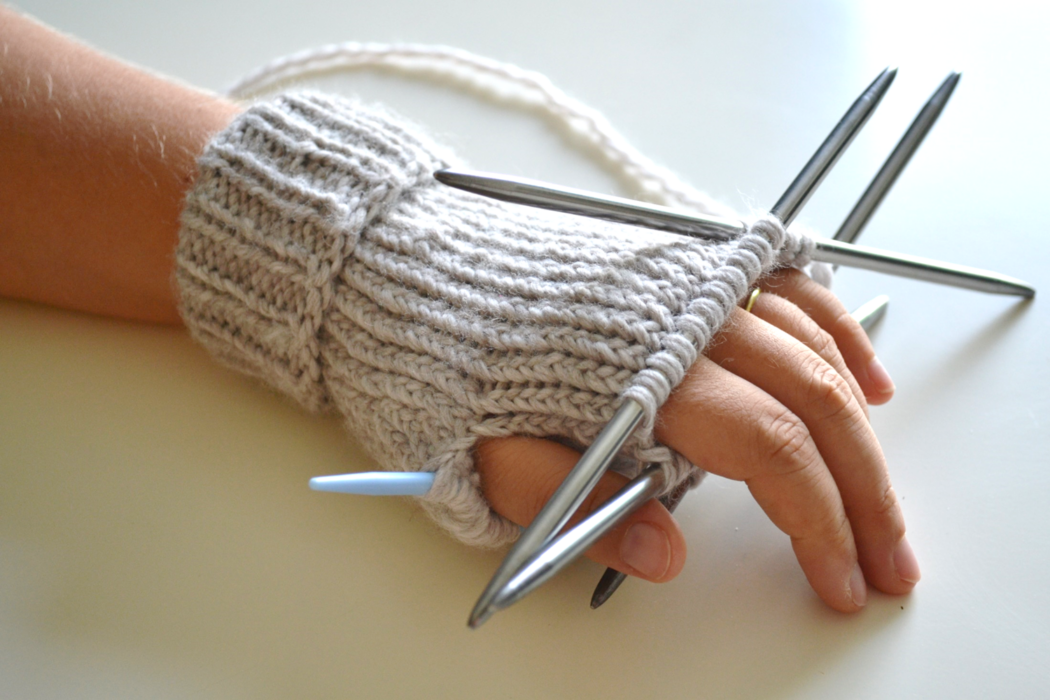
If you have longer hands this is where you should add some rounds. Just put your hand in the unfinished mitten. The mitten should reach the start of your fingers. -
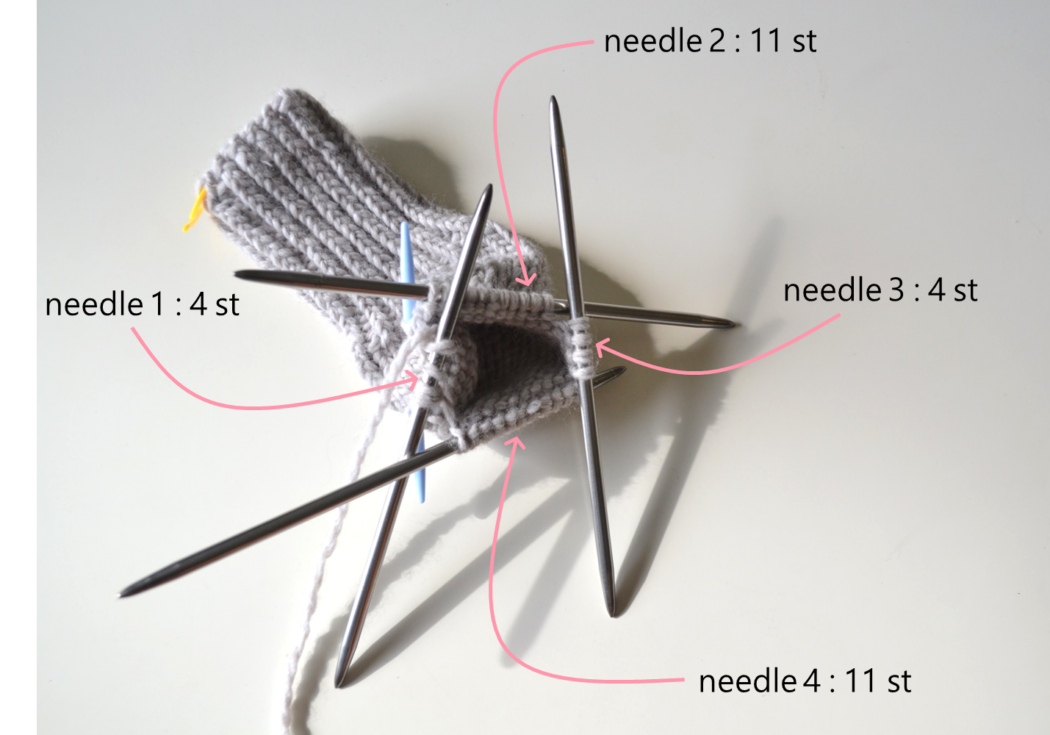
Switch to 4 6mm double-pointed needles. Divide the stitches on the needles as follows:
Needle 1: 4 stitches (the 3 st you added at the end of the last section + 1 st from the 1st needle)
Needle 2: 11 stitches
Needle 3: 4 stitches
Needle 4: 11 stitches -
Next round:
Needle 1: k1 (the 3 other stitches are from the previous round)
Needle 2: ssk, k7, k2tog
Needle 3: k4
Needle 4: ssk, k7, k2tog -
Knit 5 rounds.
-
Next round:
Needle 1: k1, k2tog, k1
Needle 2: knit all 9 stitches
Needle 3: k1, k2tog, k1
Needle 4: knit all 9 stitches -
Knit 3 rounds
-
Next round:
Needle 1: k3
Needle 2: ssk, k5, k2tog
Needle 3: k3
Needle 4: ssk, k5, k2tog -
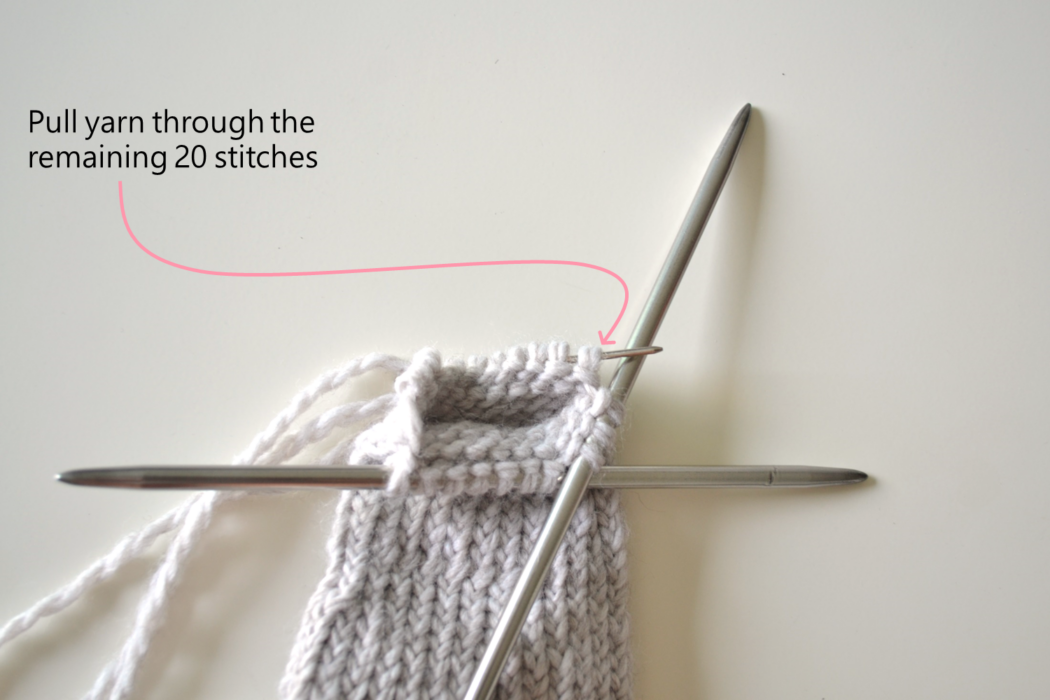
Knit 4 rounds
-
With a needle, pass the yarn through all the stitches.
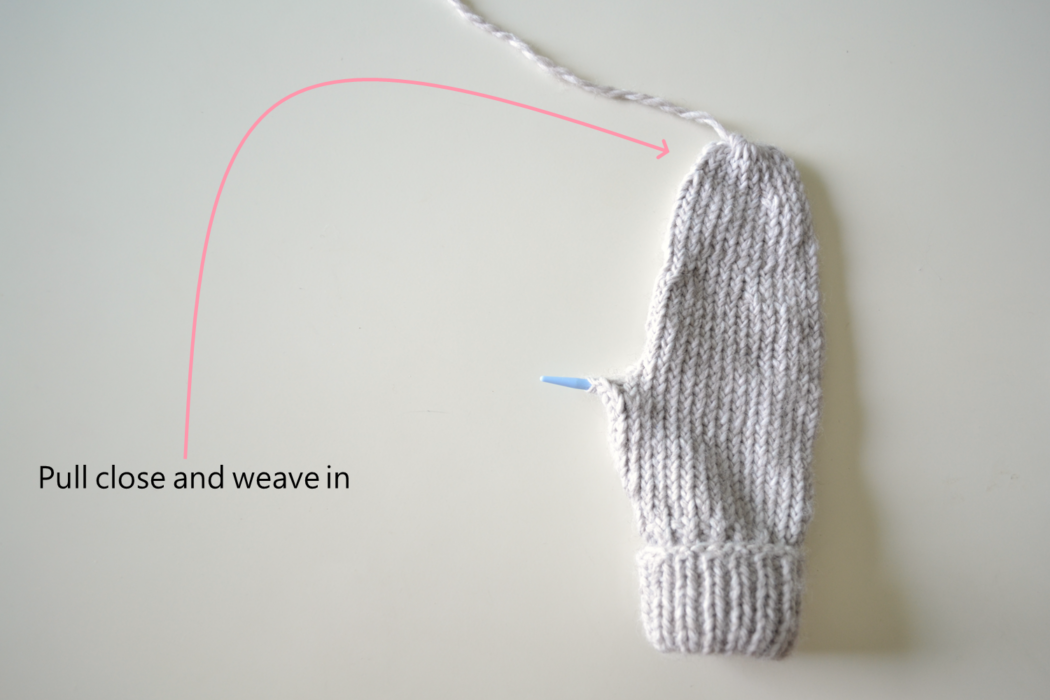
-
Pull the hole tight. I like to weave in this tail straight away so I barely have any finishing touches at the end of the mitten. You can leave it for later if you prefer.
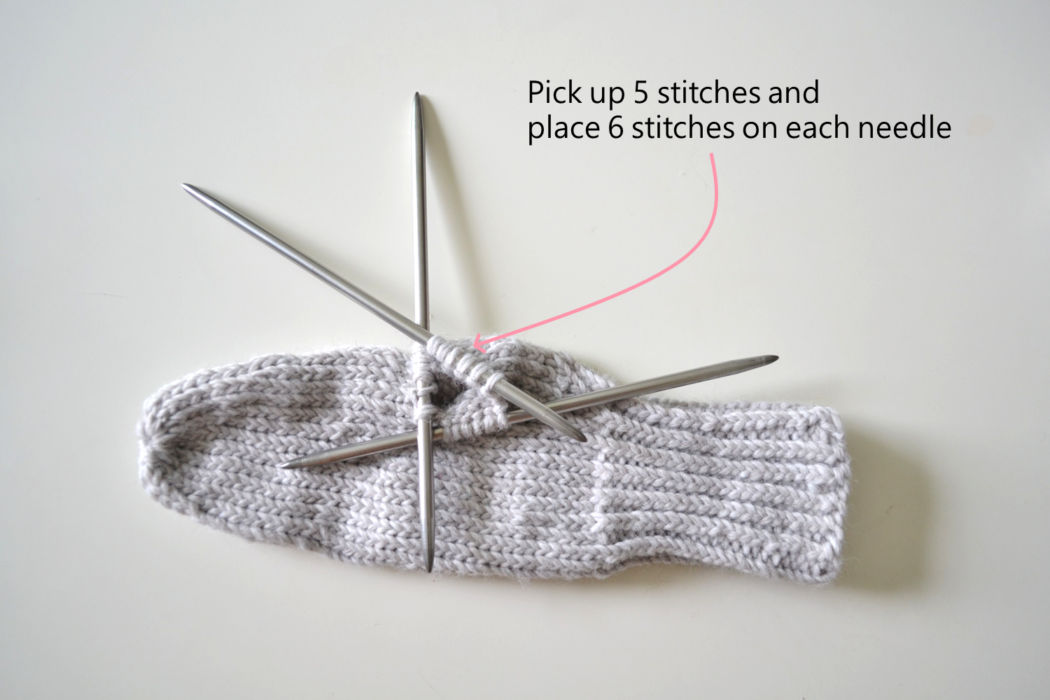
- Go back to the Thumb
Using 3 6mm double pointed needles, pick up the 13 stitches you left aside and pick up 5 additional stitches. Place 6 stitches on each needle. It doesn’t matter how you divide them.
-
Knit 2 rounds
-
On each needle: K2, k2tog, k2
-
Knit 1 round
-
On each needle: K2tog, k3
-
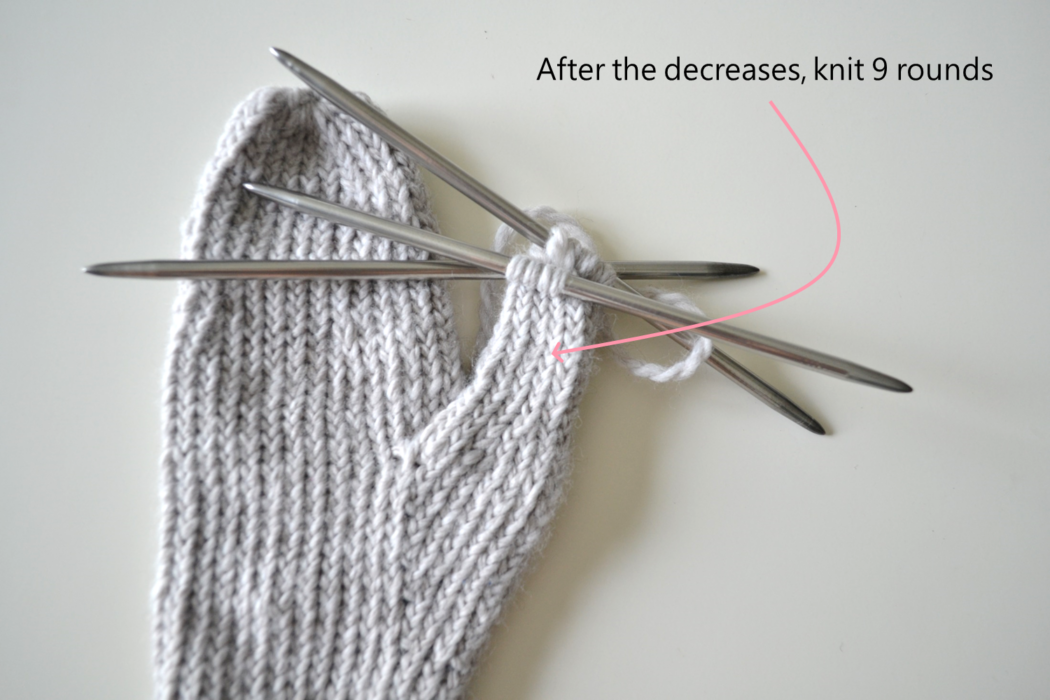
Knit 9 rounds
If you have a longer thumb this is where you can add some rounds to adjust the pattern to your size. Just put you hand in the unfinished mitten to check how many rounds you need. -
Pass the yarn through all the stitches and pull tight.
-
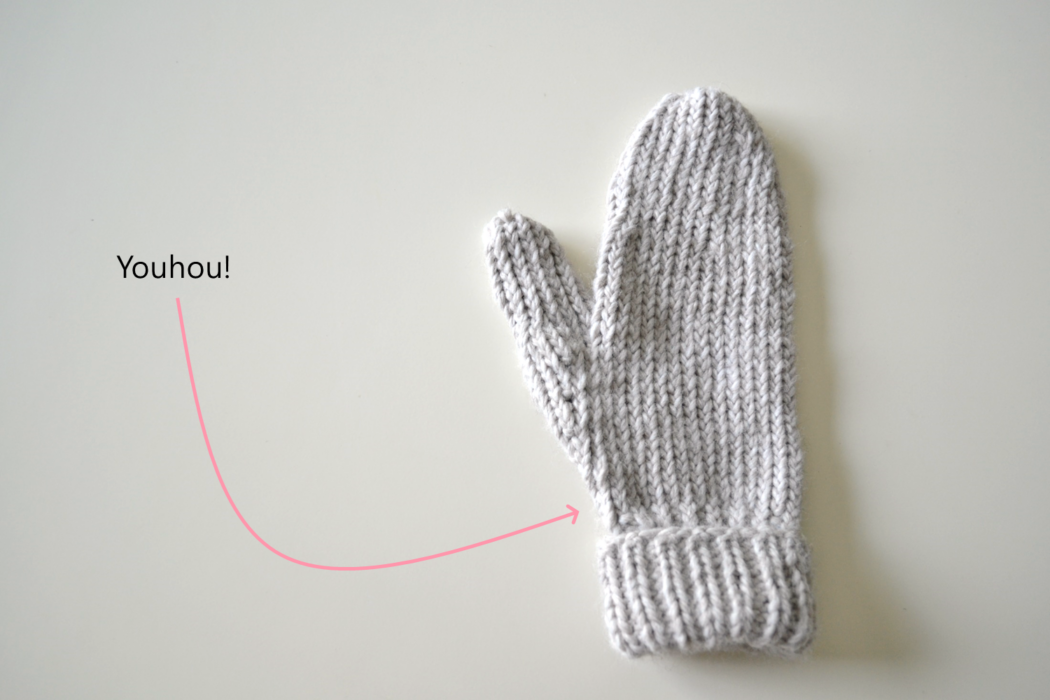
Weave in all ends.
-
Follow the exact same steps for the second mitten (top of the pattern).


Blocking your Knit Mittens
To make the mittens look even better and uniform I lightly block them. For this project blocking is not absolutely necessary but it never hurts and can always improve the finish of your mittens. Make the stitches more even and smoother.
Don’t skip this step as it can make a huge difference. Read my detailed tutorial on why block, how-to, and all my tips and tricks if you need help.
Vaporize some cold water on the finished mittens and pin them on a blocking mat (or an improvised version of it as I use).
Let them dry completely before removing the pins.

Now you’re 100% done. Congratulations!
If you are wondering why I have drawn a big circle in permanent ink on my improvised blocking mat you should check out my Mandala Placemat pattern.

Génial et facile à suivre. Jai retrouvé avec toi le patron de mitaine de ma grand-mère que j’avais perdu.
Fantastik andceasy to follow.
Thanks to you I found back my grandmother’s pattern.
Good day